Computer Aided Design
Antimony
Antimony is a new CAD program — they say it is a CAD tool from a parallel universe. The way that you attach shapes and nodes together is similar to Quartz Composer. You can add scripts to quickly create whatever you want. It's fun to play around with when you link parameters together from different shapes. Favourite thing is morphing a function onto shapes, as it creates interesting visual results (which you can then transform even further).
Here are two art models I created. I rendered each one out to a .stl, then opened it in Meshlab to take a screenshot. Added a blue tint for colour.
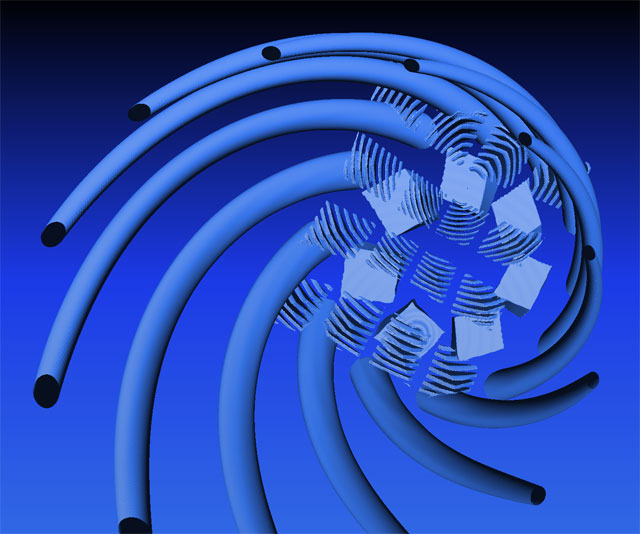
Top view of art 1
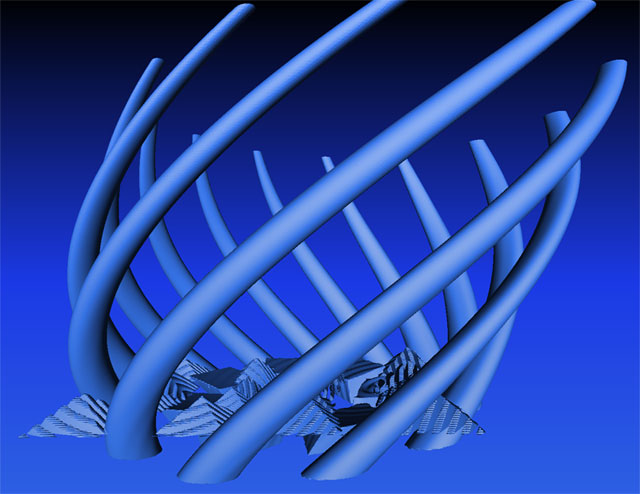
Side view of art 1

Art 2
Art 1 was exported at 30 voxels per unit. It has 1721982 verticies and 3442728 faces. Here is the .sb file.
Art 2 was exported at 50 voxels per unit. It has 1671477 verticies and 3339794 faces. Here is the .sb file.
On/Off Node in Antimony
I thought it would be neat if you could turn on and off certain shapes. It's helpful if you want to hide a shape temporarily while designing.
To use it, just attach the input shape to 'a', then attach the output shape to whatever is next (like a transform). Shift + click + slide on on_off, and every odd number it will turn off.
Here is a screenshot:
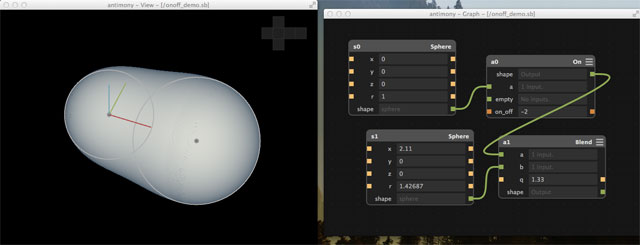
Here is the script, onoff.node:
import fab.types
import fab.shapes

title('On / Off')
input('a', fab.types.Shape)
input('empty', fab.types.Shape)
input('on_off', int)

if on_off%2 == 0:
  title('On')
  output('shape', a)
else:
  title('Off')
  output('shape', empty)
Add it to py/nodes/CSG, remake the code, and now you will be able to access it with Shift + A.
Robot Base Model
Here is what I modeled from the final project idea: the robot base.
It's comprised of two parts- the center and the 'piece' (lame name), aka the part with the hinges on it.
Here are all of the parts together from an angled view:

Here is a top-down cross section view:
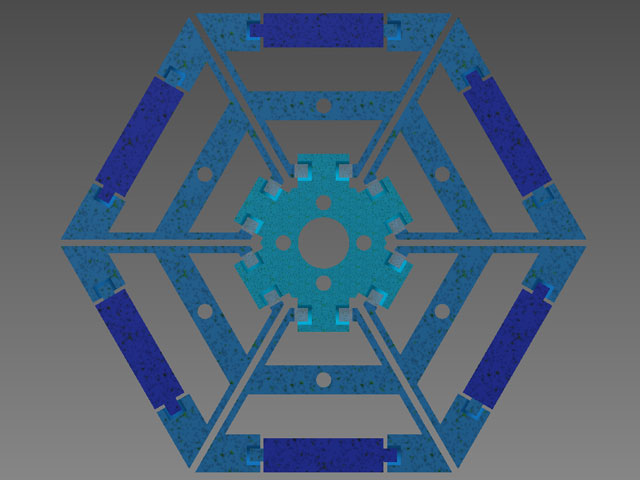
Here is the 3D model of the 'piece' part:
Here is the 3D model of the center part:
In order to keep the six pieces in place, I created link pieces that will attach to the center piece with screws.
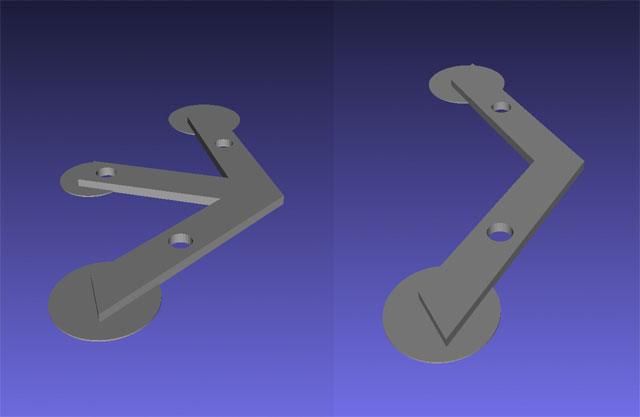
The circles on the bottom of each design are for 3d printing. They are 1 layer height tall (in this case, 0.3mm). Easily removable afterwards, and they improve the first layer adhesion to the build plate.
Here are link #1 and link #2:
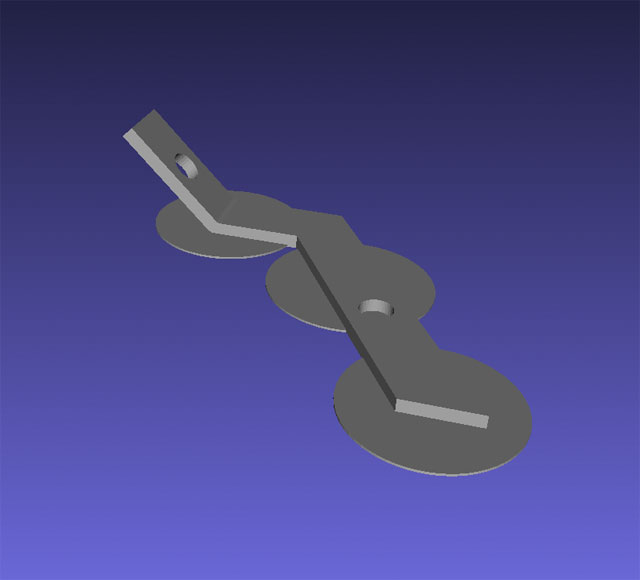
The links do not have to be flat, there could also be angled links.
I messed up thinking about this one though, and so the design doesn't actually work because the bend is in the wrong place.
Here are the design files:
- RobotBase_Center.ipt
- RobotBase_Piece.ipt
- RobotBase_Link1.ipt
- RobotBase_Link2.ipt
- RobotBase_Link3.ipt
Parametric Hinges (Autodesk Inventor)
Here are the parameters I added for creating our hinges:
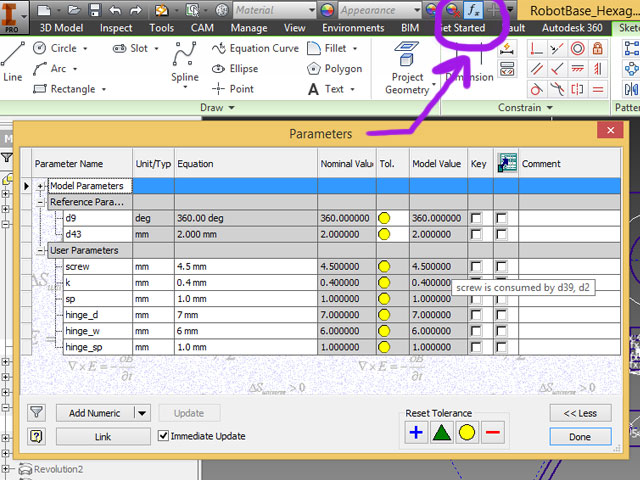
Here are how the parameters were used in the design:

Assemblies & Simplify Part (Autodesk Inventor)
I learned an incredibly useful trick this week in Inventor that helps with making the models ready to print. It uses the 'simplify part' option.
Here is our assembly. It consists of 3x AAA battery holders parts that I modeled. They are constrained into a triangle 'holder' part.
The problem is that when I export to .stl as is, there are lines in the model where the pink and green are. The slicer will mess up on this.
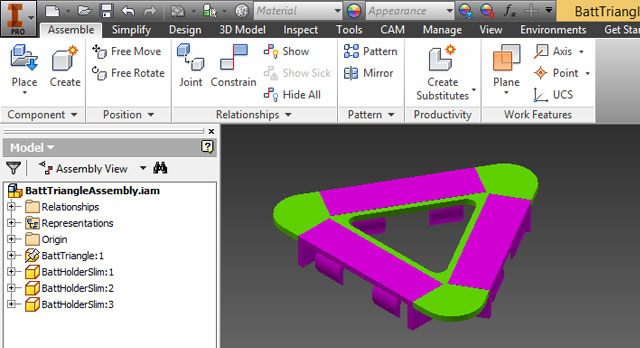
After going to the top ribbon menu and selecting Simplify, then pressing Simplify Part, a new Inventor part will be created from this assembly.
All of the lines are fixed, as you can see the model is now one colour.

Building Antimony
It was a bit of an adventure to build Antimony. Here are the steps that I did to make it work. (Warning: read through all of this, if you want to try it yourself. Because I documented my stupid mistakes in here as well)
Append this to .bash_profile:
# adding homebrew
export PATH=/usr/local/bin:/usr/local/sbin:~/bin:$PATH
Close & open a new terminal window and type:
echo $PATH
Should see that /usr/local/bin is first
Now can link python
brew link python3
Checking what the path is for python3
which python3
/usr/local/bin/python3
Now time to make it (prior to this: cd into the repository, create the build directory, cd into it)
/usr/local/Cellar/qt5/5.4.*/bin/qmake ../qt/antimony.pro
make -j8
It builds, but there is a new error when trying to open the app:
Dyld Error Message:
Library not loaded: /usr/local/Frameworks/Python.framework/Versions/3.3/Python
Referenced from: /usr/local/lib/libboost_python3.dylib
Reason: image not found
Logged the console output of make to a file (make -j8 > log.txt 2>&1), and searched for python. It seemed fine, always in the Cellar path... Let's see what python versions there are:
cd /usr/local/Frameworks/Python.framework/Versions
ls
2.7  3.4 Current
It appears as though the problem is that there is no 3.3, there is a 3.4.
First I tried cheating with a symbolic link to see if it would work...
ln -s 3.4 3.3
and ls -l to verify that it worked.
cd back into the repository. Remove the build directory, start over, rebuild.
This time, opening atimony.app works! But then it crashes right after opening. Dang.
Thread 0 Crashed:: Dispatch queue: com.apple.main-thread
0   ???                             0x0000000000000001 0 + 1
1   org.python.python               0x000000010fe64946 PyObject_CallFinalizer + 55
2   org.python.python               0x000000010fe64977 PyObject_CallFinalizerFromDealloc + 30
3   org.python.python               0x000000010fe70256 subtype_dealloc + 267
Undo our symbolic link:
cd /usr/local/Frameworks/Python.framework/Versions
rm 3.3
Uninstall python3:
brew uninstall python3
Someone has already created a brew formulae for 3.3.
Edit the name of the file to python3, and the class name to be just Python3.
cd /usr/local/Library/Formula
cp ~/Desktop/python3.rb python3.rb
Now install python3 again with this new formulae. The debug flag will output more text, so you can see if something messes up
brew install --debug python3.rb
Check to make sure that it is 3.3
cd /usr/local/Frameworks/Python.framework/Versions
ls
Another thing to do, check that there is a python3-config file. There is a python3.3-config, but not a python3-config. Symbolic linking here should work:
cd /usr/local/bin
ln -s python3.3-config python3-config
Go back to the repository, remove the build directory, start over, build it...
It builds! Opening antimony.app works, and it doesn't crash! Let's add a torus to celebrate.
I didn't see a torus in the menu, but it is already a resolved issue (cool!). Solved it by running make again.
Design Files
You can find all of the source files in my repository