Application Planning
What will it do: Digital Textile wrapping machine
For my final project, I'm proposing to create materials by digital thread wrapping. This kind of thread structures could be very nice for large size lighting luminairs which brings it close to my daily work.
Therefor a desktop machine will be realized which wraps pre-installed rods with threads. This covers: power electronics with coummincation and user interface / carboard fit press structure / 3D design and prints / composites
How does it work?
A basic fabric will be perpared on a rod. This basic fabric will be a part of the end product and when wrapped and bonded, will be released from the rod. This rod with basic fabric will be placed into the wrapping machine. A wrapping thread will be attached to the rod (manually). With machine start, the rod will rotate and the thread will move along the axes until the full rod is wrapped. The rod will be taken out of the machine. A thermal bonding process will adhire the wrapping to the basice textile. (melting yarns will be used as default). This process is tested by me in the past months succesfully. Textile ribbons with LEDs are wrapped on a cord and applied in a wearable lighting running shirt (designed by Pauline van Dongen) Phototrope project Pauline van Dongen
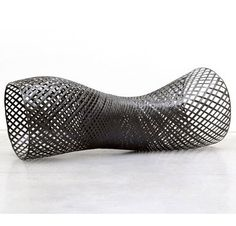
Later on in a second phones the rod can be replaces with other circular symmetric structures and the wraps will look like the example.

who's done what beforehand? Done before
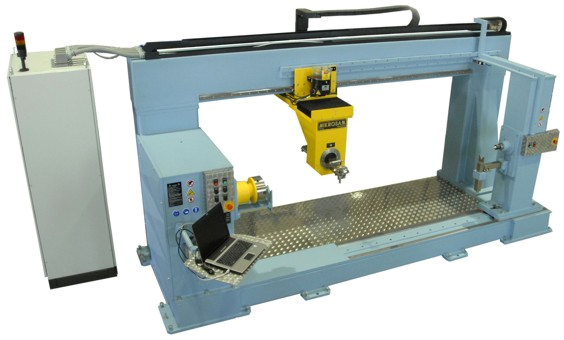
Industrial machines are available to make composities. For example from company Mikrosam. However this kind of machines are huge investments, huge speed, and made for different application (no home use, but industrial functional products).
Materials and components will be required
The Machine will be build on a based baseplate. The rod will be composite material bought in the DIY store. I've used it before. The movement will be done by two steppermotors. The PCB will be made from CEM1 material. Attiny45 manually soldered. Headers and SMD resistors capacitors from grab store. Main parts are 3D printed. PLA with metal look from ULTIMAKER (diameter 2.85 mm) is the printing material.
Cost of materials
PLA : 25 Euro
Steppermotor: 10 EUro
PCB with Attiny45: 5 Euro
Baseplate & Rods: 10 Euro
Total: 50 Euro
Main parts
Main parts will be the rod with on both sides fabric supply/storage containers. The rod will rotate on a left and right module. On the left module, it will be motorized with stepper motor 1. On the linear axes, the thread guide will move. The thread guide will move by stepper motor 2 and have 2 swithes to change direction at the stop of the guides.
Process to be used
Design by INVENTOR.
Parts generated by Ultimaker 2.0 PLA printing
PCB by Roland Modela milling
Programming by ArduinoIDE
Thread bonding by composite thread bonding on hot press
Tasks and planning
The tasks to come to this products:
1- Design ready parts ordered May 22
2- Make parts May 29
3- Assemble the machine June 2
4- Programm the electronics June 3
5- Test run and tweaking June 8
6- Make first material June 10
Open questions
The lineair axes and the gear for the rotational axes.
THis is one of the main questions: I would like to use the machine building modules (Gestalt boards) in this project. However these are only available for group assingment. This came to my at a pretty late state in the course.
How to make a linear stage? This can be done in several ways. What way to choose? I have to investigate all?
Another question: can I make machine parts with 3D printing with just using digital input and PLA printing characteristics. Is it good enough to make click connections.
Evaluation
I will make light emitting devices out of the fabricated materials. Those lamps will be disseminated among collegues. Feedback (quotes) will be reported.
LET's START!!!