Week 7
Embedded Programming
Datasheet and Programming
The assignment for this week was to read a microcontroller data sheet, program my re-designed "Hello board" to do something, with as many different programming languages and programming environments as possible.
reading the datasheet
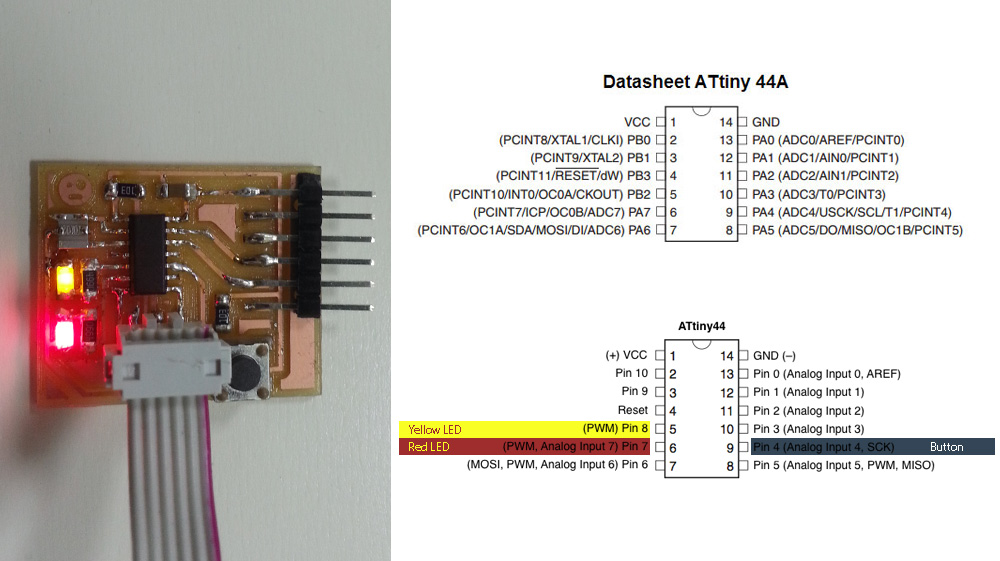
It was the first time I read a datasheet completely. It contains many information about the characteristics of the components, especially the power requirements (helpful to don't damage the component) and the pinout (useful to correctly connect the component).
I admit that I have understood only some parts, for this reason I focused on looking for what I could be really helpful to my needs:
Pinout, power requirement, clock system and frequencies. Very important to me were the diagrams and schematics to better understand the functioning of the component especially to use it on the board according to my necessity.
Another very important thing was understood the role of the fuses and to know how big could be the program that I can upload into it because sometimes is necessary to optimize the code, in my case, I used Arduino IDE, i had a bigger program perchè it imports libraries (and the bootloader)
Before Programming
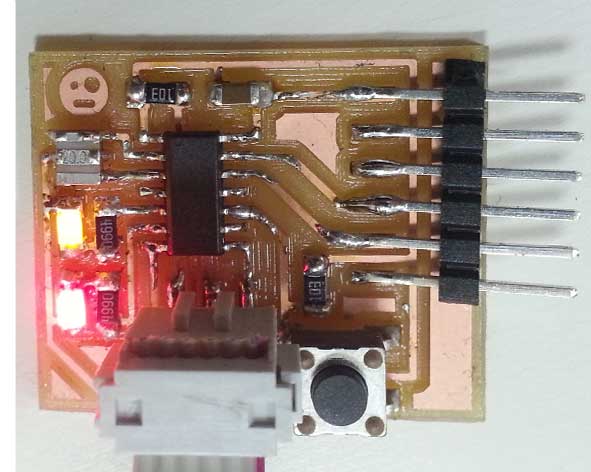
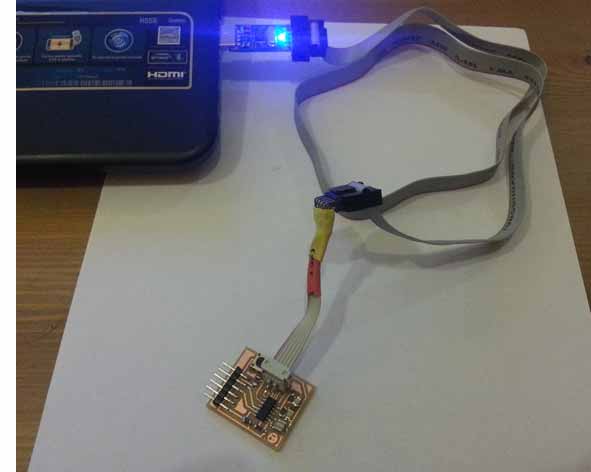
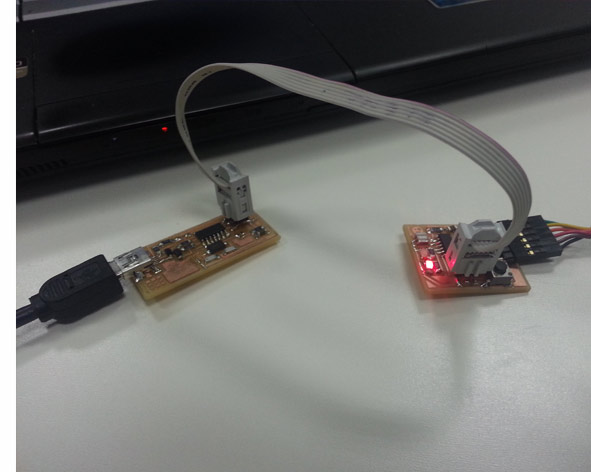
I used USBasp - USB programmer for Atmel AVR controllers to program the microcontroller ATtiny44A because I had trouble to program the FabISP, but in the end I was able to make it work, the 2 leds and the buttom of my re-designed "hello board" using the Arduino IDE.
To start I need to have all Softwares and Drivers installed (in this case I reported the process using USBasp, using instead the FabISP you don't have to install drivers) :
- Arduino ATtiny hardware Library
After downloaded and installed Arduino IDE and USBasp Drivers, to install ATtiny Arduno Hardware Library I created a new sub-folder called “hardware” in the sketchbook folder and I copied the “attiny” folder (not the attiny-master folder) from the unzipped ATtiny master.zip to "hardware" folder.
Programming
I started studying basic tutorials of Arduino IDE Software and the Reference web-page Arduino. I also attended the Fab Lab Frosinone Webinar and the open lecture of IDE.
Steps to programming the microcontroller with Arduino:
- After loading the Arduino ATtiny hardware library and opening the Arduino IDE Software I set the "Programmer","Board", "Processor", "Clock" and "Serial Port" in "Tools" menu of IDE Software.
In my case:
"Programmer" -> USBasp (or FabISP, in the end I was able to used it)
"Board" -> ATtiny
"Processor" -> ATtiny44
"Clock" -> 20 MHz (external) to program and 1 MHz (internal) to write bootloader
- I connected the programmer and the board to the Computer; Before to program the board, I tried to write bootloader and set the fuses, but the Software gave me a generic error. I tried several times, but nothing. I checked again every parts, components and soldering, but nothing again. Finally with the help of the tutor, I discovered that I "cooked" the microcontroller. I made another board and I restared; this time it worked and I was able to set the fuses (using "Clock" 1 MHz (internal))and started the programming.
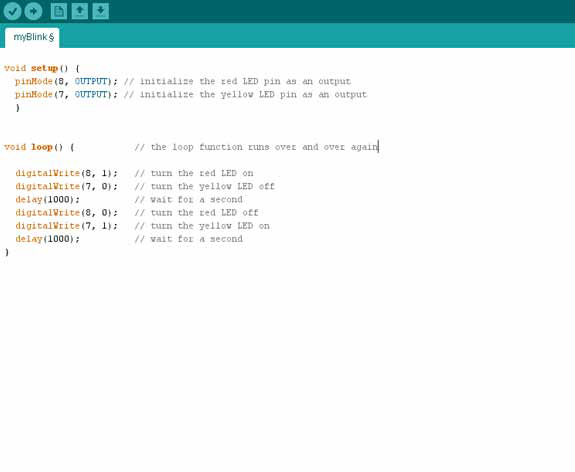
- To test the LEDs I modified a basic example sketch of Arduino IDE (File>Example>01.Basics>Blink) changing the value to corresponding pin number of my microcontroller setting and using a double (opposite) blinking. I Uploaded the code with the "upload" button.
- I tried to use the PWM~ pins to make a fade with LEDs while the button is pressed . I also tested the functioning of the button.
Playing, Studing and Programming
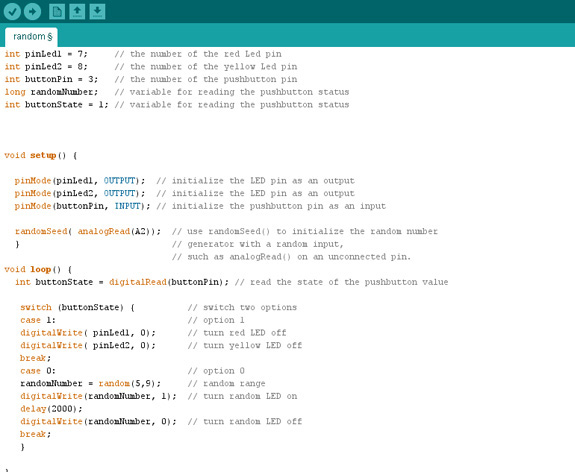
Established the operation of the board, I played with random() and randomSeed() to have a random system controlling the LEDs.
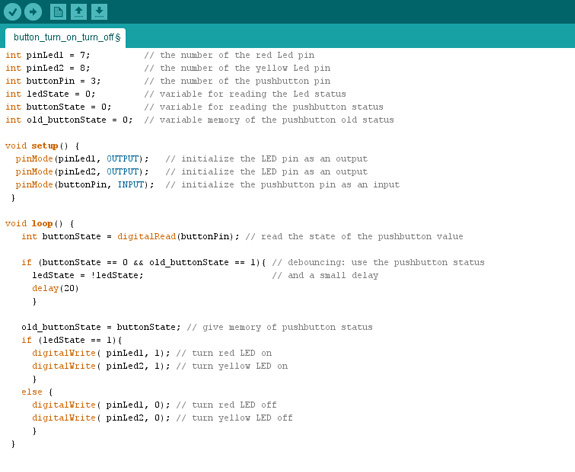
I tried one last program to understand how to solve the problem of Debouncing of the button.
Download Files
Arduino IDE:
Programs: CS Eagle, Arduino IDE Software, Photoshop.
Machinery: Roland SRM-20.