Week 2
Computer-Aided Design
Modeling a possible final project
In the second week we were asked to explore the different software packages presented for 2D and 3D modeling, in order to render a possible final project.
2D sketching and drawing
I prefer doing an handmade sketch of my idea before drawing and model it using a computer.
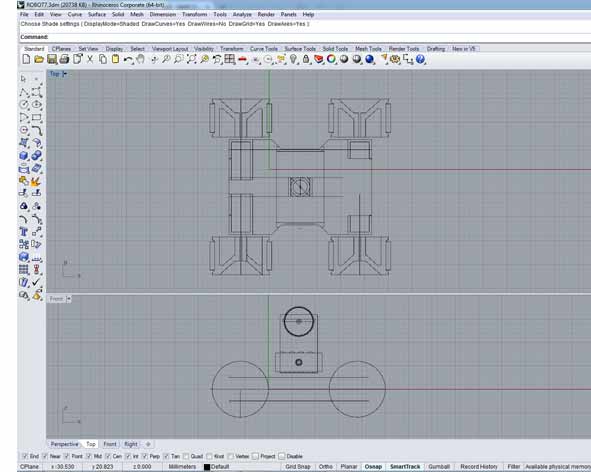
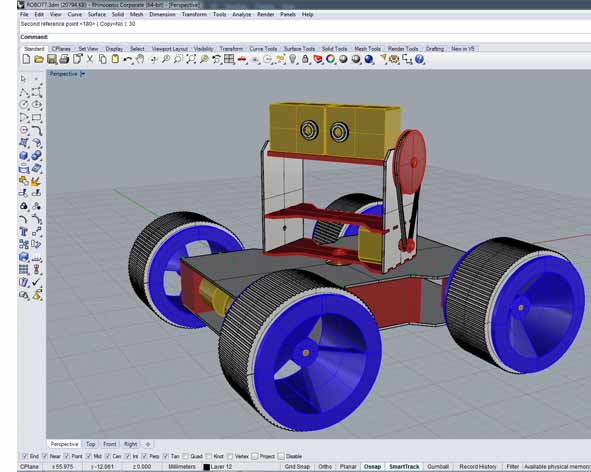
I started to use Inkscape. It's an intuitive and easy program and I learned the basic commands quickly, but I needed more and I decided to prove Illustrator. The commands are more complicated, but there are many good tutorials in internet. I also used Rhinoceros to do the 2d technical drawings.
Programs: Inkscape, Illustrator, Rhinoceros.
3D Modeling
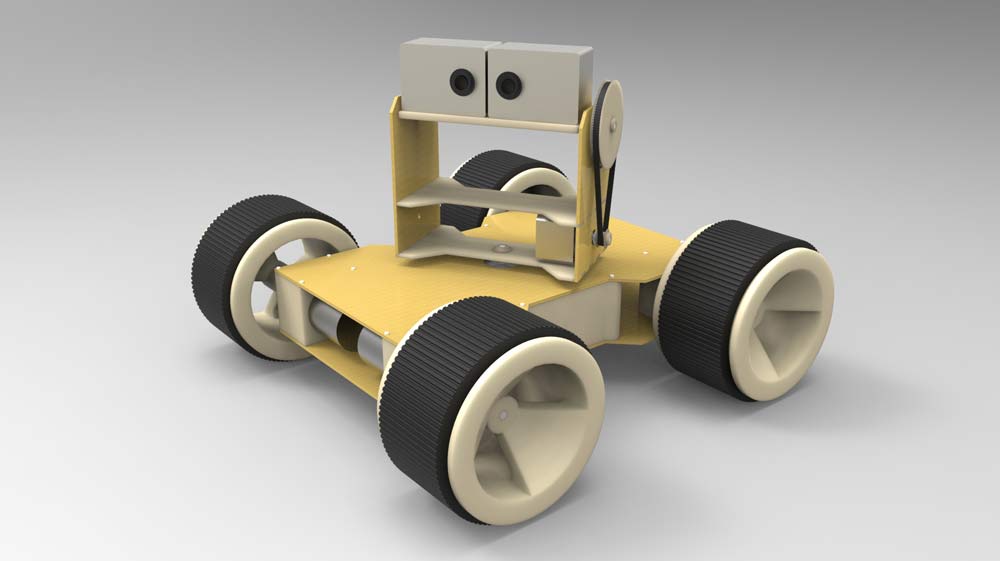
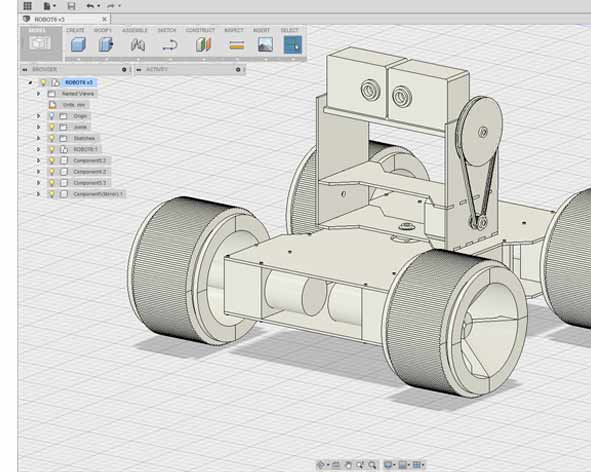
I used to model Fusion 360 and Rhinoceros.
I started studying tutorial of Fusion 360 and then I tried to model my project. I chose this program because it's a good tool that combines industrial and mechanical design. I thought it was perfect to model my project: the tools Assemble, like Joint, were precious. I had problems to change my modelling routine, becouse usually I do 2D vectorial separate draws and then I use tools like extrude or revolt to transform the drawings in 3D objects, so i can use basic boolean operations to combine them. In Fusion 360 is possible to draw directly on the canvas object and use those draws to do boolean operation. I also used Rhinoceros to control and to compare the 3D models.
Programs: Rhinoceros, Fusion 360.
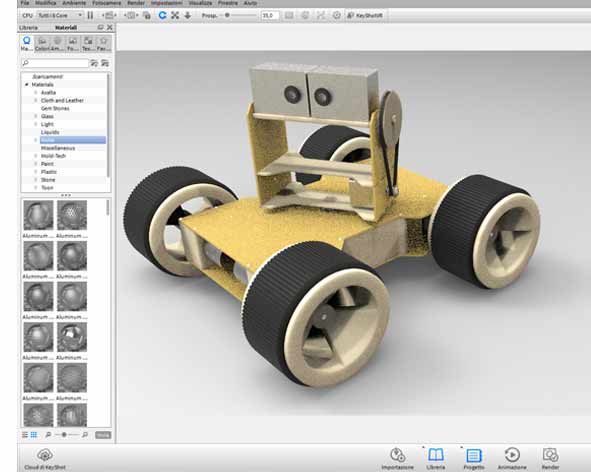
Rendering
I preferred to use an external rendering software because Fusion 360 have only a basic render system.
I started studying tutorial of KeyShot. I saved the 3d model in .3ds format and I imported it. It was very easy to change the scene and the object: I applied the materials at each level to facilitate comprehension of the project and I modified the lights to give more authenticity to the scene. KeyShot allows to have a realtime preview of your job where you can control the final image. The problem to use an external rendering software like KeyShot was the impossibility to change the 3d model.
Programs: KeyShot.
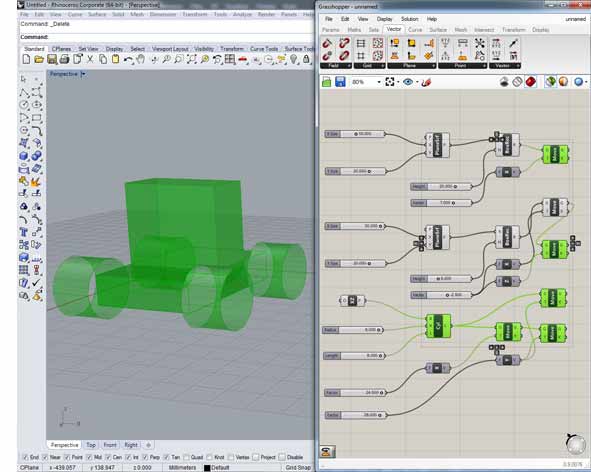
Parametric modeling
I wanted to experiment the Parametric 3D modeling using Grasshopper, a plugin for Rhino .
This was the second time I used Grasshopper, the first time was a disaster. I restarted studying basic tutorial to understand the mechanisms of primitives and editing tools. I designed parametrically the macro components of my project and I controlled and modified size and positions at each object. It was a good way to start using it. The potential of this software are (almost) endless.
Programs: Grasshopper
Video
I used the animation tool of Fusion 360 to create a short video.
This is a simple and intuitive tool that allows to animate, analyze and control 3d models in no time. I studied tutorials of Fusion 360 to understand better this function. The video is built on a time line: if you select a point of this line and then change the position of the object or of the camera, the software calculate the route from the start point to end point and it will create an animation. The video is in .avi format. I used VLC to control and change the file size and format.
Programs: Fusion 360, VLC Media Player.
Download Files
3d Rhino files:
- robot.3dm -mesh- (robot.rar -surface/polysurface-)
Fusion 360 file:
Key Shot file:
Grasshopper and Rhino files:
Illustrator file: