Week 12
Composites
Composites
Make something big
This week assignment was to create a 3d mold using a CNC machine and produce a fiber composite part in it
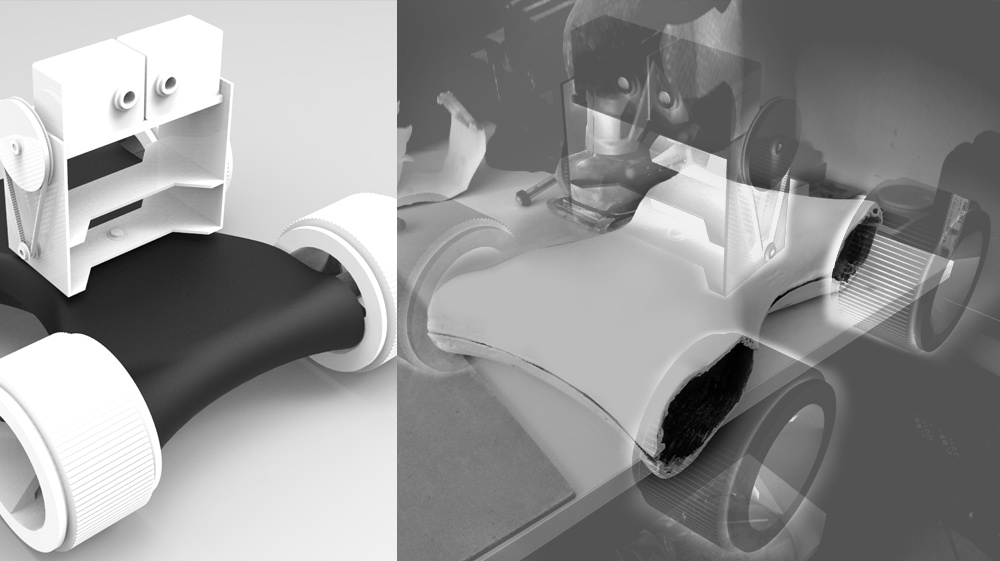
I started drawing small object, but after seeing a video on youtube of how guys built a hull, I decided to make the "body" of my robot.
Modeling and Milling
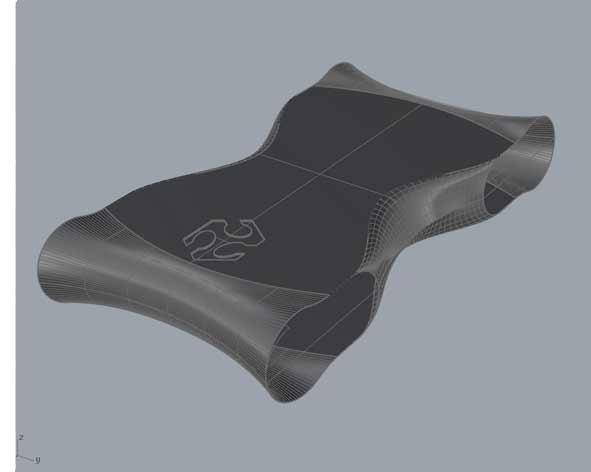
The first step was revise and made a new 3D Model of my Robot Roll.e to make the mold on a polyurethan panel ( 600x800x100 mm of which profits 500x600x60 mm).
I split the body into two parts to facilitate the process of composite and I started to draw the mold: knowing the height of the tool (3,5 cm from the mandrel to final tool) I could draw some inclined walls, in this way the machinery does not come in contact with the model when milling (similar to the process of molding and casting assignment).
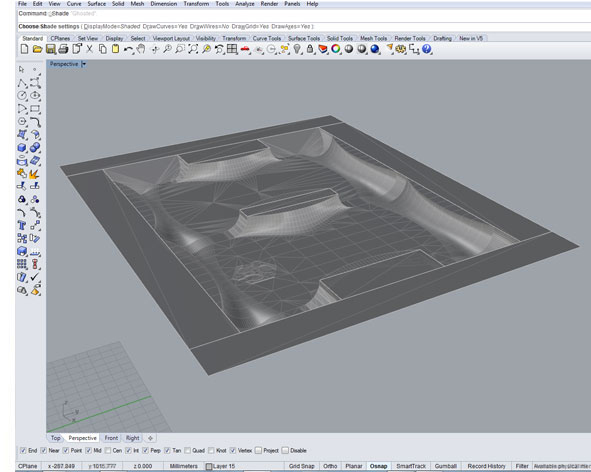
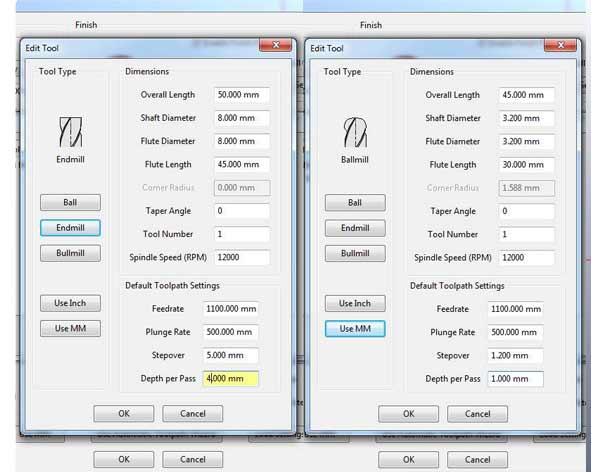
I Imported the .stl file in the Meshcam software and I set the two milling process which are the Roughing (tip 8 mm flat-head) and the Finishing (tip 3.2 round-head).
Roughing Settings:
- toolpath diameter: 8 mm endmill;
- feed rate : 1100 mm;
- plunge rate: 500;
- spindle speed: 12000 rpm;
- stepover: 5 mm.
- depth per pass: 4 mm.
Finishing Settings:
- toolpath diameter: 3,2 mm ballmill;
- feedrate: 1100 mm;
- plunge rate: 500 mm;
- spindle speed: 12000 rpm;
- stepover: 1,2 mm.
- depth per pass 1 mm.
- After the software has calculated the cam, I have saved the two .iso files and have them imported into the milling software Isons.
- I cleaned the CNC before to put and anchor the polyurethan block because every mm under the material may be a mistake during the process.
- I set the X,Y (0,0) and the Z-axis home coordinates values and I modified the gcode to start the milling process.
- After the Roughing and Finishing process i had lightly sanded to complete finishing.
Wet Lay Up
Wet lay-up is a molding process that combines layers of reinforced fiber with liquid resin to create a high quality laminate. This process involves the positioning of reinforcement material into or against a mold in layers. These layers are then impregnated with a liquid resin system, either with a brush and roller, to ensure a good wet-out of the reinforcement material. The step is repeated until reinforcement thickness is achieved. Curing can be performed at room temperature or under heat, depending on the selection of the resin system. This can be accomplished with the use of a vacuum bagging process.
Equipment, Components and Material:
- Peel Ply-Plastic Laminate;
- Holes-Breather;
- Bleeder;
- Linen Fabric 200 g/sqm of Bcomp°;
- Air-Vacuum Bag;
- Epoxy resin and Hardener (2:1);
- Release and Wax;
- Gelcoat and Reagent (100:2);
- Brush and Roller;
- Protection: eye, mouth/nose and hands.
The ideal ratio between resin and fabric it's 30% resin and 70% fabric. In this specific case, considering the textile material (linen) the ratio considered is 50% resin and 50% linen. The specific weight of linen is 200 grams/square meter. The three layers total area is approximately 0.3 square meter. So, the linen weight is approximately 60 grams. 60 grams of resin are required and considering the ratio 2:1 (resin:hardener) the hardener weight is 60/2 grams equal to 30 grams.
Proceedings:
- I Lightly sanded the mold and clean;
- I cut three pieces of linen of the size of the mold (1 with the texture of fabric at 45 ° to reinforce the composite);
- I also cut Breather, Bleeder and Peel Ply of the size of the mold (the Breather 3 time the dimension of the mold) ;
- I Put 2 Coats of Epoxy resiner and Hardener mixture (2:1 ratio) to completely cover the mold;
- I put 4 Coats of Wax Mold Release each 30 min;
- I put 3 Layer of Linen fabric and Epoxy resin mixture using brush and roller(quickly), making sure to evenly distribute and cover all parts of the mold( I used some small piece of linen to adjust empty areas);
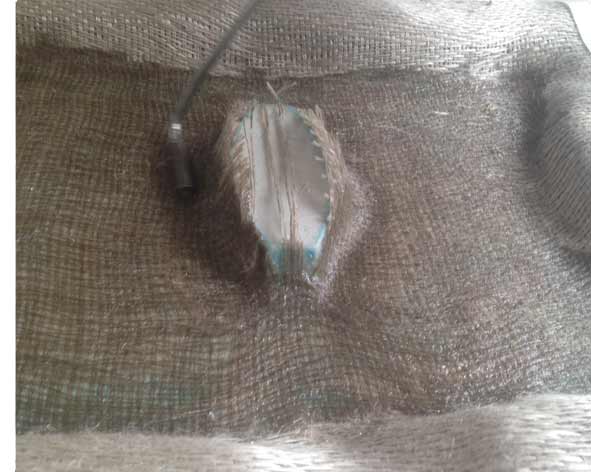
- Then I covered using Peel Ply, Bleeder and Breather (where there will be the valve of the air-vacuum I bent breather to have greater absorbing part)in this order;
- At this point I put it all in the Air-Vacuum bag, I closed the valve anche the bag and I turned on the air pump to created the vacuum;
- after a night the model was ready to be removed, but The release did not work very well and I had to break the mold;
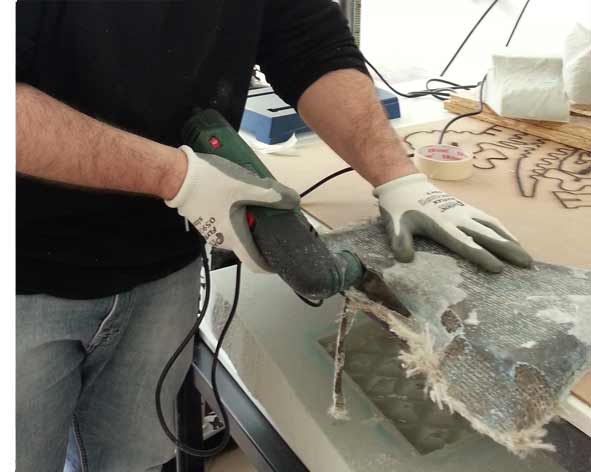
post production and PROBLEM FIXED
Unfortunately the model didn't come as I wanted, I think that during the process wet lay up, I used too little resin; Furthermore the release wax did not work very well, despite the many layers I used.
For this reason I had to work a lot to fix the the model:
- I cut the edges and sanded many times to reduce the imperfections;
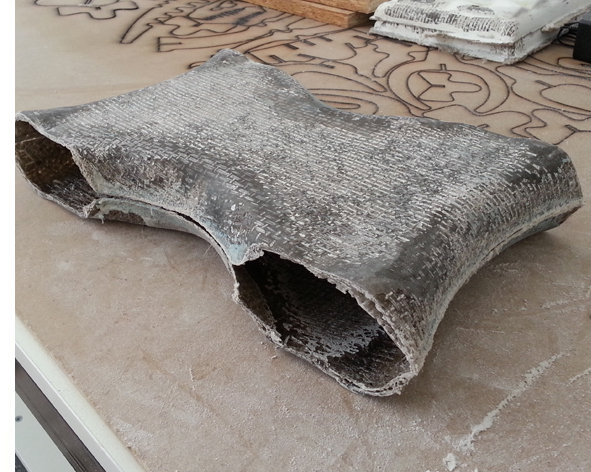
- When I got an acceptable and uniform result I put 2 coat of Gelcoat mixture;
- I Lightly sanded the mold and clean and the end, I have the "body" or "shell" of my robot;
Download Files
Rhino and STL:
Programs: Rhinoceros, Artcam, Meshcam.
Machinery: VREL CO2 ME-1300.