EXAMPLES FOLLOWED
This week I started by having a good look at some examples:
- Neil's step response example
- Akash's 8 pins step response computing centroids between different pins
- Matt Blackshaw's 8 pins touchpad (on which Akashe's example is based)
- Dan Chen's transmit receive and 8 pin step response tests (which is using Neil's step response example)
I was interested in understanding the differences in code, components and use.
NEIL'S STEP RESPONSE & DAN'S STEP RESPONSE:
ATTINY45 LEGS:
PB5
PB3 (shield/step/charge pin)
PB4 (sense pin)
GND
VCC
PB2 > receive pin rx
PB1
PB0
AKASH AND MATT'S STEP RESPONSE:
ATTINY44 LEGS:
VCC
PB0
PB1> chargeport rx
PB3
PB2> charge pin
PA7> sense7
PA6> sense6
GND
PA0> sense0
PA1> sense1
PA2> sense2
PA3> sense3
PA4> sense4
PA5> sense5
All board work by sensing a change in capacitance, allowing to record touch interactions on the surface. Akash and Matt are using a ATTINY44, whereas Neil's step/response example uses ATTINY45. Their boards multiply the amount of pins used as sense pins, but still use one singe step/charge pin as in Neil's example. The code is of course more complex, but for now I am trying to understand the hardware. Since reading Dan's documentation I found out that he had problems in making Akash's and Matt's boards working I decided to get started from Neil's transmit-receive example.
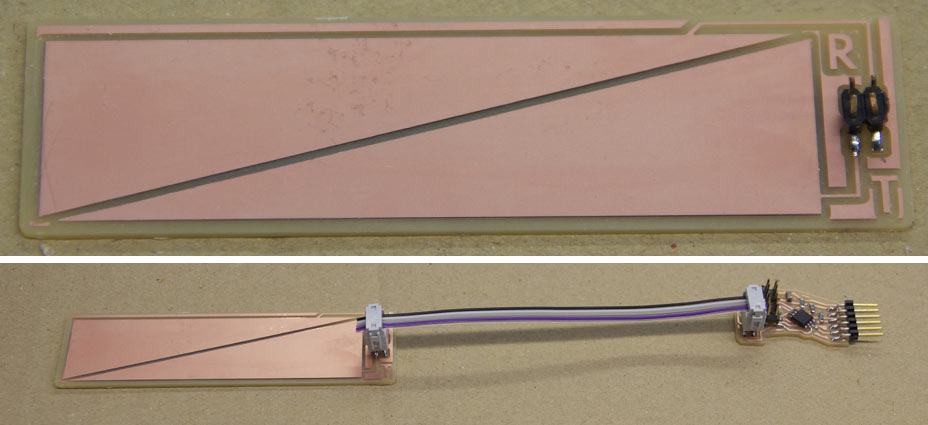
Design-wise I decided to make my boards in a way that they will be able to connect to a variety of capactive sensing substrates, in a variety of shapes and materials; so instead of integrating the sensing pads on the programmed board itself, I made a separate txrx pcb board connected via headers. This way I can interchange this with others, test flexible plastic and textile bases, copper traces, conductive paint traces, embroidered traces etc... So both boards use 2x2 header pins
So I designed and milled 3 pcb boards:
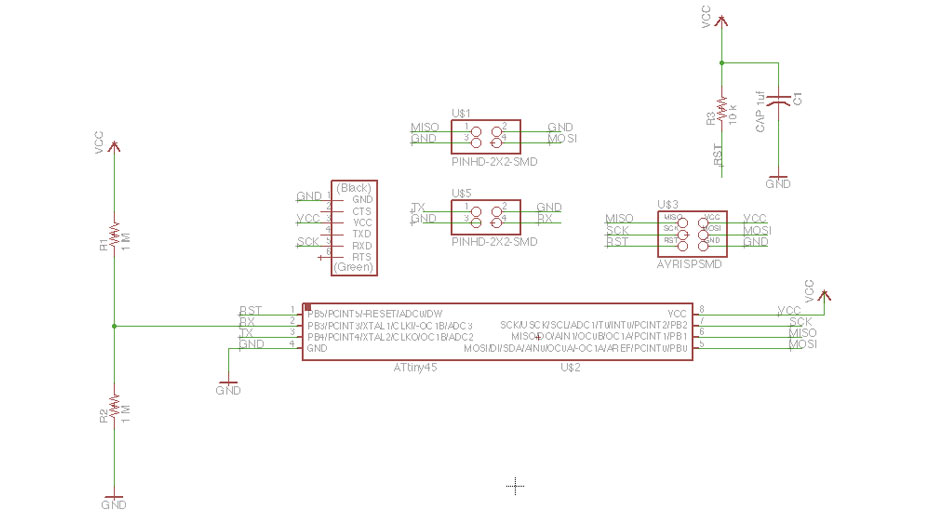
- RXTX :Neil's transmit/receive board (with an additional 2x2 pin header reusing some pins after programming)
- RXTX PAD: transmit receive pcb board unit
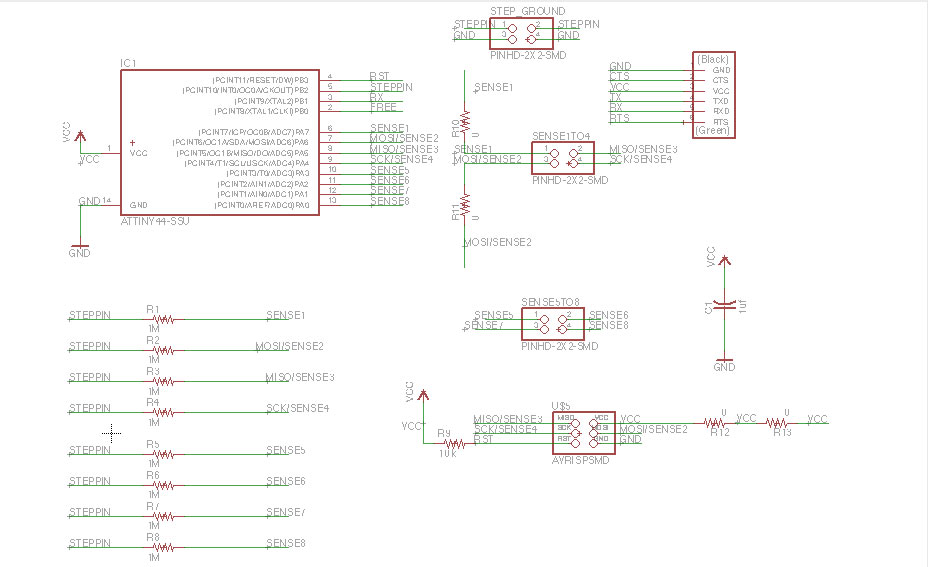
- 8 PINS STEP/RESP: Matt's 8 pins step response board redesigned
COMPONENTS USED:
RXTX:
1 x ATTINY45SI
1 x 3X2 PIN HEADER (ARVISP SMD)
2 X 2X2 PIN HEADER SMD
1 X FTDI HEADER SMD
1 x 10k Ohm RESISTOR RES-US1206FAB
2X 1 M Ohm RESISTOR RES-US1206FAB
1 x CAPACITOR 1 uf
RXTX PAD:
1 X 2X2 PIN HEADER SMD
8 PINS STEP/RESP:
1 x ATTINY44SU
1 x 3X2 PIN HEADER (ARVISP SMD)
3 X 2X2 PIN HEADER SMD
1 X FTDI SMD HEADER
1 x CAPACITOR 1 uf
4 X 0 Ohm RESISTOR RES-US1206FAB
8 X 1 M Ohm RESISTOR RES-US1206FAB
1 X 10 k RESISTOR RES-US1206FAB
PLUS PIN HEADER CONNECTORS
MILLED BOARDS
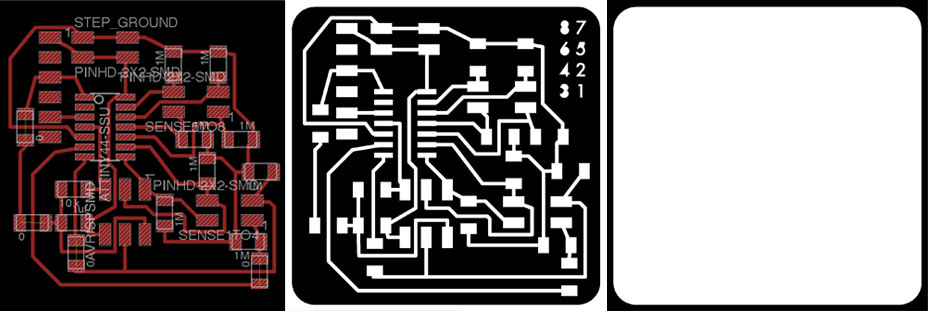
Traces width: 0.4064
PNG file border: 0.8 mm


REFRESHING MY MODELA MILLING SKLLS
1.
Never change mill bit when in view (light on if I'm in view) because it means that the machine is still in the middle of a previous process and you'll risk to damage the mill by moving to xy position and actually also stepping down in the z , since Z is always remembered from the latest ran file!
2.
To delete a running program on the Modela in Linux:
- open new tab on terminal and type:
ps -e | grep cat
- a list like this will appear:
2098? 00:00:00 cat
- kill cat:
kill 2098
'Cat' are all the processes that communicate through serial port with the computer. We are sending data from and to the Modela so we need to find the serial cat and shut it down.
Then press Z up and down at the same time on the machine, there will be a light flashing, when it stops blinking it is successfully reset!
3.
'VIEW' is the back right corner.
If we leave view by pressing it again and no process is still running, the machine should go to the front left corner. From here, I can change my mill bit and move to my new xy position.

PYTHON 3.4.3 IN WINDOWS 7 TUTORIAL
1.
Download Python.
I downloaded the latest version: 3.4.3
2.
In the latest python version the tkinter library is automatically installed.
BUT THE NAME OF THE LIBRARY CHANGED in version 3 from Tkinter to tkinter, so in Neil’s python file you need to change in the first few lines:
from Tkinter import *
to
from tkinter import *
Error encountered otherwise:
ImportError: No module named 'Tkinter'
Reference
3.
Since you are already changing Neil’s file, also change the line where you have
print “something”
to
print (“something”)
which also changed between the 2 versions.
Otherwise when trying to run your file you’ll encounter the error:
missing parentheses in call to 'print'
Reference:
This error message means that you are running on Python 3 a program that uses the Python 2 print statement:
PYTHON 2 : print "Hello world"
The statement above does not work in Python 3. In Python 3 you need to add parentheses around the value to be printed:
PYTHON 3 : print("Hello world")
4.
Download the pyserial library
LATEST VERSION: pyserial-2.7.win32_py3k.exe for Python 3.x (3.0...3.4)
After exectuing it, with the latest pyserial release you don’t need to do anything else, it will run smoothly. I only recommend to restart command prompt to make sure the folder is refreshed if you are running python at that very moment.
For previous versions there is a tutorial that explains how to unzip and install the library.
Error encountered otherwise:
when running the file from command prompt you will get an error that looks like this:
import error LINE 16 NO MODULE NAMED ‘SERIAL’
5.(not necessary)
You can check whether your python is correctly installed with this tutorial, using Python IDLE (but then you need to get real with command prompt :-D)
6.
Still, what you’ll most likely find out is that if you type
python
on command prompt (which is how you run python), it will not recognise the command...
YOU WILL NEED TO EDIT THE PATH in SYSTEM VARIABLES.
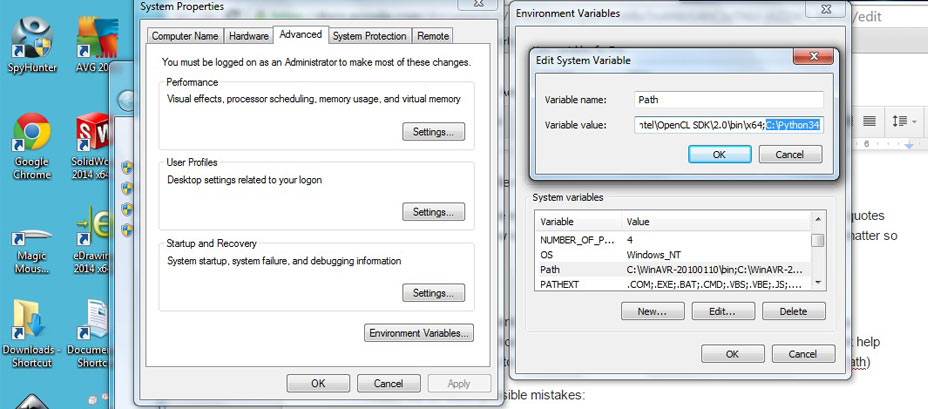
I followed this tutorial.
- Find where your python is saved on your computer, in mine is C:\Python34
- Go to : Computer > right click > properties > Advanced system settings > Environment Variables button
- Find ‘PATH’ between the system variables (bottom scroll)
- my path looks like:
C:\WinAVR-20100110\bin;C:\WinAVR-20100110\utils\bin;C:\Program Files (x86)\NVIDIA Corporation\PhysX\Common;%SystemRoot%\system32;%SystemRoot%;%SystemRoot%\System32\Wbem;%SYSTEMROOT%\System32\WindowsPowerShell\v1.0\;C:\Program Files (x86)\Intel\OpenCL SDK\2.0\bin\x86;C:\Program Files (x86)\Intel\OpenCL SDK\2.0\bin\x64
- Edit PATH and append ;C:\Python34 to the end (or other version name)
- Click ok and restart command prompt
A cool kid wrote a tutorial on MISTAKES IN EDITING THE PATH: I added a backslash at the end because some tutorials had it and I can assure it DOESN’T work!
When setting Environmental Variables in Windows, I have gone wrong on many, many occasions. I thought I should share a few of my past mistakes here hoping that it might help someone. (These apply to all Environmental Variables, not just when setting Python Path)
Watch out for these possible mistakes:
- Kill and reopen your shell window: Once you make a change to the ENVIRONMENTAL Variables, you have to restart the window you are testing it on.
- NO SPACES when setting the Variables. Make sure that you are adding the ;C:\Python27WITHOUT any spaces. (It is common to try C:\SomeOther; C:\Python27 That space (␣) after the semicolon is not okay.)
- USE A BACKWARD SLASH when spelling out your full path. You will see forward slashes when you try echo $PATH but only backward slashes have worked for me.
- DO NOT ADD a final backslash. Only C:\Python27 NOT C:\Python27\
5.
Finally run the damn .py file from command prompt!
- Navigate in command prompt to your folder, mine looks like C:\Users\Fra\My Documents\week_10\rxtx\
- Upload your c sketch : make -f hello.rxtx.45.make program-usbtiny
- run the pyfile: python hello.txrx.45.py COM8 (this is my com port, yours will probably have a different name
And it should run fine.
If you wonder how to close python this is the command:
quit()
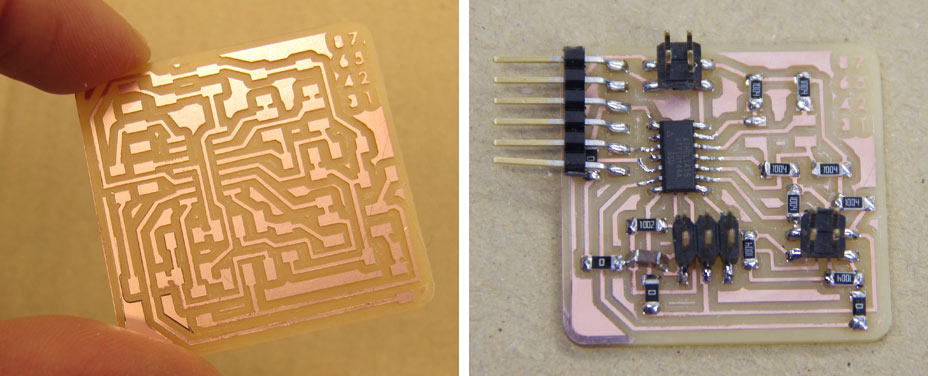
PROGRAMMED BOARD
FILES DOWNLOAD LINK
HOME | ABOUT | WORK | CONTACT
Francesca Perona © 2015

This work is licensed under a Creative Commons Attribution-NonCommercial 4.0 International License
Original open source HTML and CSS files
Second HTML and CSS source
Francesca Perona © 2015

This work is licensed under a Creative Commons Attribution-NonCommercial 4.0 International License
Original open source HTML and CSS files
Second HTML and CSS source