NOTES ON THE DESIGN PROCESS
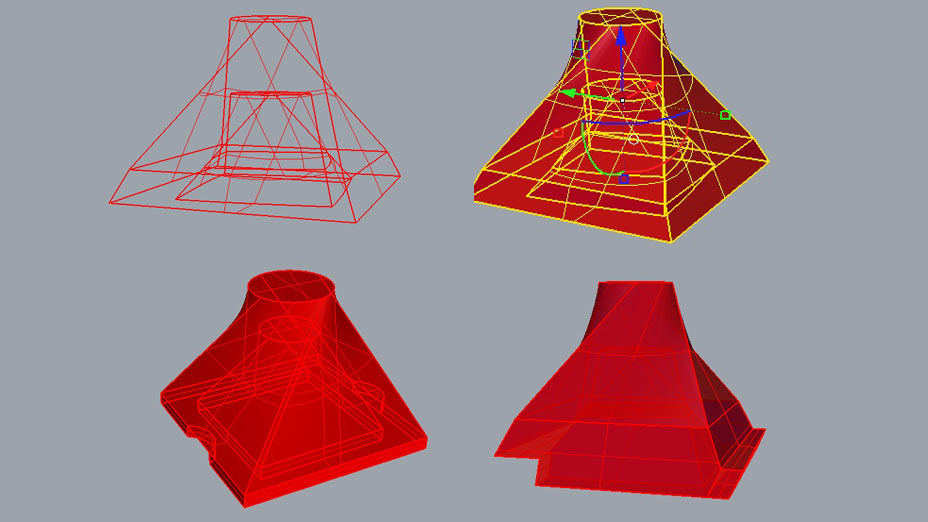
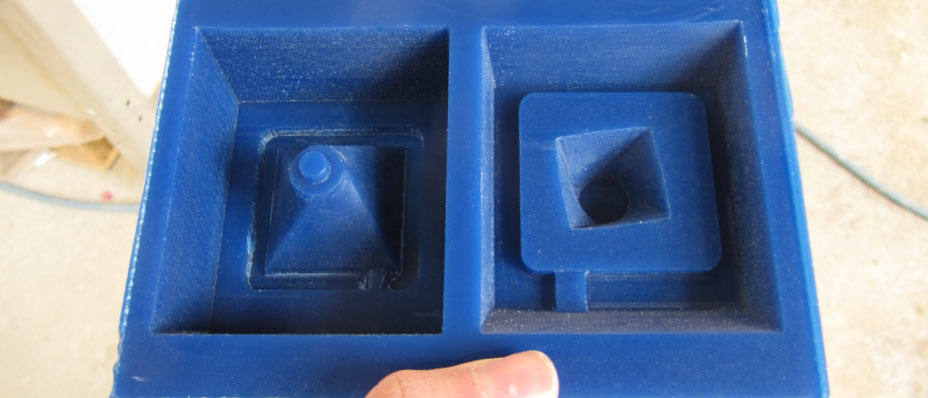
I designed a 2 sided mold in the shape of a half pyramid with a top circular cross-section, whose sides are rotated. The object was designed to be stacked onto itself, with the second side of the mold modelled to allow this feature. The shape was designed in Grasshopper, and the positive mold in machinable wax was designed in Rhino.
As Neil suggested I went through the 3 steps of:
- creating a rigid positive mold in machinable wax
- create the negative mold in silicone
- cast the object from the silicone mold
The wax block is 3.5 cm thick, and when designing the object I needed keep into account its dimensions.
Suggestions:
- leave at least 5mm between the base of the object and the bottom of the wax block
- leave around 5 mm between the top of the object and the top of the wax block
Each design has a different configuration, but we always need to keep 2 little holes in our mold design:
- one to let the casting material in
- one to let the air bubbles out
In my design the only way to pour the casting material in the mold is through a channel located on the top, therefore I designed a 5 mm wide conical channel connecting the surface of the mold with the top outer section of my object. When pouring in the silicone, the channel surface has to be clear, so that we have an easy path to let the material in.
I also designed an air channel on the bottom of the object, than crosses both sides of the mold and reaches the external wall.
Since the Modela tool to mill the machinable wax is straight for the first 18 mm and has an inclination after that point, it is unable to mill straight walls higher than 18 mm. For this reason the walls of my positive mold have an inclination of about 5 degrees.
The tool is also unable to mill overhangs, which needs to be kept into account when designing the object. Despite I originally planned and tried to design an element that could snap on the side with itself and be modular, I gave up because I kept bumping into overhanging parts.
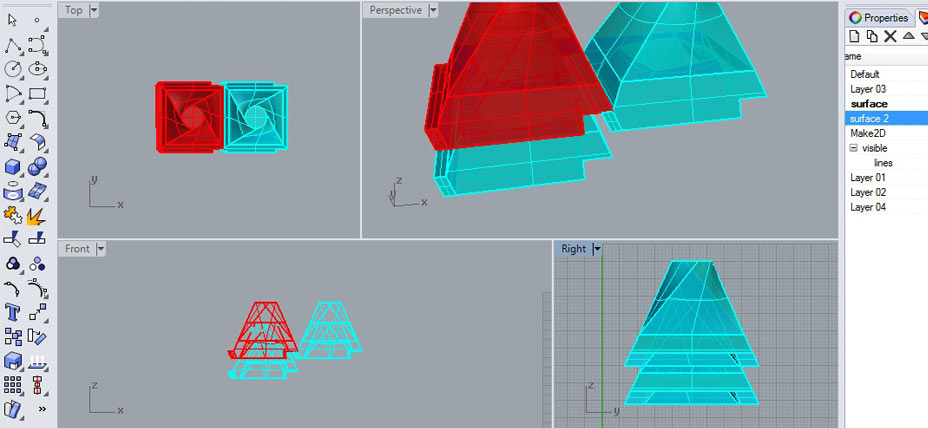
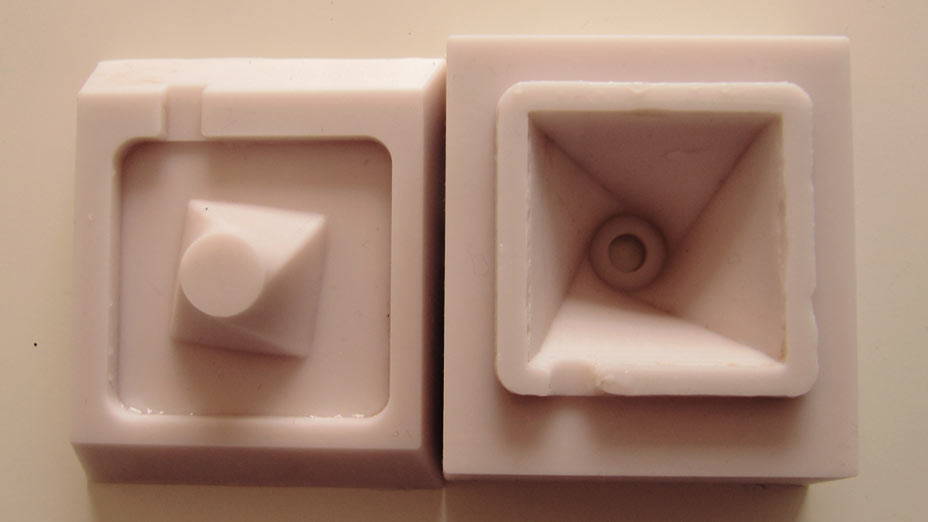
To make sure that the two silicone mold parts perfectly adhere without any casting material leaking, I designed a rim, 4 mm from the inclined walls and 4mm deep on one side, and subtracted the same rim from the second part of the mold.
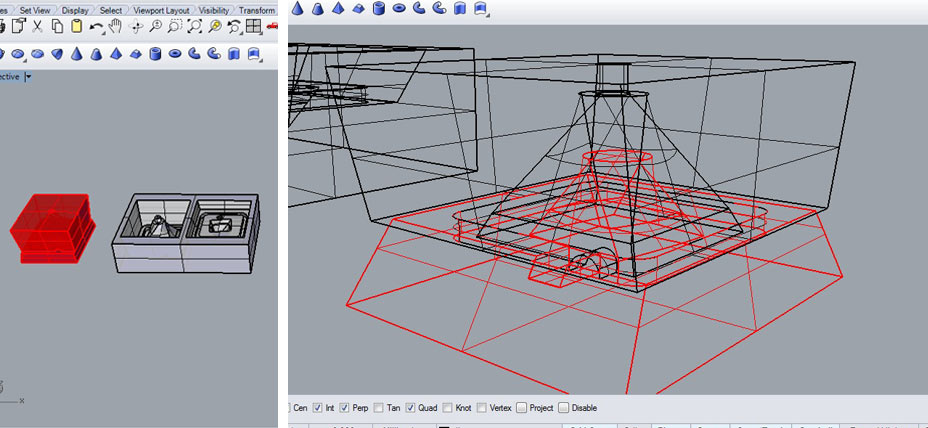
I then tested the fitting of the two part. Using boolean difference between a solid and the mold parts we can obtain a representation of the negatives in silicone and double check the correspondance of the rims and air channel.
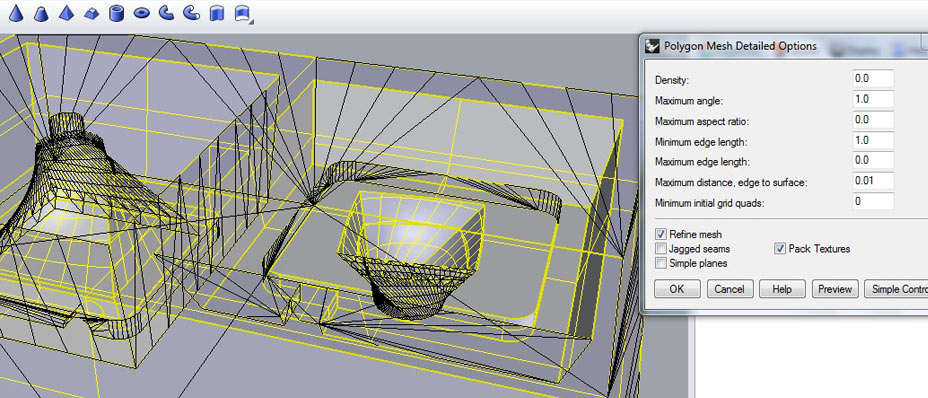
My first exported stl file was horrorific. The detail required by the geometry generated in Grasshopper created a very heavy file. I managed to reduce the size of the stl to the 10% by simply rebuilding the 'complex' parts of the model with the 'Rebuild' function in Rhino.
I also had to change few values ( minimum edge lenght and maximum angle) while exporting the stl in Rhino.
For Rhino newbies like me some very useful functions discovered while designin the mold were:
- dupEdges to copy the perimetral geometry of solids
- planar surface to make a planar surface from a polysurface (works with 2 closed curves on the same plane)
- extrude surface
- boolean differences
- trim surfaces and solids from a lateral perspective with a line (it is perceived like a plane by the program)
- control + select to deselect objects (I know... right? spent so much time reselecting everything till now)
- exploding everything
- 'hide' objects, very useful!
- check for naked edges (non manifold geometries)
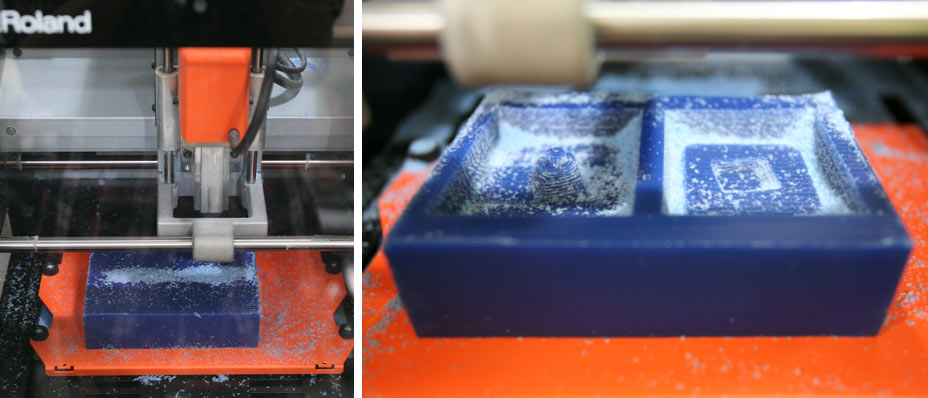
MODELA SOFTWARE AND MILLING
Steps on the Modela Software:
- set the origin to the top left front corner of the model
- select 'modeling wax' as a material
- select the machine in File> Select machine, SRM-20 in our case
- xy speed 30 mm/sec
- spindle 7000 rpm
Generate the Gcode for 2 processes:
- Roughing with a 2.2 mm tool
- surfacin with 1.2 mm tool
To set up the machine:
- find the local x and y values
- lower the z until it touches the material (very precise setting)
- set the new xy coordinates and z coordinates
Now we can send the Gcode to the machine!
I sometimes paused it to clean from the wax dust.
The whole process took around 10 hours... Happy waiting.
It then took me another 2 hours to sand the details of the model and ulteriorly smooth the surface.
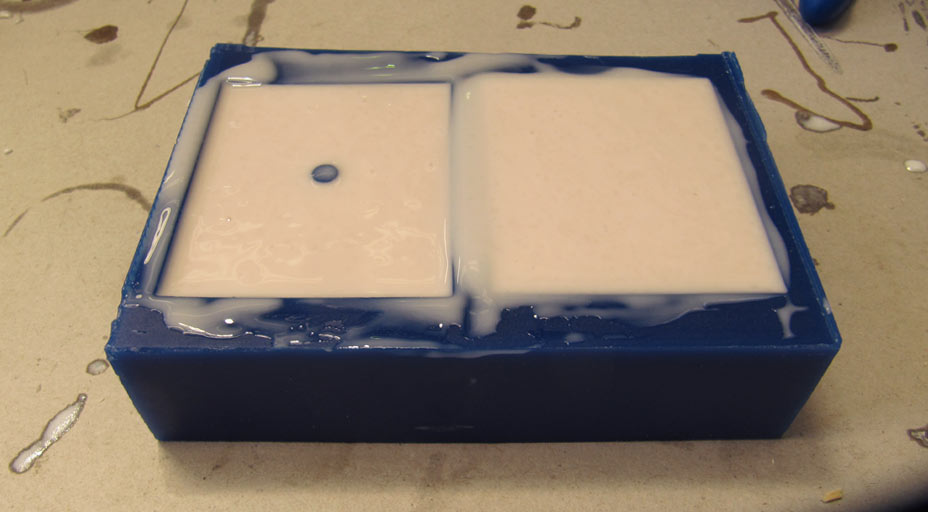
MAKING THE MOLD
Calculate the Volume of silicone needed:
Pour water in a cup and measure the volume it takes. Use this as a reference to pour the right amount of material, considering that most materials are 2 parts, so you have to account for both. In my case Part 2 is neglegible.
Set the table to make the mold:
- Gloves
- Kitchen paper. Lots.
- some sort of brush / piece of paper to spread the material
- 3 stick for facilitating pouring part a and part b, and one for mixing
- 1 big enough cup, that also fits in the vacuum chamber
- a vacuum chamber (homemade or professional, Ferdi made a very nice one for us)
- a scale to weight the ingredients
- Take note of the weight of your empty cup so you always know how much material is in the cup
MATERIAL SPECS:
Smooth Sil is a 2 parts food safe silicone rubber.
Part A is very thick, almost with gum like consistency, whereas part B is very liquid.
The ratio is 100 A : 10 B.
It starts hardening after 20 minutes from opening.
It will then need 24 hours to cure at room temperature (around 23 C).
FAST! FAST!
- Mix well the two materials together in the cup.
- Vacuum the full cup until you get ridd of most of the bubbles. We repeated this step around 5 times.
- Then pour some of the material in the machined wax. And try to spread it evenly on the whole surface to create a thin layer.
- We vacuuumed this thin layer so that the silicone on the surface of our mold would have no bubbles.
- Once done this we pour the rest of the material from one corner, covering the whole mold till the surface.
- We vacuum again trying to get ridd of all bubbles.
- We leave to rest for 24 hours.
MAKING CHOCOLATE
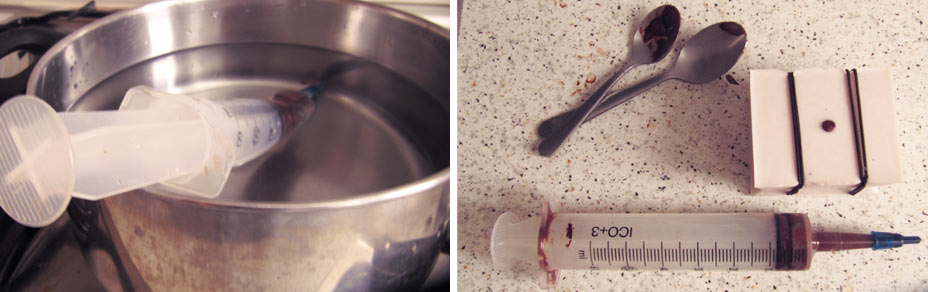
As guru Ferdi suggested, I bought a siringe at the pharmacy to do the job.
I heated water in a pan. IMPORTANT: water must not be boiling, temperature should be around 50 - 60 degrees, so that the chocolate melts nice and slow.
When it is all melted in the siringe, I pressed it inside the mold.
I left the chocolate to cool off for at least 4 hours.
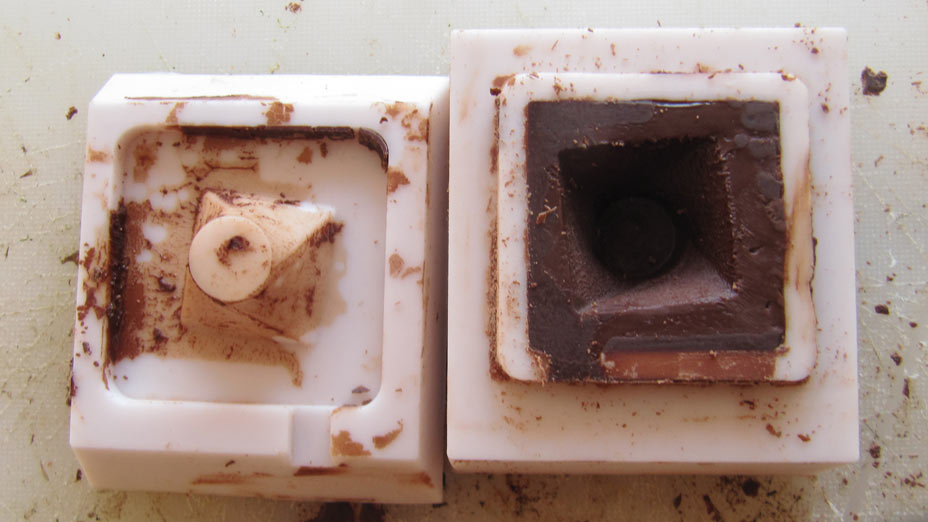
Since the weather is quite warm now in here (26 degrees), it remains sort of soft even when cooled at room temperature. So before removing it from the mold, I put it in the fridge for about 20 mins. This ways it's easier to pop the mold open.
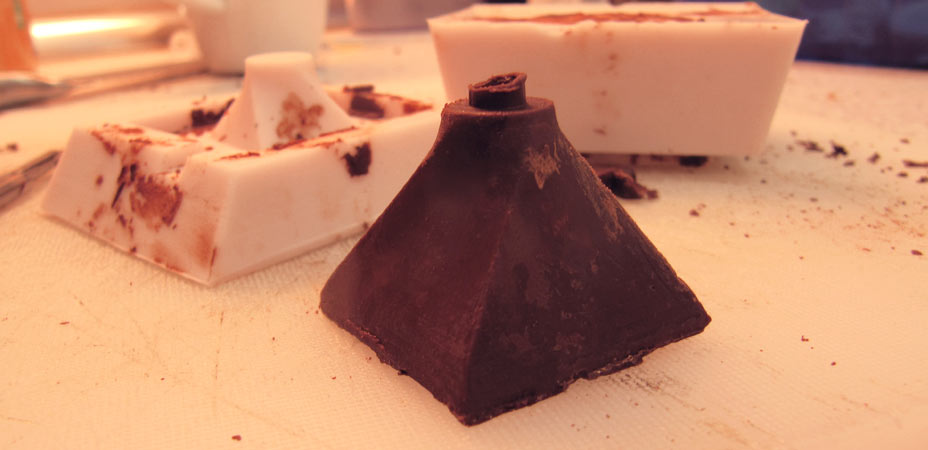
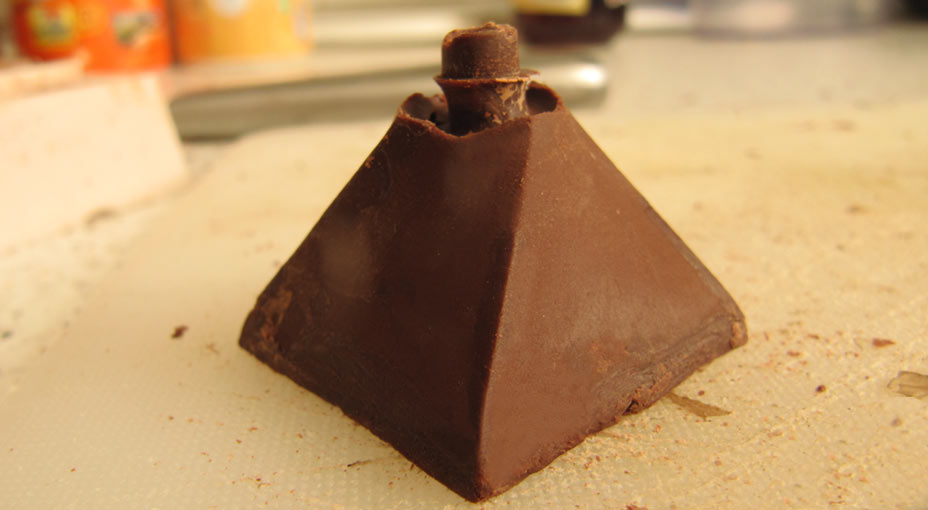
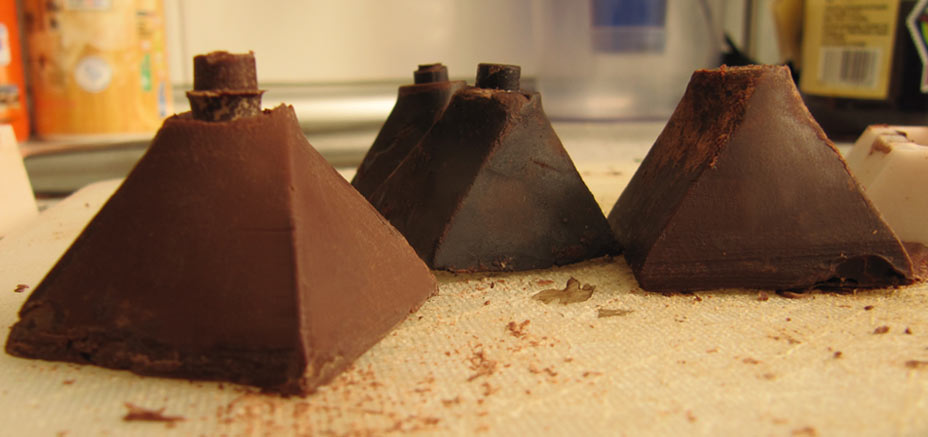
I first remove the bottom layers, than, with a craft knife, I make sure that the side of my chocolate detach from the mold.and press from the top to release the chocolate from the mold.
As you can see, I am still perfecting my technique. I'll keep you posted if my casted chocolate improves!

FILES DOWNLOAD LINK
HOME | ABOUT | WORK | CONTACT
Francesca Perona © 2015

This work is licensed under a Creative Commons Attribution-NonCommercial 4.0 International License
Original open source HTML and CSS files
Second HTML and CSS source
Francesca Perona © 2015
This work is licensed under a Creative Commons Attribution-NonCommercial 4.0 International License
Original open source HTML and CSS files
Second HTML and CSS source