Electronics production
Make it, produce it, solder it
Build a FABISP
Learn by doing, doing mistakes, listen Neil, do it again, happy at the end. ;)
FABISP in the not so good way
This week i was invited to build an FABISP, a simple board that was very useful to program AVR microcontroller's from Atmel.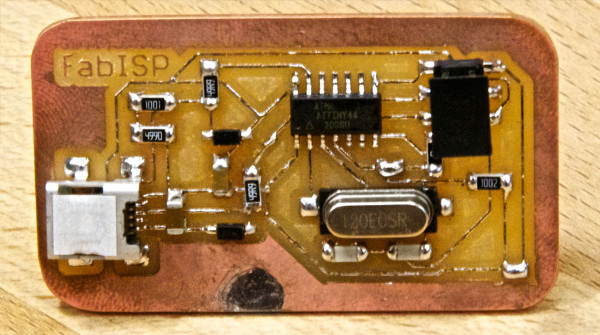
FABISP
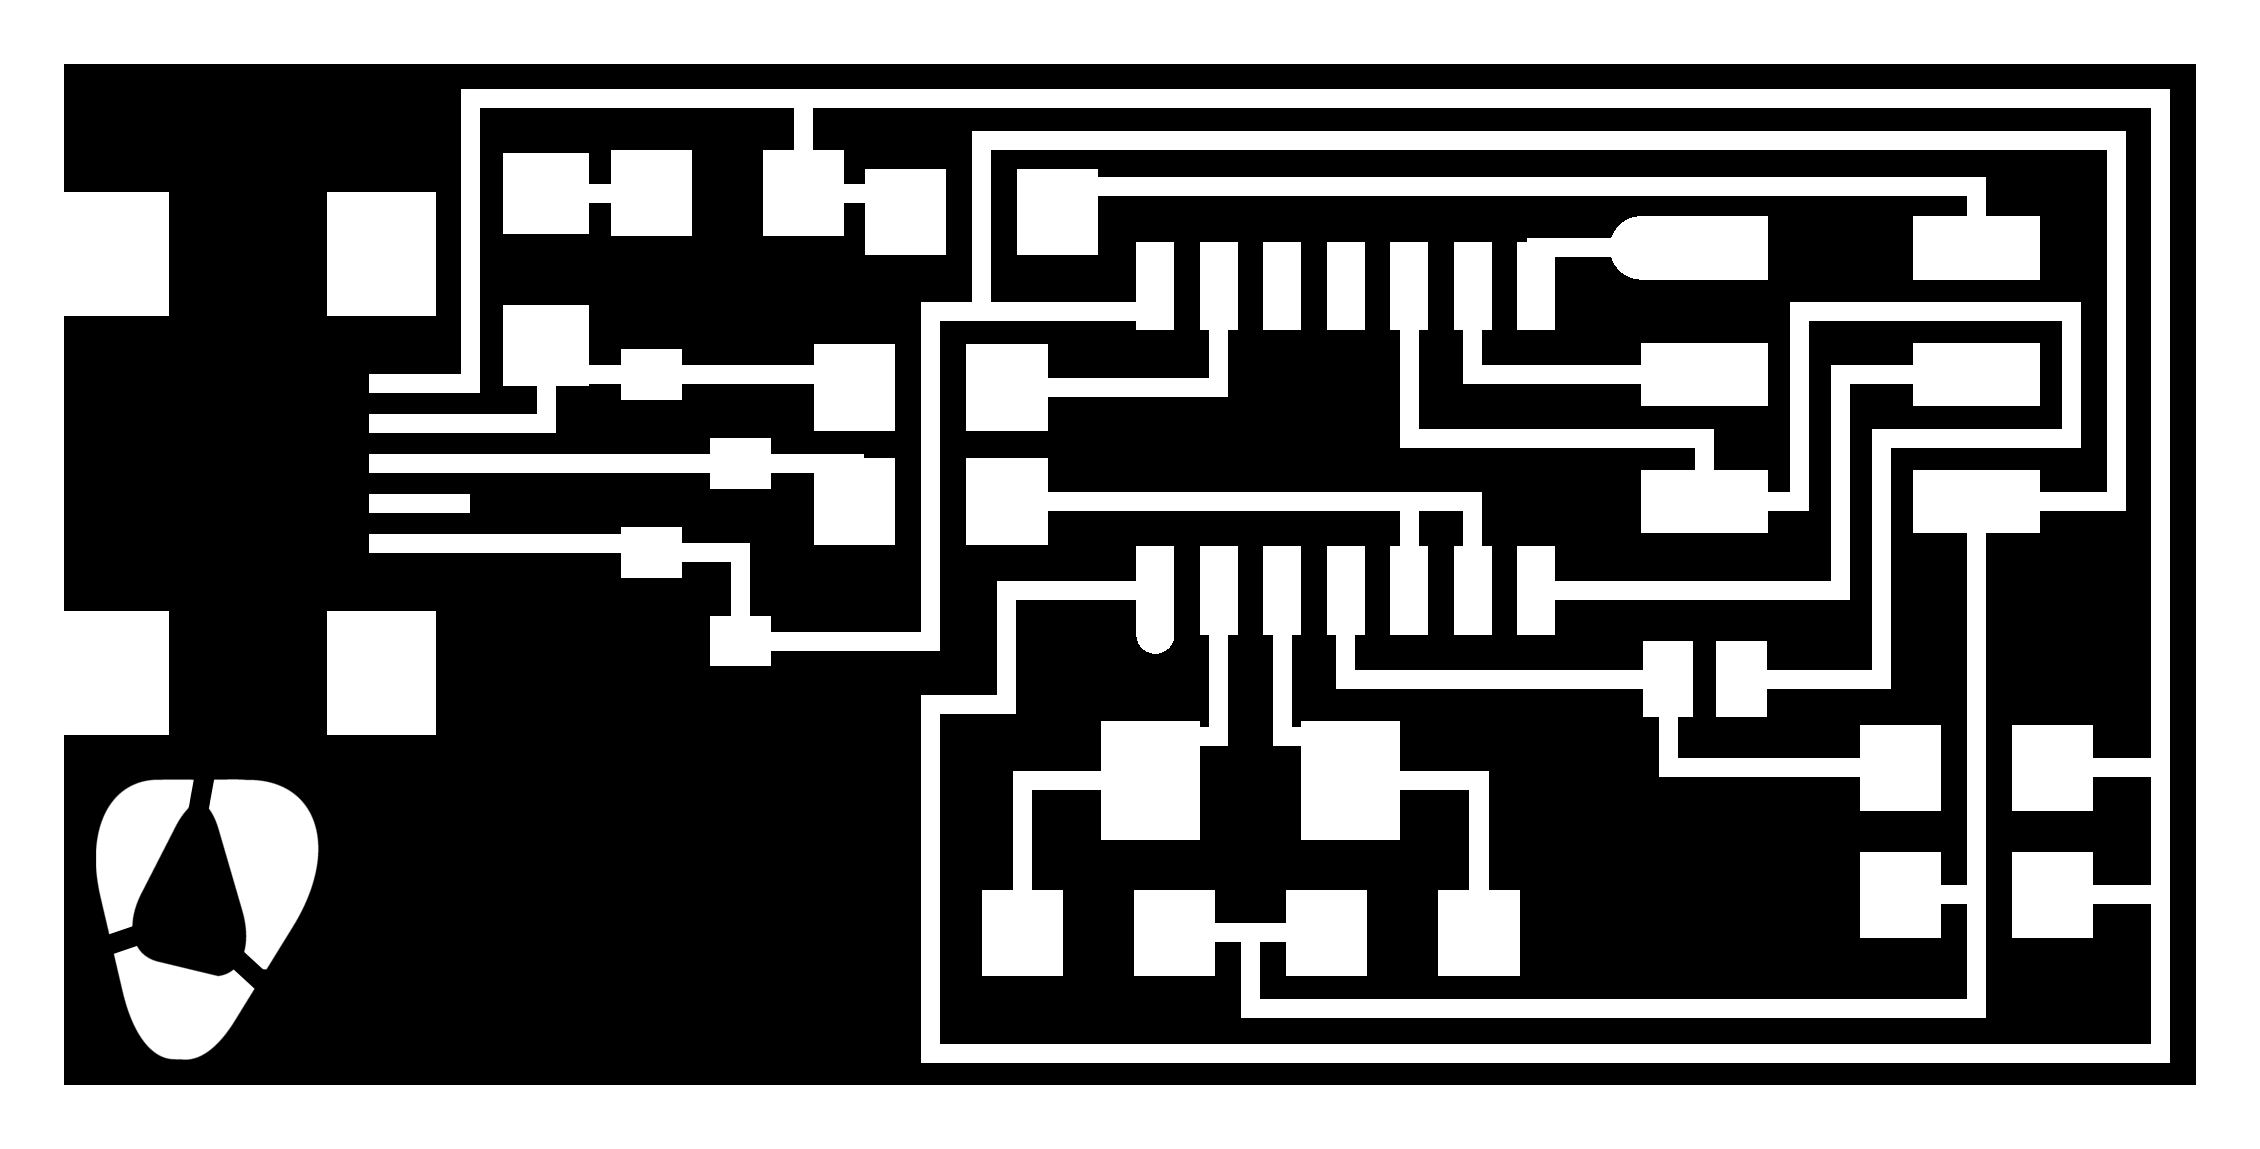
Electronics is my thing, but... I never produce a board like this, i always use electronic specific software like eagle, and i make my boards or by etching process or by ordering it from board houses. So the big challenge is how a png image, can be a physical board. First i use fabmodules to vectorize it. Than i try to import that svg to my SRM20 software.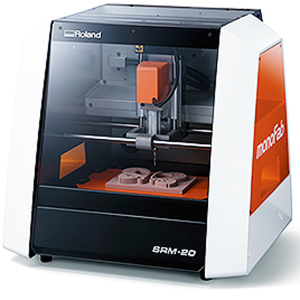
Rolland SRM20
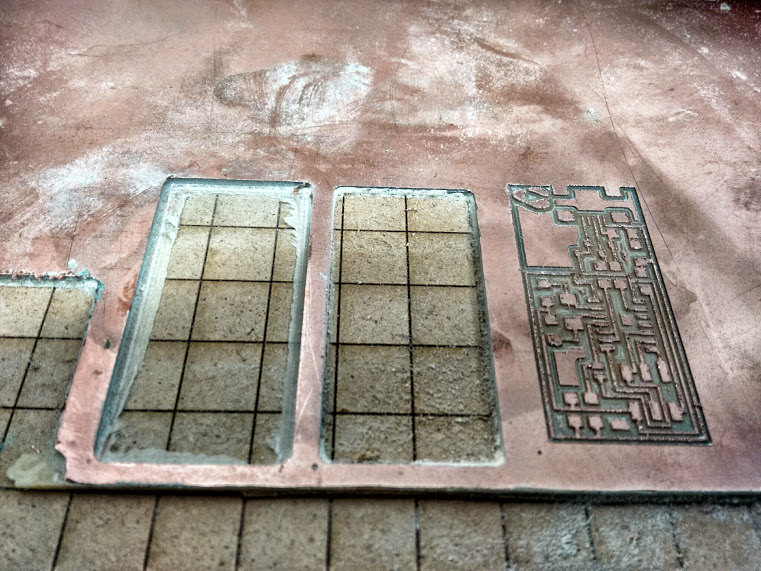
Ok first the SRM20 adventure ;) My SRM20 have a lower bed so i must put some high to make the pcb reachable by the milling cutter. I pick some wood, glue tape it to the bed. After that i use the click mill software from the SRM20 to make it completely flat. With a 3mm milling cutter i made a flat surface where i gonna put my pcb.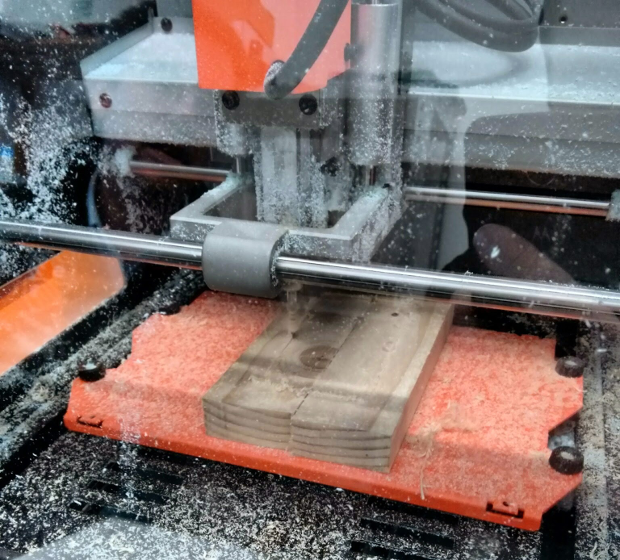
Leveling the bed
Well the first mistake was done ;) i use wood to be the bed, but i don't recommend it, because wood is random fiber material not so good or stable over time. In Fablab Penela where i test it i don't have FR2 so i use a board from bakelite. Error 2, FR2 have a much much better behavior. Error number 3 I chose the wrong collet. My milling cutter's are 3mm Shaft, but my collet are 1/8" or 3,175mm So i must use a conic milling cutter.But... My pcb work's ok, some off...
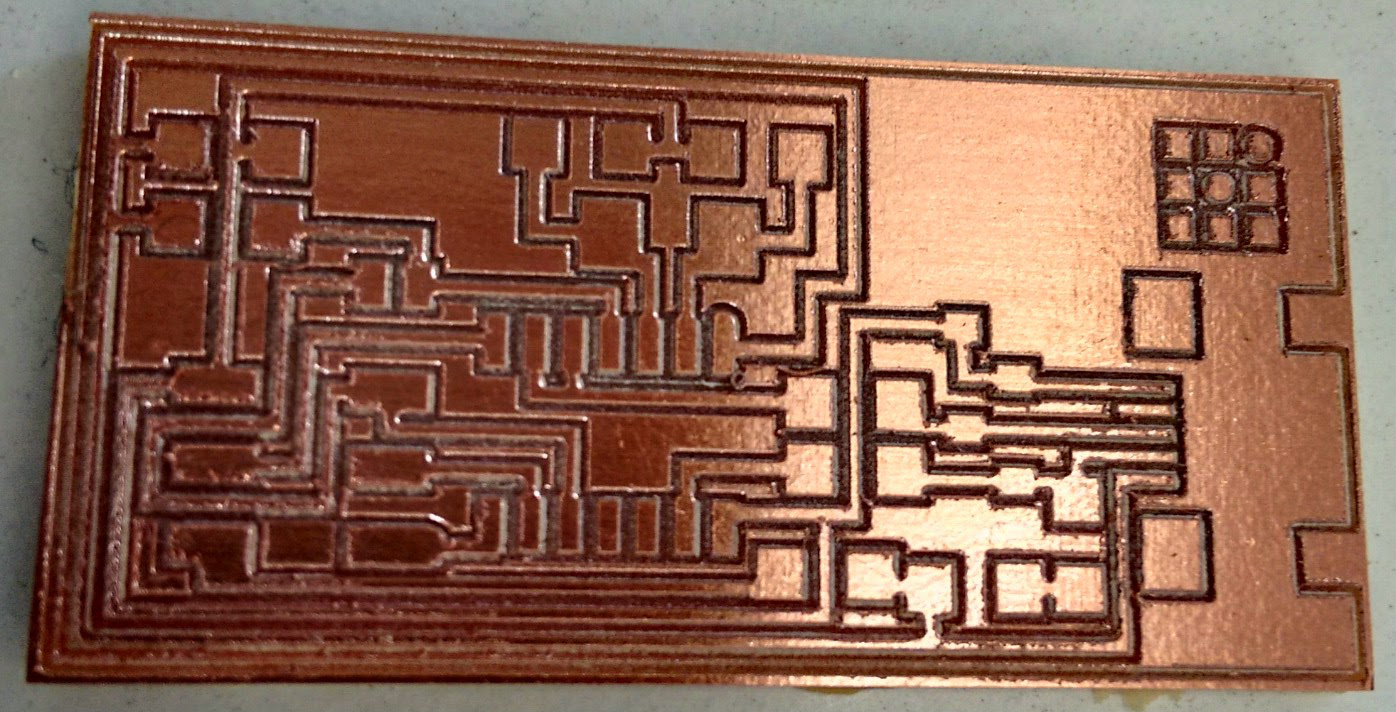
My first milled pcb
Build a FABISP 2.0
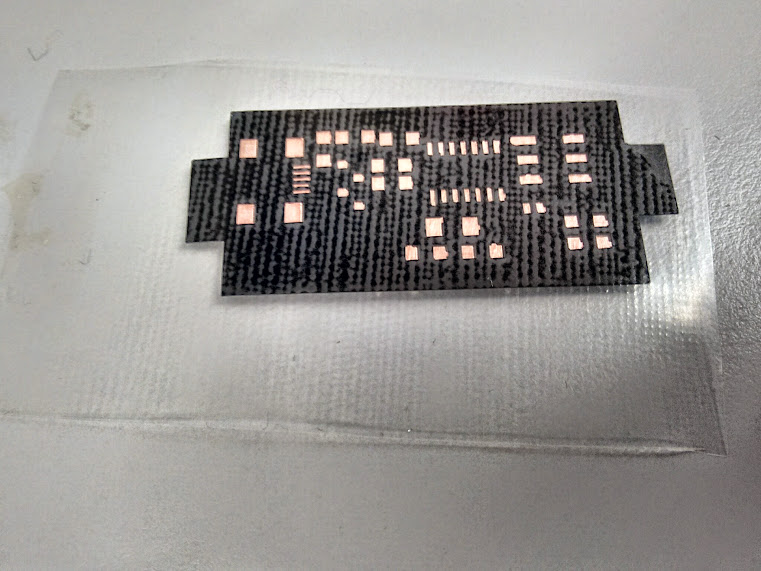
Well well wellNow with the help of fabMaster's in Fablab EDP i build a fabisp.
 I name it fabispPenela, in gimp change the logo.
 I mill it in MDX20.
Everything easy and smooth.
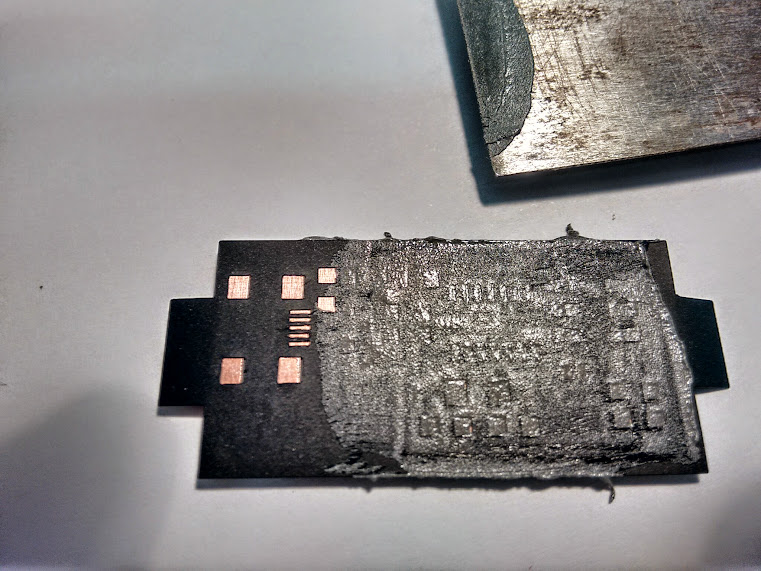
The challenge begin's in soldering it.
We at fablab try to adopt a new approach.
We are trying to solder all the component's via hot air.
So for this i use gimp to make a solder paste mask.
I mill it in MDX20.
Everything easy and smooth.
The challenge begin's in soldering it.
We at fablab try to adopt a new approach.
We are trying to solder all the component's via hot air.
So for this i use gimp to make a solder paste mask.
 like this.
 After that i apply it in pcb
 than i pass the solder paste
 populate the board with the component's
 and applied the hot air to it.
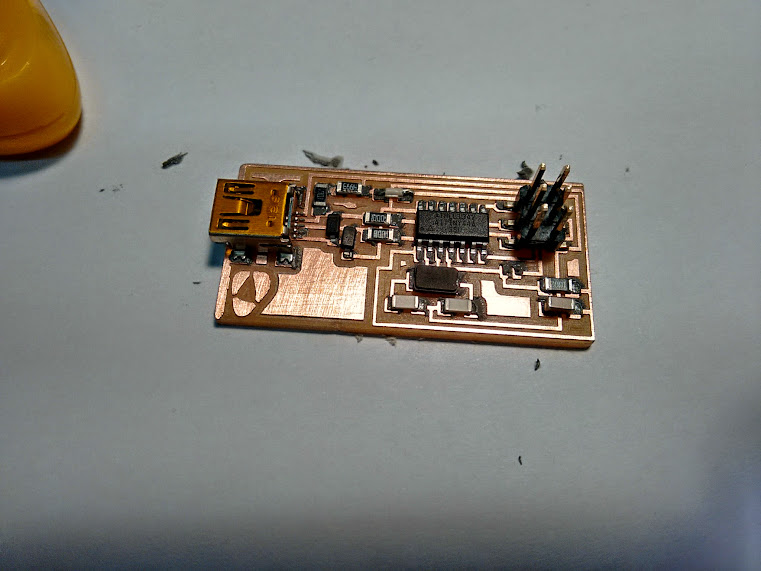
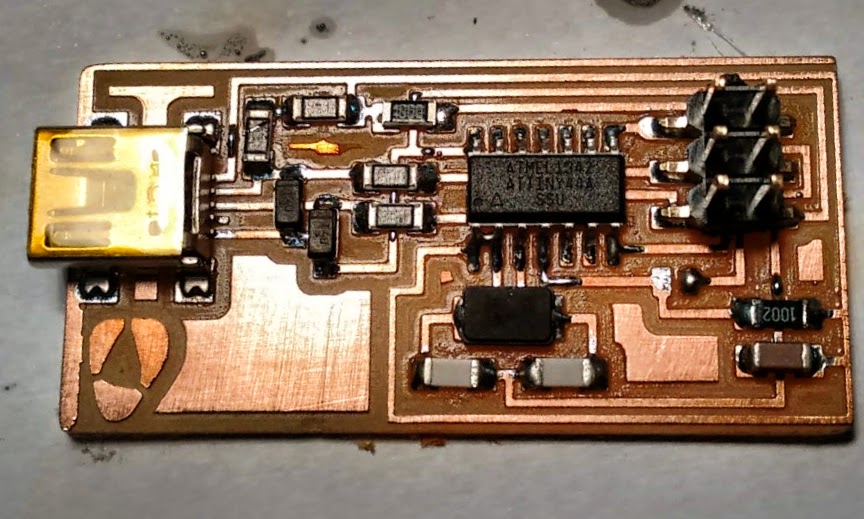 And voilá the board was ready :)
Double check the connections and it was in did great.
Tip's and trick's i use an android app as microscope.
aTools
And voilá the board was ready :)
Double check the connections and it was in did great.
Tip's and trick's i use an android app as microscope.
aTools
Here is the link to this week files. :)