
Computer-Controlled Machining
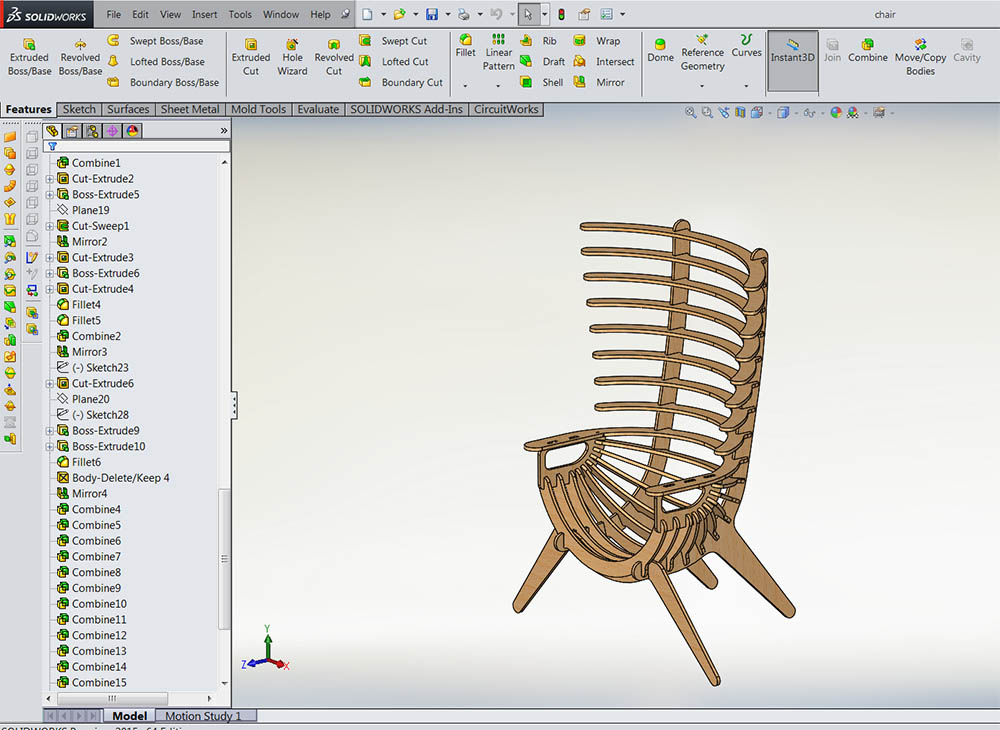
For this weeks assignment, I want to make a chair. The biggest challenge would be to make a desgin there will fit into a single sheet of hardwood. I am designing the chair in solidworks. I will not get future into how I have designed the chair. But here you can download the solidworks file , and check it out. After designing the chair in solidworks, I had to turn it into a 2D design. There is to ways to do that. One is to make dxf-files by exporting each surface into separate files. It is nesesary to do this, because the surfaces is not in the same "plane" or parallel. This takes a lot of time, and it can be difficult to keep all these files in order. The way I did is, was to import all the solid bodys into a new part-file. In that file I simply used the "move" function to turn and move all the body so the surfaces of each body was in the same plane, and therefore could be exported as one dxf-file.
From solidworks to the shopbot
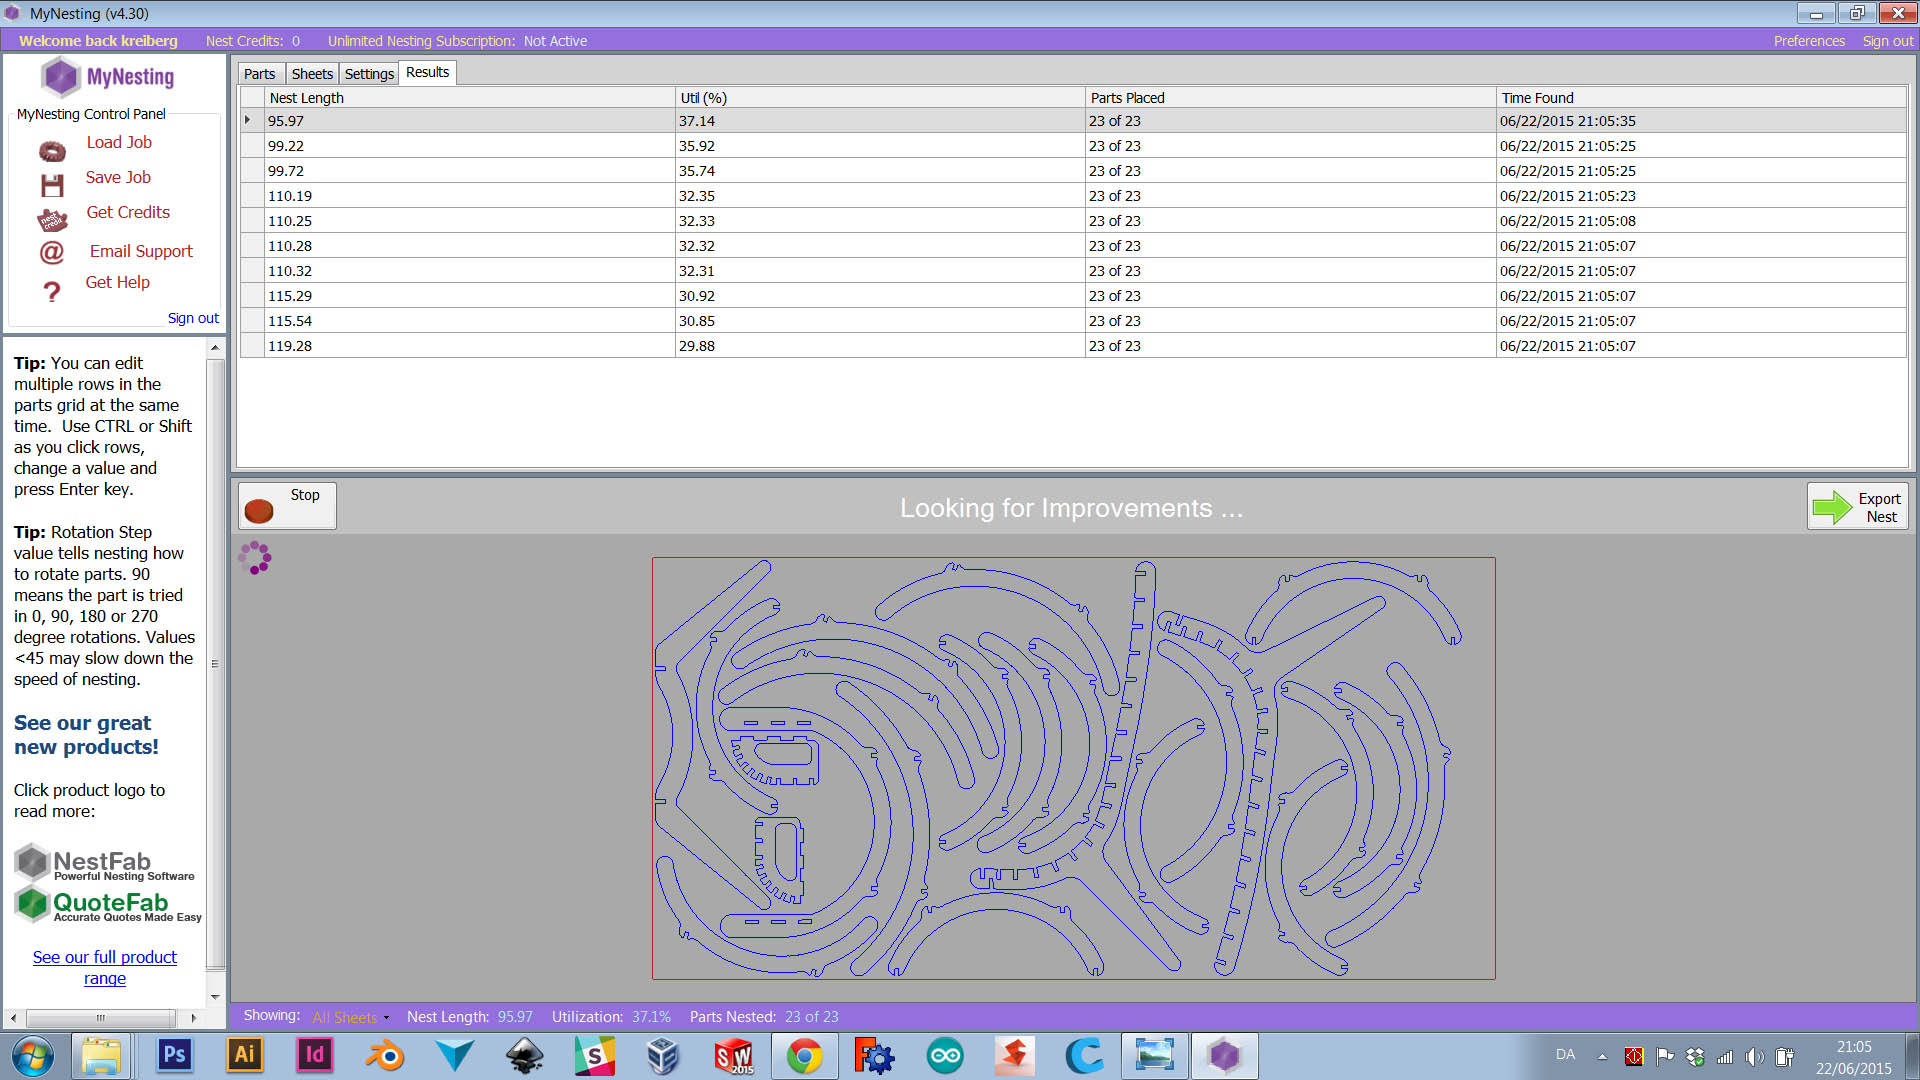
After the dxf-files where correctly generated in solidworks, I still had to fit all the parts into one sheet. I started out in Illustrator to layout the design, by moving and turning each part to fit the limited sheet size. After some hours of trying I realised it was nearly impossible to do it in this "stupid" way. So I made a quick google-search and found a program called "mynesting". The program is amazing, I am not sure if the program is free or not. It seams like you have a couple of free tries. as I said I am not totally sure.
The program is pretty simple. You can load in f.ex. a DXF file with a lot of parts in it, and mynesting will determine which parts sticks together and which does not. Amazing!! After the files are importer next step is to define the sheet size. After that; let "mynesting" do its magic. You can define some rules for the program before it begins to "nest" your parts. f.ex. that parts can only be flip in 90 degrees intervals. This is a good thing if you are using cardboard or something like that. Even if the program seams to be done, it is not. My layout was difficult to fit on one sheet and the program worked for 15min before it went from a 2 sheet layout to 1 sheet. Here is the dxf file before I "nested" it in mynesting, try mynesting on your own.
Milling out the chair
In the CAM program for shopbot called pathworks, it is possible to generate taps to hold the different pieces in place in the milling process. But in my case the feature was not precise enough an i had to make the taps in solidworks. I imported the dxf layout back into solid works and made some taps manually. It was a lot of work, but it had to be done to get a good result. When milling it is important to know your machine, and the material you are about to mill. The hardwood I am using is in fact quit soft compared to for an example birch plywood. Michael my tutor have alot of experience with hardwood, and he helped me out with the settings for the milling-job. Using a 6mm end mill we ended up with these settings.
Feed rate 4.5 inch per sec
Pass depth 3mm
Plunge rate 1 inch per sec
Ramp 20mm
After that all there was left was to load the hardwood on the shopbot, and carefully fasten it with screws in strategic places. I used a 6mm End-mill for the entire cut.


Ready for sanding and assemble

The Kasper Kreiberg Chair
After a bit of sanding the chair was finished!
