Soft mold
Lumumba and Takete Candy.
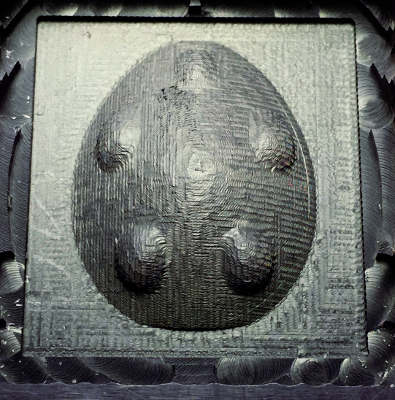
For our first mold we set a time limit of 30 min for the design phase. This to make sure we got through the whole work flow. I wanted to make two chocolate piece with as different texture I could come up with. In practice it is the classical lumumba/taketet exercise. I made my first piece in antimony with a couple of spheres, some attractors & array magic.
The mold was also made in Antimony and I made sure I had space disent wall thickness of 10mm for my cast mold.
With the exported STL I decimated it in Mesh labs to reduce the polygon count and make the file size smaller and easier to work with. From there I took it to Fab modules and the the rough pass setting for Roland MDX-20.
 Flat end mill not giving a smooth finish.
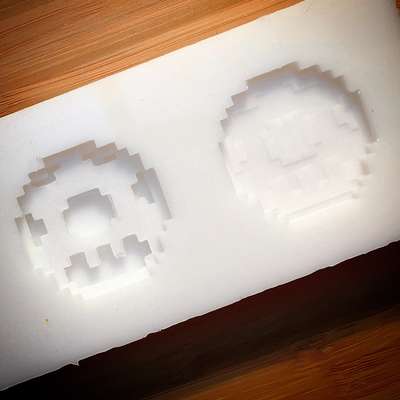
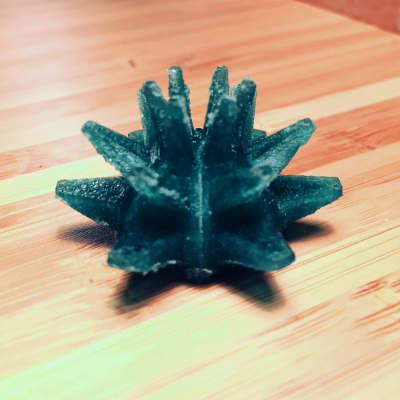 Takete shape 3D printed and ready for the cast mold.
The finishing pass was done with a 1/32 flat end mill. Since this is a different end mill then the standard offered thorough fab modules I had to calculate the new diameter by dividing 3.175mm twice. (1/16. 1/32) with the result of 0.79375.
Since the 1/32 end mill is much smaller then its shaft shaft I had to make use of the clearance settings (Local Fab Module)Clearance Setting from Anders Haldin on Vimeo.
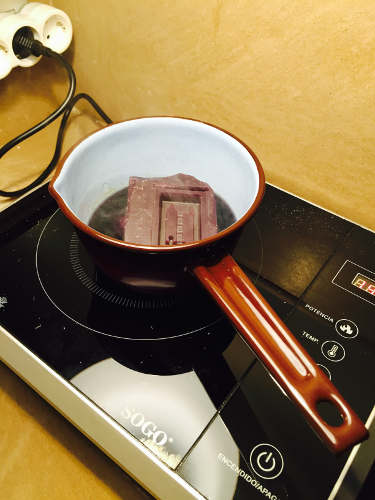
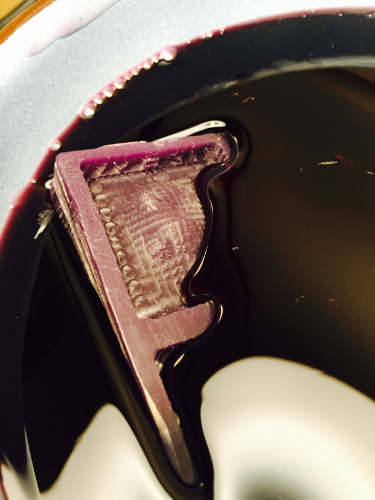
Carefully stirring the mixture trying to avoid adding air in to it and then pouring it in to the mold, having the mold tilted at an angle to make sure I don't trap air.
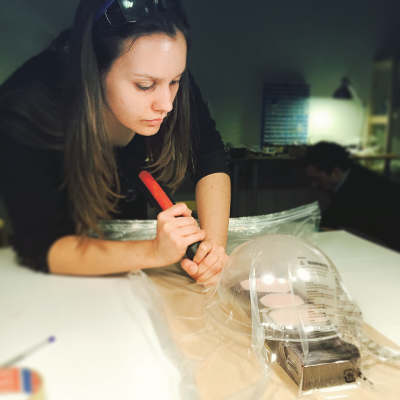
We used an IKEA vacuum bag and a vacuum cleaner to create a vacuum chamber for removing or at least draw the bubbles from the surface touching the mold up to the surface. At first we had some problems that the molds would get sucked up in the dome (we had 3 molds next to each other) We resolved that by putting a piece of wood, with rounded corners under the molds. After about 20 min we sealed it tight and left it over night

Result:
I think the mold turned out great, a bit on the thick side but sturdy. The piece piece it self came out a bit rough on the surface. Now afterwards I have learned the the molds for chocolate have to be super smooth and you also need to temperate your chocolate for it to cast well.
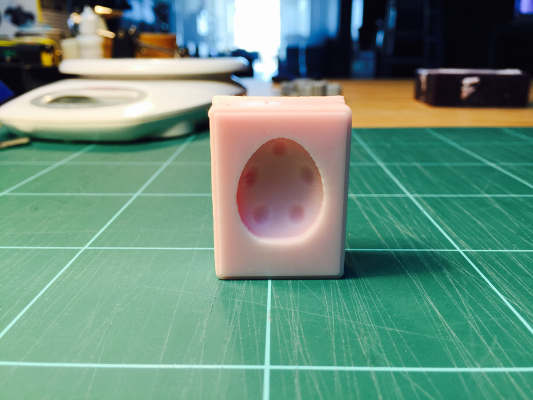 Finished and ready for chocolate.
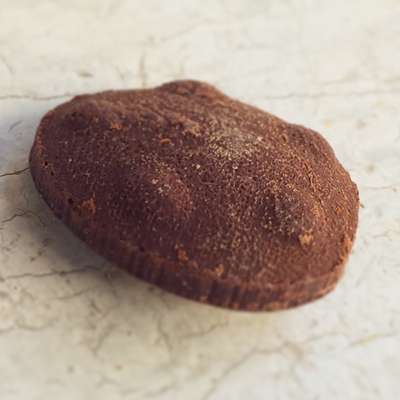 Chocolate cast with surprise inside.
Milling test.
I was curious of what different result the different size end mill would give. So I made a quick test with my lumumba piece. I have a 1/8th and a 1/32 flat end mill. The piece it self is quite small 30mm * 20mm. I starter with the rough pass with the 1/8th followed by the final pass also with the 1/8th end mill. Next to it did the same but this time with the 1/32 end mill for final pass. I also changed the overlap from 0.5 to 0.65. on the second one.
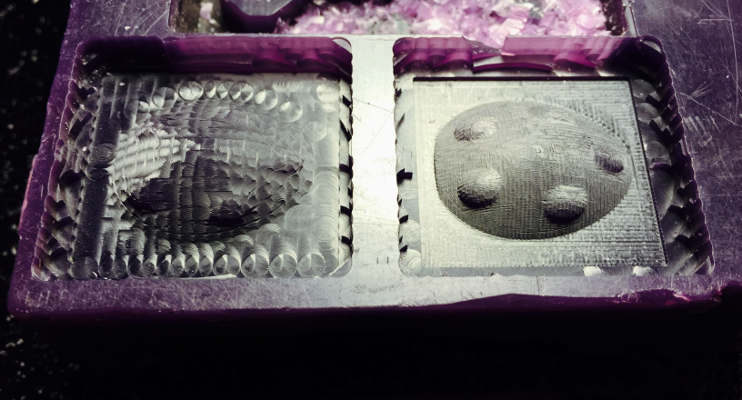 To Left final pass done with 1/8:th (3.175mm) to the right with 1/32 (0.79375mm)flat end mill.
 Overlap 0.5.
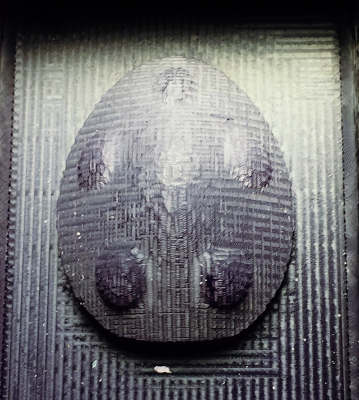
 Overlap 0.65.
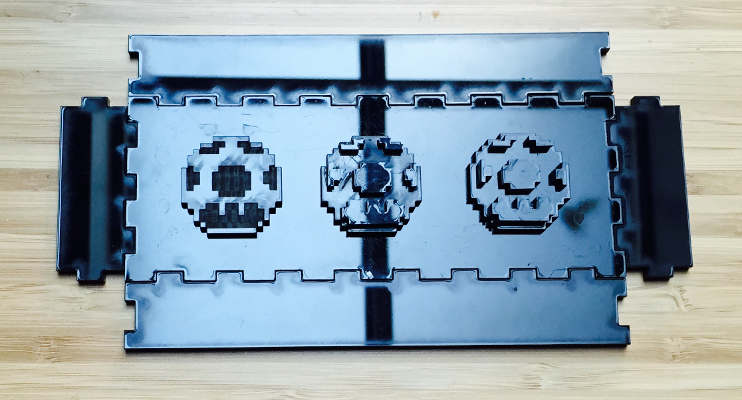
Molding and casting 2.5D.
If the designs have negative sharp corners or a narrow pointy design the size of the end mill is going to become a factor. You could choose a tiny end mill to get in to those areas but that would take a lot of time. The other option is to do 2.5D molding. A 2.5D mold is where all the surface are planar either horizontally and vertically. Here laser cutter comes in to to join the molding and casting party.
I decided to make the mushroom from Super Mario. A quick trace bitmap and break apart command in Inkskape and off to the laser for engraving test in acrylic.
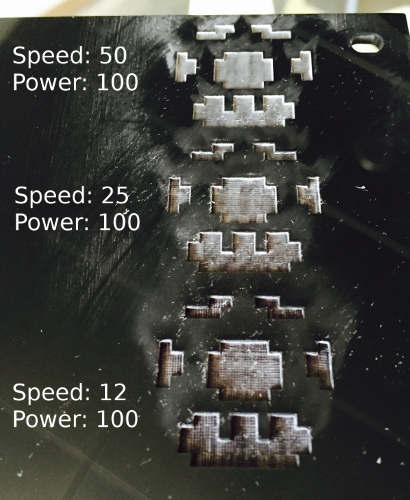
I thought to make two versions, one with just the engraving, and the second one with a second layer of acrylic glued on top to create the relief. Here I used the engraved version to align all the pieces on the bottom layer.
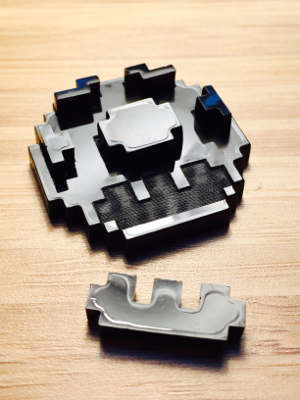 I used the engraving to align all the pieces.
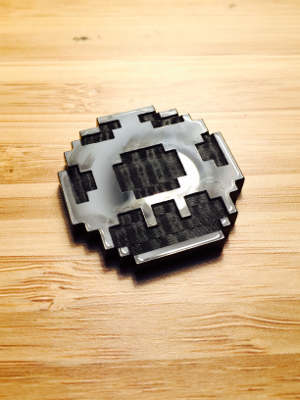 The engraved version by it self.
 For the enclosure I used the tabbed box maker in Inkscape.
 The final mold.
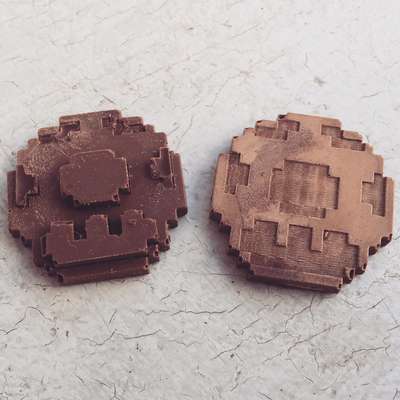 Toxic mushrooms.
Recyling Machinable Wax.
Francisco went out and bought an induction stove and some pots for melting the left overs from our milling. I had created a couple of containers using boxmaker that we used as molds. we cranked it up to 140-160C (Paraffin ignites at around 204C) and stared at the slowly melting wax.
Long board wheel
Next I wanted to cast a long board wheel as part of my final project. This would be a two part model with a 3D printed hub inserted.
3D printing the hub
Modeling for the hub was done in Freecad with solids and boolean operations + chamfer. I could make a mold and cast this as well, but I think I'll try 3D print it inXT-copolyester For now how ever, I just used the standard grey that comes with Ultimaker 2
Diameter of ball-bearing is 22mm but the 3D print came out at 21.7mm that is a 0.3mm considerable shrinking! back to Free cad for minor adjustments.
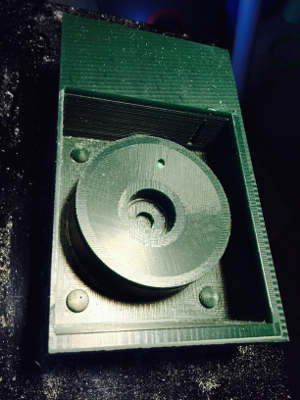
Milling the wheel mold.
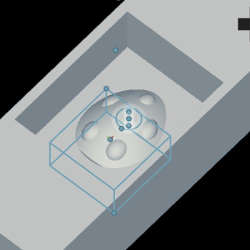
The wheel model was also done with Free Cad and then exported to Blender for making the molds. Using boolean operators it was quite easy to get two parts with the alignment marks, air vents and fill hole. I also made the wall s slightly tilted outwards so it would be easier to remove the cast mold as the wheel is pretty big... and yes the positive-negative-positive mold making did get me once. but not a problem with incremental save.
A tight fit.
My wheel mold is 11x11 cm but the milling wax comes in blocks of 9x14.5 cm. I could squeezed one side to 9cm sacrificing the angled walls. This how ever turned out to caused an other problem. The end mill is to short to reach the bottom and with the walls now straight the collet now started touching the mold edge. The lowest I can go with the current end-mill is 3.5 cm. But by putting it just at the edge of the collet I got it just long enough for it to reach the bottom.
Small accident: As I had aborted previous job from Fab modules and now pressing the view button on the Roland mdx 20, expecting the mill to go to 0.0. It instead plunged right in to the wheel with a plunge rate of 22mm/s. Nothing to do about that now maybe I can fix the mold afterwards?
The second try of the rough pass worked out fine and time to switch to the finish pass. I chose a 1/32 bit end mill and made sure it was long enough. In the settings for final pass I also made sure I had clearance set. I calculated the diameter of 1/32 end mill by dividing 3.175 twice with the result of 0.79375. Change clearance diameter to 3.275 (bit to little 3.3 next time.) Clarance length to: 4 thing that is spot on
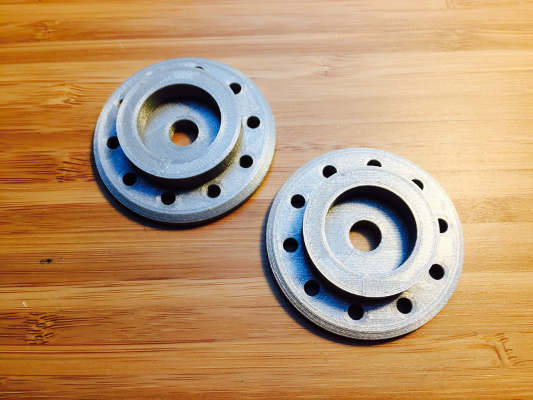
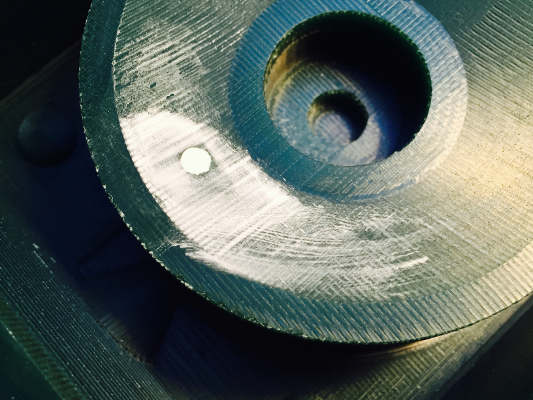
 Finished first half of the mold.
The cast mold.
I started out fixing the hole that came about in my abort procedure. I used some cement I found in the lab, mixed with water and as good as new, if you squint your eyes really hard and look the other way you wont even see it.
Back to school: Calculating volume and mixing ratio.
First I needed to find the volume I needed for my wheel. I used my math brain and got got an approximate answer until Fransisco showed me the easy way. Fill the mold with water and then weigh it!
I used FormSil 25 PRO form FormX for the cast mold. We calculated the volume to grams by measuring the 1kg cylindrical container and used the formula V = Pi*r2*h and got 908 cm3.(thank you Google) Divided that by 1000g and the result was 1.1g/cm3. So the calculation started to look like this:
175g*2*1.1*1.2 (175 my mold volume in grams, *2 for the second mold, *1.1 for the silicone density, *1.2 for extra material that will be stuck in the cup) That was the Part A now I need 2% of that in Part B the result was as followed:
Bring out the gloves and on wards to the scale!
After some carefully measuring, mixing and pouring it was off to the IKEA vacuum chamber.
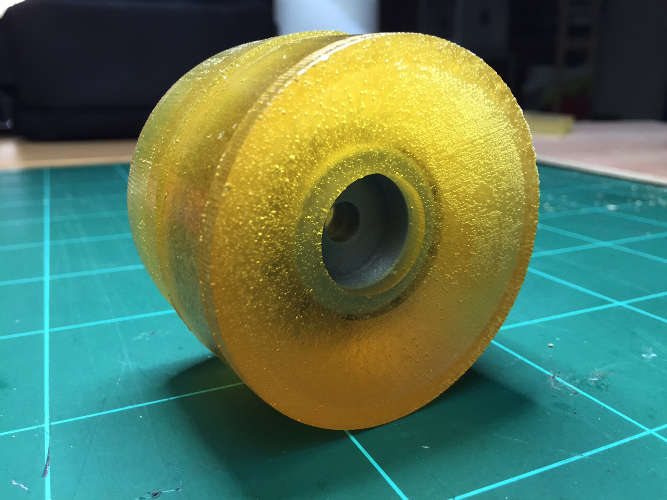
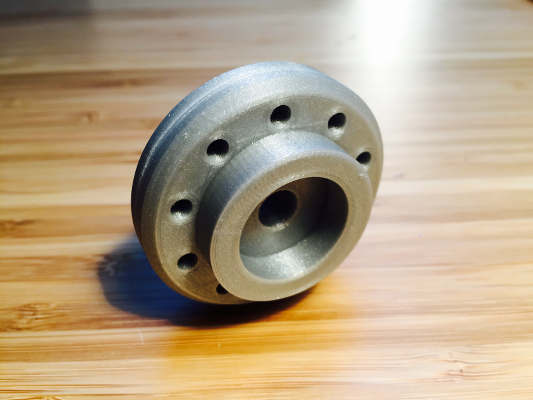
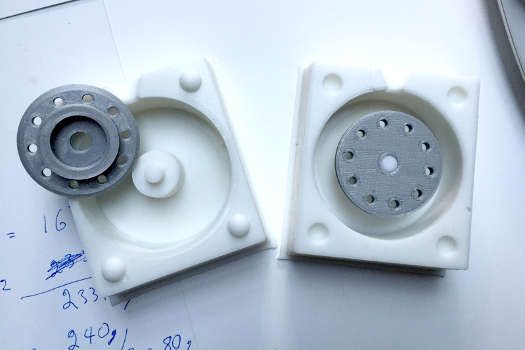
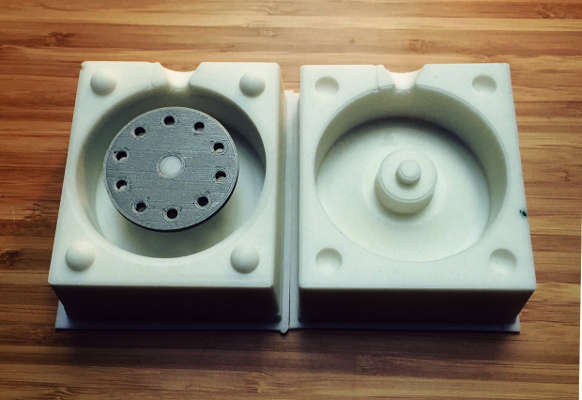 The final result with the hub in place.
Casting
Casting the wheel went fine, not great but fine. Being a soft mold and with thin walls I noticed that they would deform as i press the mold together and also if I force to much material in, the wall would open! For next mold I'm definitely make the walls thicker.
Result
The material density is just right and the inset molding worked perfectly. The mold had th thin walls and the air went was not put in the right place but all in all I'm pretty pleased with the result.