Mechanical design & Machine design.

Make a machine, including the end effectorBuild the passive parts and operate it manually.


Principles:

Stress-strain: Push on a material you press, that is the stress. When the material respond it is strain. Stress is press, Strain is pain.

Modili: Linear elastic deformations, returns to original shape. e.g. after being pressed.

Elastic,plastic flow: Irreversible deformations due to e.g. press.

Friction: Friction is the force resisting the relative motion of solid surfaces

Spalling: Two material that are the same rubbing against each other.

Hysteresis: The value of a physical property lags behind changes in the effect causing it, as for instance when magnetic induction lags behind the magnetizing force.

Backlash: Is clearance or lost motion in a mechanism caused by gaps between the parts (3D printing)

Flexure: Gives precises movement but not much range.

Force loops: End effector like a spindle,the path that the force takes to close what is holding the work piece.keep as small as possibel

Elastic averaging: represents a subset of surface coupling types where improved accuracy is derived from the averaging of error over a large number of contacting surfaces.

Kinematic coupling: Describes fixtures designed to exactly kinematically constrain the part in question.


Wednesday 20:th of May.

Making a 3 axsis machine:

Making cables

We started to make a list of all the task we could come up with. It was not that easy since non of us have done anything like this before. From the list we assigned a group of tasks to each person. I got the programing movement... but first we needed a power supply and cables to get it all connected.


Getting things to move

After cloning and installing the git archive I ran the single_node.py. and just like that the first stepper motor was running. Now I had to figure out how to do a virtual machine and control it in real time... and what was this gestalt thing anyway!? I turned to Ilan Ellison Moyer thesis in hope of answers.
Friday 22:th of May.

3 Axis

I connected the second stepper motor and loaded the xy_plotter.py script. It registered the first node but the second gave us a "could not reach virtual node" error and we also noticed it said: "Running in booth loader mode". Going back to the single_node .py and testing all nodes one at a time. All nodes except one worked fine and the once that worked gave us a "running in application mode" Something where note right with one of the nodes! Luckily we had four steppers and nodes so swapping out the broken one and now we could run the xy_plotter.py.

Very excited with this progress I threw my self at the script adding a third motor. But ended up with errors. Not sure what was missing in my code I started to compare it with an example script, snap.py and made the the changes I had missed. But I was still getting errors and it was not until debugger champ Maria came by and spotted the difference in 2 sec.

And just one more thing...


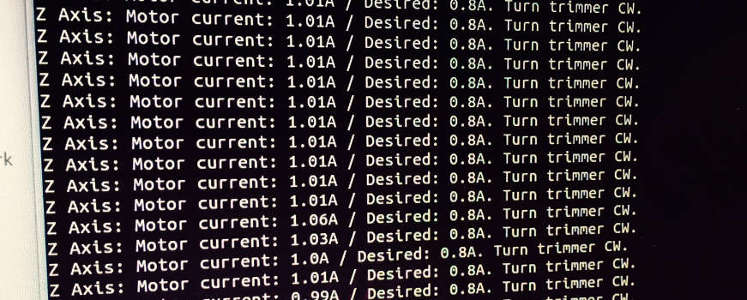
Fransisco showed us where to manually adjust the voltage with a screwdriver and finally it works! 3 Axis machines running with hard coded values!


stage3 test from Anders Haldin on Vimeo.

Calibration.

We noticed that when running the single_node.py the measurement seemed to be off!

The way we went about calibration was to set the height from the base at 20mm: drive the motor up 20mm, measure and then coming back to the original position. I repeated this for 40 mm and 60mm and got the following result:

    20mm = 25.98mm

    40mm = 52,43mm

    59mm = 78,93mm


To find out how much the offset is I divided the numbers on both sides:

    20mm / 25.98mm = 0.769

    40mm / 52,43mm = 0.762

    60mm / 78,93mm = 0.76


    25.98mm / 20mm = 1.29

    51,43mm / 40mm = 1.31

    78,93mm / 60mm = 1.31


We multiply the current lead screw value with the new number to correct value.

1.31 x 6.096 = 7,985

In the single_node.py file elements.leadscrew.forward.096) We rounded it up to 8 as the measurement was not 100% accurate.


Monday 25:th of May.

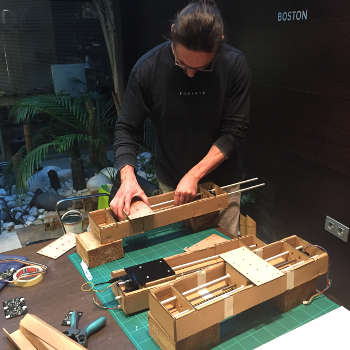
Making the stages.

Today we wanted to finish the stages. Maria is our Rhino expert so she has been modifying the provided Rhino file so we can fit it in our laser. The file we got was not up to date and the documentation was a bit scares so figuring out how to assemble it took a while but in the end came out with a nicely working station.

stage1 from Anders Haldin on Vimeo.


This was a great milestone to reach but I still have no idea how we are going to control the machine "live" I was looking at Massimos code in wxGestalt.py file. Hoping I cold get some hints but he is just setting up the machine not controlling it "live"... at least not yet. Not sure where to turn to get this documentation!?

Wednesday 27th of May.

Enclosure for the gestalt node.

I started making a case for the gestalt nodes. First I modeled it in Freecad but we where laser cutting it so I needed lines which I could not export and I needed tabs as we where laser cutting it. So back to Inckscape and tabbed box maker plug in. The first version needed some adjustments, but having done those the Full spectrum software suddenly decided to make some line double!!! I did not find a solution for that yet. Put this part of the project on hold as other tasks where more important.

New direction.

We had earlier talked about what functions the machine should have but last week Maria came with a great suggestion, being at the beach lab we should make a draw bot for sand. With that settled we needed to laser the rest of the parts. Haven a small laser we need to cut 6 boards for one machine. This takes time... to much time with all the other task piling up and time getting short.


Friday 29th of May.

Stages final push.

Today we wanted to finish cutting all the stages. I came in early and started to cut the rest of the files. It was only when We started assembling them we noticed that some of the cuts where off set. Went back to the design file and they where all centered and good but the dimension for the file where 1 cm bigger then then what our laser could handle. I believe this must be the cause for the offset. To make things worse, we also ran out of cardboard but with some excellent knife skills we got all four stages assembled.

End effector.

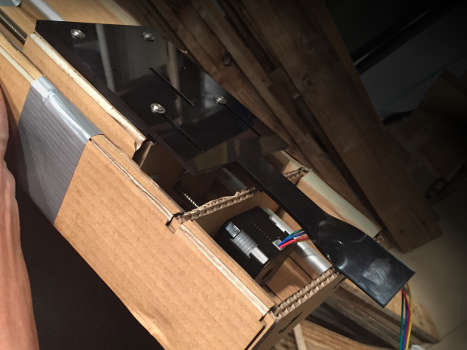
For the end effector I suggested we should make the "pen" the shape of a calligraphy pen to get more dynamic lines. The tool would look something like a twisted ruler. with that decided we now needed to figure out how to attach it to the stages, and what production technique to use. We first thought of 3D printing it but soon realized that it it would take to long a the tool had to bee minimum 20 cm preferable 25cm.. I did a test heating up acrylic with the heat gun and bending it manually. That worked like a charm. it is not a precise fabrication but it is fast and looks great.

Sunday 31:th of May.

Got the end effector from Maria and laser cut it in acrylic. Speed: 15, Power: 100 (this is slow 20 speed would not be a problem) I put the freshly cut, smelly piece in a wise and used a heat gun while twisting it lightly. It did not take long before the acrylic got soft and I could easily twist it to the desired shape.

Fixing the broke node.

Figuring out GND and VCC. There is a small dot next to the chip connects to VCC and the nest to.. is ground GND. with this knowledge it was easy with the multimeter in continuity mode to test which pin where corresponding to what.


Sicne I'm using usbtiny for programming I had to changing the make file

avrdude -e -c avrisp2 -P usb -p m328p -U flash:w:086-005a.hex

to:

avrdude -e -c usbtiny -P usb -p m328p -U flash:w:086-005a.hex

I fused and flashed the board and just like that the gestalt node was ready for action!


I find the make file very cryptic with all its -p, -c and so on but here is a link explaining what they do.


Assembling the machine.

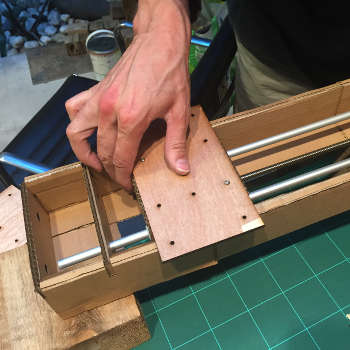
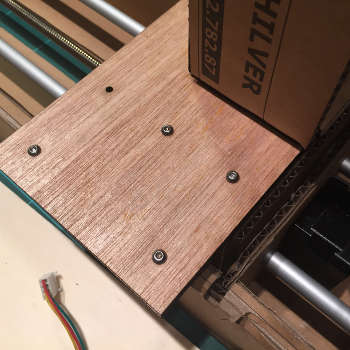
We spent a lot of time trying to figure out how to align and attach the stages. Having spent so much time building the modular stages we wanted to keep it modular so you can easily assemble and disassemble the machine depending on your needs. The solution we came up with was to attach wooden plates on the stage head and on the stages itself.


Monday 15:th of June.

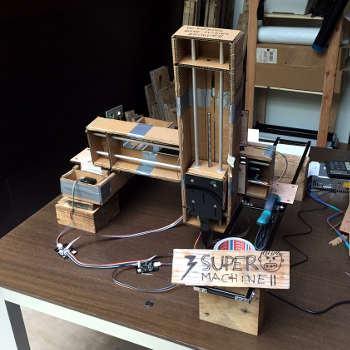
Today we wanted to finish this assignment. We started by assembling the rest of the machine and from there continued with looking at the wxGestatl.py. Interestingly enough we could not run the wxGestalt.py script if the machine was attached so in the end we ditched wxGestalt and went back to the xy_plotter.py and used it as a starting point for coding.
I change the code so it would worked four nodes but now we ran in to the interesting problem that it would not register the fourth node. We did a serious debugging and found that all nodes and all cables where working and we could run one,two and three nodes but not four. As we had two nodes as the base (x axis) we decided to remove one and put it on a dolly built of metal rails.
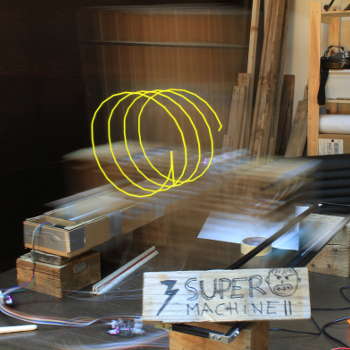
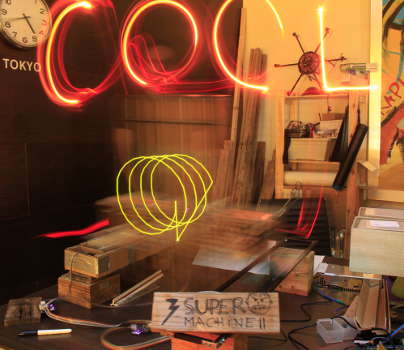
We also stayed away from the draw in sand idea to a light painting machine. We attached a battery powered LED to the Z axis and rigged a camera to captured the movement with a long exposure.


We started out with drawing a circle. Adolfo did the calculation using Excel using Sin & Cos and I plotted the numbers in to the python script. Loaded the script and the machine came alive. We had to make some adjustments to get the scaling and zero point right but soon we where up and running with a light painted circle. Excited with the success we pressed forward with doing a helix.


Doing the calculation in Excel was OK for simple geometry but if we wanted to do some more advanced shape it would be difficult. Maria our Rhino expert knew how to get points out of any shape using grasshopper. This looks very promising but need a bit of testing to get the alignment right.

There are a lot of improvements that could be done to this machine, but the most fun one would be to be able to control the LED color and brightness over time from the same script. how ever this is for another day.

Download Assets:

  • Assets files for week 16.

  • Google+

    Follow me on Google +.

    Click me

    Twitter

    Twitter madness.

    Click me

    LinkedIn

    Connect with me on LinkedIn.

    Click me