Module 4: Electronics Production
Module Content:
The assignment of this week was to make the FabISP in-circuit programmer.
Even if I had some experience using Arduino and programming electronics, this module represented for me a true challenge. It was the first time I got in touch with electronic production which means starting from the origin by making the board, milling it and then moving to adding electronic components. Of course, I learnt many techniques related to making the board and also to soldering parts. Then after I moved to programming tasks in order the make FabISP in-circuit programmer working.
My Work:
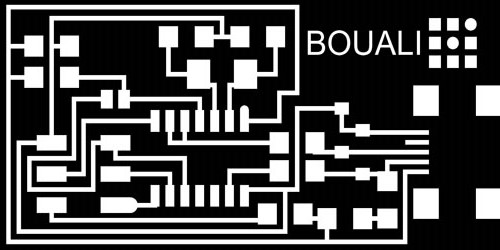
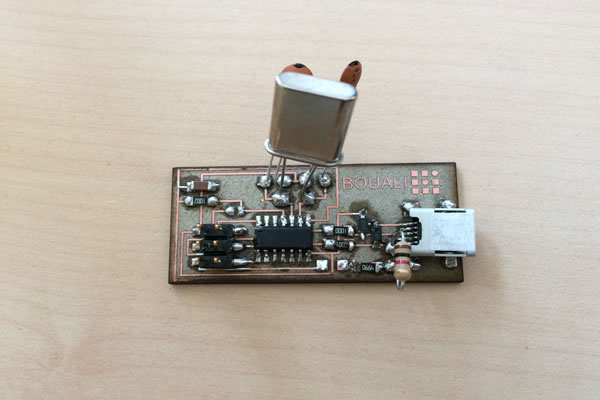
Step 1: Traces preparation for printingI downloaded the source files in PNG format from the Fab Academy website, and tried to understand the logic behind the traces designed on it. Then I tried to make some minor changes on the file in order to personalize it by adding my last name. In order to have good resolution of final printed board, I created the vectorial version of my name and added it to the PNG file using GIMP. After saving the modified PNG respecting original resolution, the traces are ready for printing:
Step 2: Printing the board
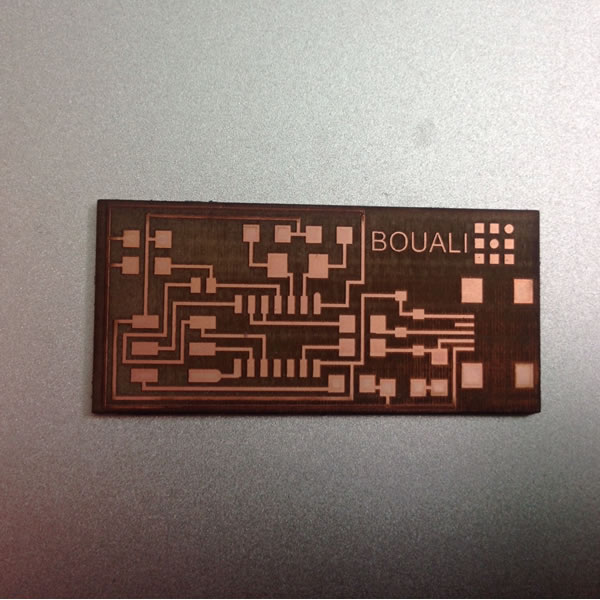
Here inside the Opendot FabLab, we have experimented a new technique of printing the board. Thanks to some past experimentation, we managed to use a laser cutter machine to engrave and cut the board more precisely using a FR-1 sheet.
At the Opendot FabLab, we have access to a laser cutter with the capacity to cut two different kinds of laser beams, CO2 and fiber. Therefore, we applied fiber laser to engrave and completely remove copper from the FR-1 surface, and then the C02 laser beams to cut the board. The following is my board after this process:
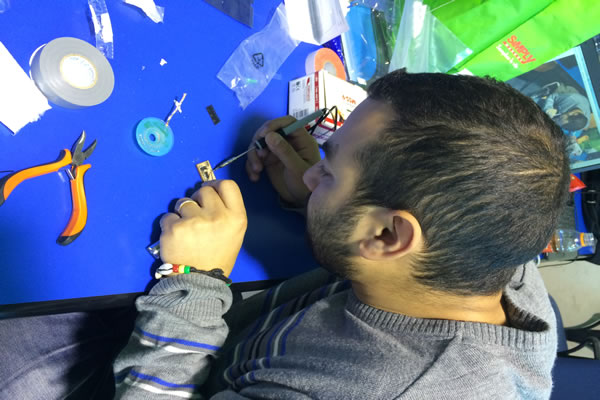
In order to program our FABISP borad, we need the following:
- Another FABISP or use Arduino as ISP;
- Avrdude, for programming AVR microcontrollers;
- GCC, to compile C code;
- The FabISP firmware, downloaded from the tutorial page;
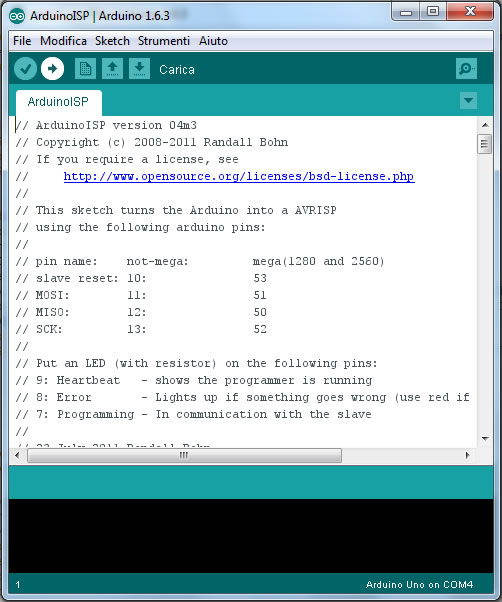
In my case, I used the Arduino UNO as ISP. I loaded from the Arduino IDE the sketch "ArduinoISP" in order to start programming. I also added the following line on the Makefile in order to use Arduino as ISP:
-> AVRDUDE = avrdude -c stk500v1 -P com4 -b19200 -p $(DEVICE)
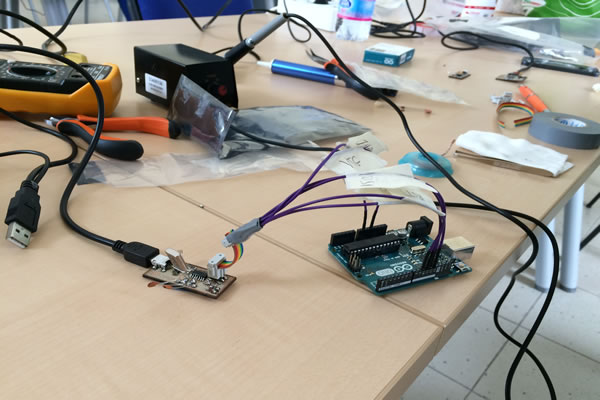
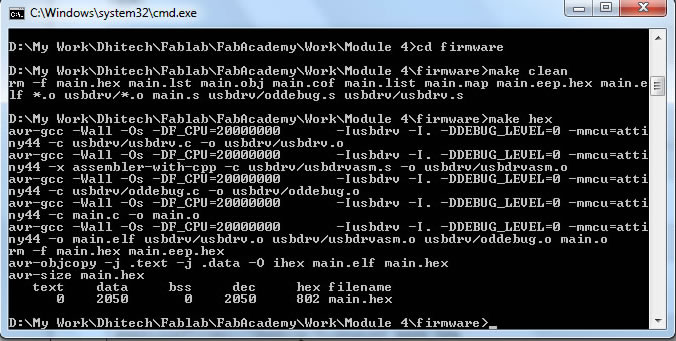
From the command line, I started programming the board following these commands:
Command 1: "make clean"
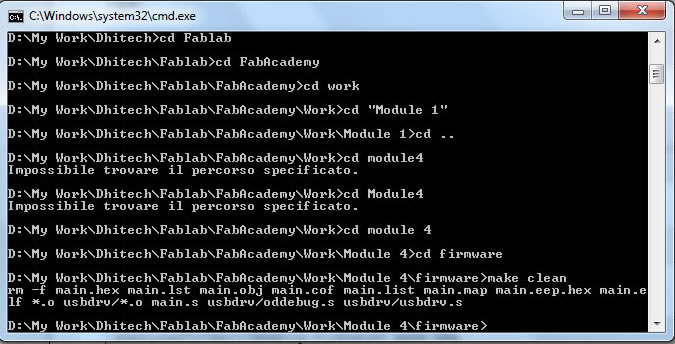
Command 2: "make hex"
Command 3: "make fuse"
Command 4: "make program"
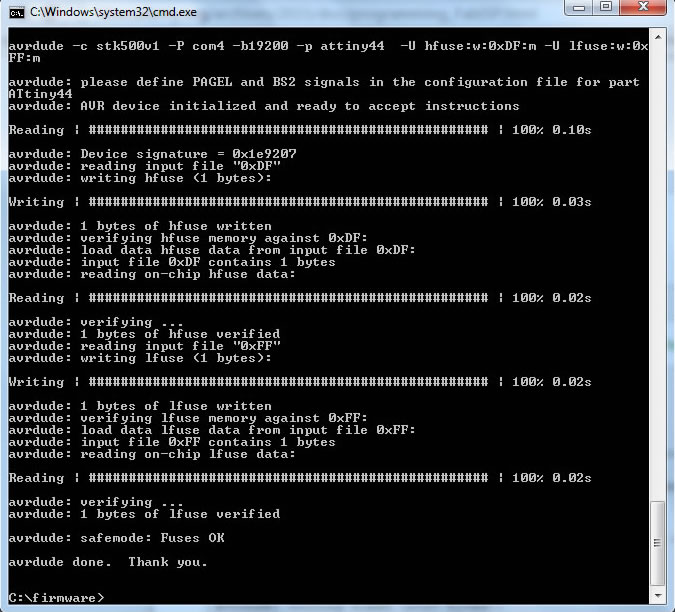
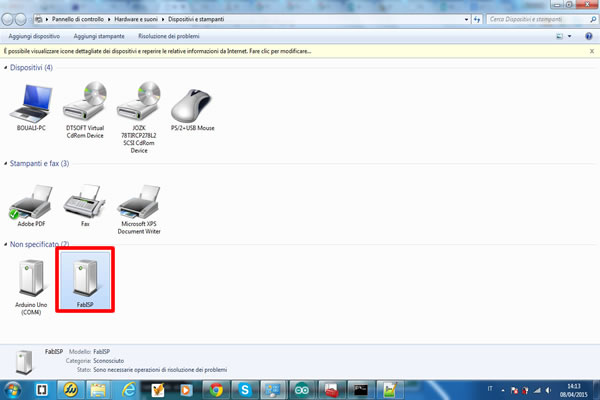
After the programming phase, I verified that the FabISP has been programmed properly and is detected by my computer. To do so, I went to Start Menu > Hardware and Sound, and WOW it is there.
Download Zone
The file is available for downloand here: