FabTiny*ISP - Milling the Printed Circuit Board
Milling the traces.
Before we can start we need to fix a piece of blank FR-1 stock to the sacrificial layer of the Modela, and insert the 1/64 milling bit.
Make sure that the sacrificial layer is clean and any leftover tape and glue is properly removed.
Also check if the blank stock is straight by looking along the edges, and bending it back until flat if it isn't.
Five or six pieces of double sided tape should usually be enough to hold the big piece of blank stock in place, just make sure it isn't folded or overlapping.
The stock needs to be fixed to the sacrificial layer as flat and level as possble.
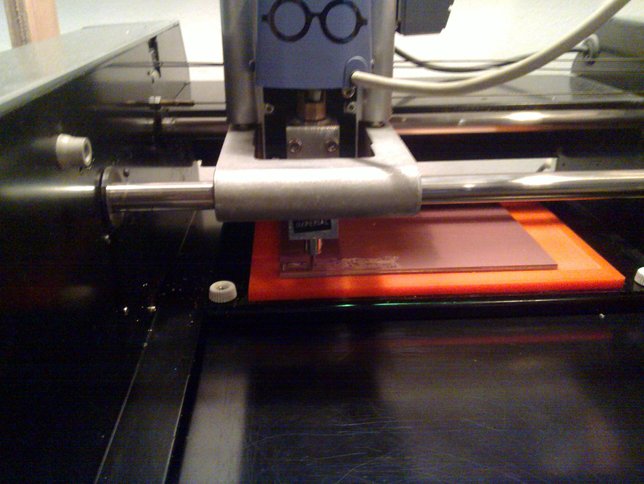
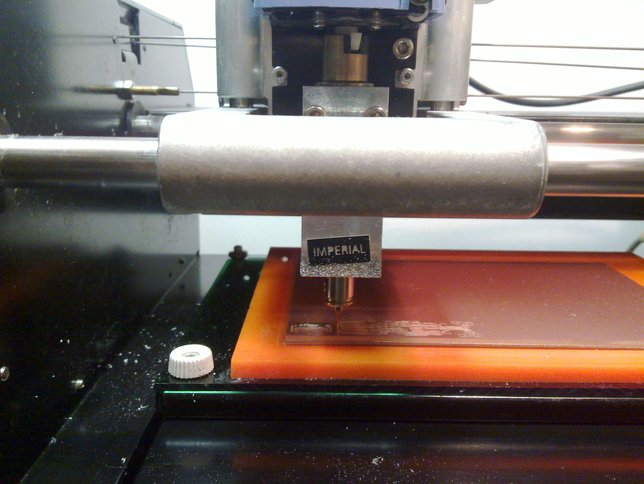
Insert the milling bit way to high at first (you don't want to hit the copper when lowering the head) then lower the head almost to the end, leaving enough room for the head to move down, as shown in the third picture below.
Finally loosen the milling bit and lower it onto the stock, optionally wiggle it back and forth once or twice (by turning the collet with your fingers) to make sure there is no dust or dirt underneath, then tighten it again.
Take care not to overtighten it or you will quickly wear out the little screw and the hex wrench.
Now we have set the zero point of the Z-axis, and we're ready to mill.
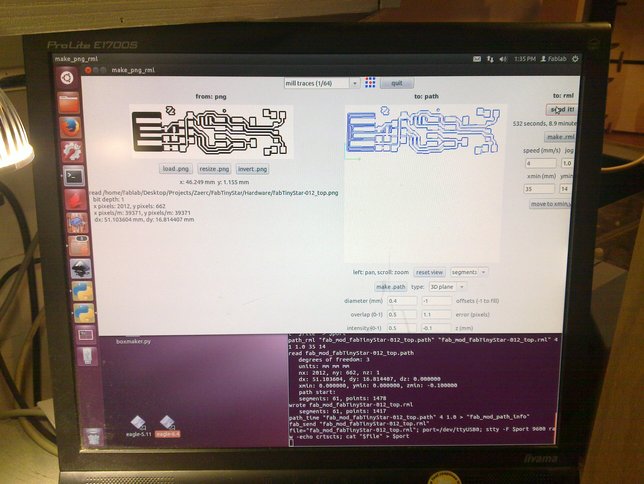
Start the make_png_rml program from the commandline, and load the "fabTinyStar-012_top.png" image.
We'll be using the default settings for "mill traces (1/64)", except for the "offsets" value which was set to "-1" in order to take all the unwanted copper away as we need the USB connector to be clean.
And we have set the "xmin(mm)" and "ymin(mm)" starting point values to where we are going to mill.

The milling turned out to be to shallow, most likely due to a dull milling bit.
Don't panic, this happens quite often as the bits get near the end of their lifespan.
It also happens when the board isn't completely flat and/or level.
The height setup was allright, with enough room left to cut through the board and the bit being minimally extended from the collet to reduce vibrations.
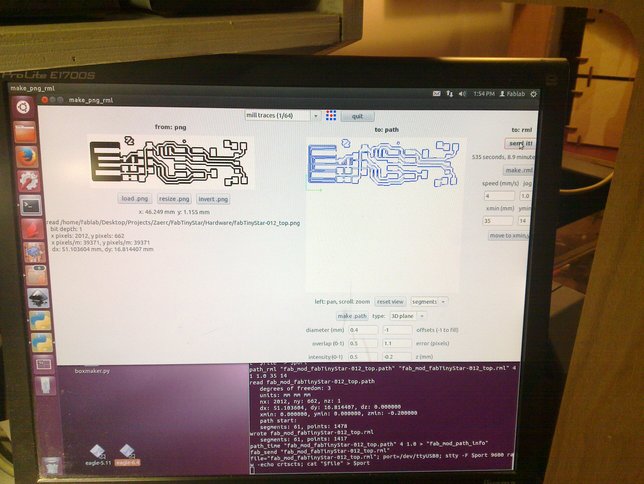
Now we're milling a little deeper, "z(mm)" set to "-0.2" value.
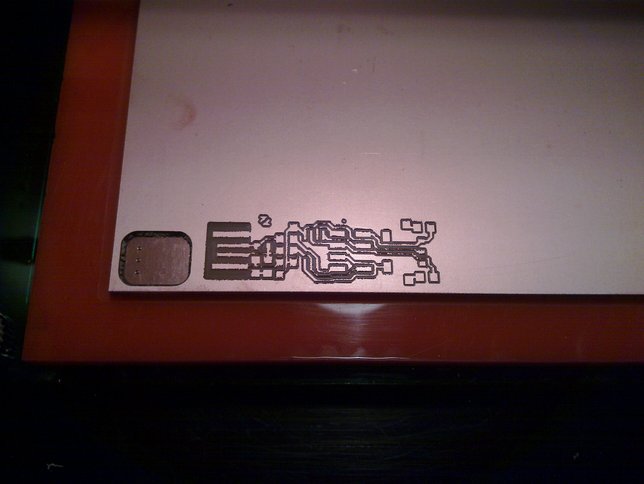
Traces milled out of the copper layer, it may look horrible but not to worry as we will clean up the rough edges later.
Cutting out the board.
Milling PCBs has one huge advantage: you don't have to cut it out (and/or drill holes) by hand, instead the machine will do this for us with much greater accuracy and in just about any desired shape including usb dongles.
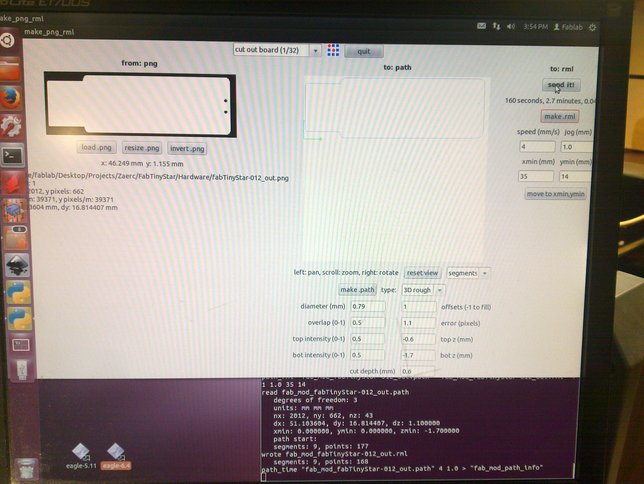
Loaded "fabTinyStar-012_out.png" into make_png_rml.
The default presets for "cut out board (1/32)" do not need to be changed and "xmin(mm)" and "ymin(mm)" are left at the previous values that we also used to mill out the traces.
Changed the milling bit with the 1/32 bit used for cutting.
The height is fine, leaving enough room to cut through with the bit minimally extended from the collet.
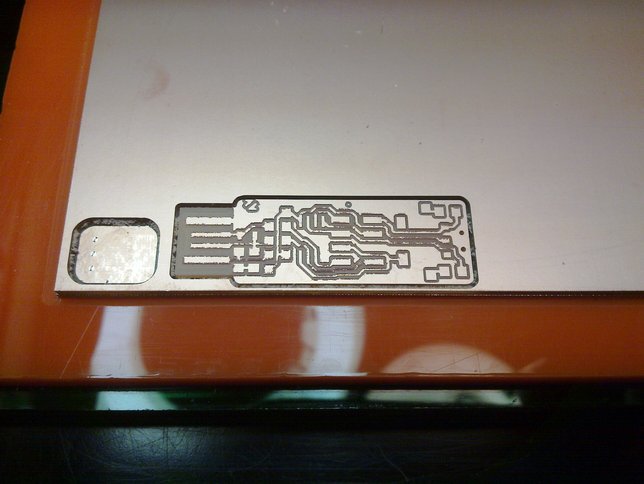
Now we're all done with the modela, so carefully remove the new PCB from the sacrificial layer.
Deburring and cleaning the board.
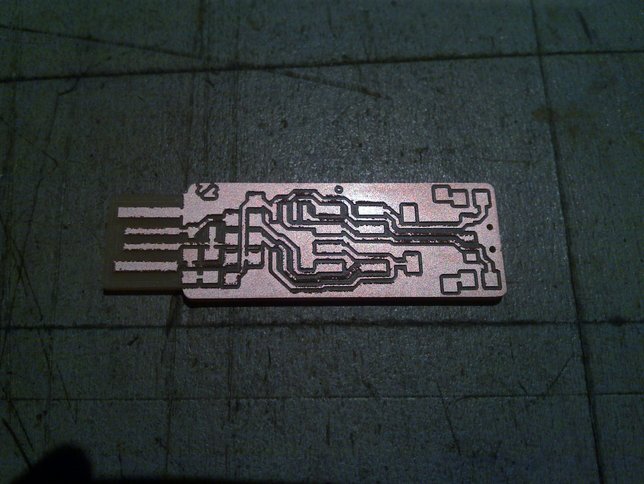
It almost looks like several traces were ruined, but that's just the fluff of the rough edges obscuring them.

After a little wet-sanding with P1000 sandpaper, we can clearly see that no traces were actually hurt in the making of this PCB.
The two little pieces of copper that remained between the pads were easily removed with a fingernail (if you bite yours: try a sharp hobby knife).
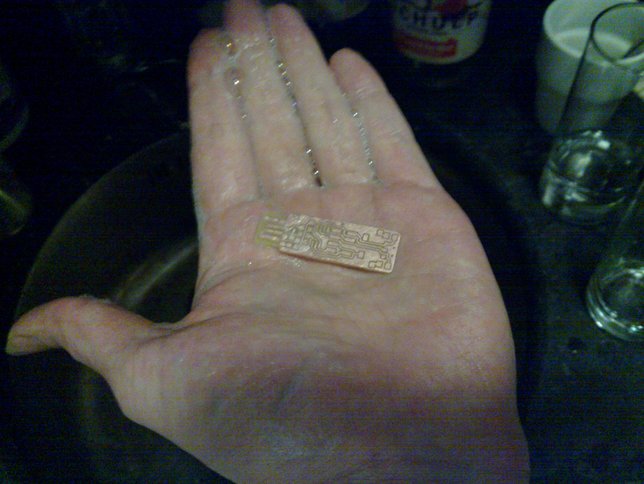
To clean the board from any remaining dust and grease, just wash your hands with dishwashing liquid (or hand soap) and hold the board in between your hands.
As a bonus your fingers will also get degreased leaving less prints and smudges when handling the board.
Last modified: 2015.02.26