{ Fab Academy 2015 : Koichi Shiraishi }
{ Home } { Final project } { Class } { Fab Academy }
- Week 05: 3D Scanning and Printing -
Weekly Assignment
-
design and 3D print an object (small, few cm) that could not be made subtractively
3D scan an object (and optionally print it)
3D scanning
I report the usability of 3D scanner which I used.
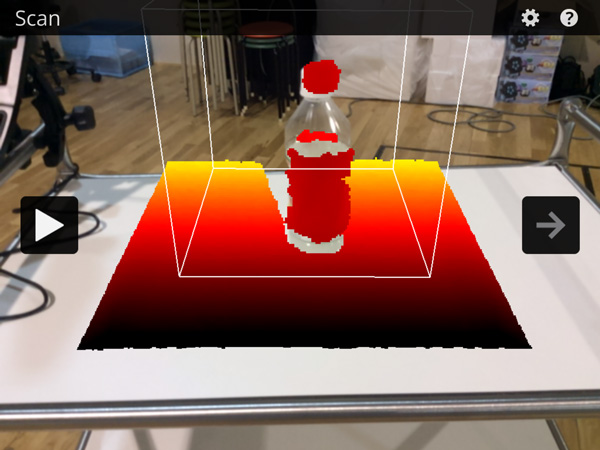
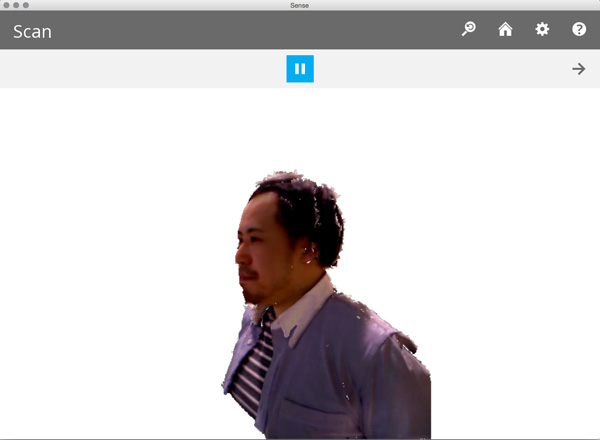
1: iSense(3D SYSTEMS)
"iSense" is a scanner worked with iPad. The scanner preparation is easy and simply.
I did only two process. The first one is attachment the scanner to an iPad, the other is installing iSense app for iPad.
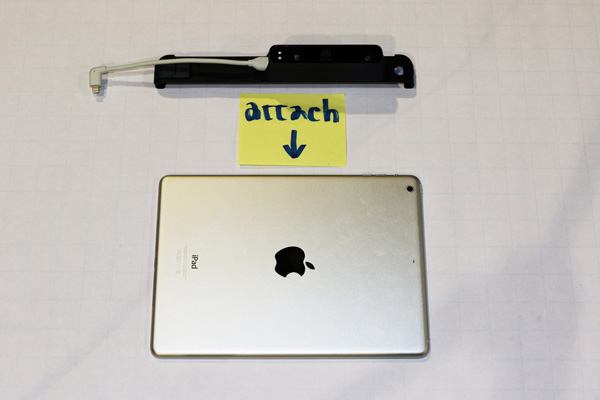
The app also is simple function, but it is difficult setting the scanning range.
It fix the range by pinched a cube on display. It goes well by setting horizontally toward the middle of target’s overall height.
It did not generate some details, however it seldom lost tracking. I think it is very good point to use.
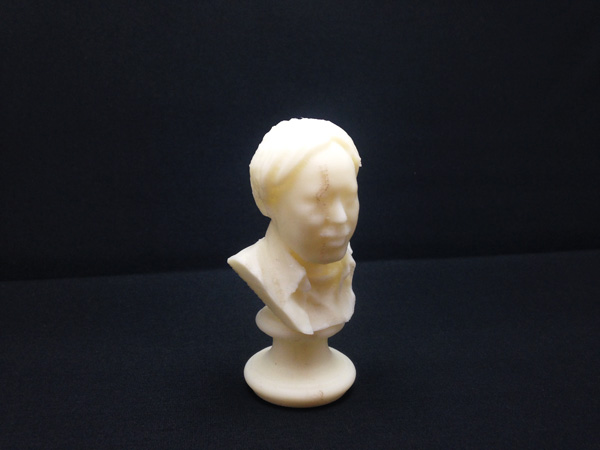
This is my scanning data which I took it at my work place(Kyoto Universty). It is a statue of Mr. Orita.
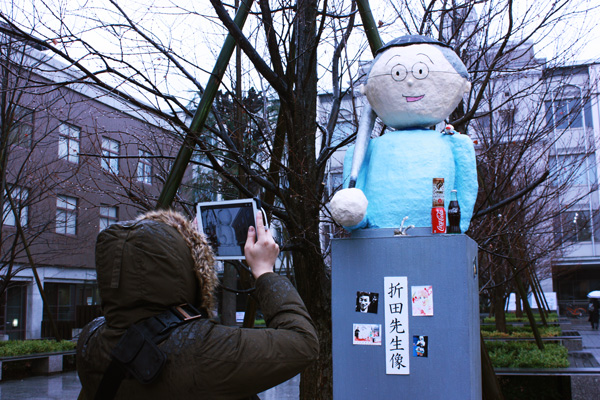
He was a school principal of “Kyusei Daisan Koto-Gakko” high school. The school is predecessor of Kyoto University. The statue was built inward Kyoto University in 1940. It was written graffiti over and over again. Therefore, the university put the statue in storage.
From that time on, someone built an another statue at the place missed Mr. Orita in entrance examination period. It continues every year.
2: Sense(3D SYSTEMS)
“Sense” is a handy scanner worked with PC. The preparation is only setup the sense app.
It needs to contact by USB. The Sense app have some range. you can select a appropriate range of target.
It is simply and nice usability.
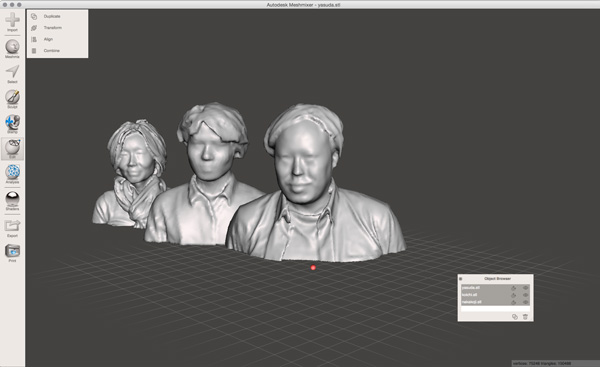
I tried to scan the 2 parsons and me.

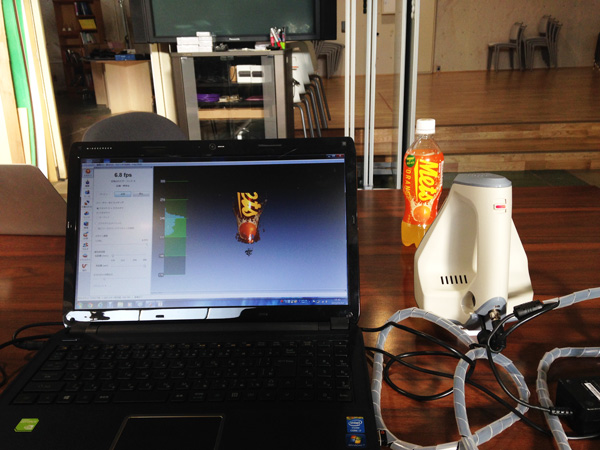
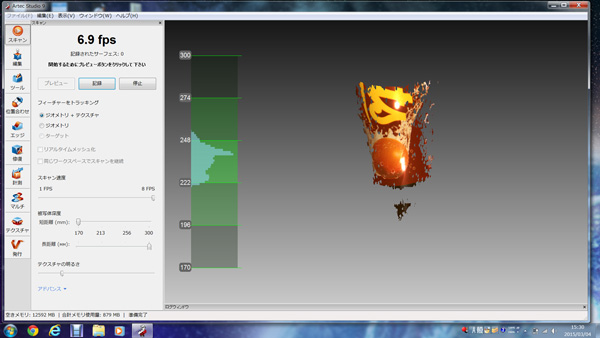
3:Spider(artec)
“Spider” is a scanner worked with PC. It is controlled by dedicated software.
The software can connect a “Kinect.”
The device is able to scan as high resolution, but it often lost tracking.
For that reason, I took the piecemeal surface in software.
I had to combine a lot of surface data. I was so tired to use it.
4:Kinect with Skanect
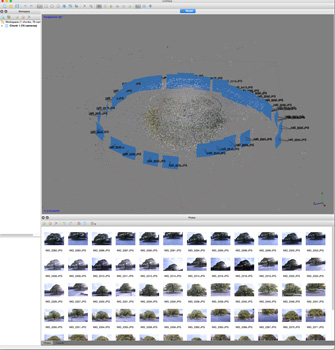
5:Pictures with PhotoScan
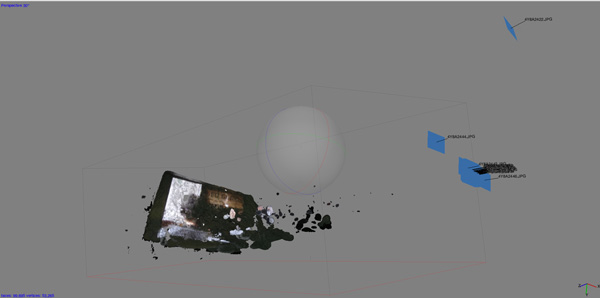
“PhotoScan” is a software generated mesh by pictures.
It needs about 50 pictures which took periphery of a target.
If you want to increase the accuracy, you should take pictures from various angles.
The software align the pictures from detected characteristic points. Therefore, It is necessary that there is still thing in the background of the pictures.
I operated the software in accordance with the workflow.
I spent about 30 minutes for generating the mesh by 50 pictures.
I tried 3 objects to generate the mesh data.
1,Middle size object(30 pictures)= Succeeded
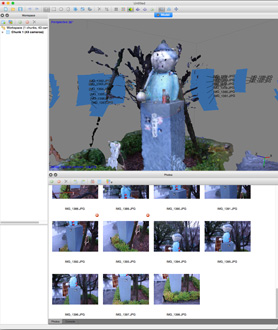
2,Large size object(60 pictures)= Failed
3,Human(Alex) through the screen(40 pictures)= Failed, but I will try again.

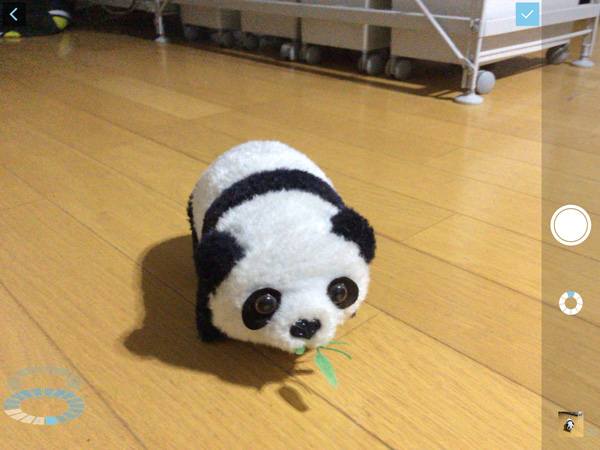
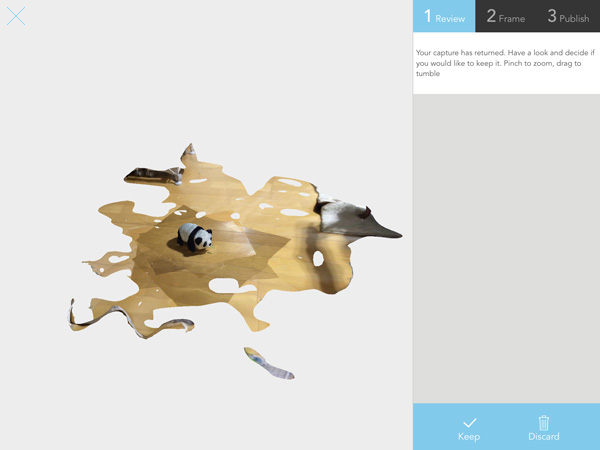
6:123D Catch
“123D Catch” is app worked on smartphone or tablet.
It can generate a mesh data only taking pictures. It utilize a accelerometer and a gyroscope assembled in smartphone. Therefore, The app assist to take pictures from various angle.
It record the shooting position. It is very nice GUI.
The app generate the mesh data in cloud. I send the pictures to the server. After 2 hour, I receive the mash data.
It is bad point that generating a data by the server need a lot of time.
7:fluid Scanning(OF Milk Scanner)
“Milk Scanner” require setting the “OpenFrameworks(OF).”
I set up the “OF” according to the instruction on this site.
But the “Milk Scanner” is not support Mac OSX(Yosemite).
8:Structured light
I could not challenge. But I interested in this method.
I will try it as soon as I can.
Modification a mesh data
Most scanning apps has modified function. However, It cannot control details.
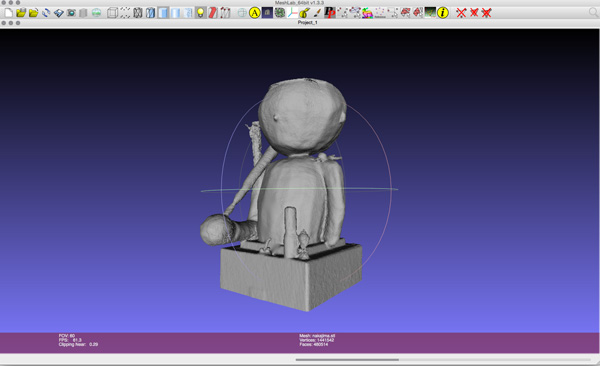
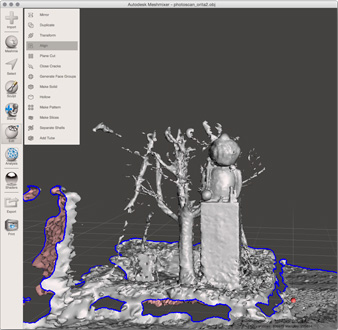
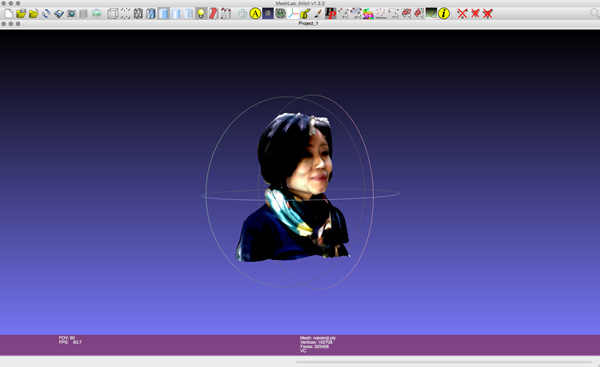
I used editing mesh software for generating beautiful mesh.
I tried 2 softwares. The first one is “meshlab,” the other is “Meshmixer.”
Both softwares have similar function, but “meshlab” often crashed. I think “Meshmixer” is better than “meshlab” to use.

3D printing
I printed the “3D Printer Tolerance Test” and my scanning data by Dimension Elite(Stsratasys).