Week 16
Making a Drawing Machine
Machines
MODELA MDX-20 (Software: Fab modules)Trotec Speedy100R (Raster setting: Speed 3%, Power 20%, Vector setting: Speed 1%, Power 40%)
Components, Tools and Materials
*Highlighted materials were included in the machine kit delivered to our fablab- Solder x 1
- Tweezers x 1
- Gestalt Boards x 2 (board data)
- Stepper Motors x 2
- 12V power supply x 1 (秋月)
- 5mm Cardboard
- Nylon Bearings x 8 (McMaster)
- Aluminum Shafts x 4 (McMaster)
- Velcro
- Screws, Washers and Nuts
Making the Bridge Board
In order to use the USB-RS485 cable for controlling the Gestalt nodes (Fabnet), a bridge board is necessary. I milled the board (Bas’s version) and soldered the bias resistors, wires and headers.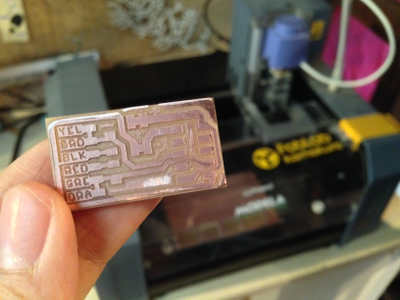
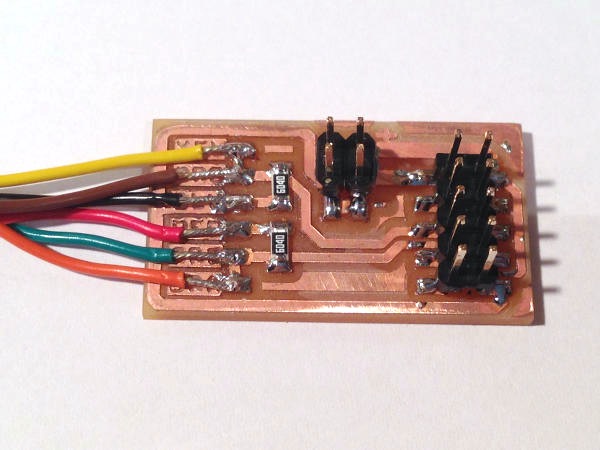
- Data - (B) Signal
- Terninator 120R, Pin 1
- Gnd
- 5v power
- Terninator 120R, Pin 2
- Data + (A) Signal
Testing the Gestalt nodes
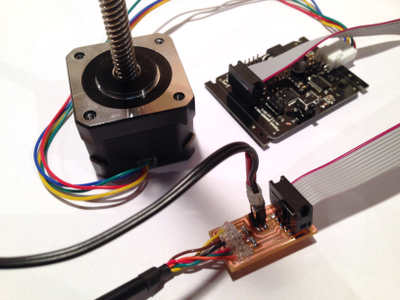
After connecting the boards and motor, Asako-san and I tested the Gestalt nodes by downloading the pygestalt code and entering the following commands in terminal.- cd to the pygestalt folder
- sudo python ./setup.py install
- cd examples/machines/htmaa
- After connecting the board to the pc, ls /dev/tty.usb* and copy the name (mine was
/dev/tty.usbserial-FTXW9Z5W ) - Change the port name in singlenode.py (in my case, form /dev/ttyUSB0 to /dev/tty.usbserial-FTXW9Z5W)
- Turn on the 12v power supply and python single_node.py
Cutting the Cardboard Parts
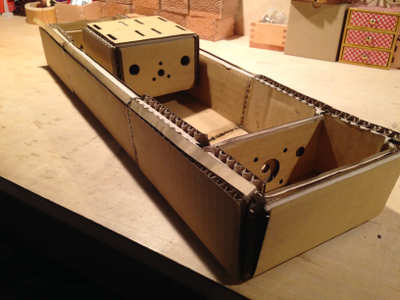
I used 5mm cardboard to cut this data (for 2' by 1’ laser cutters) but the stage part fit into the frame part too smug. Asako-san adjusted the original model’s thickness to 4.5mm with Grasshopper and cut the cardboard parts for two stages.
Assembling the Stages
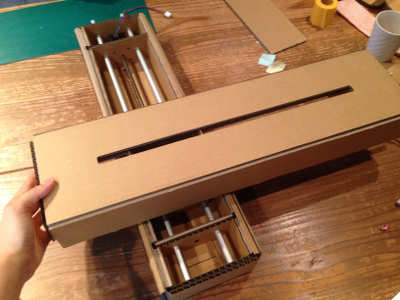
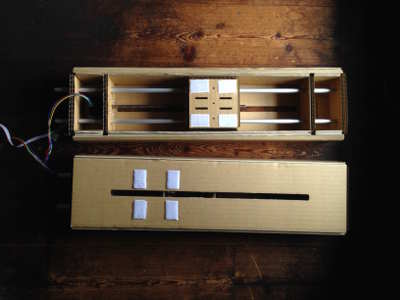
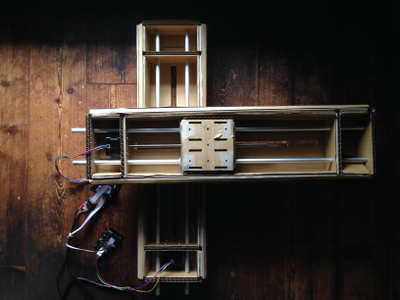
Now that all of the parts are ready, it's time to assemble the stages!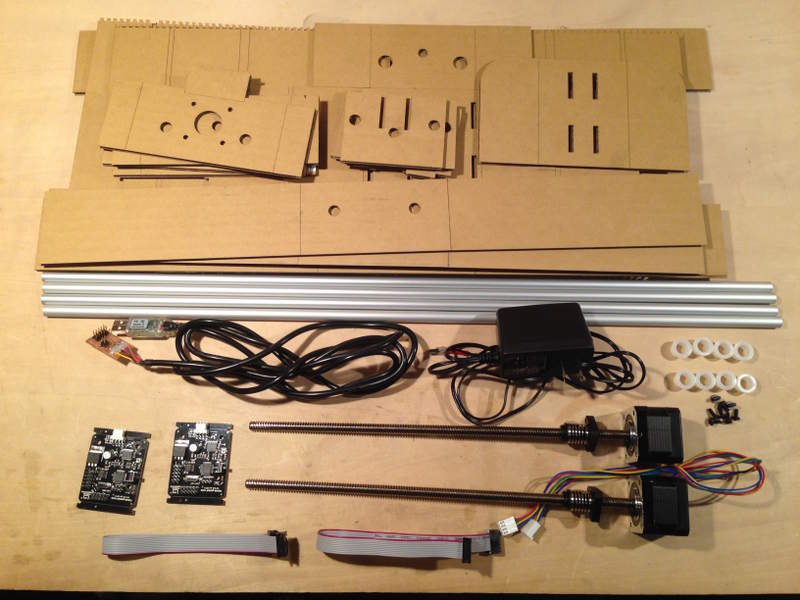 In order to connect the linear stages in a way that they can be easily detached when necessary, I used velcro. First, I tried to connect them by their stage parts (left photo), but I realised that the weight of the motor made the top stage unbalanced. So I connected the bottom stage part to the top frame part (right photo). The top stage is shifted a little to the left to keep balance.
Making the Pen Holder
Inspired by the cheating pencil, we decided to attach multiple pens to this machine. I made the pen holder with 2 layers of cardboard, so that the pens can be attached to its corrugated layer by the pens’ clips. This way the amount and position of the pens can be freely adjusted (right photo). At first this worked, but after moving the stage vertically multiple times the penholder started to bend a little and lost its sturdiness.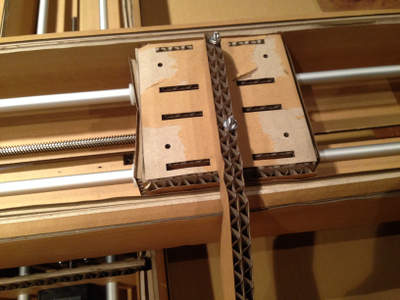
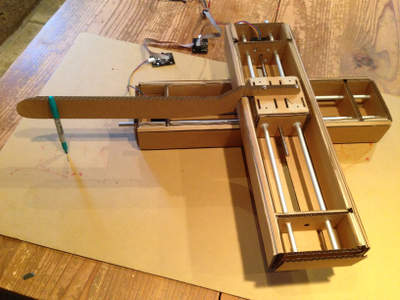
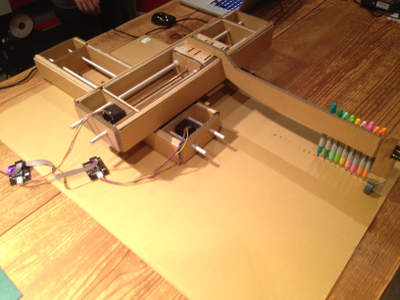
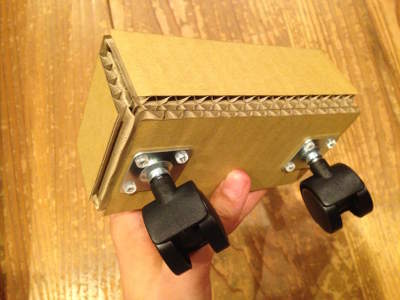
When I first attached the stages together, I shifted the top stage to the left a little so that it could keep its balance but this limited the area of which the machine can draw (The top stage couldn’t go to the left end, or the pens on the pen holder would hit the bottom stage). That is why I decided to shift the top stage to the right and added wheels (left Photo) under the stage so that it can still keep its balance. I used an extension in Inkscape to make the box's data (Extensions Render Foldable Box) cut it out with the laser cutter, assembled it and attached the wheels to the cardboard with screws. I improved the penholder so that it would be folded into a study structure (middle photo) and also added wheels to keep the pen holder horizontal. After clipping on a pen and moving the machine, I noticed that the pen would draw smoothly when it was moved to the left, but it would get stuck whenever it was moved to the right. I learned that the pens shouldn’t be attached to the side of the pen holder but at the center. I made a partition by cutting holes out of cardboard, glued this inside of the pen holder and inserted the pens. This way the pens don’t get stuck when drawing. Yay!
(Unfortunately adding more than 3 pens would create too much friction and prevent the pens from moving smoothly when drawing. I had added wheels on the pen holder to reduce this friction but that didn’t help. Maybe this could be solved by drawing on a smoother surface than paper, like a white board?)
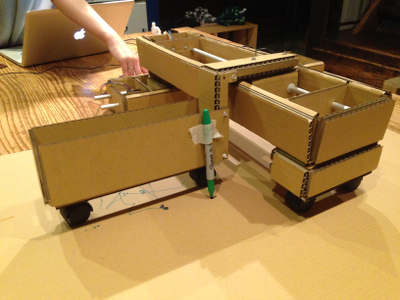
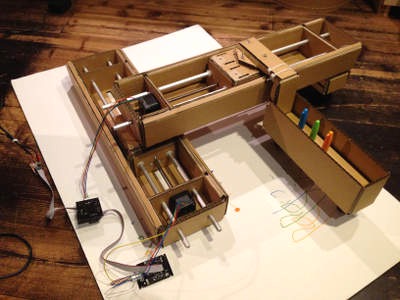
(all photos can also be viewed here)
Making The Program
Asako-san wrote the python program to control the machine. Whenever the mouse is dragged, the stages move according to the mouse's position.
Links
- Modular Machines that Make : Cardboard CNC
- [modular] Machines that make: cardboard stages
- Getting Started With Gestalt Nodes
- Gestalt’s documentation