MOLDING AND CASTING
This week, the task was to machine wax to create a positive mold. We were then to cast it in a flexible material (silicone, rubber), to then cast into that to create an object using a harder material (resin, plaster).
Starting with a molding and casting session with the 3d workshop team, we were shown the basics of how to cast, and shown some of the initial materials we could possibly use.
I started by looking at previous assignments.Aisha Jandava cast parts for a modular shoe. Although not specifically relevant to what I want to do,Alejandra Diazdelon cast in ceramic and pewter, making molded skulls.
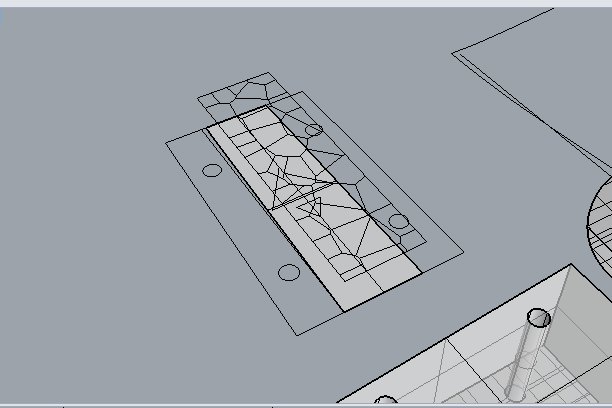
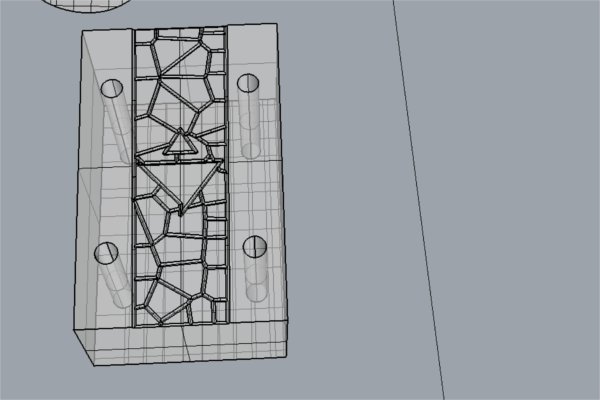
I initially wanted to use aluminum (in the new furnace we have in the 3d workshop) to create a metal block to hold the neck to the body (potentially made of softer material). Unfortunately that didn’t quite fit the assignment brief, so I changed to creating a prototype of the neck block using the materials recommended. I quickly created a suitable 3d model in Rhino while melting the machinable wax into a block.
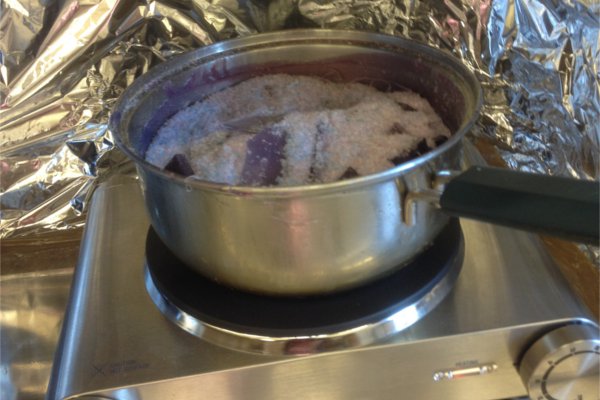
The trouble with machinable wax is that it needs to be very hot to melt, but too hot and the wax will burn, making it useless. The pot to melt the wax is quite but, but more than a certain amount of content will mean it stops melting completely. If you want a successful mold, it is better if you make it small.
This meant that I could only mold one half of my two part neck at a time, a lesson I didn't learn until my third time pouring the wax in. It also takes 12 hours to cure completely, meaning within the first two days I was behind schedule enough to miss the regional review.
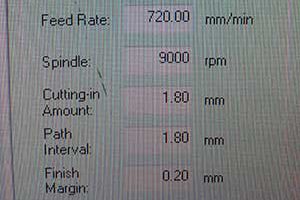
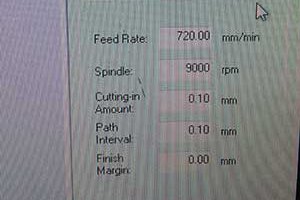
Oh well. Moving on at my own pace, I moved onto milling my wax. I used one of the two Roland MDX40a which uses the program SRP player. Using SRP player was both good and bad. It offered a lot of versatility in some regards (changing specific aspects of the toolpath for instance) but offered only one or two options in other parts. It was also quite useful to be able to leave the modela running without needing to watch it all the time. I used a 1/8 bit for the roughing and finishing passes, then refined the area and ran a detailing pass with a 1/32 bit. I created a small area to be able to zero the z axis in with the smaller bit. The end result was satisfactory.
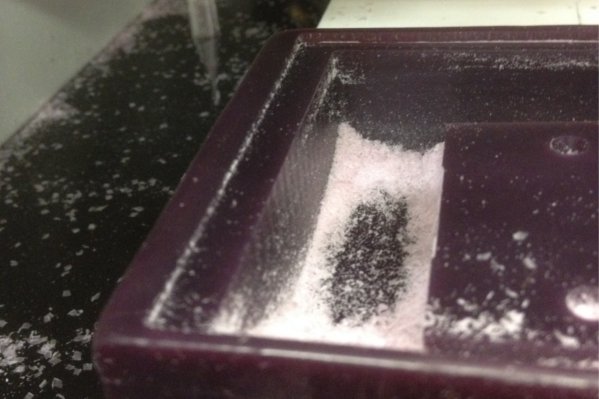
I had to clean up the wax a bit, mostly using a small but bristle paint brush, some methylated spirits and a cotton bud. The only other issue with my wax mold was that a part of the mold (the original locator pins for the other part) cut almost all the way through the wa. I needed to make sure it was watertight, so I cut up some spare acrylic and hot glued it to the bottom of the wax mold. I wanted to make sure it was watertight, so before I poured silicone into the wax, I poured water to measure the amount of silicone I would need and to see if any water would leak out. It did, so I went back and applied some more hot glue.
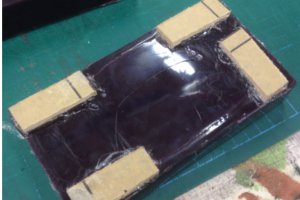
Moving onto the silicone, It was quite hard to accurately measure how much mixture was going into the mixing container. After mixing the two parts, the mixture was full of bubbles. Having a vaccume chamber to get rid of these bubbles was essential. The water test showed me I needed 140 grams of silicone, but after applying, I found that this was not enough. I applied some more silicone, (the hour working time for the silicone I was using allowed me to do this, otherwise I would not recommend) to hopefully make a workable mold.
THE SECOND PART
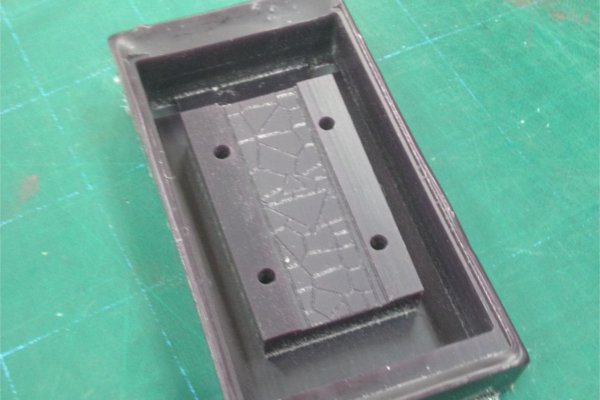
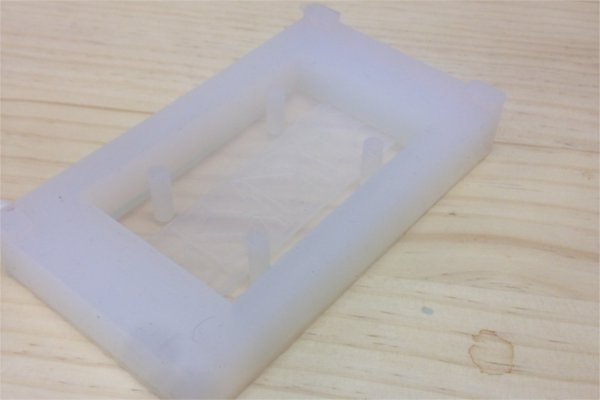
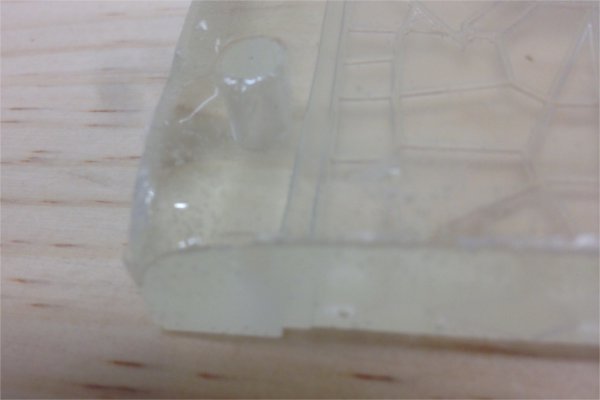
Demoulding the silicone proved to be difficult as I didnt put a draft angle on the machinable wax positive. I had to use a blade and break off the sides. Apart from that, there was a single area where the silicone wall was very thin and fragile. I managed to cast into it before it broke, but I had to handle it pretty carefully.
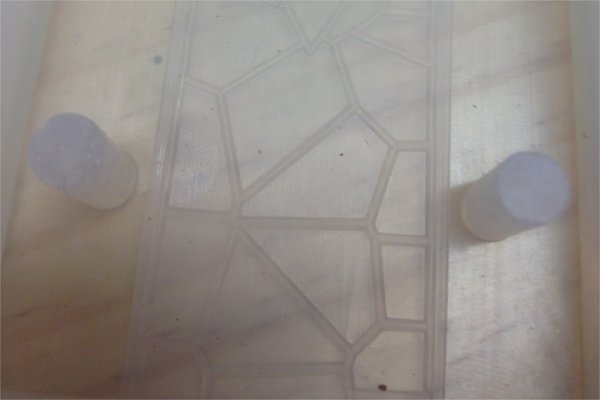
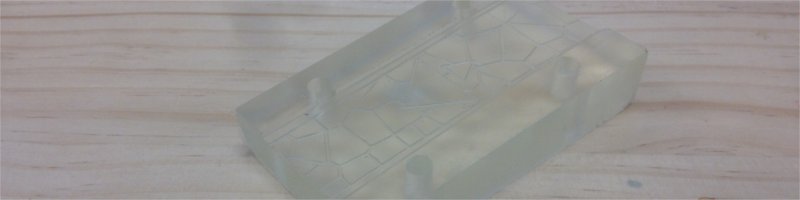
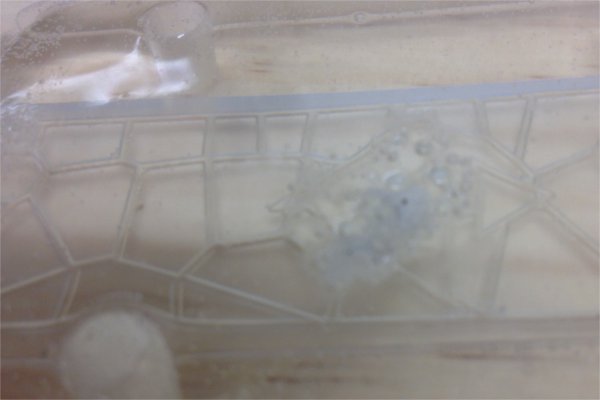
I decided to use UMU clear cast to make my final mold. I found it easy after casting the silicone. It had a working time of about 30 minutes, which was plenty to fully remove most of the bubbles, although the mixture wasnt thick enough to trap much air.
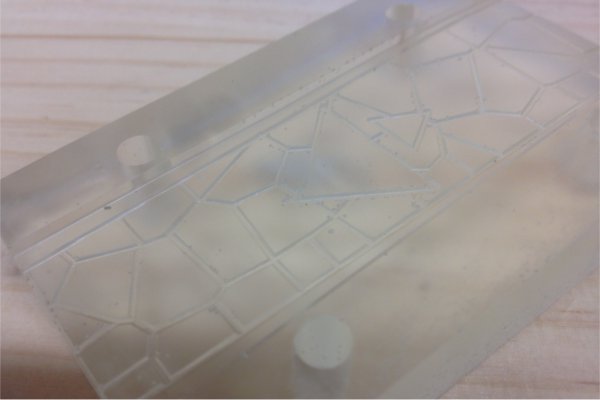
I left the cast overnight to dry and cure. The mixture worked well except for a few bubbles near the top of the cast. It also shrunk in the corners, which I wasnt expecting at all.
The detailing worked very well, and as an exercise in molding and casting I am pleased with it.