MY FIRST CRISIS OF FAITH
I was impressed and amazed by some of the final project ideas in the regional review. I now feel like I should work to improve my idea.
After the regional review finished, I lost faith in my final project. I felt my project lacked impressiveness. My idea didnt seem big enough, or crazy enough to be interesting to the rest of the world. I certainly didnt explain it in a way that captured attention. I need to improve my communication skills and I need to do it quickly.
Afterwards I talked to Wendy (the Wellington Fab lab manager and one of the tutors of Fab Academy). She told me to map out the market and that I needed to figure out how my product would fit into the market. I need to find the reason why people will use my design and I need to find the area which could make it a great product.
This project has to fit in the context of an industrial design project as well as Fab Academy for me. I am starting to notice the difference between the two. I will do my best to fufill the criteria of both.
My plan from now is to research other guitar design projects, and then I will figure out how my project is different.
I will start the cyclical process of development next week hopefully by finding a suitable material, and I will start to contact the potential users for interviews to find out what they want in this design.
I will update this thread with my progress.
This weeks assignment is to visulise my final project in 2d and 3d. I will try and use this oppurtunity to write down some of my ideas.
WHAT ALREADY EXSISTS
Most of this research are for products that arent in the mainstream. I have focused on recent innovation and included on the most important or interesting entries.
The full list of entires can be found here.
Initial Inspiration:
These are the videos that originally inspired me to take up this project. None of them spell out anything specific about the research, bat are interesting all the same.
Yaybahar by Gorkem Sen - This video shook up my beliefs about making instruments. It is a instrument that uses a cello neck with the strings attached to a bridge. The bridge attaches to 2 loose springs which in turn vibrate 2 seperate drums. The drums and the springs create a well sustained sound. When the Cello strings are plucked or bowed, it creates a beautiful and haunting tone. Before I found this video I honestly thought that new acoustic instruments were impossible to make.
Diago Stucco makes an Instrument - Diago Stucco is a fantastic innovator of musical instruments. His experimental and iterative approach to instrument deisgn is what interested me in him. This video shows Stucco creating an instrument out off a metal pipe and a cello bridge.
Hello Kitty guitar - This guitar juxtaposes what it looks like and what it sounds like. The result is a surprising experience for the audience. Something about this video makes me excited for my final project, and I often find myself watching this video when I am looking for motication or inspiration.
Innovation in Materiality:
The guitar design industry is well over 100 years old. Because of this most timbers have been used and documented for sound and ease of use. Researching new innovations in timber has caused me to look to other materials. The materials of a guitar change in part, the sound of a guitar. Despite this, there has not been much experimentation into a wide variety of materials.
Carbon Fiber- The most popular use of composites in guitar design is carbon fiber or graphite. Brands like Ovation guitars, Emerald and Alpaca all utilize these materials differently. The video below shows Alpaca guitars, which use carbon fiber to make the guitar more durable for hiking and adventuring.
Acrylic - Acrylic guitars have been around for 50 years and are popular because of their translucent qualities. Guitars using Acrylic and LED create a geat theatricality to the instrument. It has been debated whether Acrylic has the acoustic qualities suited for guitar design. the Electrical Guitar Comapny (EGC) has the best example of an acrylic guitar (shown below).
Aluminum - Aluminum guitars were the first fully metal guitars becuase of the lightweight quality to the material. EGC uses aluminum in their guitars as a point of difference. The tone of an Aluminum guitar is bright and resonant, as shown in the video below.
Mechanics/ Playability:
Changing the fundamental way a guitar works is an excellent way to create new and interesting instruments.
Birdfish guitar - This guitar uses a metal frame which extends above the strings to attach two tonewoods to the instrument. These tonewoods change the sound qualities of the guitar and are completely removable. Having a modular guitar is not a new idea, but having the parts work without a solid timber body is something completely unique.
Electronics:
Technology now means that any musician can digitally alter the frequency of the strings and sound of a guitar. Musicians feel more connected to an instrument if they know the sound comes from the materials and construction of the guitar rather than digital manipulation. A prime example of too much electronic manipulation is the synth axe.
Arduino guitar fx -
This video uses an arduino board to create position based manipulation in the sound of the guitar. If implimented without too much interence in the playability of the guitar, this manipulation could be used to great effect in increasing the theatrics of playing and because the arduino board is infinately configurable, changing the effects in the instrument could be as easy as loading up a script into the guitar.
Gibson E-tuning/ tronical tuning - The Gibson E-tuner uses servos and a tuner mounted into the back of the guitar head to robotically change the tension (and tuning) of the strings. It is the most recent peice of electronic technology to be picked up by Gibson and is debated whether the technology is a gimmick or a lasting peice of guitar innovation.
Solderless systems - By using custom parts, it is possible to completely assemble the guitar electronics without solder. It has been argued whether this affects the quality of electronic signal. It would be interesting to try and design a solderless system that includes regular parts.
Fabrication:
Personal digital fabrication is a processed that hasnt been adopted by many luthiers yet for many reasons.
3d printing - 3d printed guitars, originally innovated by Olaf Diegel has been popular within both guitarist and maker communities. The creation through 3d printing of forms that were impossible to create in traditional manufacturing methods has created a point of interest for this product in the market. The use of timber to support the ABS plastic means that the body is heavier in the same places and makes it feel like a regualr guitar to the user. It also makes this instrument sounds at least partly like a timber guitar.
Amit Zoran’s Chameleon guitar - The Chameleon guitar uses a mixture of digital sound enhancement, and pieziometers on a replacable timber core to create new sounds as well as meaning the user can create new timber with whatever material they have avaliable. This project is works really well with mixing traditional guitar fabrication processes (a luthier wood core, the way the bracing affects tone) with acoustic (using springs and sand to create acousitc effects) and digital (altering the sound by changing the volume and shape of the virtual guitar) effects.
COMPUTER AIDED DESIGN
This week relates to my final project in the visualisation of my final project (through drawing and CAD), You can find the post here.
FEEDBACK
On monday morning I had a chance to talk to Wendy (my fab academy supervisor and generally knowledgable individual). We went through my entire project up to this point and she came back with some feedback:
- I need to update the wording of my website. At the moment it is too long and doesnt say much. Communication is a huge part of this course, I will try and be a clear as I can from now on.
- The contruction method I was using will need to change. I thought using corrogated cardboard by itself would have the structural integrity and acoustic queslities I was looking for. Wendy convinced me that resin soaked fabric might provide more strength, something I will try soon.
- I have also been encouraged to stop thinking of this as a guitar. I am trying to design a platform for the creation of musical instruments in digital fabrication. In this way parametrics might be a big part of the design. I could start brainstorming how exactly the user could customise their instrument and its sound.
- Having a discussion with Stuart (the other fab academy instructor and fabrication wizard), I was reccomended to have a running experiment where I would create a press fit mold and test it for acoustics. I could then play with the shape (with grasshopper) and basic materials to get an understanding of the different sounds coming from it.
For now I will rewrite the website. Next week I will play with grasshopper and start this acoustic form experiment. After that I will start to look at the materiality, as well as starting to draft some questions for informational interviews.
HOW A GUITAR WORKS
The User interface for stringed instruments is something most people are familiar with. A musician will press a string against a timber board with one hand, while strumming, picking or bowing the other end of the string. The string vibrates and sound comes out.
Understanding how the physics of a guitar works will help understand some of decisions for construction.
A quick internet search can find any number of good infographics about guitar mechanics. The one below is the one I found most helpful. What is explains is this:
- Guitar strings are plucked, usually with a set of strings pressed against the fretboard. The metal frets cut off vibrations of the string at certain lengths. These lengths change the harmonic frequency of the strings, which changes the pitch of the vibrating strings. A good example of a seeing harmonic frequency is by using a camera with high shutter speed like in this video.
- The strings vibrate against the air and produce a pitch, however the sound that comes from string vibration alone is usually quiet and dull. It is the body of an acoustic guitar that amplifies and changes the tone of the strings. The vibration of the string travels into the bridge (where the guitar string is anchored to the body) and vibrates the front of the guitar (this part is called a soundboard). The soundboard oscillates like an air pump. This amplified frequency travels around the inside of the guitar before traveling out the sound hole to the ears of the audience. The different material of the soundboard, the bracing behind the soundboard and the rest of the guitar body influences the sound.
- An electric guitar uses these same mechanics but creates electrical sound through a device called a pickup. The pickup is a set of (usually) 6 metal rods wrapped in copper wire. This coil is sandwiched between 2 magnets essentially creating a induction coil. When the steel strings are vibrated above the pickup, it creates an electronic signal at specific frequencies, which when put through an amplifier, creates sound. It is worth noting that the pickups generate different tone through the vibration of the whole guitar, which is how different materials affect the sound on an electric guitar.
This is a really good lecture to watch about the different way materials and form affect the tone of a guitar.
The construction of a guitar should conform to a few different standards for the best kind of amplification:
- The inside of a guitar and guitar material should be structured so that any kind of acoustic frequency is not dampened (which is why MDF and laminated plywould do not produce a good sounding guitar).
- The bridge (which is the contact point between soundboard and string) should be positioned in the middle of the soundboard (where the maximum vibration will occur).
- The neck should have as much contact with the body as possible to ensure that any vibrations are transferred between neck and body.
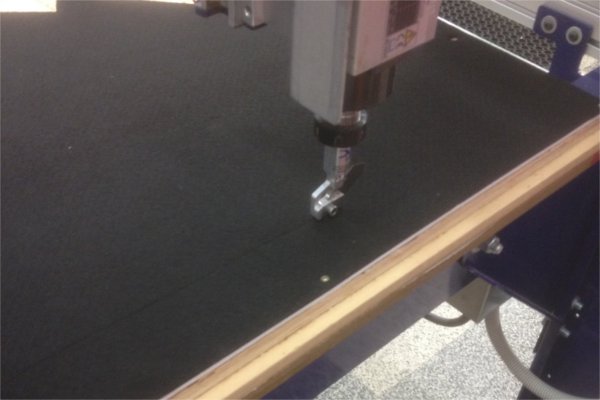
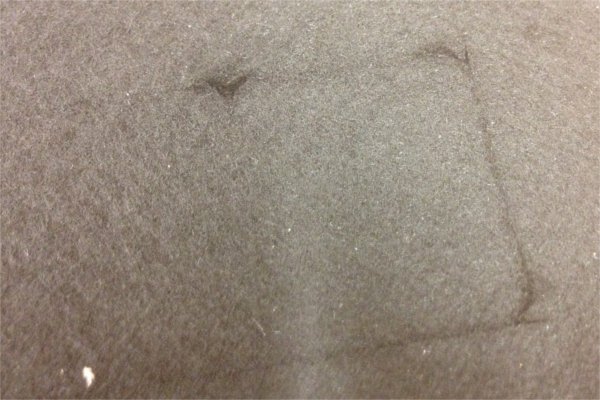
All of the guitar components and materials contribute to the sound of a guitar, but following a few different guidelines in construction should increase the chances of a nice sounding instrument. I plan to experiment the sound of form and materiality using quick, laser cut press fit boxes. You can read about the design and outcome of the experiments here.
PRIMARY RESEARCH
The first day of university has finally come. I have been trying to work in as much of my university content over the past few weeks however now there will be a consecutive timeline of this project for my university research paper. The main task for the university paper is to conduct extra user research. I aim to hold informational interviews with various people involved with digital fabrication and instrument design both locally and internationally. The intent is to find information from people with previous experience or insight and from people who would benefit from the final design of my project.
I’m going to contact both makers of instruments and musicians. Because of this I have a set of interview questions for both types of interview. I will try to use these questions as a starting point for the interview, but will stray from the list if need be. I will also try and record the interviews for further analysis. These are the interview questions:
For Makers/ Designers of Instruments:
- When were you first introduced to Instrument design? What is your favourite project or creation?
- What are your thoughts on instrument design? How do you go about the design and creation of a new instrument?
- What do you think of this project, where is there room for innovation? What would be your perfect instrument?
- how could you see digital fabrication working for you in your process and practice?
Have you had many different types of your instrument?
For Musicians:
- How long have you played your instrument? how did you get started?
- How do feel about your instrument now?
- Have you had many different types of your instrument?
- Who do you play for??
- What do you look for in an instruments in terms of sound, playability and image
- What kinds of emotions do you get in different situations? (for example, practising with others or by yourself, playing for others)
- What keeps you coming back to this hobby or profession?
- Describe your perfect instrument to me
I have also started an attempt to be active on internet forums. I will post questions for feedback striaght from my target market.
I have started by posting the question: How do you feel about Digital Fabrication? to the Luthier subreddit and recieved somewhat negative responses. A few of the replies were:
- Guitar construction is a pretty mature technology and a good playing guitar is defined by some pretty rigid parameters...I don't think digital fabrication is a guaranteed gateway to innovation, however it can speed up processes and allow you to create instruments that would be difficult or impossible to build with traditional materials and methods.
- I don't have any problem with digital fabrication or fab labs and such things.
But I don't think it's economical or practical on a whole instrument at the moment.
I Have lined up two practice interviews with some of my freinds. Hopefully I will figure out what questions work, and how to best get the information I need in the best possible manner.
INTERVIEW ONE - CONNOR
Today I held an interview with my good freind and musician Connor. I went into the interview with the intent of trying out my questions in a casual enviroment. I recieved some good answers and also figured out that I need to work on the ethics (confidentiality, informed consent and how I can use the interview data in the coming weeks).
Some interesting quotes from the interview were:
- I picked up a guitar in intermediate school.. obviously playing the piano accordion wasn't the coolest instrument around.
- Its made music very important to me because its synonymous with family to me.
- learning to play on an instrument that isn't held back by it's design, you cant put a price tag on that.
- There are a lot of people that want to own a lot of guitars, I think it was more important to have one that covered everything.
- Ill be really honest with you and say I started playing music because I thought it would make girls like me.
- There is always a part of me that says I play for me, because I like being able to better myself.
INTERVIEW TWO - RICHARD
The second Interview I held was with my freind Richard, who was the first person I met who made instruments as a hobby other than myself and played an important part in the design of my first guitar. He had alot of insight as someone who made insturments in his youth and moved to Amplifier deisgn.
Some interesting quotes from the interview were:
- Insert quotes here.
INTERVIEW THREE - KOZM GUITARS
Following the two practice interviews I felt confident enough to start sending interview requests from people in the industry. I was extremely excited to recieve a response from Jeff Kosmoski, founder of KOZM guitars. KOZM guitars use digital manufacturing as a tool for form innovation in guitar design. I felt a personal connection to these guitars as they have been a source of inspiration for my own guitar designs in previous years.
The interview went great, unfortunately It was my first time screen recording with Skype (as opposed to goolge hangouts), and It didnt correctly record the interview (which I only found out afterwards). I will make sure to do a practice run with any screen recording tools in the future before I start any interviews.
At the end of the interview I requested to get back in touch once I had a prototype to show. Jeff graciously accpeted, so hopefully I will be able to record any response in the future.
UPDATED PLAN
It has been a while since I have updated the final project plan. Upcoming is the composite week, which will be hugely important to my final project and because of this I thought it would be a good idea to update my plan of attack.
Originally I wanted to use the molding and casting to create a resonator that sits within the body of the guitar. The idea was that the resonator would increase sustain and improve resonance within the body of the guitar. I could then pick up vibrations through a piezo meter attached to different parts of the body.
However the design is already quite full and adding a different mechanic would be too much within the scope of this project, and so I have decided to resort to more traditional sound methods - an electronic pickup system.
I would like to in the future, look into the resonating system and possibly an electronic effects system built into the guitar, but for now I will focus on the material and structure of the body, and getting a working iteration.
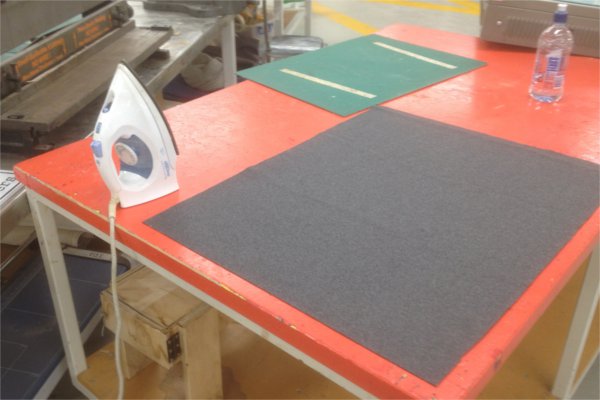
PLAYING WITH AUTEX
I've struggled with what to make the sides of my guitar body out of for a while. I could use the same composite material I've been experimenting with as the front and back of the guitar, but finding a way to secure everything was going to be difficult. Without more thickness glue possibly wouldnt work, and screws were out of the question.
It seemed like a needed a new idea for what to make the sides out of. It was then I re watched this video. He mentions a theory in acoustic guitar design that says thye sides can be isolating the vibrations of the sounboard from the back, but only if the sound chamber properties of the hollow body wont be affected.
'
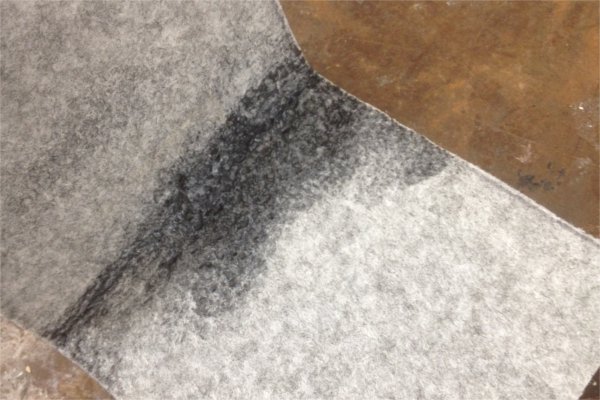
What I would need is a material that could be bent and hold its shape, would mute vibrations and could be use to hold glue or screws. My initial thought was to use felt, as it would add a point of interest to the design of the guitar. However there are a few negatives to the material in its natural form. These are:
- The material would affect inner vibrations of the sound chamber
- I wasnt sure if I could bend it, or if it would hold its shape
- I didnt know where I could get it in the thickness I needed
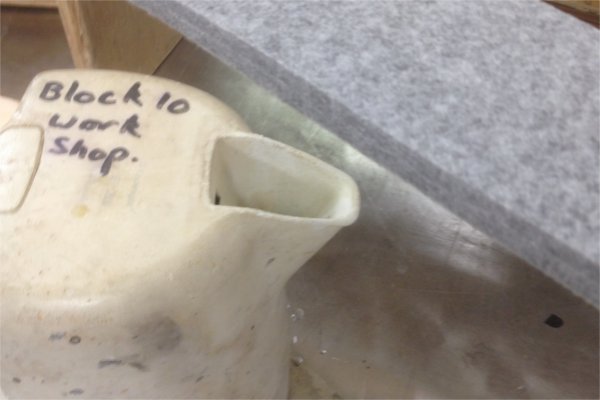
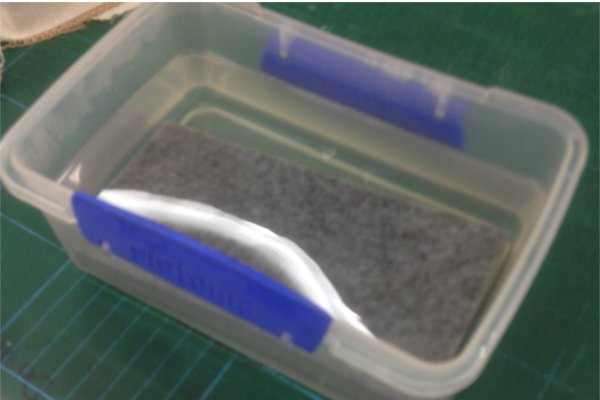
Luckily, Stuart was doing a project that involved huge samples of synthetic felt, a material called Autex. He kindly donated a large offcut from his project for me to use. I decided to start with how I could bend it.
The first thing I tried was using a heat gun. Unfortunately this didnt work at all as the Autex just melted into hard plastic and didnt become easier at all to bend.
The next thing I tried was using steam to bend the material. I initially just held the peice of Autex over a boiling kettle. This didnt work as well as I couldnt tell whether the steam had actually bent my material or if it was just me forcing a bend into it. I decided to use a steaming chamber we had in the 3d workshop. I left the material in there for 5 minutes which was plenty of time for it to become completely pliable. I held a bend in with a small clamp and it adopted that shape almost immediately. The material died extremely as well. Overall this was the best method, but perhaps unsuitable for my project as it is unlikely that my user will have acess to a steam chamber
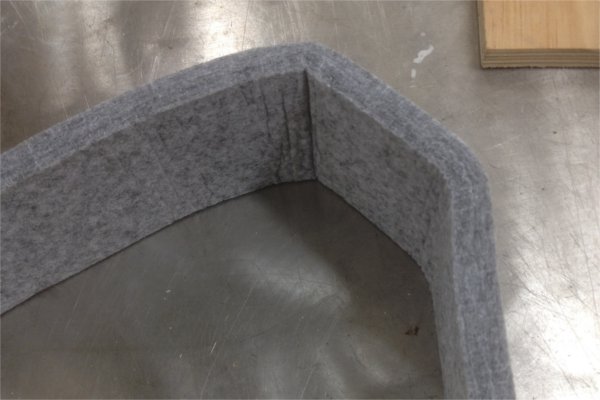
Finally I tried soaking the autex in boiling water. I left it in the water for about a minute. The autex absorbed the water with no problems and bent almost as easily as the steamed autex. However as of a day later the material still has not fully dried which could be a problem. I will try lightly heating it up in the oven to see if I can accelerate the drying process without melting the material.
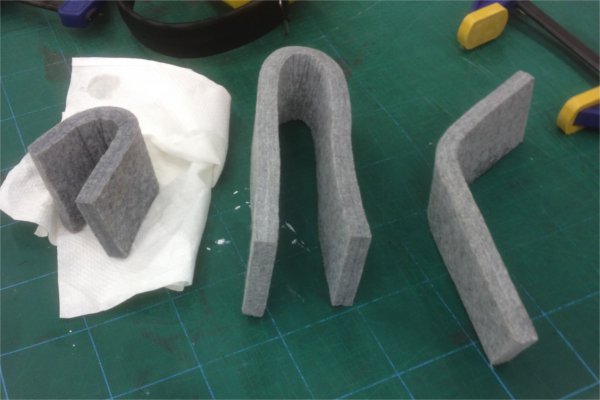
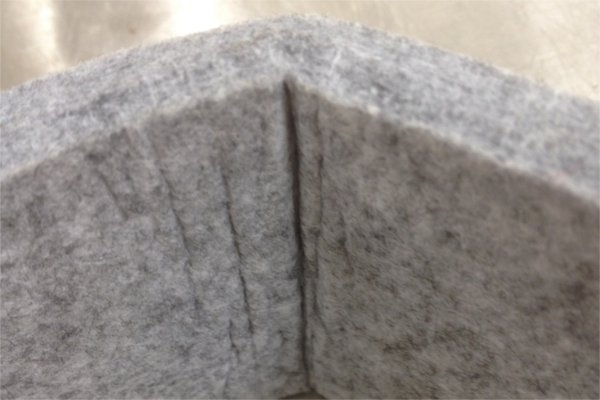
As you can see by the last picture I compared the bends of my most sucsessful tests. To the right is a peice that was just bent with force. The middle is steamed peice, and to the left is the water soaked peice (still wet). It is worth noting that a day later the bend is slightly less pronounced. It seems the material is fighting to resturn to being straight. I will try impregnating the material with resin to make it stay in shape. Overall these tests were sucsessful.
FURTHER AUTEX DEVELOPMENT
The first developments were great, but I noticed that after a while the autex was losing some of its curve. I decided to try laying it up with resin to ensure it held its shape. This worked really well, although used up alot of resin. I was also showing Wendy my samples and she mentioned it would work better with a thinner peice of autex. I repeated the process with the thinner peice and it seemed to be true. I will use this in the final model.
The next thing I needed to do was cut the final peice of tooling, the press that would bend the sides to shape. I decided to use the greenfoam press I used for the vacuume bag composite (which you can read about here). Using greenfoam meant the cut wouldnt take long at all, although because the press needed to be big enough to fit the sides of the guitar I needed to glue more greenfoam uto the press. The longest mill bit we had couldnt cut all the way down to the bottom, so I had to go to the workshop and cut out the rest of the mold seperately. Next time i will rework the greenfoam tool so that it could be used as the tooling for both the front and sides.
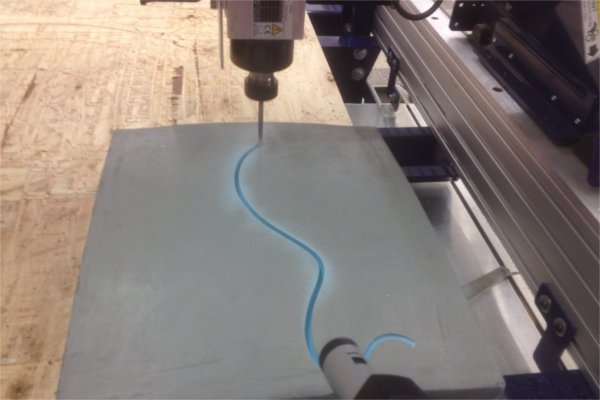
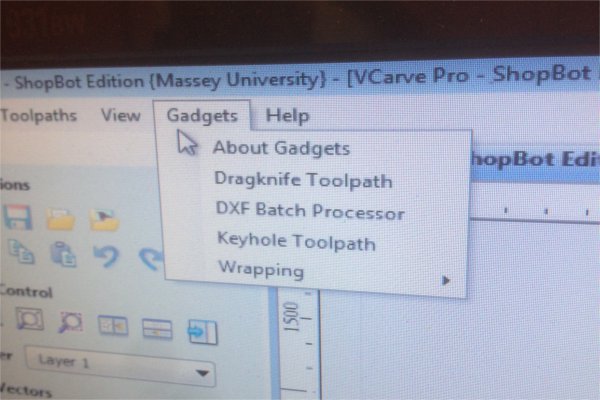
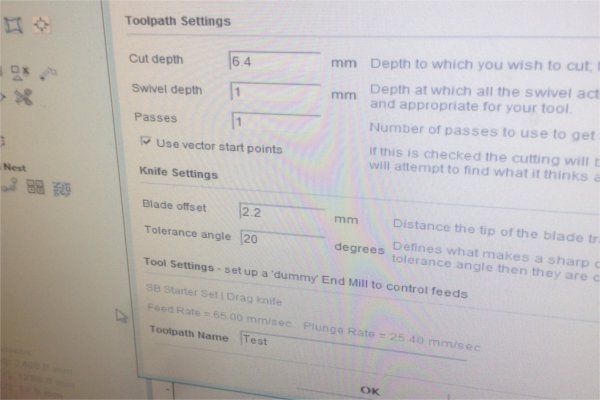
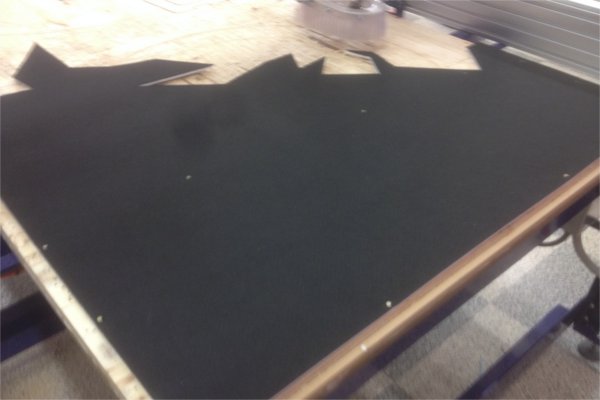
The last thing I needed to do to prepare the sides for bending was actually cut out the sides. I could have cut out the sides by printing out a template and using a knife, but instead I thought it would be quicker to use a dragknife on the shopbot. Stuart had already done alot of cutting of the autex with a dragknife so he showed me how to do it. It was extremely easy.
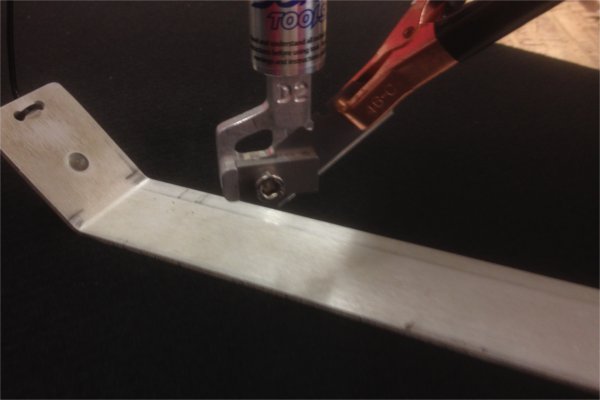
Instead of using partworks, I used Vcarve which has a dragknife tool path option. I just had to set the cut depth (because our sacrificial layer isnt soft, I couldnt cut all the way through without blunting the knife). I used screws to hold the autex, and set the z height using the z plate and clip. Cutting took about 30 seconds per path, and I made sure to cut extras just incase something went wrong. It turns out I would need those extras, cutting them out with a craft knife was easy to mess up. In the end I got two sides that looked good.
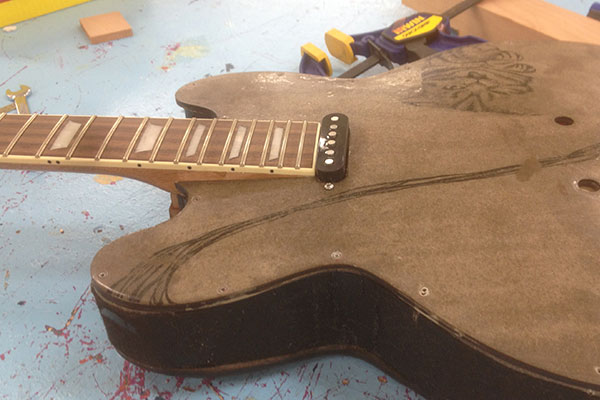
MAKING THE FRONT/BACK
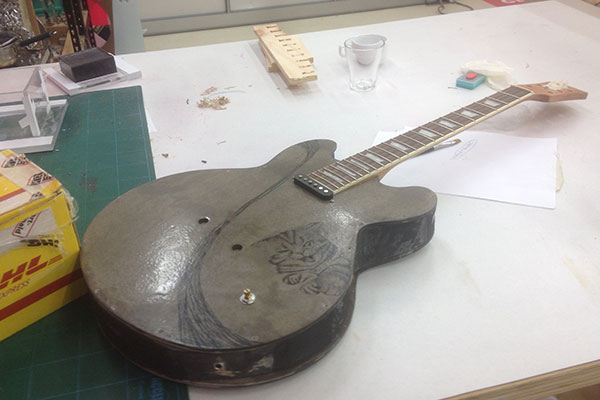
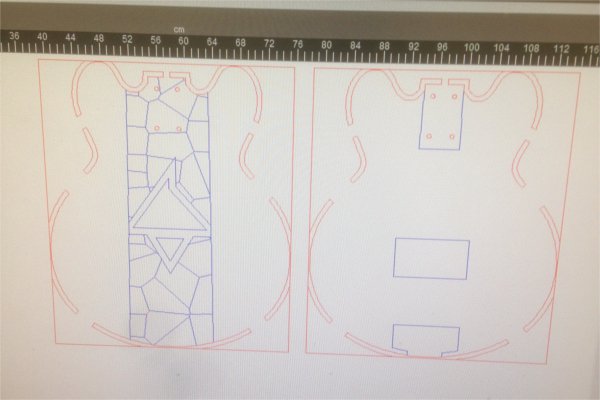
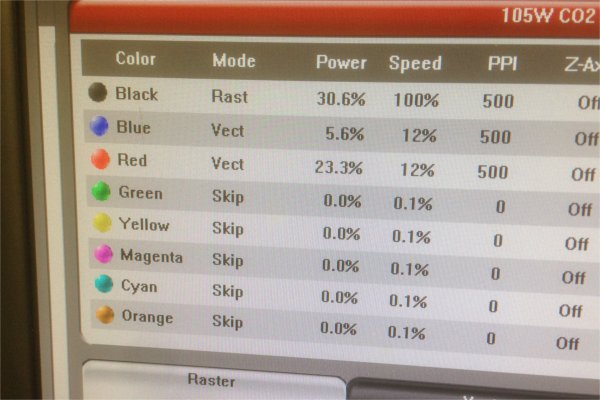
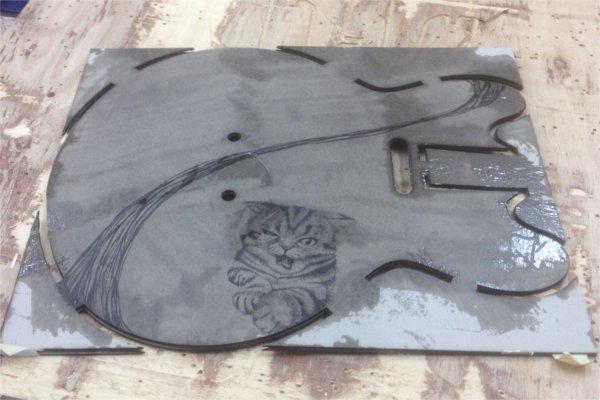
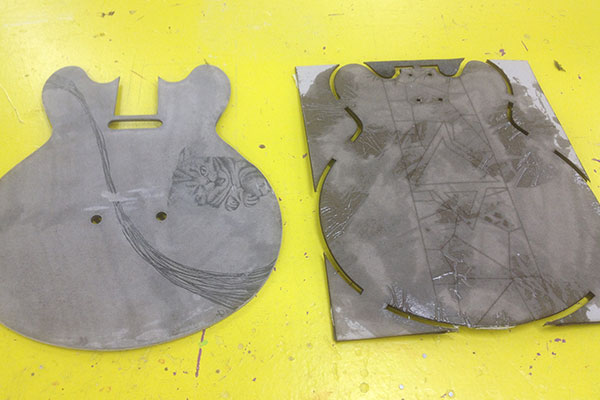
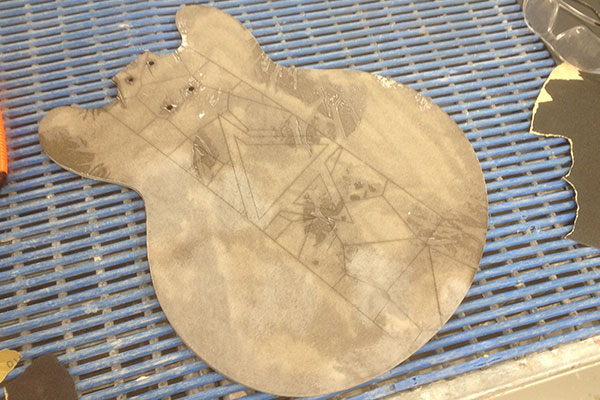
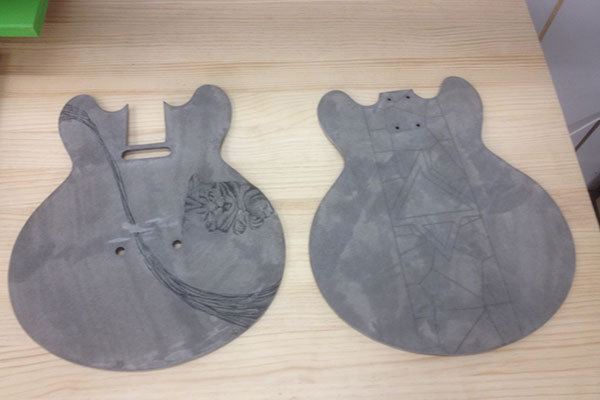
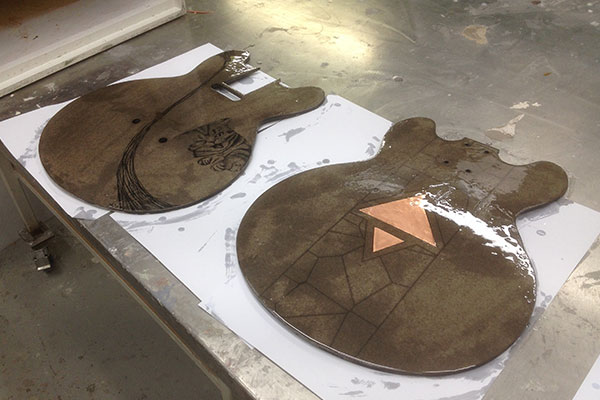
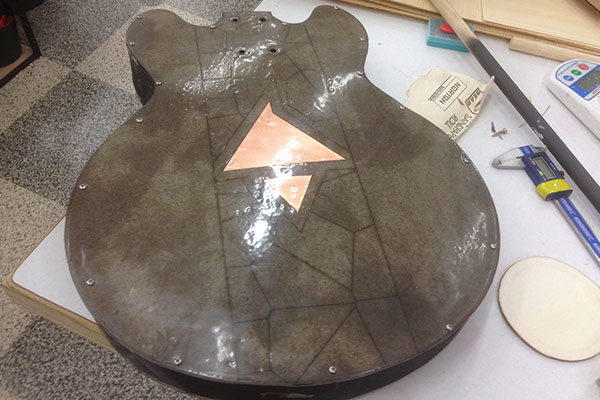
I did alot of work on the vectors to cut the front and back. I needed to get the tolerences as I didnt want to do any more finishing work than I had to. I also needed to make sure the tab system worked so that it wouldnt be a pain to align the peices when they were soaked in resin. Finally, I made sure to engrave lines to indicate where all the peices would sit.
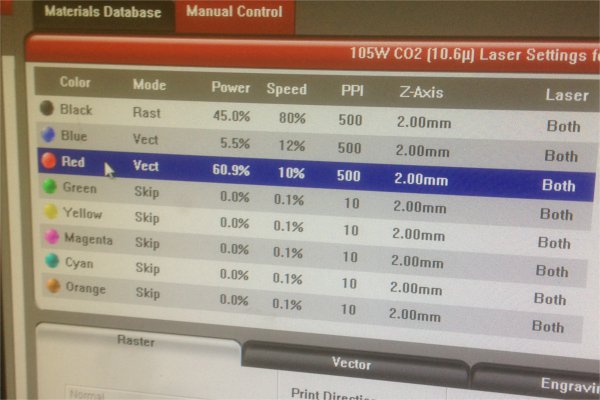
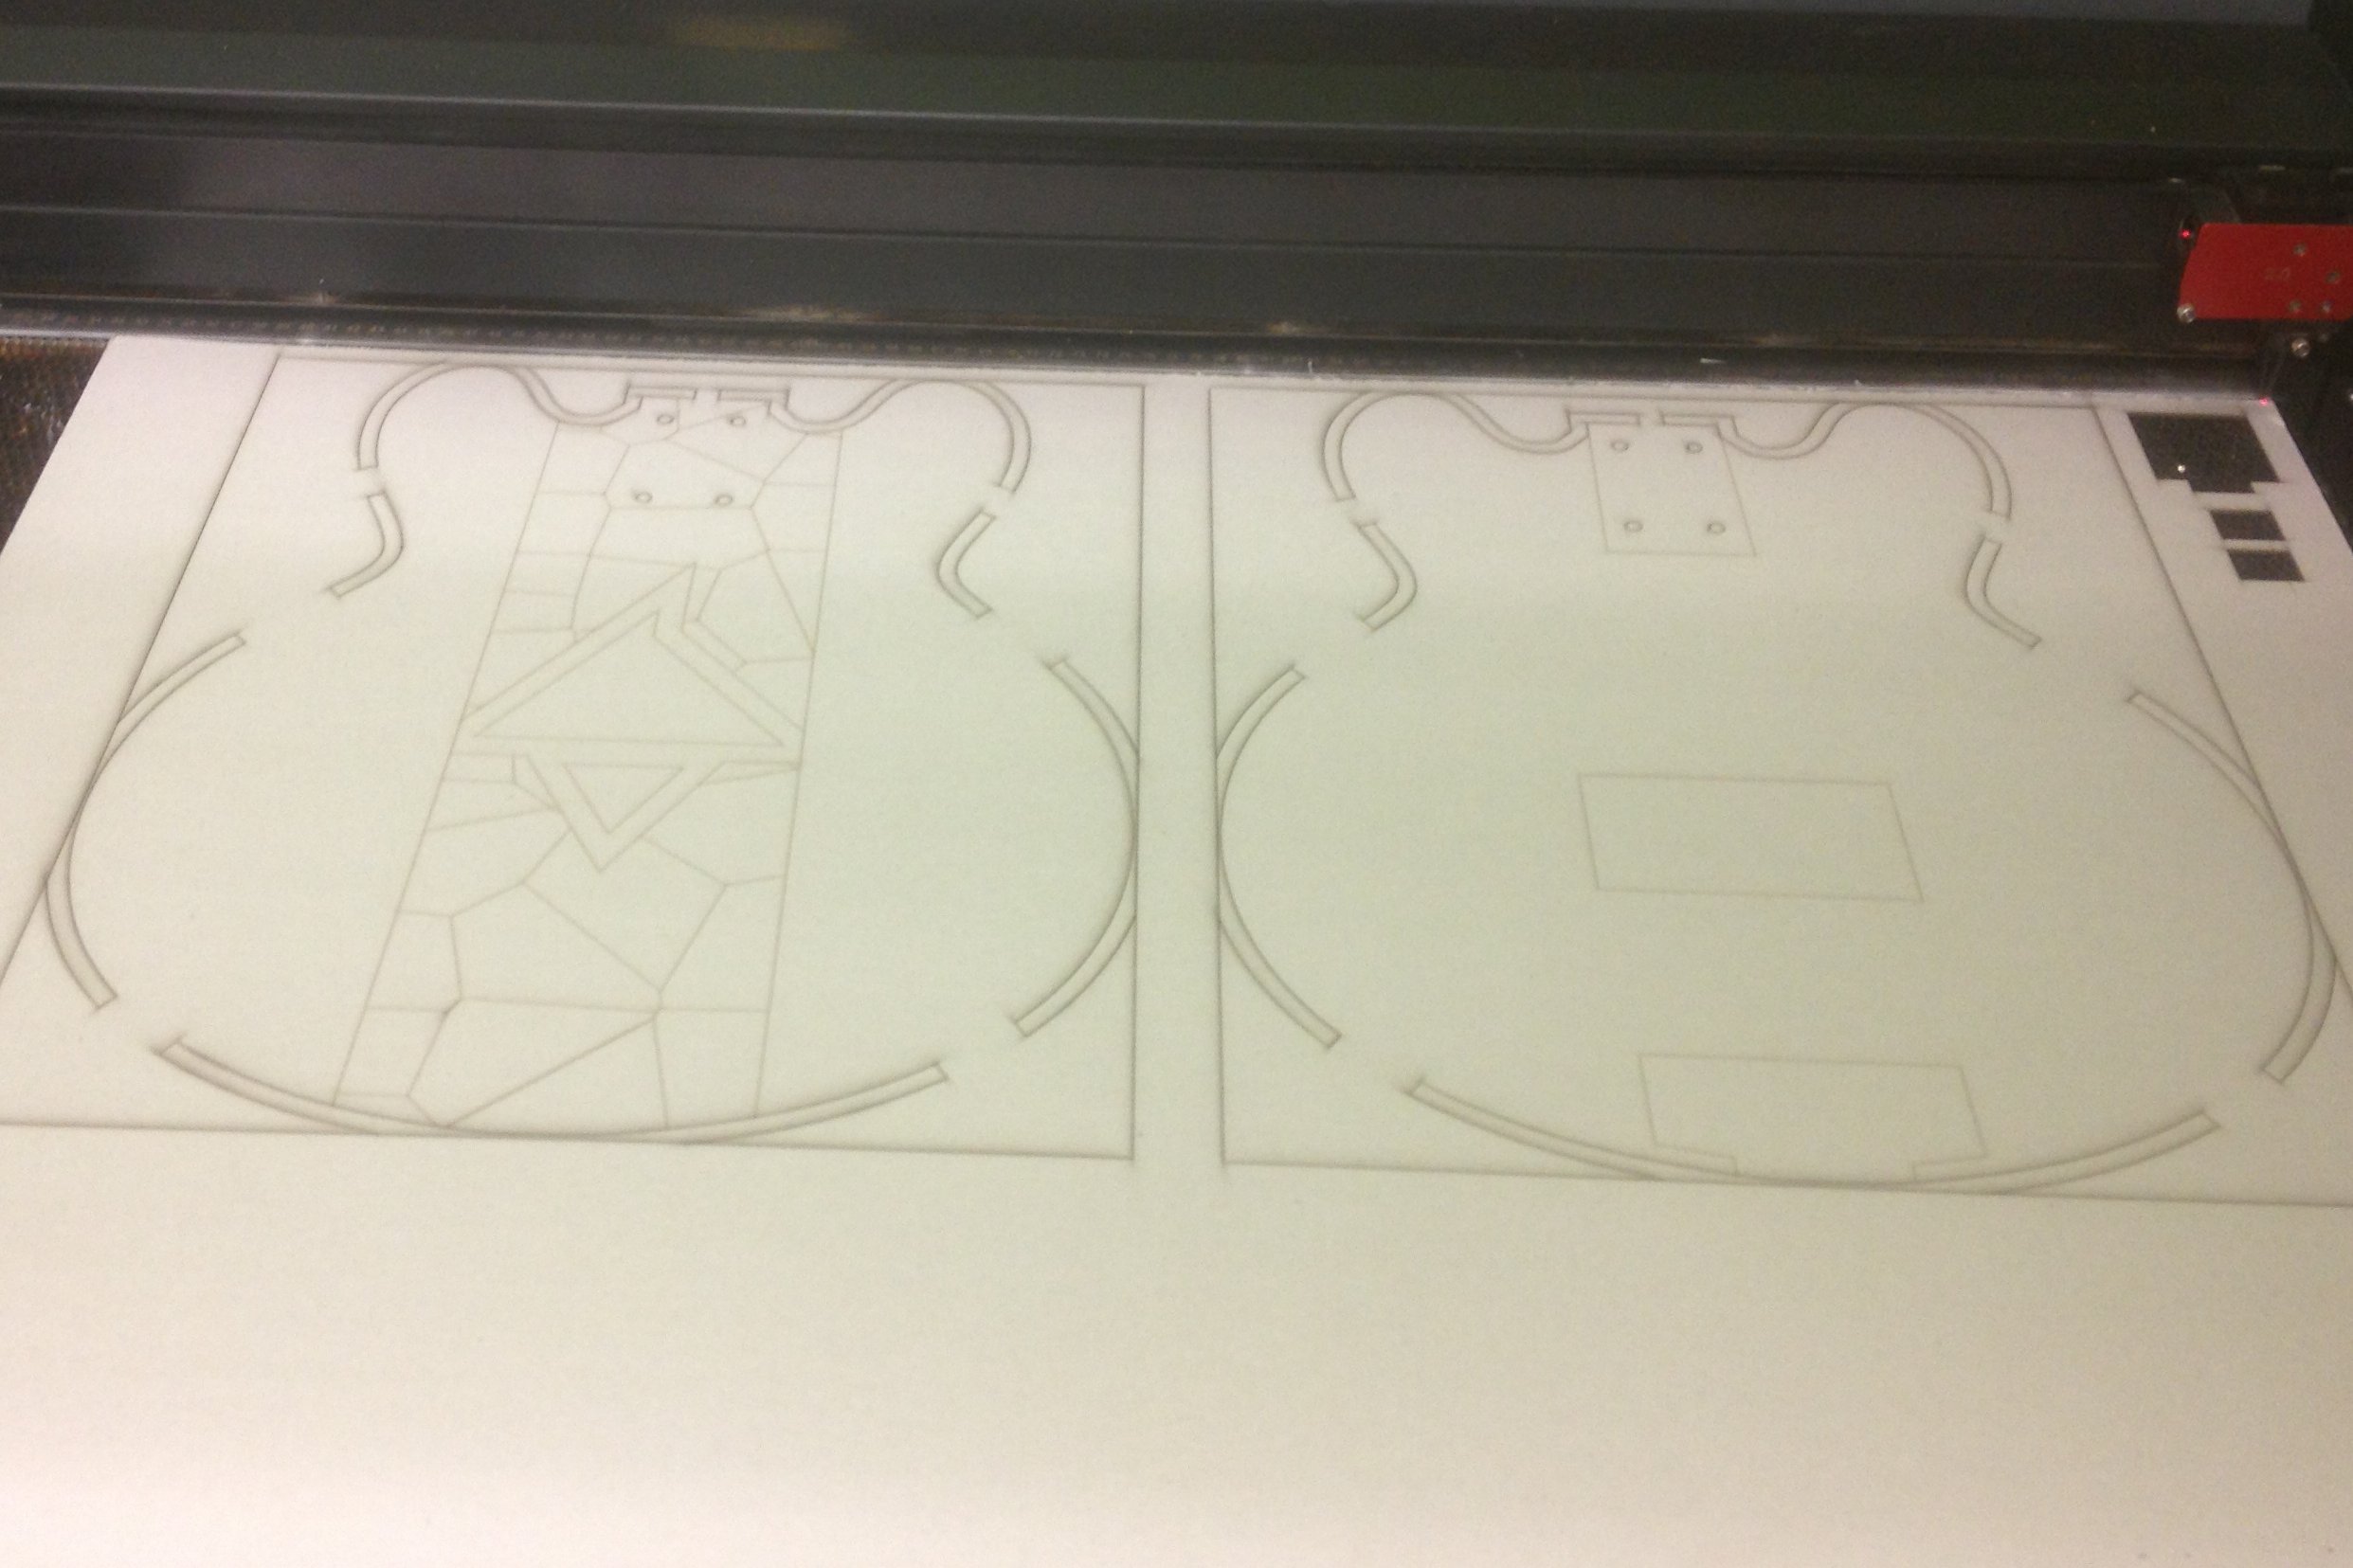
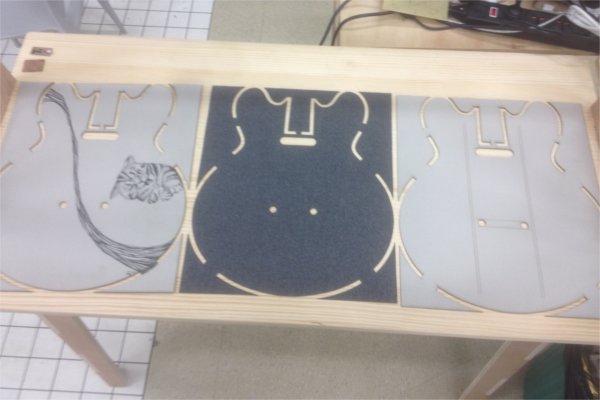
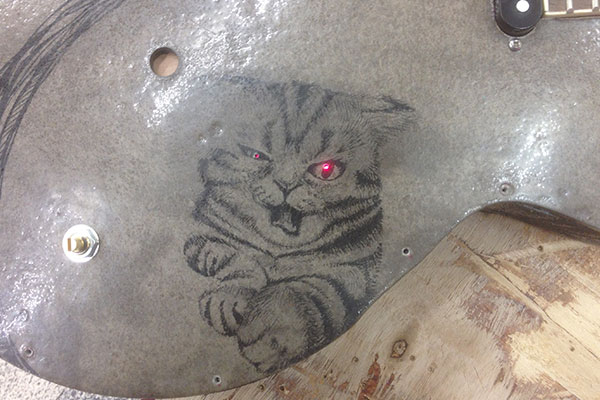
I tested the cut settings for both the wool and the matboard, and adjusted them so that I got a good cut. After all of them were cut, I asked my fellow Fab academy collegue Jasmin if she could draw a picture for the front of my guitar. She did a wonderful job drawing decorating it with Maru (the internet box cat). As Craig has been teeling me constantly, the guitat needed 100 percent more cat pictures, and now it does.
It finally came time to press the front to shape. I was very nervous as I arranged all the peices. I asked my freind Phill to help me with the alignment of the peices on the press, so that when I was laying each peice with resin, he could be aligning the peices on the press (making th most out of hour 30 minute working time). It all went well, I mixed 350 grams of resin, which was just enough.
I let it dry for 5 hours, and then opened it up for a look. The result was somthing I am happy with. It will require a small amount of finishing work, both for excess resin build up, and alignment issues. I will press the back next. I have also made a mistake in the design, that I forgot to include sound holes for any acoustic vibrations to escape. This isnt a huge deal for the first prototype, but will have to be included in the next iteration (a silly mistake on my part).
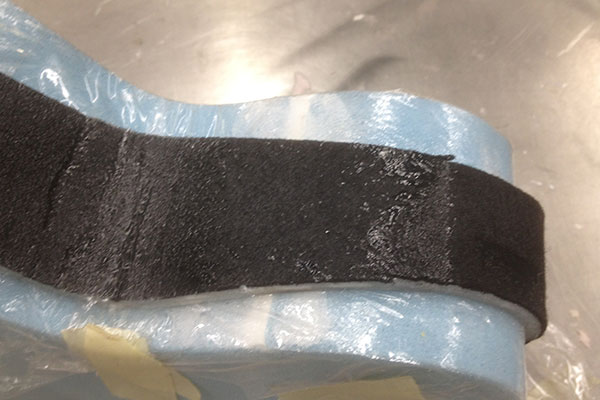
PRESSING THE SIDES
Now that I had both the autex cut to shape and the press, I could finally make the sides. I started by wrapping cling wrap around the press, which wasnt as simple as it seemed it would be. I had to cut slots to tape the cling wrap to the press in any inwards curves. After fiddling my way through that I then marked out a space on my mold to screw the autex to. I had made the autex side template longer than it needed to be on each side so that I had some room to play with.
I used a bath of hot water to soak the autex in, so it was pliable enough for the press. I also used a wrap around clamp to hold the press in tension. Getting the autex on the press was probably a three person job, but I had to make do with just the help I could find in the workshop. The result was that the sides could have been tighter on the press, but seemed to be ok. I will attempt the same process with resin now, hopefully it will be easier now that the autex has some of the curves in it already.
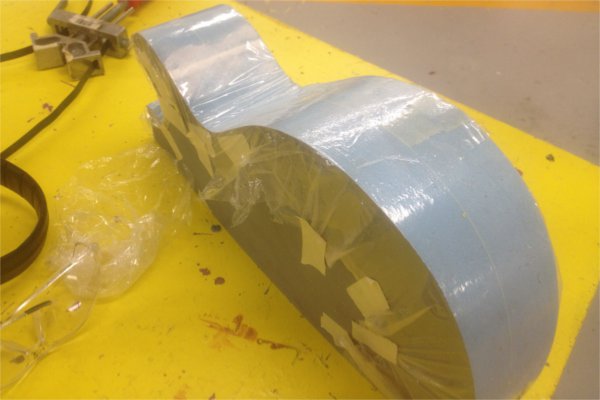
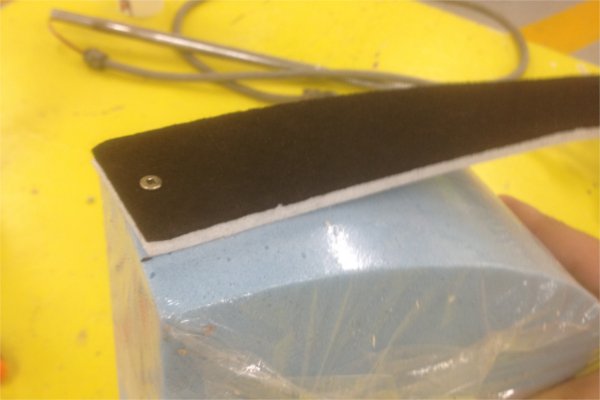
Applying resin to the autex sides was a huge process, even though I had the help of two other people. I will definately be changing the process of making the sides in further developments. After the resin dried the sides werent even that accurate in shape, and didnt come out with a nice finish at all.
The front and back worked alot better, and I cut them out with ease. Less easy was sanding back the excess glue on the faces showing. I tried to shortcut the process by using a power sander, but after sanding too far into the finish, I resigned myself to some good old fashioned hand sanding. I started with 150 grit (with some 100 grit as back up for the really built up parts) but then moved onto 180 grit and finally 240 grit. This took forever (as it usually does) but I eventually got the finish I wanted.
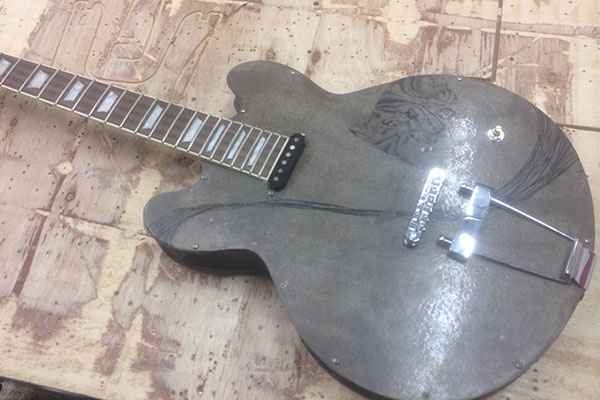
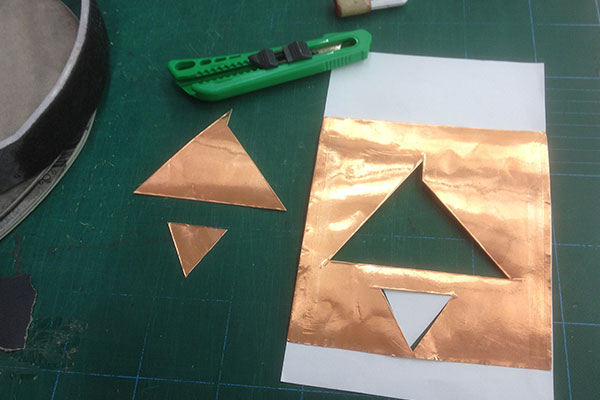
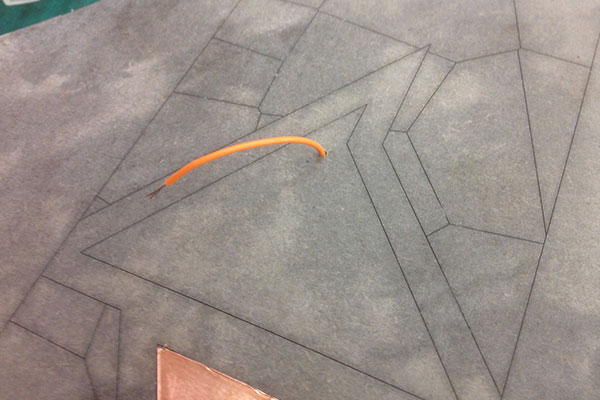
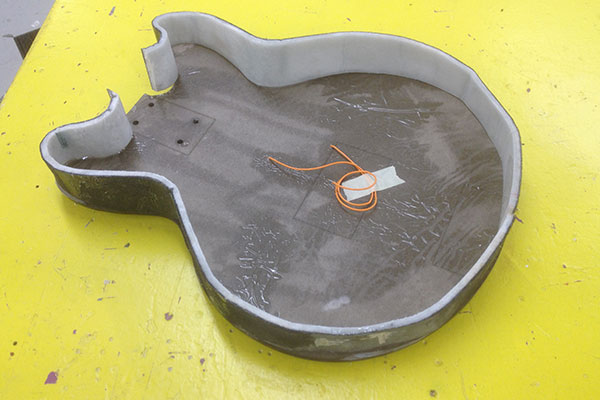
I used the vinyl cutter to cut out the capacitive touch sensor to match the logo on the back of the guitar, I had to stick paper to the back of the copper so that the viny cutter would use the entirety of the copper. This worked out well and the copper cut beautifully.
I drilled two small holes in the back of the guitar and poked wires through, attaching them to the copper. I then finished the showing faces of the card front and back. I normally would have used pre catylised laqquer, of which I had alot left over from another guitar project. However I needed to spray it on and I didnt have the right type of spray gun, so i decided to use the same bioresin to finish it. I used a brush to apply the resin and it worked relatively well.
When it dried it was apparent that I needed another couple of coats to give it a proper finish, however I was out of time, so I just opted to keep it as it was.
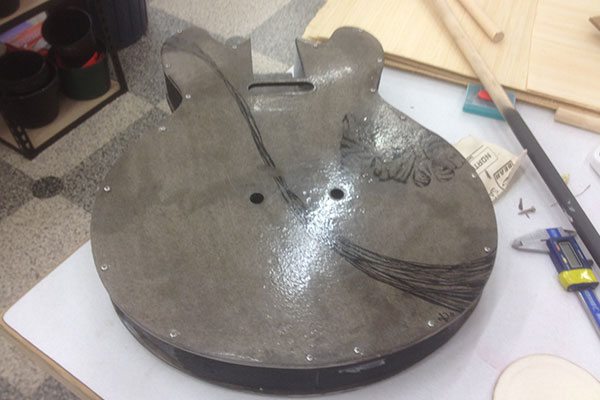
Attaching the sides to the top and bottom was not a precise procedure. Because I couldnt garuntee the shape of the sides, I couldnt laser cut pilot holes with the cardboard. This meant I had to drill and screw the sides by eye, something I generally hate to do. I did a half decent job with just a few errors.
After it was done it was apparent the screws did not make the guitar look nice, much too industrial for my taste. I will have to change this for the next iteration.
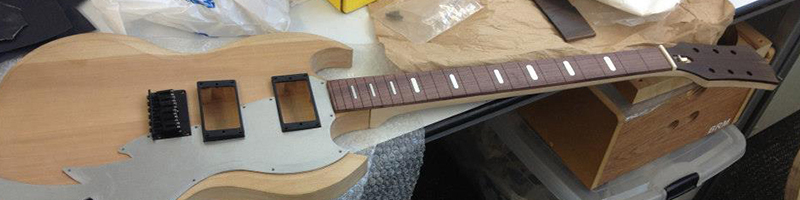
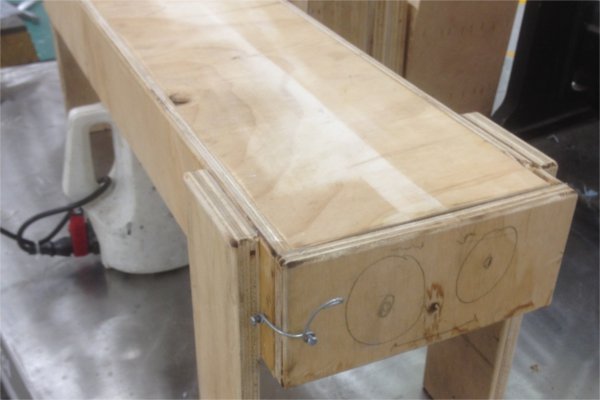
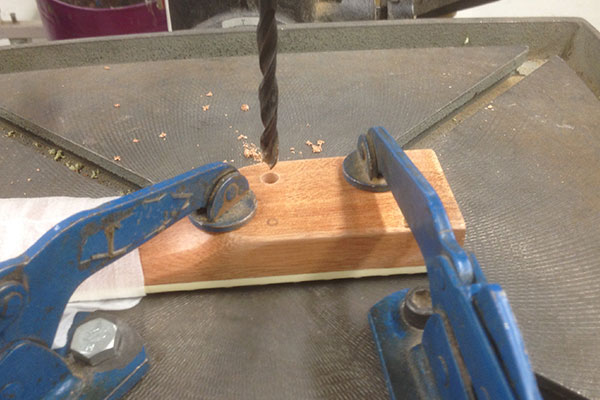
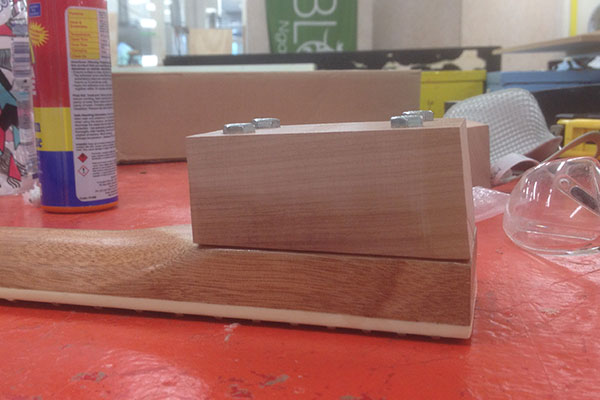
The two final things I had to do to get it finished were to create and insert the blocks, as well as all the componentr, as well as finishing off the electronics.
After a good day in the workshop, I was able to create the 3 center blocks using a combination of a bandsaw, electronic mill, drill press and belt sander. I made them out of some red Beech timber kindly donated by Wendy. I glued in the blocks to the assigned places with more of the bio resin, which worked really well. I was off to a good start.
I then used the drill press to insert the self tapping nuts into my guitar neck. I made sure to put the nuts in on an angle so that the bolts would be held straight. Unfortunately once the neck was bolted in plae I realised it was set too low and at too little of an angle. This was because I didnt account for the curves of both front and back of the guitar ( in rhino I only based the angle off the front). This meant I would have to use a shim, which I did. Although it doesnt look pretty, It will have to do for the time being.
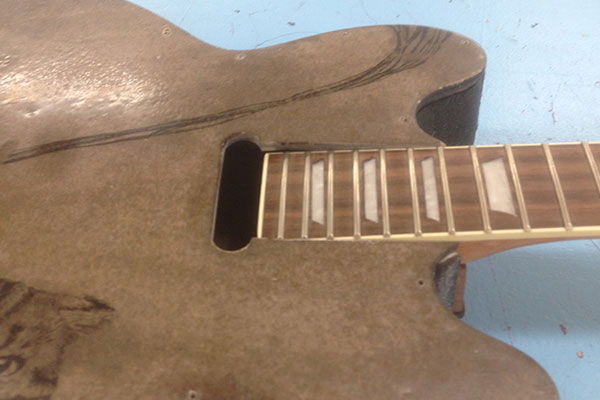
I also had to make adjustments to the front in order to get the neck to fit into the slot, which was easy to do with the bandsaw and a file. At last everything was fitting. It was a simple matter to drill a few holes to place the bridge and tailpiece on the body.
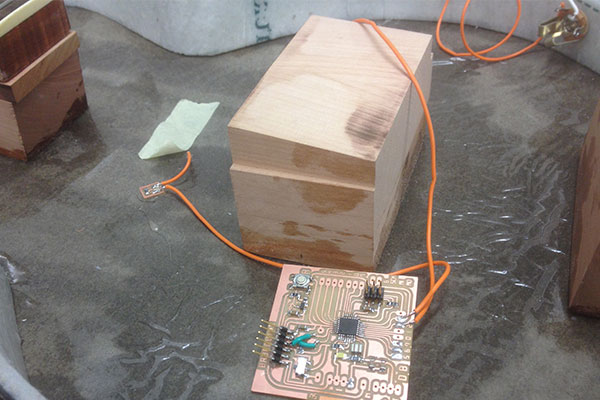
The electronics were a different matter. I quickly created some breakout boards for the capacitive touch sensor resistor and LEDs. Making the LEDs work was a simple matter of attaching them to the right pins of my Babeduino and using a pulse width modulation to fade the two LEDS. I decided to mount them behind the eyes of the cat picute with hot glue. This turned out to be quite effective.
The capacitive touch sensor was another matter. I repeated exactly what I did with my previous capacitive touch sensor and got a serial print out of -2, which consulting with the reference material, means that there was a time out issue. I tried the following:
- made sure the copper was connected to the cords by using a multimeter. This told me the copper and cords were all attached nicely.
- Swapped out the resistor, and made sure the breakout board was working fine. It was hard to tell as the multimeter wouldnt retern a value with resistors higher than 1 M ohm.
- Checked the connection to my Babeduino. This was all working well.
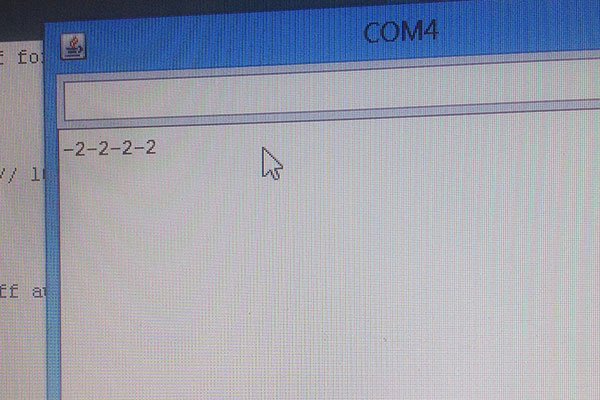
I then talked to Craig, who then suggested I turn the send and recieve pins to input or outputs respectively and send a voltage. I would then swap the pins around and see whether the same would work. Confusingly to everyone helping out, the signal would work in one direction but not the other. Even though there was no polarity specific component on the circuit! At this point I decided to move on. If I have time later I will have another look at it.