Papierion3D: Paper machine
One meter of cardboard
and what we can do with it..
The volume was always important for me in my art.
The futures that i discovered on Fab Academy is inspired me to create very helpful tool for digital artist and people that works with 3D software.
Why cardboard?
We passed great experience of working with allot of different materials and techniques, and how not weird, I discovered amazing material, that was always in-front of my nose, it's super-cheap, very light, and can be pretty strong in case of using right technology for it.
So, comparing to previous** projects that i have done in
in search of good solution for my final projects
- this one is definitely winner.
Very fast, available for everyone to do it at home for just for one hour..
**To take look on first versions
So, all what you need is :
**1)Phone with camera**
**2)micro-controller**
3) 5v Stepper motor
**4)Headphones with
digital volume control**
**5)Relay**
**6) Any empty box from refrigerate or washing machine or even microwave , if you got no special cardboard around **
Depending from the
thickness of surfaces -
you might be need more or less similar components.
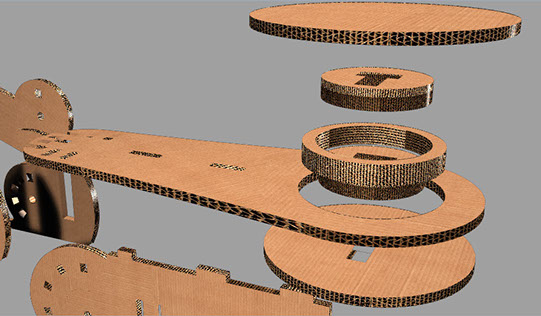
In this example I use 5mm cardboard in two layers
but it can be easily replaced by 3mm in 3 layers.
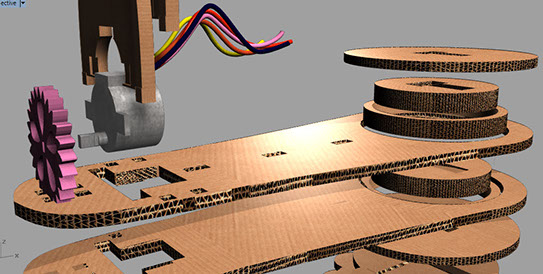
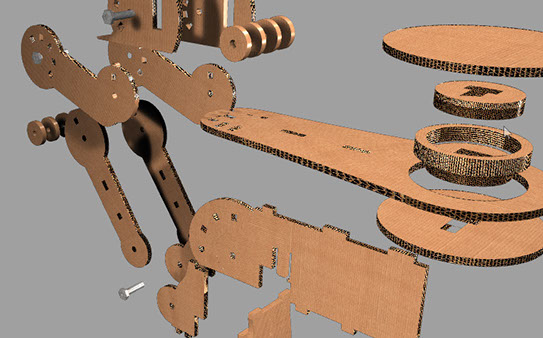
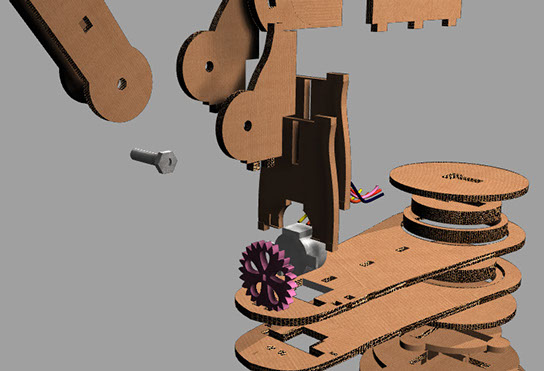
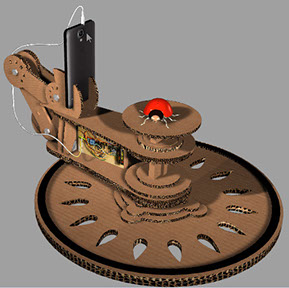
I can recommend - to build a first bottom part of the Papierion 3D till the motor like on the picture ->
and check if the surfaces has no tilt - that's the guarantee that your camera will rotate without interference.
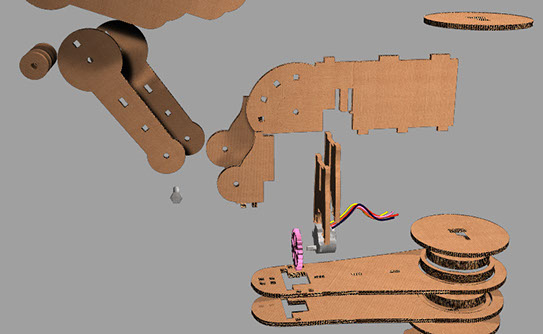
For calibration just take out one stair from the way of motor
or from the main stage
In order to avoid slip
of the wheel,
glue a line of soft fabric
on the trace.
Here is simple sketch, i found in internet and modified it.
Small Stepper Motor and Driver V1.3 11/30/2013
http://arduino-direct.com/sunshop/index.php?l=product_detail&p=126
Shows 4-step sequence, Then 1/2 turn and back different speeds
terry@yourduino.com */
/*-----( Import needed libraries )-----*/
#include <Stepper.h>
/*-----( Declare Constants, Pin Numbers )-----*/
//---( Number of steps per revolution of INTERNAL motor in 4-step mode )---
#define STEPS_PER_MOTOR 32
//---( Steps per OUTPUT SHAFT of gear reduction )---
#define STEPS_PER_OUTPUT 38 * 32 //2048
/*-----( Declare objects )-----*/
// create an instance of the stepper class, specifying
// the number of steps of the motor and the pins it's
// attached to
//The pin connections need to be 4 pins connected
// to Motor Driver In1, In2, In3, In4 and then the pins entered
// here in the sequence 1-3-2-4 for proper sequencing
Stepper small_stepper(STEPS_PER_MOTOR, 8, 10, 9, 11);
/*-----( Declare Variables )-----*/
int Steps2Take;
int Relay = 7;
int stateRelay = HIGH;
int on = 1;
void setup() /*----( SETUP: RUNS ONCE )----*/
{
pinMode(Relay, OUTPUT);
}
void loop() /*----( LOOP: RUNS CONSTANTLY )----*/
{
if (on == 1)
{
for (int i = 0; i <25; i++)
{
digitalWrite(Relay, LOW); // Turns ON Relays 1
Serial.println("Light ON");
delay(700); // Wait 0.7 seconds
digitalWrite(Relay, HIGH); // Turns Relay Off
Serial.println("Light OFF");
delay(700);
Steps2Take = STEPS_PER_OUTPUT / 2; // Rotate CW 1/2 turn
small_stepper.setSpeed(900);
small_stepper.step(Steps2Take);
delay(500);
}
}
on = 0;
}/* --(end main loop )-- */
/* ( THE END ) */