- Logged in as: fablabtaipei (fablabtaipei)
- Recent changes
- Media Manager
- Sitemap
- Admin
- User page
- Update Profile
- Logout
User Tools
- Logged in as: fablabtaipei (fablabtaipei)
- Admin
- User page
- Update Profile
- Logout
Site Tools
Table of Contents
electronics production
Goal
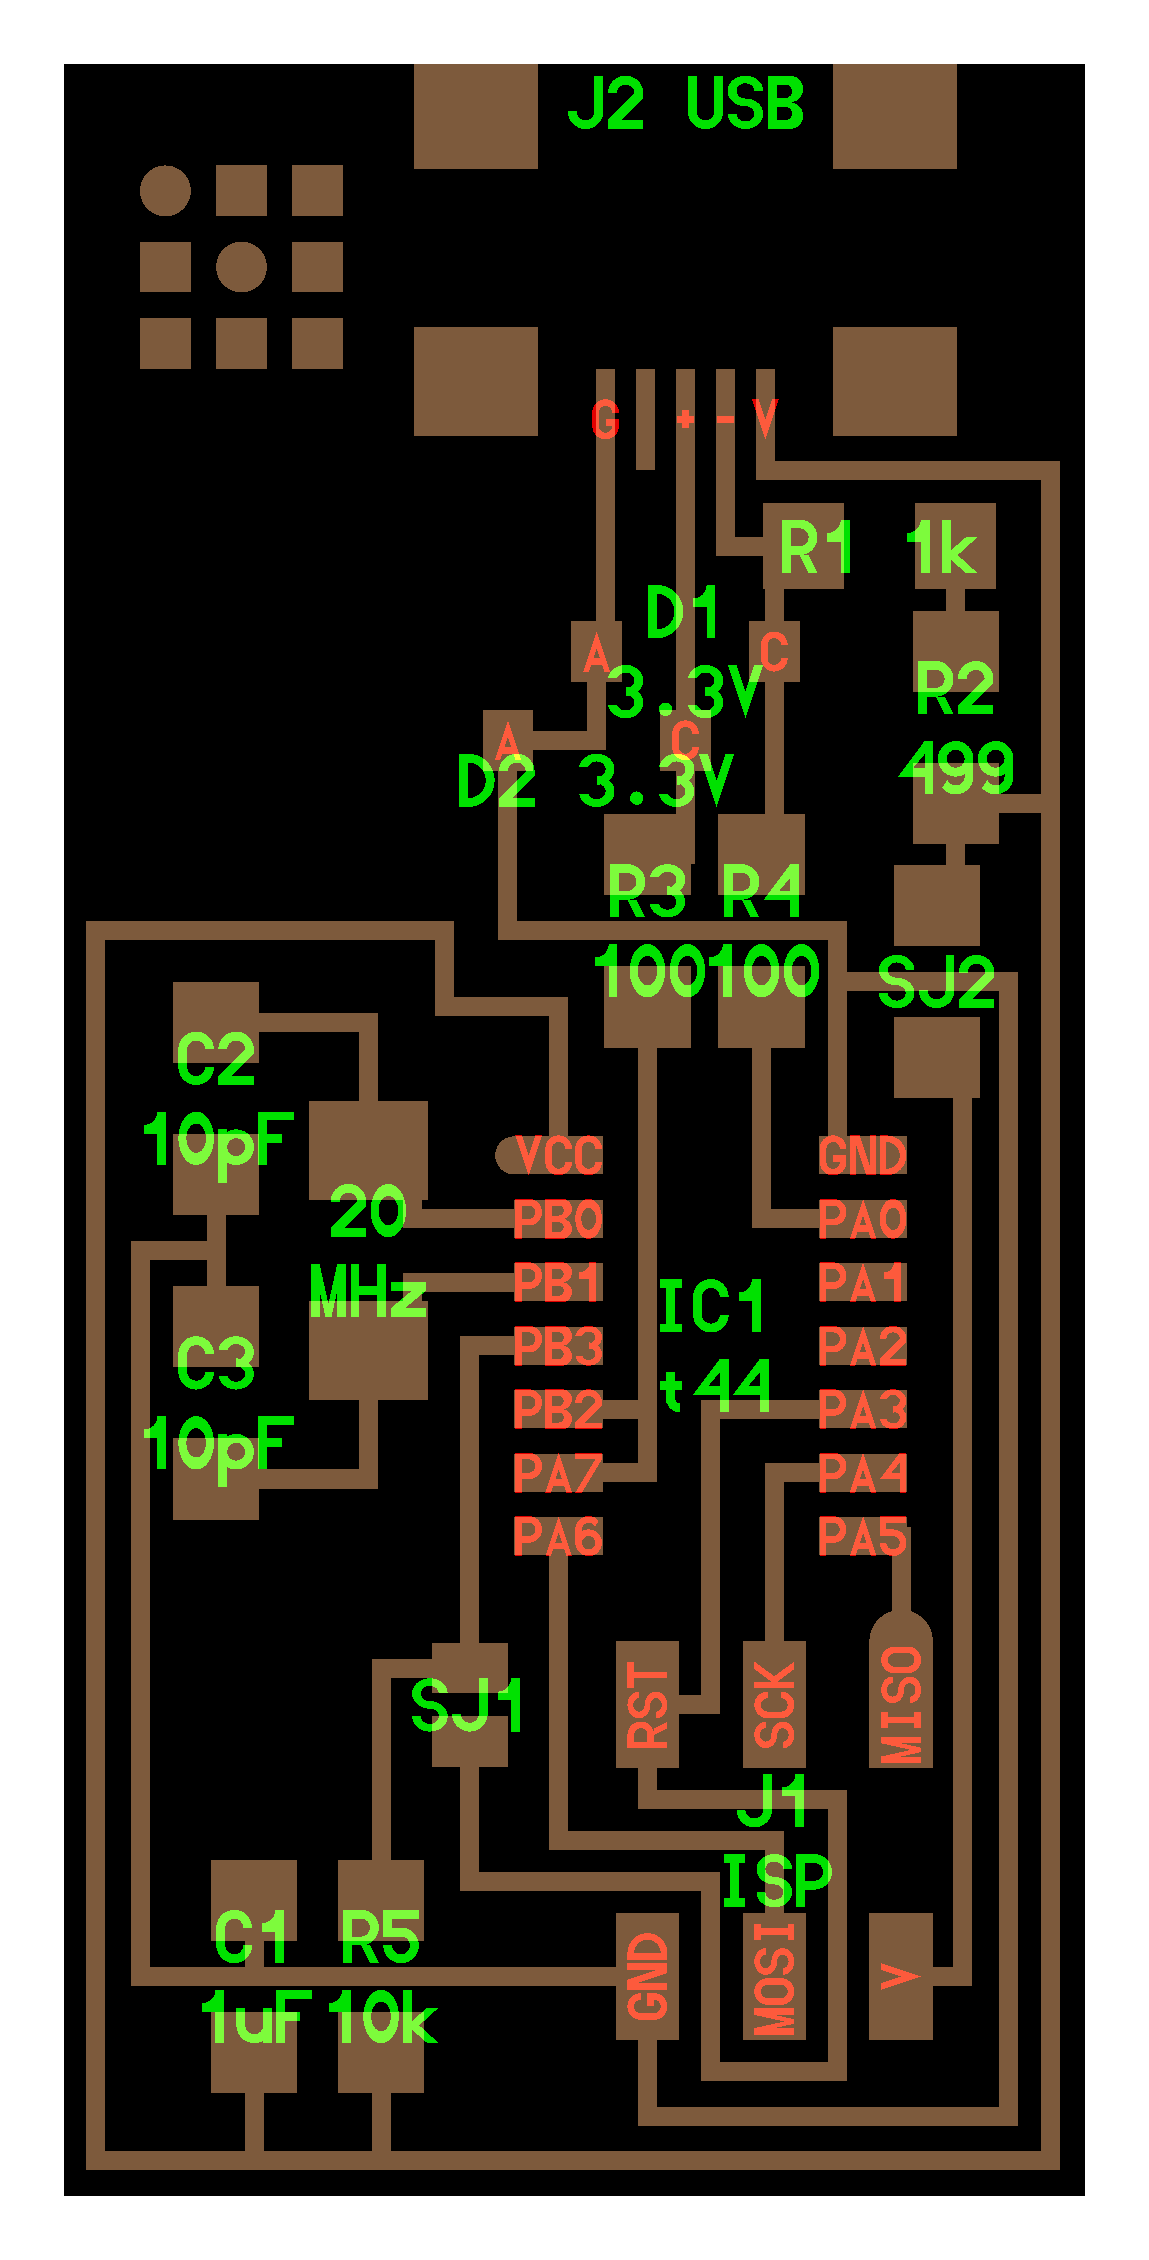
make the FabISP in-circuit programmer
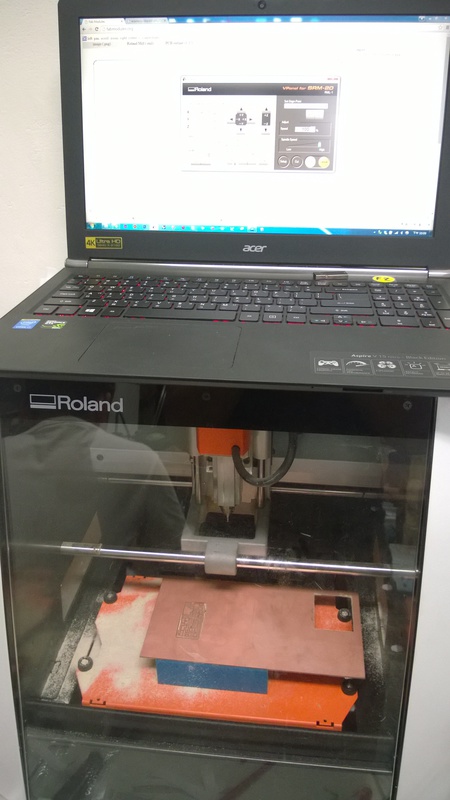
Cutting
It was my first time making electronics and every detail was new to me. Therefore I wrote down every step here:
Put the copper board and fix it by tape or screws.
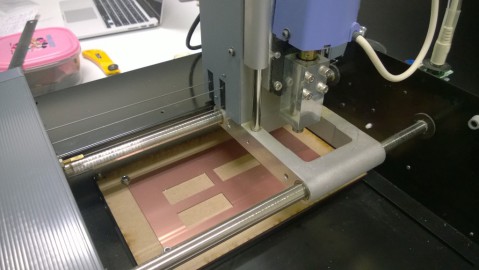
Open the box containing a fragile blade.
Adjust the blade just touches the surface by hand.

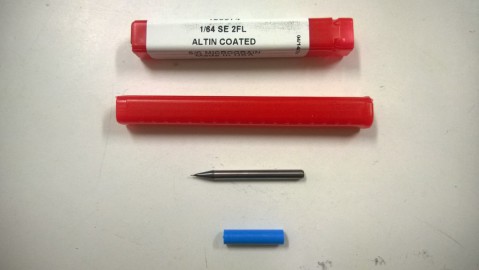
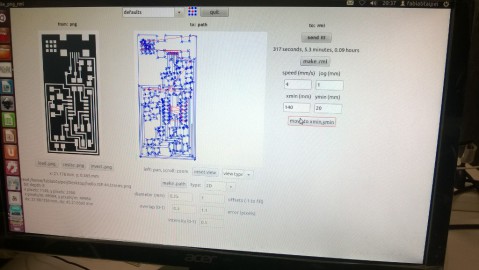
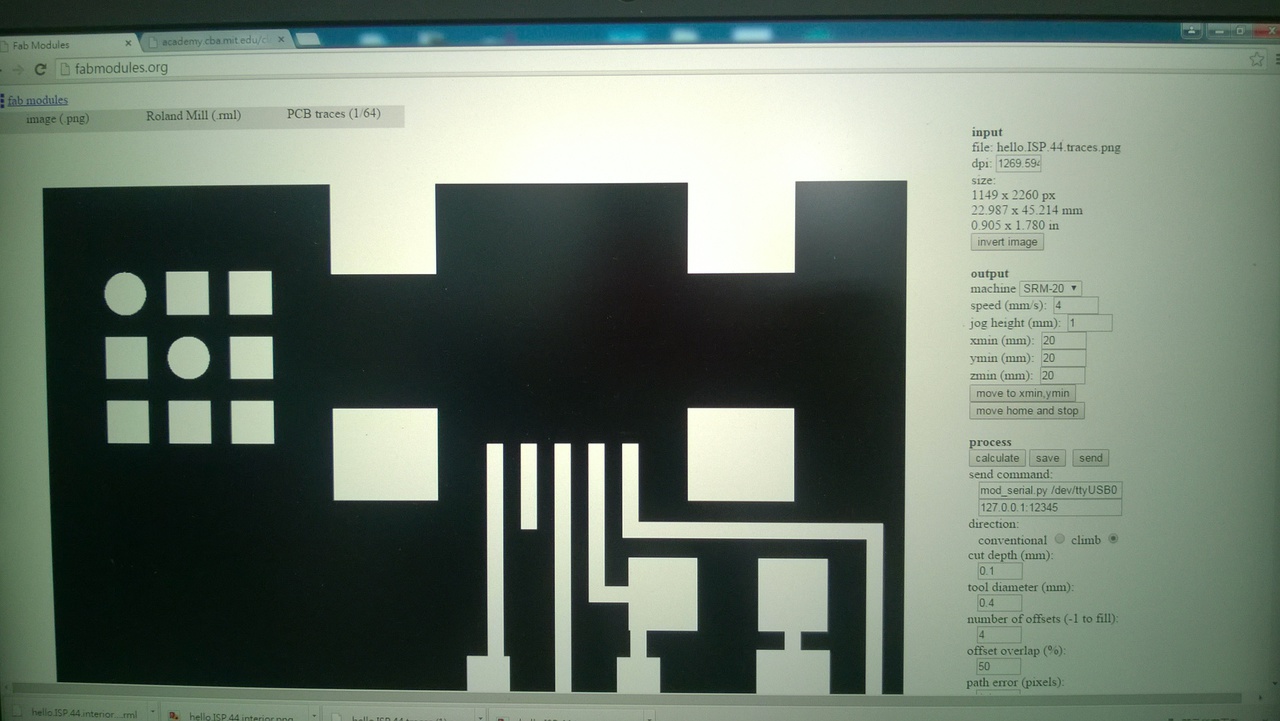
I use Fab Module to control cutting machine. Configure it with appropriate positions. Choose your blade type for cutting parameters. In my case, it works with the default settings for 1/64 mm blade.
1/32 blade to cut out board.
In my first attempt, it fails to cut the board when the material under the board is too soft.
{ :ifeng:wp_20150215_005-1.jpg?400&nolink |}}
And in another trial I put the blade in a lower Position and therefore the blade shakes when cutting.
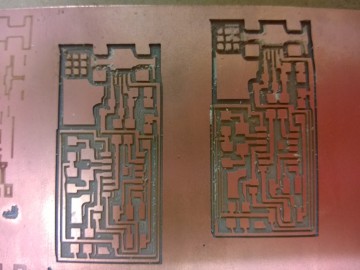
After many failures, I obtain a perfect result.
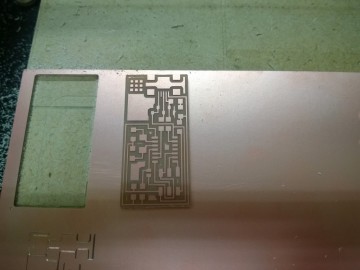
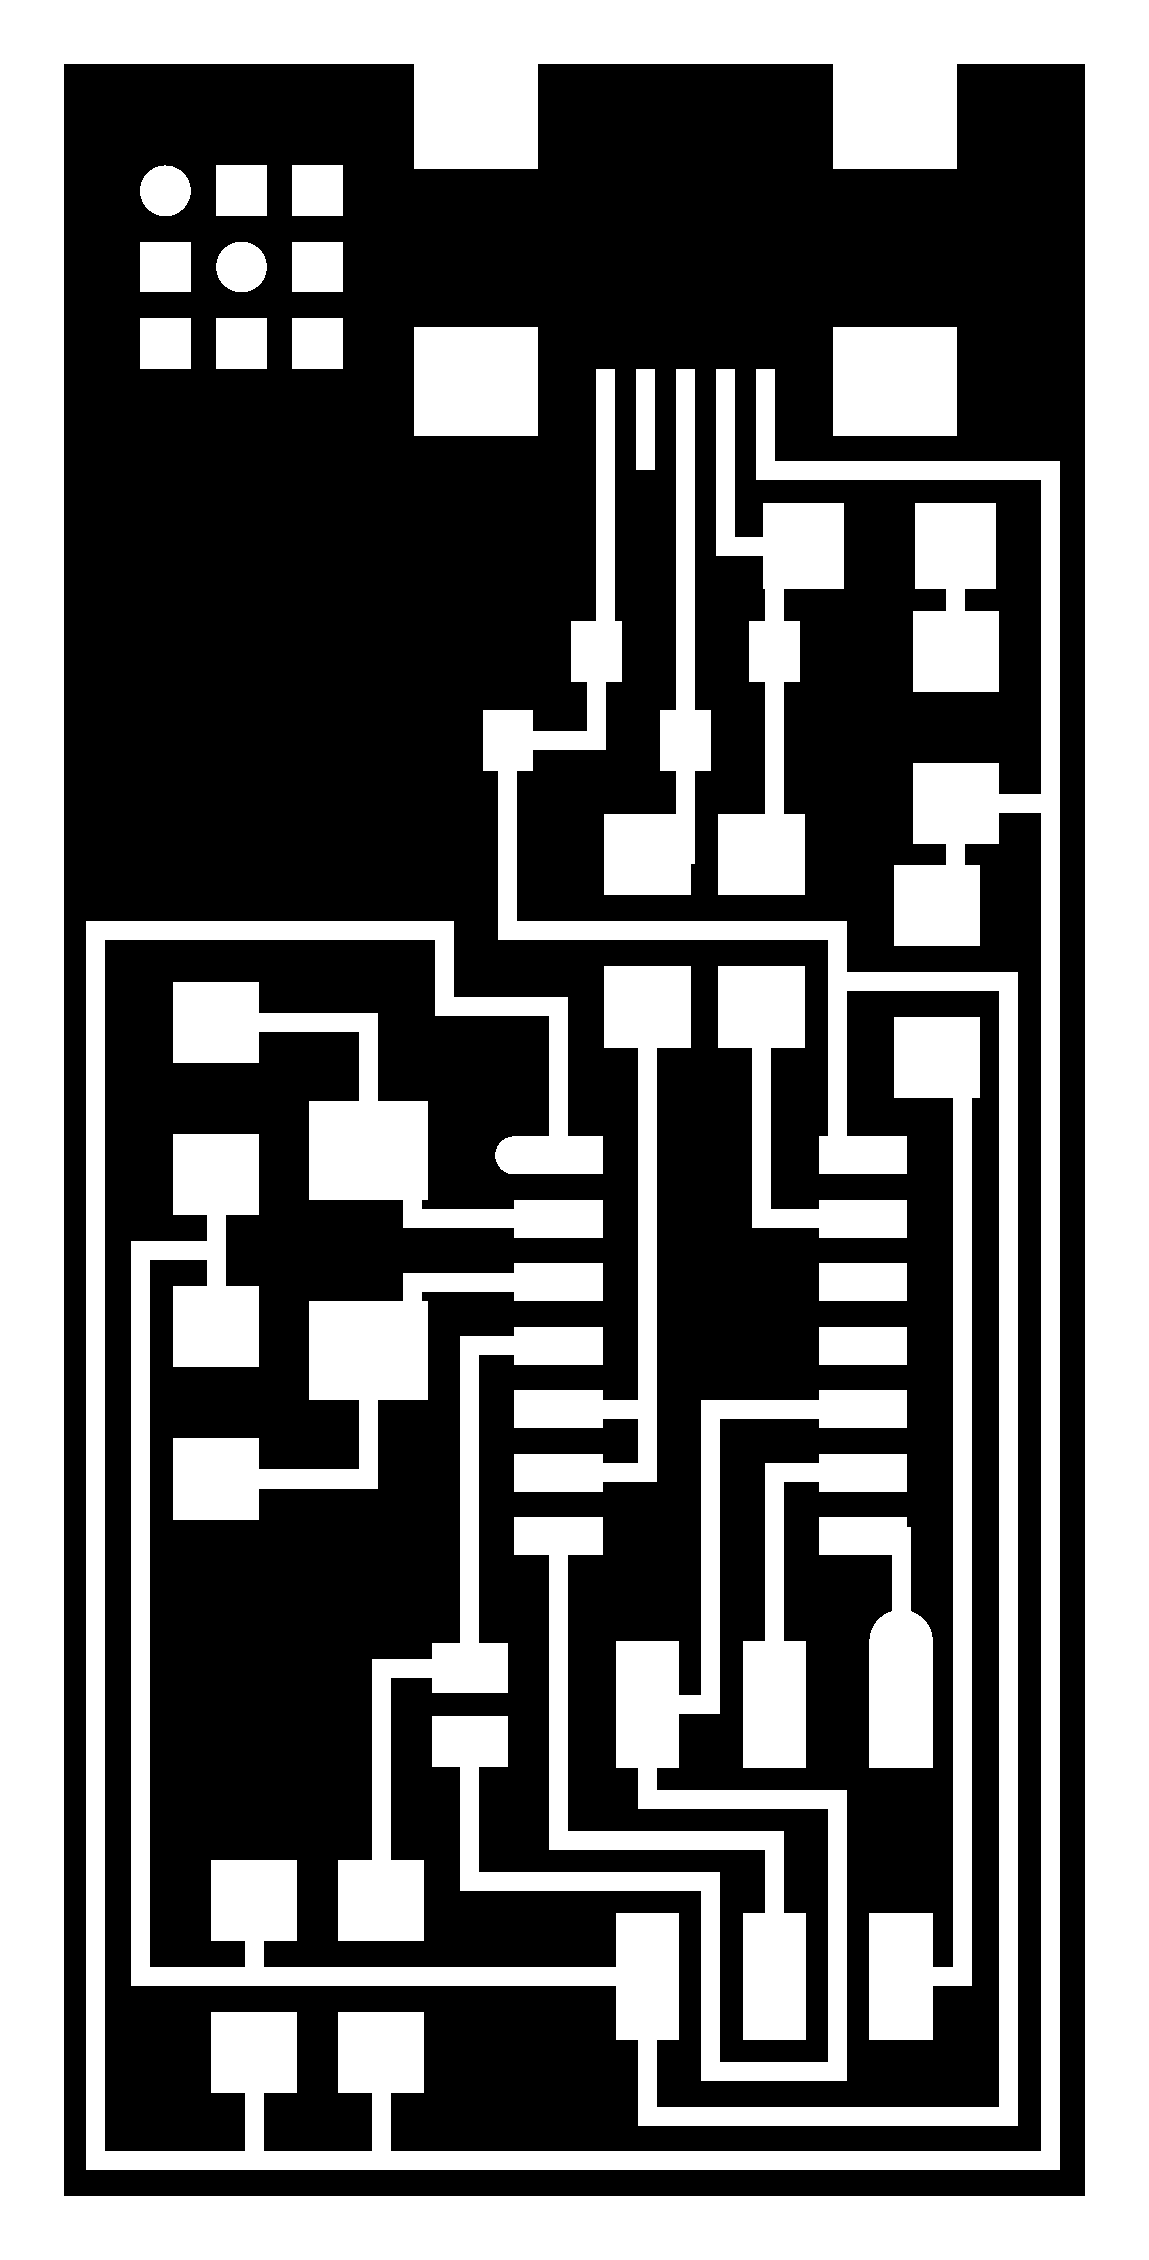
You may download the files: week4_hello.isp.44.traces.png, week4_hello.isp.44.interior.png
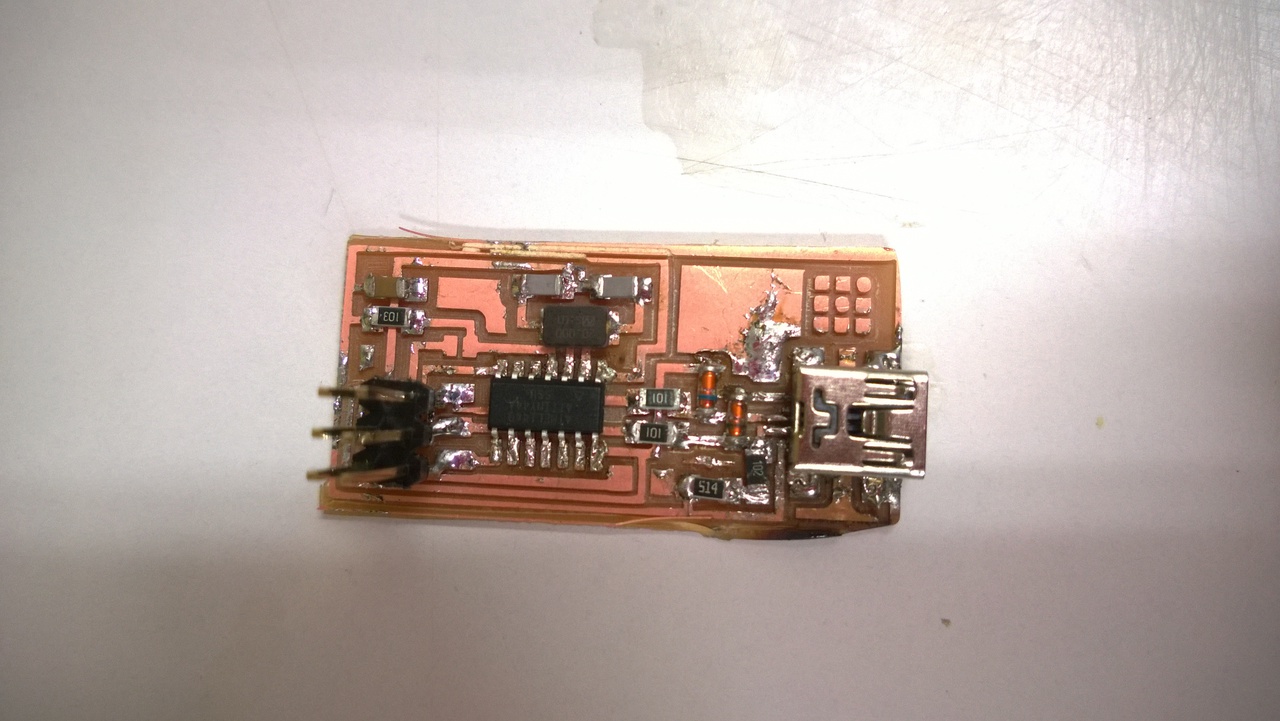
Soldering
I am very clumsy in soldering and I am far from satisfied with my result. Nonetheless I received many tips from the sophisticated and they are:
- Use tape to fix copper board on the table.
- Use sucker to get rid of messy tin
- One technique is to put the element on the copper board and then solder it. The other is to put tin on every pin of the element and then solder onto the board; I prefer this one.
Nonetheless this board was not successful because many usb pins were not well attached to board. Hence I started another one.
Fail-Over
Cutting
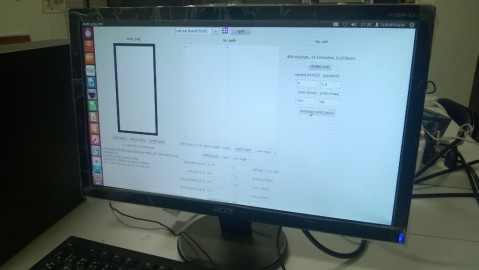
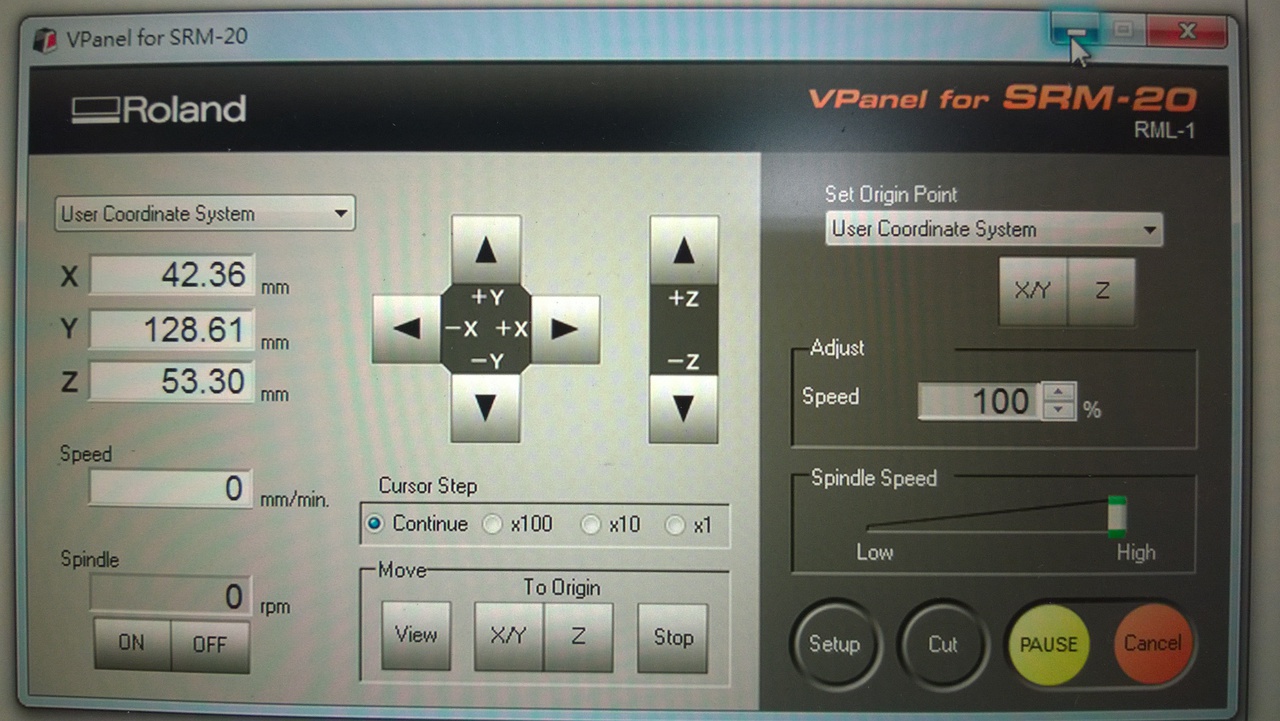
After the first failure, I cut another board with Roland SRM-20. This is a model newer than MDX-20. It is much quieter and less vibrating during cutting. This time I used fabmodules.org to export .rml file. Fabmodules supported SRM-20 so I selected PCB Process (1/64) and 'SRM-20' in output machine for appropriate parameters. Then I used V-Panel for SRM-20 to control the machine. I used the default speed 100% the traces looked really fine. However, when cutting off the board, the speed seemed a little too fast and the board vibrated too server and I had to stop it and cutting down by hand.
Soldering and Programming
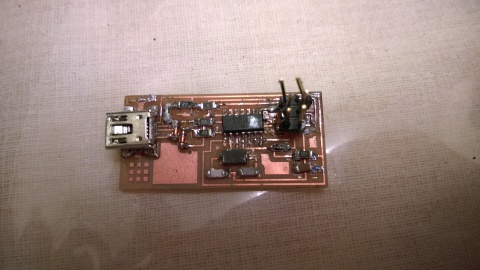
Then I soldered my new board:
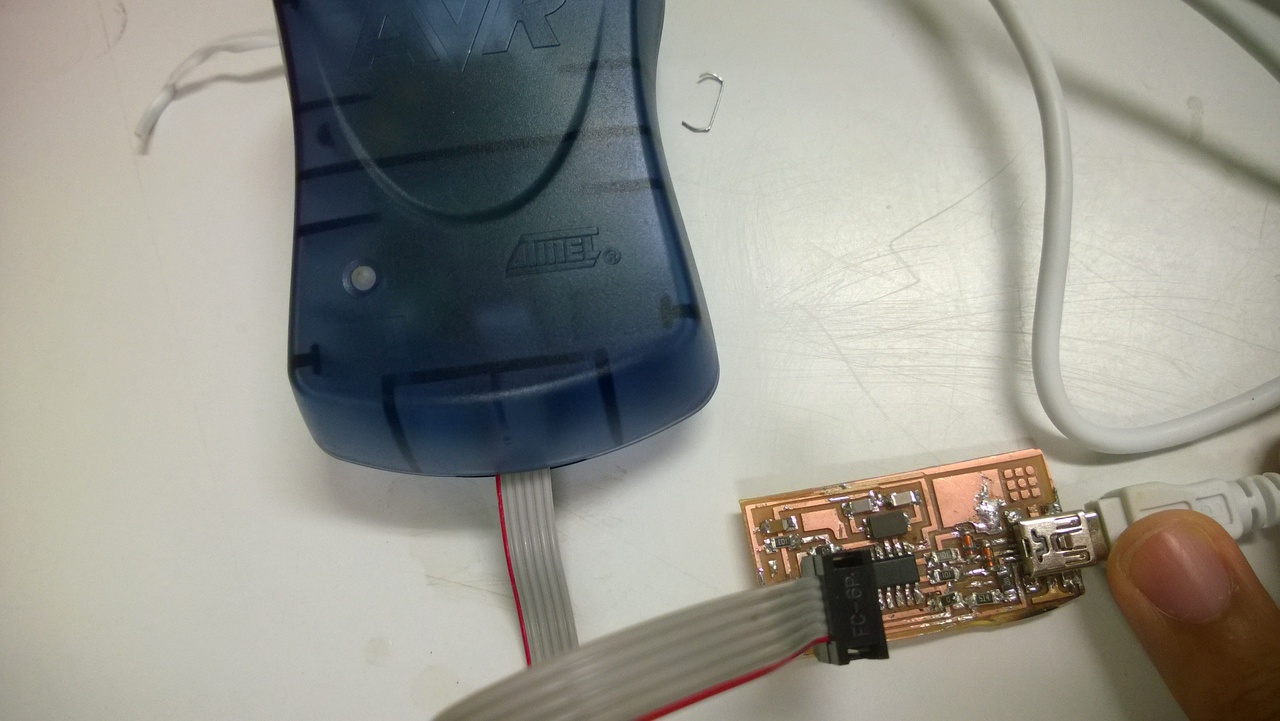
 I used AVRISP-2 for programming. I installed Crosspack AVR and Xcode on MacBook and downloaded FabISP firmware. When the software is ready, I connected AVRISP-2 and my FabISP board, both powered by USB.
 Then do the following:
#make clean
rm -f main.hex main.lst main.obj main.cof main.list main.map main.eep.hex main.elf *.o usbdrv/*.o main.s usbdrv/oddebug.s usbdrv/usbdrv.s
#make hex
avr-gcc -Wall -Os -DF_CPU=20000000	 -Iusbdrv -I. -DDEBUG_LEVEL=0 -mmcu=attiny44 -c usbdrv/usbdrv.c -o usbdrv/usbdrv.o
avr-gcc -Wall -Os -DF_CPU=20000000	 -Iusbdrv -I. -DDEBUG_LEVEL=0 -mmcu=attiny44 -x assembler-with-cpp -c usbdrv/usbdrvasm.S -o usbdrv/usbdrvasm.o
avr-gcc -Wall -Os -DF_CPU=20000000	 -Iusbdrv -I. -DDEBUG_LEVEL=0 -mmcu=attiny44 -c usbdrv/oddebug.c -o usbdrv/oddebug.o
avr-gcc -Wall -Os -DF_CPU=20000000	 -Iusbdrv -I. -DDEBUG_LEVEL=0 -mmcu=attiny44 -c main.c -o main.o
main.c:88:13: warning: always_inline function might not be inlinable [-Wattributes]
 static void delay ( void )
             ^
avr-gcc -Wall -Os -DF_CPU=20000000	 -Iusbdrv -I. -DDEBUG_LEVEL=0 -mmcu=attiny44 -o main.elf usbdrv/usbdrv.o usbdrv/usbdrvasm.o usbdrv/oddebug.o main.o
rm -f main.hex main.eep.hex
avr-objcopy -j .text -j .data -O ihex main.elf main.hex
avr-size main.hex
   text	   data	    bss	    dec	    hex	filename
      0	   2002	      0	   2002	    7d2	main.hex
There is a warning message but should not be a problem.
avrdude -c stk500v1 -b19200 -P /dev/tty.usbmodem1451 -p attiny44 -U hfuse:w:0xDF:m -U lfuse:w:0xFF:m

avrdude: AVR device initialized and ready to accept instructions

Reading | ################################################## | 100% 0.05s

avrdude: Device signature = 0x0000ff
avrdude: Expected signature for ATtiny44 is 1E 92 07
         Double check chip, or use -F to override this check.

avrdude done.  Thank you.

make: *** [fuse] Error 1
This was where I failed so I started debugging my board.
Debuging
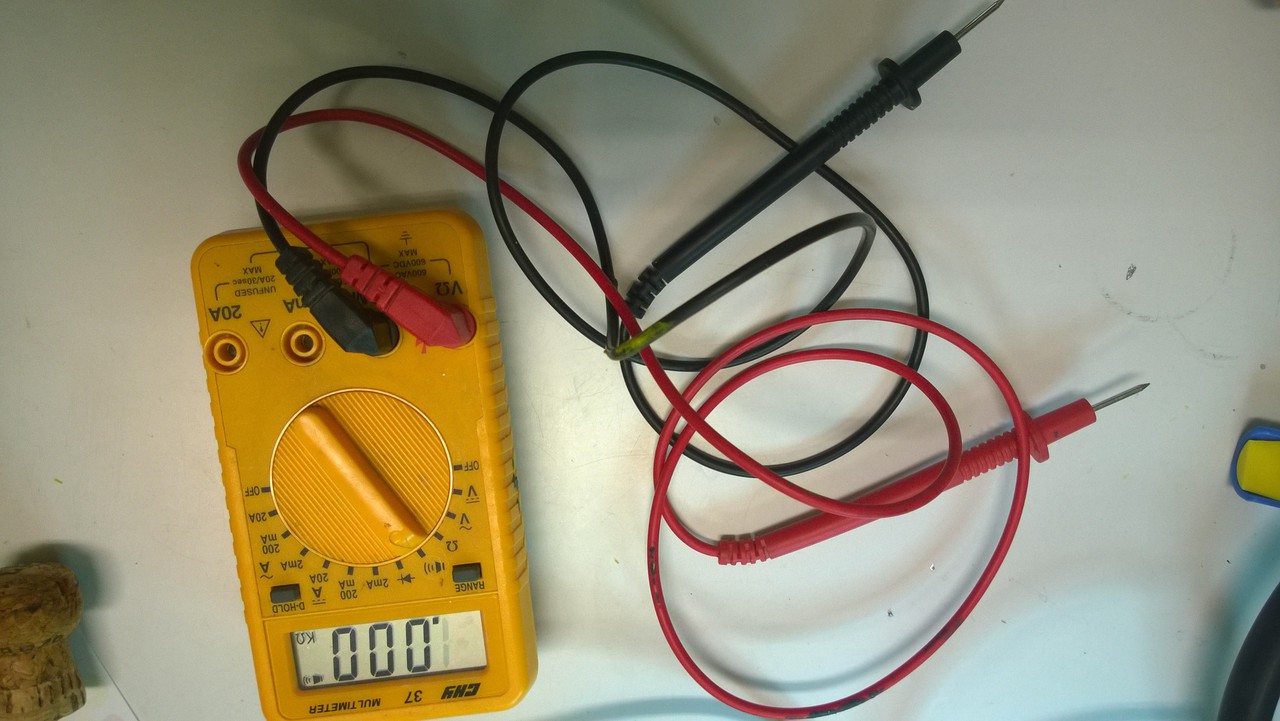
I used multimeter for debugging. I checked that the six output pins and the other components did not make any short-circuits. Nonetheless these efforts are in vain. I also replaced the Attiny44 with a new one.
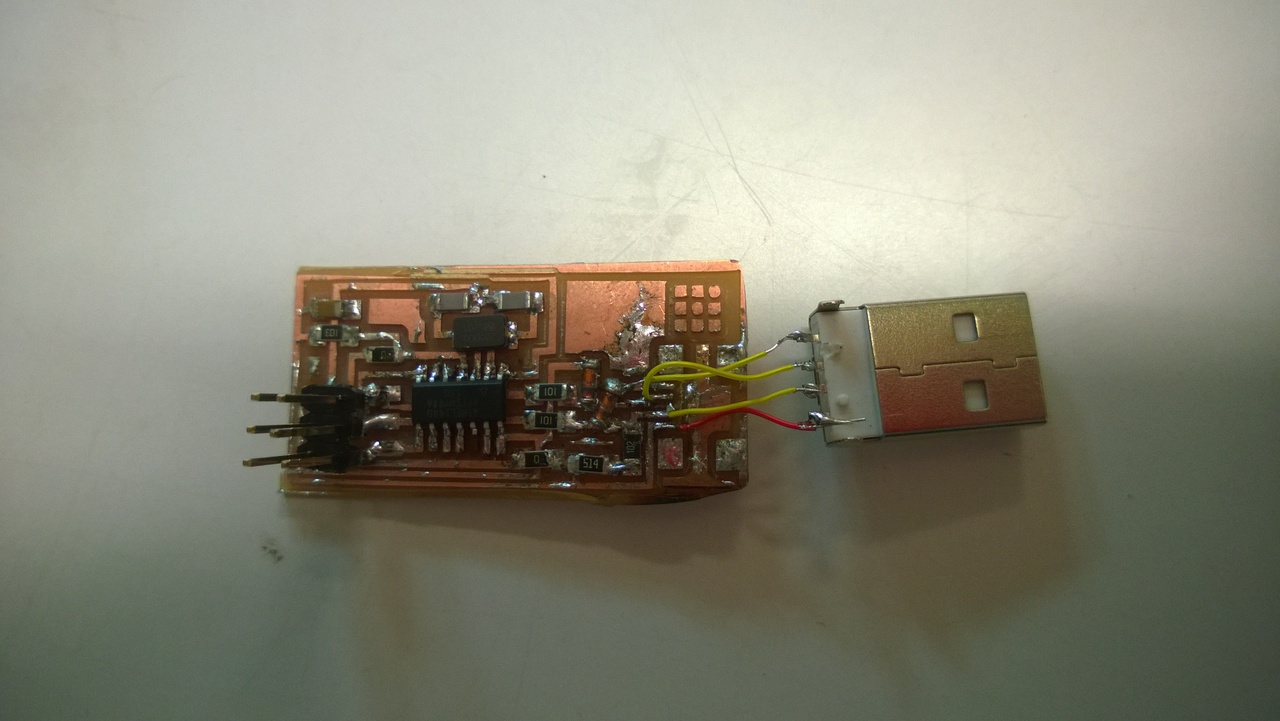
 However it was really difficult to check the mini-USB pins. To isolate the issue, I used a type-A USB and soldered them with jumpers. That looked funny but much testable.
 Then I tried again:
#make fuse
avrdude -c stk500v1 -b19200 -P /dev/tty.usbmodem1451 -p attiny44 -U hfuse:w:0xDF:m -U lfuse:w:0xFF:m

avrdude: AVR device initialized and ready to accept instructions

Reading | ################################################## | 100% 0.05s

avrdude: Device signature = 0x000000 (retrying)

Reading | ################################################## | 100% 0.05s

avrdude: Device signature = 0x000000 (retrying)

Reading | ################################################## | 100% 0.05s

avrdude: Device signature = 0x000000
avrdude: Yikes!  Invalid device signature.
         Double check connections and try again, or use -F to override
         this check.


avrdude done.  Thank you.

make: *** [fuse] Error 1
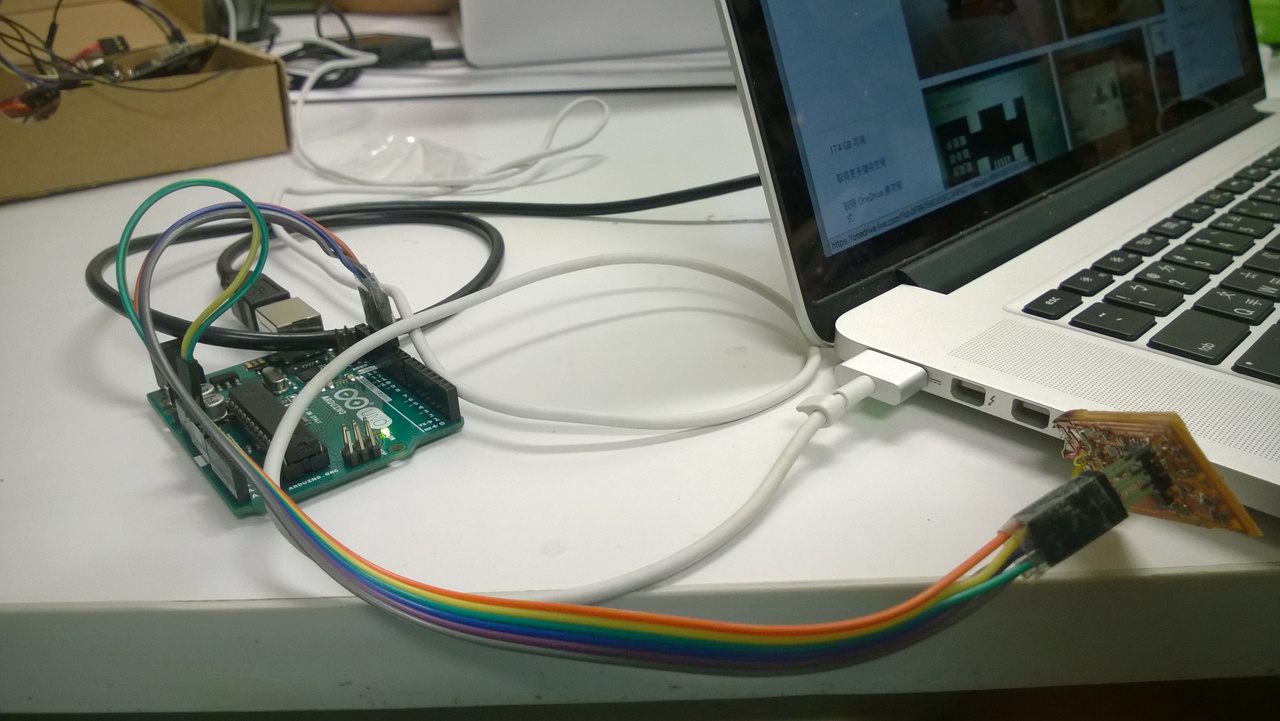
 In fear of issues it was a issue with AVRISP2, I also tried Arduino Uno as ISP. I followed Arduino board as Attiny ISP programmer, downloaded Arduino software and opened Example - Arduino ISP. I plugged in 6 pins on Arduino and on FabISP with reference to the instruction in the code:
// pin name:    not-mega:         mega(1280 and 2560)
// slave reset: 10:               53
// MOSI:        11:               51
// MISO:        12:               50
// SCK:         13:               52
 Then I stilled got wrong messages. Unfortunately I was not able to make my FabISP work.