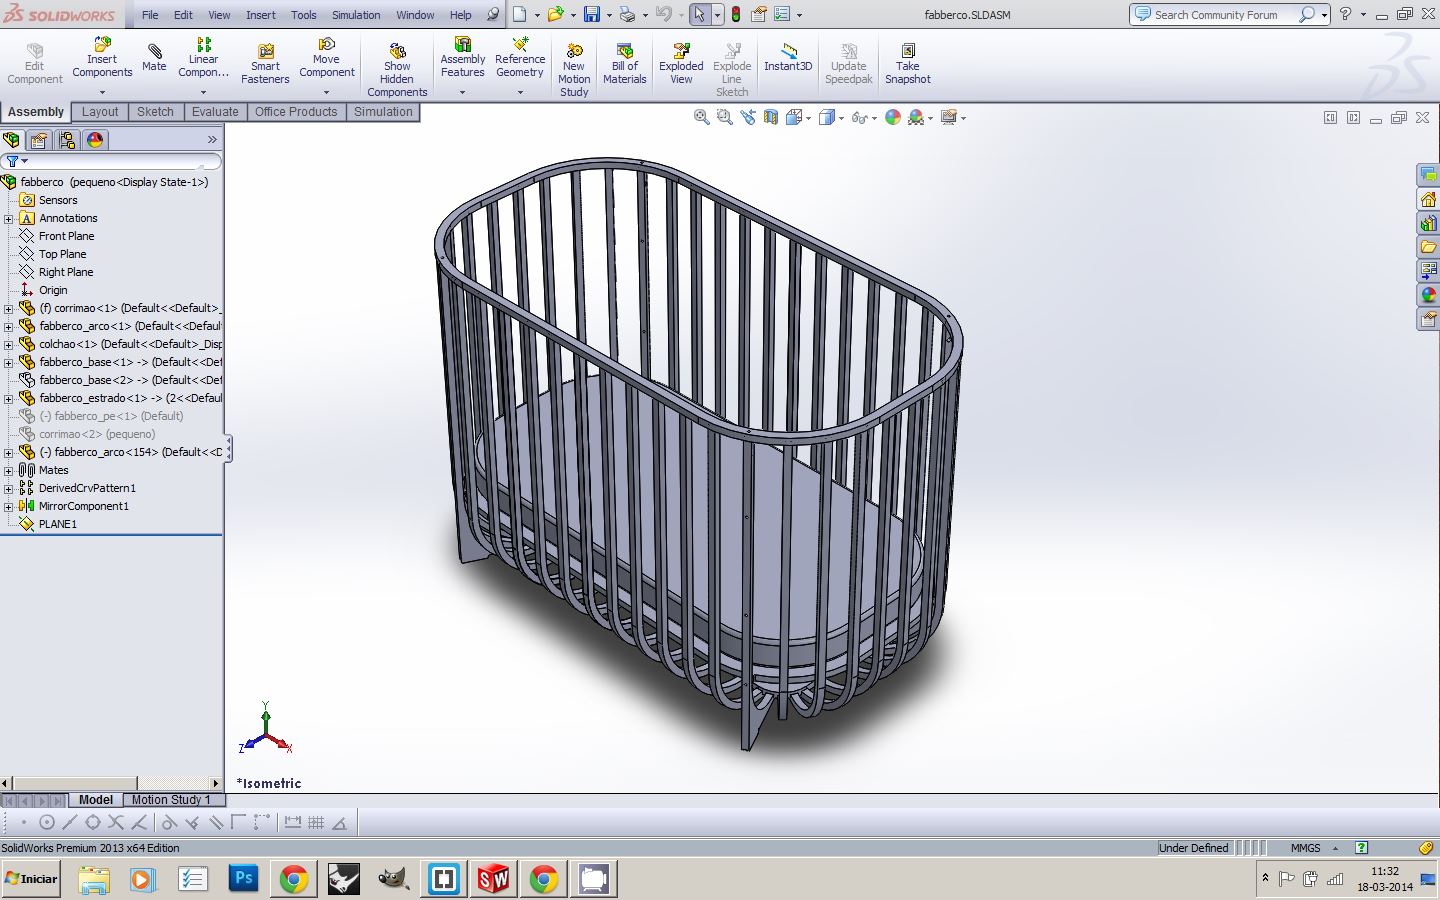
On this exciting week assignment we had the quest to make someting "big" that could be produced by computer-controlled cutting machines. First of all, im soon to be a dad of a little boy for the first time, and after looking for baby furniture models (all looked more like "painted prison boxes" to me...) and prices displayed on dedicaded stores I decided to design and produce myself a custom made baby crib!
Knowing that time was precious this week more that ever I started right away to model my idea on SolidWorks with all the parts needed.
NOTE: before modeling always confirm your chosen material sizes, thickness and avaliability so you can then start modeling after accordingly. As a bad example I model all parts to a specified thickness only knowing later that raw materials warehouse did not have my desired reference in stock. Thanks to SW parametrical and tree history features I then could adapt all parts to the new board thickness dimensions.
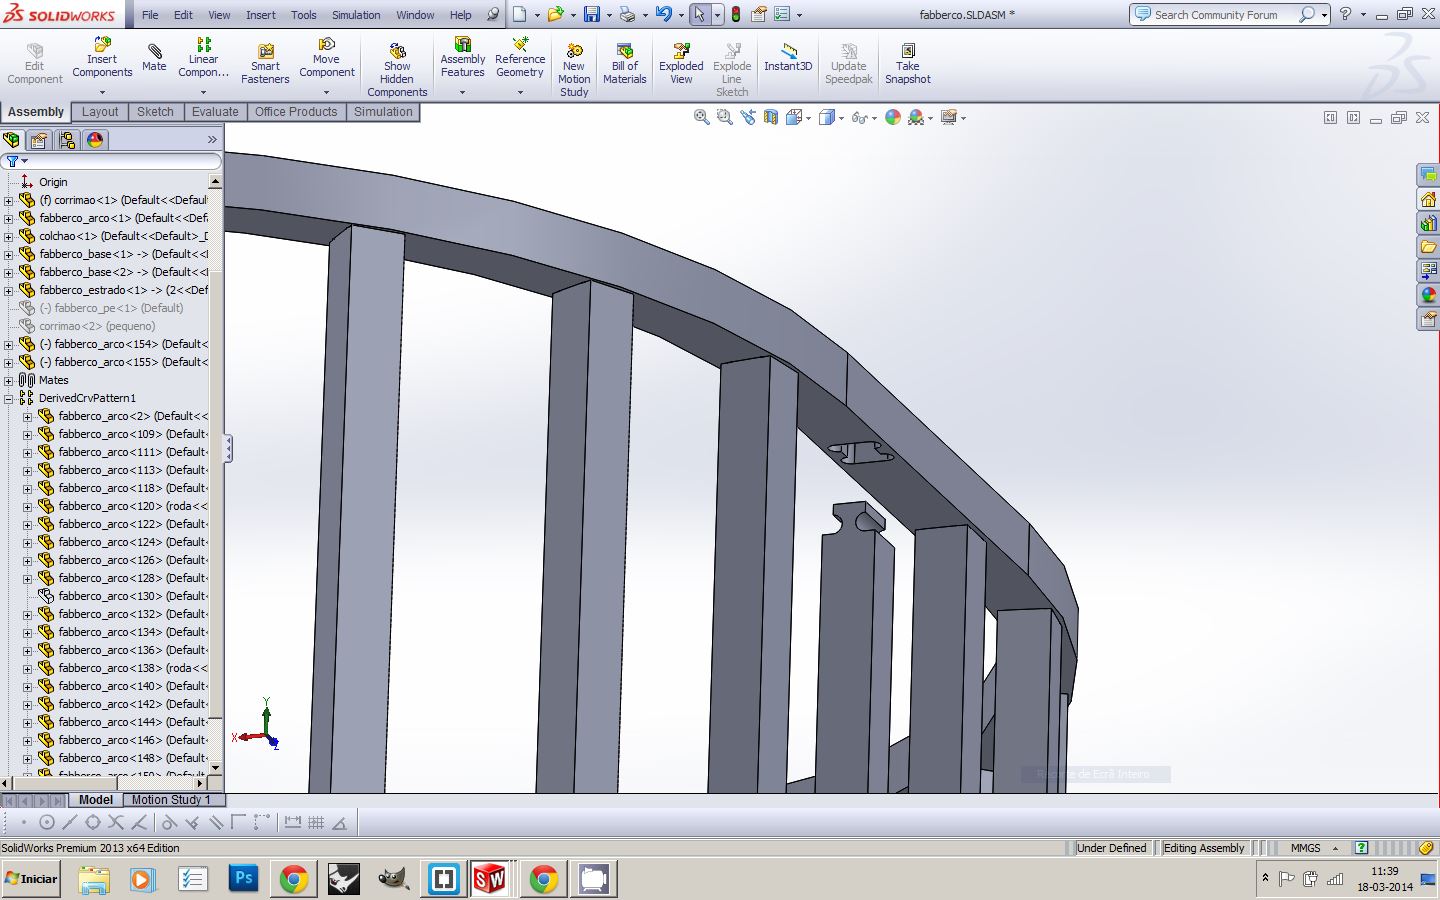
I decided as well to design and model all connection fixtures so I could have control on their visibility, in this case I wanted them to be all nicelly hidden at the final assembly.
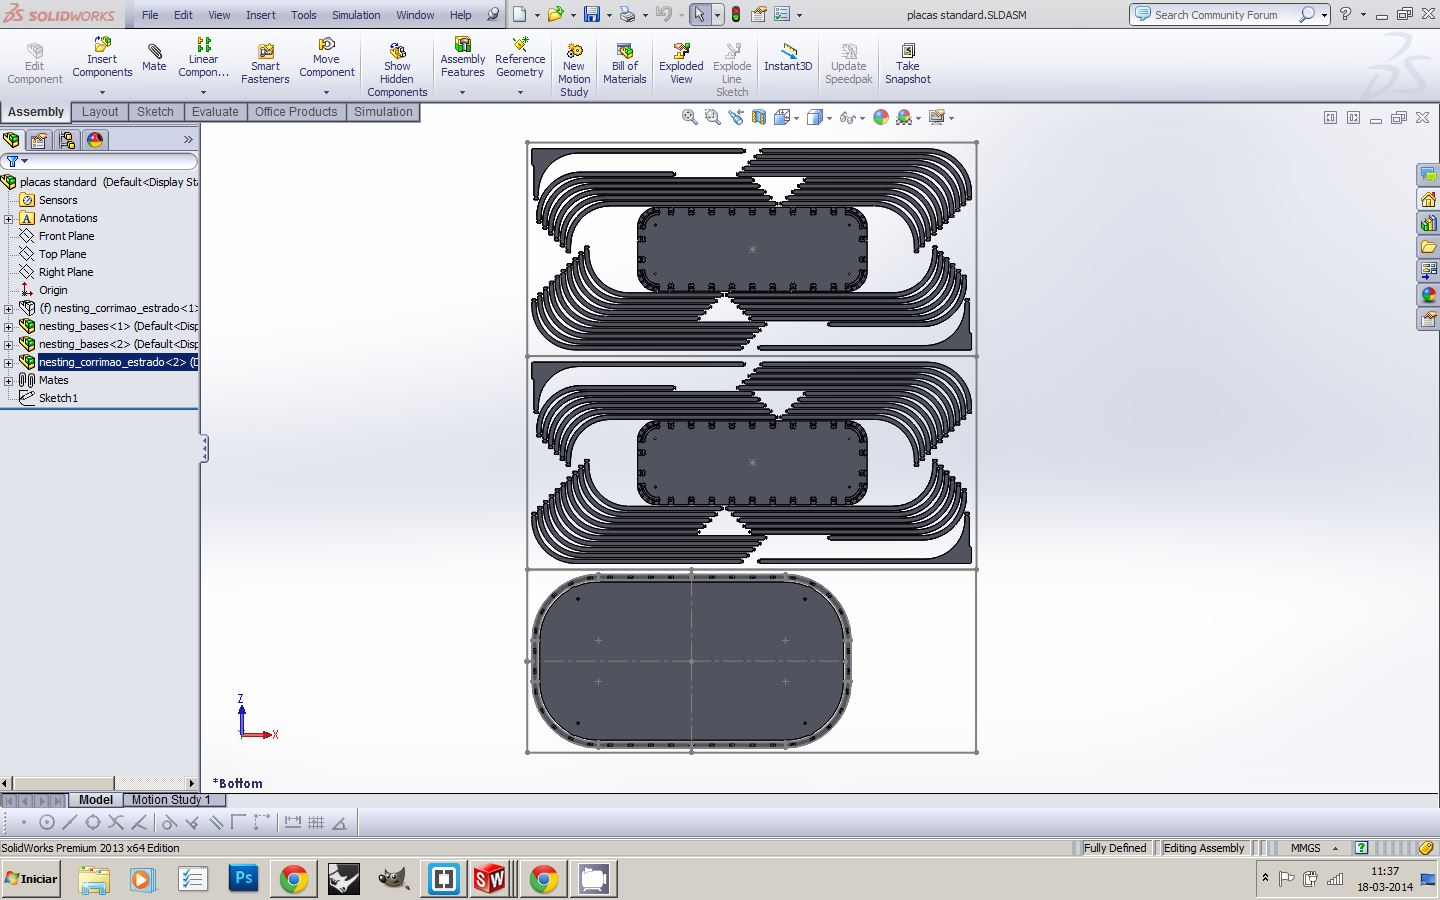
After some time on SW assembly mode, nesting each piece position and orientation at the avaliable plywood area, saved then a DWG file format to be worked later on the Aspire CNC Software for machine cutting.
Then spent some hours at Aspire still programming all different pocket toolpaths
and profile toolpaths to respective cut depth into a final toolpath setup using a drill bit of 6mm diameter, cut depth of 3mm and a 9mm/50% step-over. Also important here is the tabs placement feature that is always secure to check manualy so each cutted component stays in place and therefore avoid mill bit to destroy them while working on other toolpath.
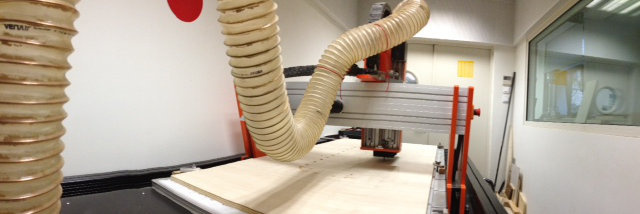
I chose 18mm poplar plywood board to this first model and after setting it on the Fab Lab CNC OuPlan cutting area making sure its all well fixed with clamps and screws (the vacuum pump was not working),
Attention to this security step of fixing the material board on the cutting table (when using clamps/vises make always sure there is no collision risk between them and the milling path) is a crucial one and should be done with attention to avoid risk of serious injury either to the material board, CNC machine, but mostly important to YOU or OTHERS near the operating cutting area! Now safety googles, headphones, shaved hair, t-shirt on. OK to go!
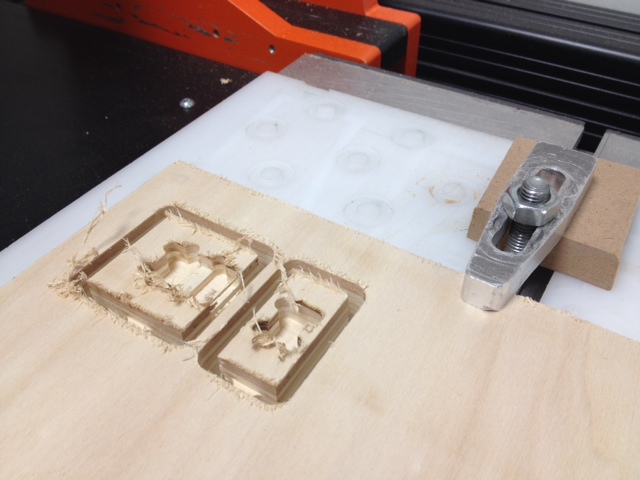
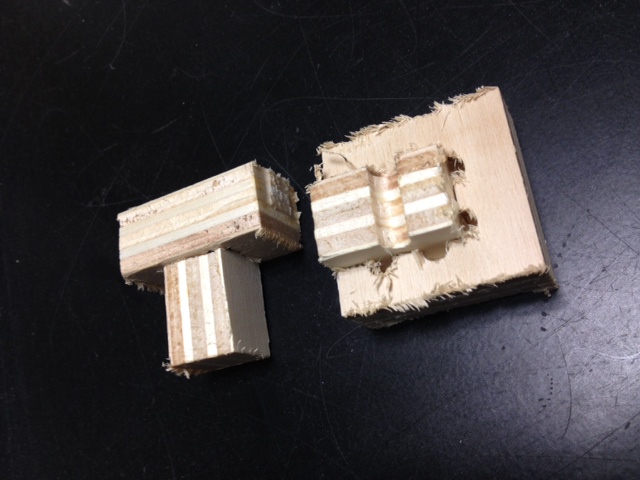
After saving new Z,X,Y coordinates did some first test by cutting t-bones samples to check if tolerances between them fit well. If not you need to get your cad model reviewed and updated all again. Here is my "T" and "B" bone fixing system designed for the model.
Realized too that milling with a "cheap or old" bit can cause plywood fibers to peel (down cut or upcut mill) and tear from the board surface. However I continued the work since it was already late friday night for ordering a new reliable mill bit in time.
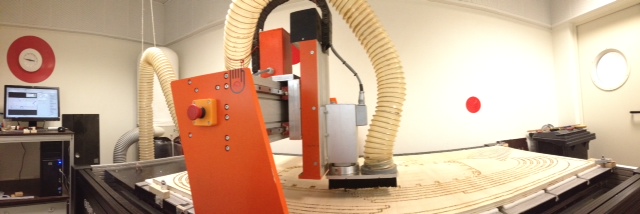
T-bones fit check, toolpaths check, machine setup check, safety check, dust exhaust ON and there she goes!
Keeping on milling during hours on saturday,sunday, and still monday morning this was my weekend spent on machine cutting supervision. However with such time looking at machine work made me realize design improvements and small changes that can significally reduce cutting time and toolpath efficiency for the future final model. I considered this first one as a full scale prototype ;)
Finally got to disassemble the board from the machine and started to cut all tabs carefully to obtain the desired remaining parts.
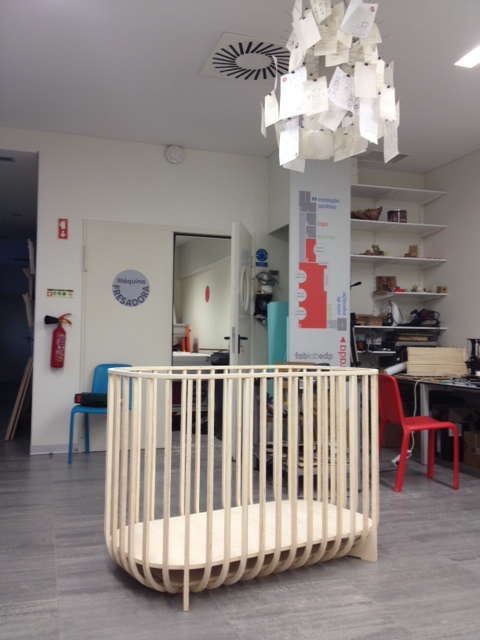
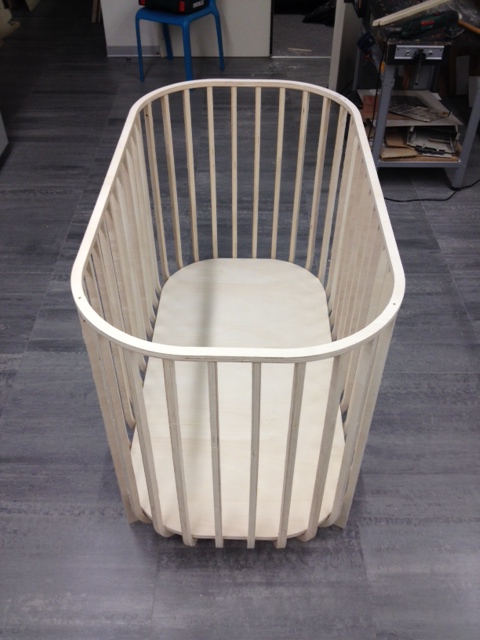
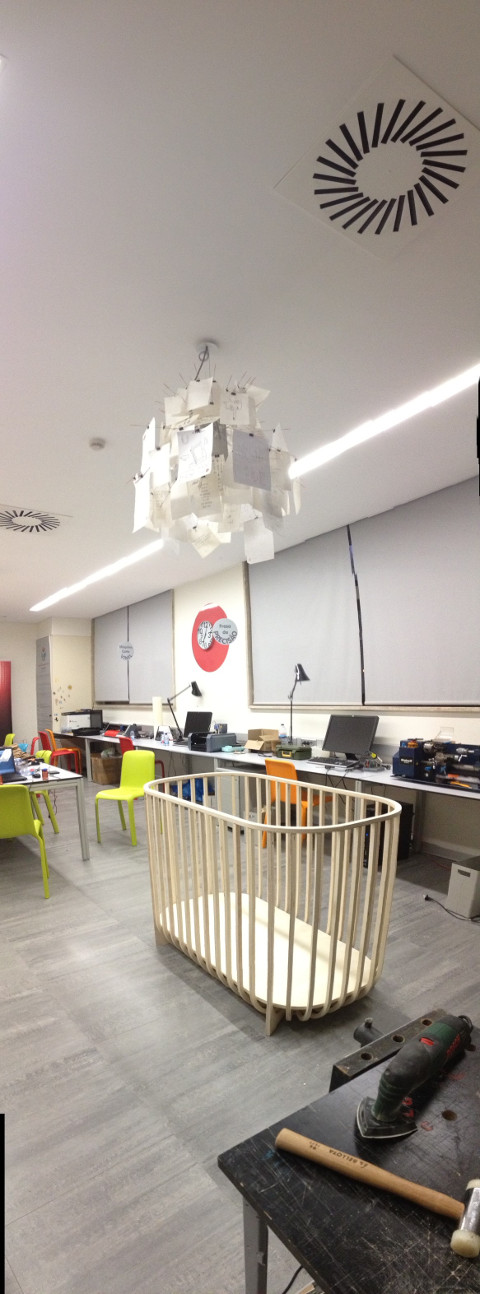
By the end of cutting and sanding all board parts, specially the tabs areas, mounted the assembly, the final result is presented!
After this positive result I already consider to review all design details and material choice to gain toolpath eficiency and therefore reduce milling time. I will be back to the drawing board and to this project very soon cause there is a baby on the way!
ATTENTION You can download the wip files to improve and work further more around design, structure and safety features but at this point
THIS IS NOT A FINAL PRODUCT (YET) SO PLEASE DO NOT REPLICATE FOR DIRECTLY USE WITH AN INFANT ;) THANKS