For this assignment we took on 3D Scanning and Printing Techniques and
devices.
3D Scanning
The assignment implied to scan a 3D object in order to obtain a digital
replica of it, mayber editing/improving/mixing it and if possible,
print the result in the machine. I attempted two different types of
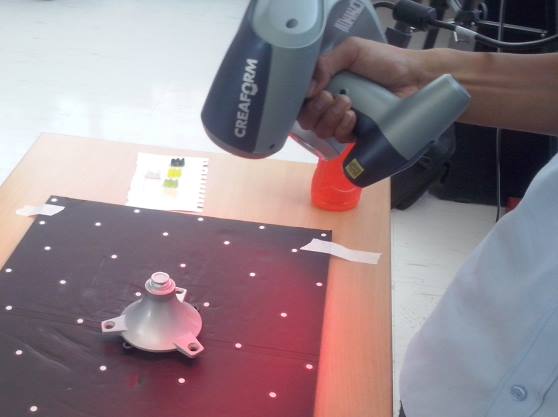
scanning, first using a CREAFORM EXA Scanner brought to the lab and
second using 123D Catch Photogrammetry. First, we used the 3D
Scanner, the procedure of use not that simple, since it needed a
certain expertise to be done, this meaning The scanning had to be
supervised.
Due to the complexity of the part, The Scanning had to be
made in two separate stages, and the resulting meshes had to be
integrated into one.
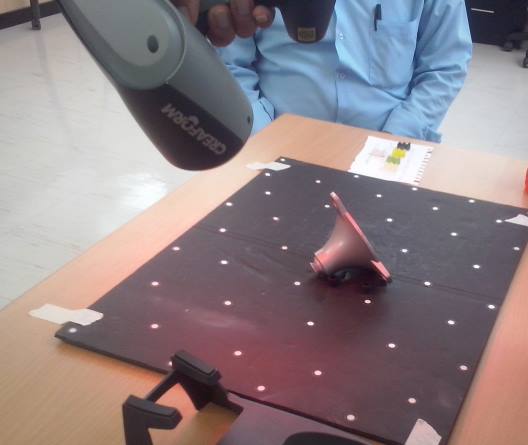
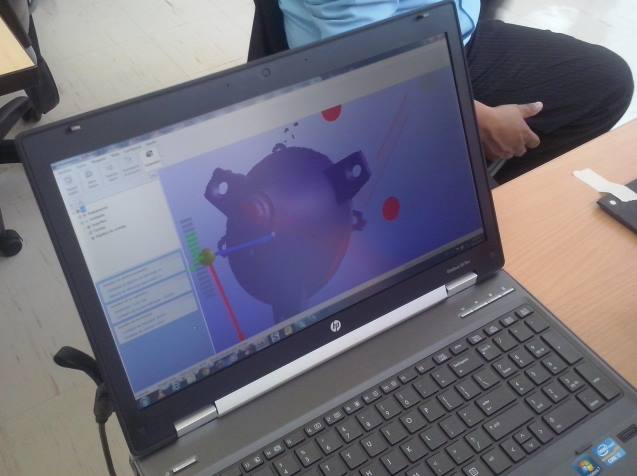
We had to take into account the degree of reflection or glimmer that
would originate from a given piece to be scanned, since the scanner was
laser-based and the reflections would not be registered properly, this
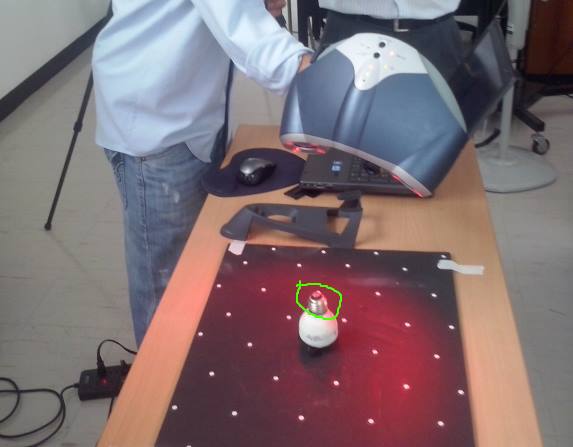
happened with a lightbulb body we tried to process:
The reflection made impossible for the scanner to get the
metalic section (The green circle) The experts recommended us to use an
opaquing powder in order to get that part to be properly scanned.
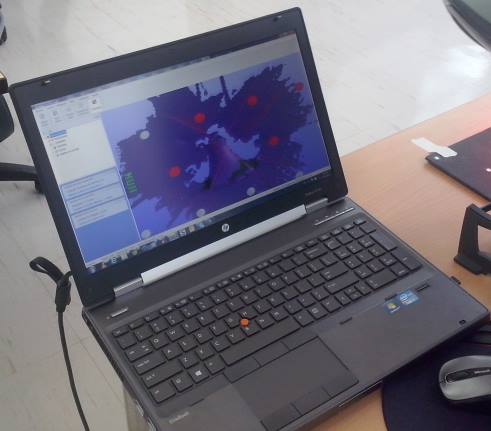
After the scanning process, it was time for the composition/editing
process: eliminating excess points and finally, joining both meshes
into one, Geomagic was used for this, Still, after the scanning and
composing, there were still a few errors to correct.
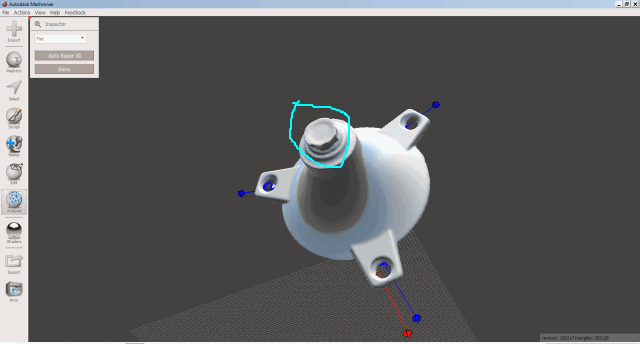
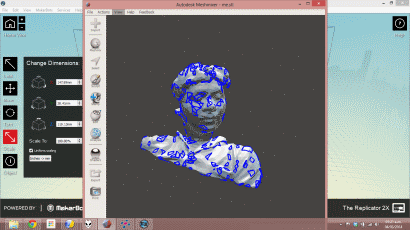
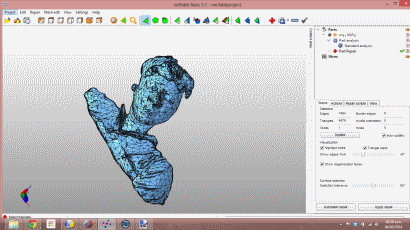
I used Autodesk Meshmixer in order to correct the remaining errors the
model had. The process was easy to follow and straightforward, the
holes are marked in blue and the non-manifold edges in red, The
software's inspector tool solved things in a very practical manner,
however the detail of the upper part (aqua circle) was not as smooth as
the original part, not much to do about it.
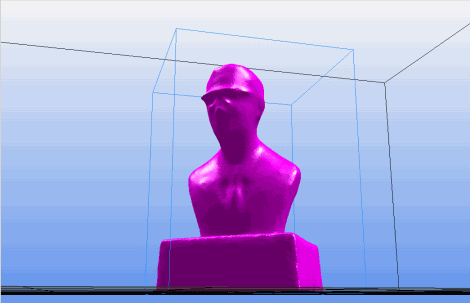
Afterwards, the model was nearly ready for printing.
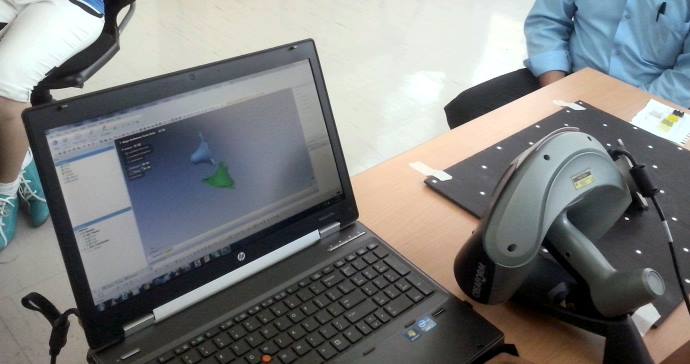
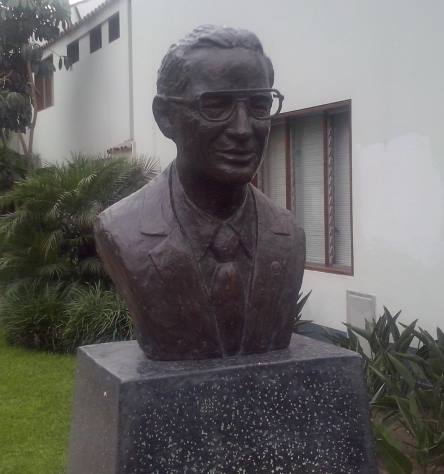
For the second case I used Autodesk 123D catch in order to create a
mesh model out of a series of photos I took of the sculpture of Prof.
Valdez, an Emeritus Professor in ESAN University.
44 Photos of the sculpture were taken in order to generate the 3d
model, The accuracy was not perfect in detail, and since I could not
get to take in the photos the full detail of the upper head of the
sculpture (just a little too high) the resulting mesh was not good at
all there.
One of the surprising facts about Autodesk 123D Catch was the
amount of environmental data it gets into the model in addition to the
object of interest. At a glance, the sculpture scan is in the red mark
in the photo below:
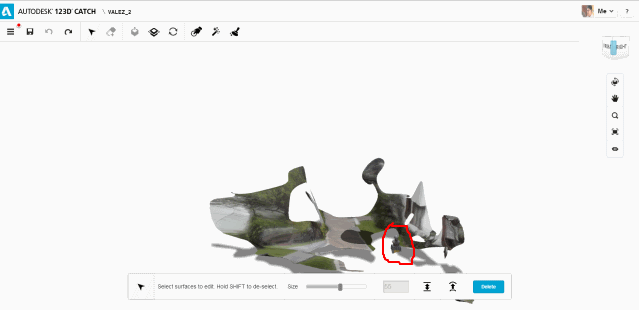
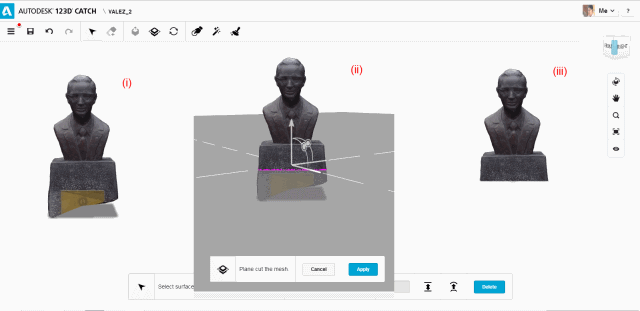
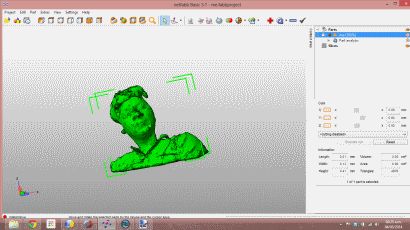
So, a lot of mesh cleaning was in order to actually get a model worth
printing, removing the additional meshes was time-consuming and not
entirely clean, meaning you have to be careful about what you delete
before pressing the delete button, but, the model, eventually, was as
clean as It could be, to save space I composed the process in a single
picture: (i) The "clean" Model, (ii) a plane-cut to make it fit for
printing and (iii) the model "ready to print".
And the detail of the top head part, when the photocomposition did not
get it right:
I tried to get this fixed in Meshmixer,but without success. As I edited
in Meshmixer, I inadvertenly made the mesh solid, which would
cost me later, in the Printing Stage:
Finally, I gave the Kinect in the Lab a go, using OpenKinect, I tried
to Scan Myself with it, since it works better with bigger objects and
did not bring anything to scan. The results were not as great since the
software in Trial Mode limits the capture to 5000 polygons, still, it
needs quite a lot of work if I'm going to print it.
I tried to repair it using Meshmixer, but to no avail... still waiting
for the program to respond.
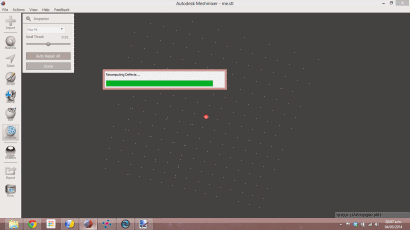
However netfabb Basic worked just fine:
After that, te mesh was nearly printing-ready.
3D Printing
For the Printing section I used two 3D Printers available: The Makerbot
Replicator 2X available at TECSUP and the Felix 2.0 we have at ESAN
University, for comparison purposes, I used the model for the Professor
for printing.
First,
I was not completely familiar with the intricacies of the Felix Printer
inner workings, so the setting up processor was not as easy-going, and
some things needed to be considered in order to get the printing done. I
actually got the model to print properly at the fourth attempt. First,
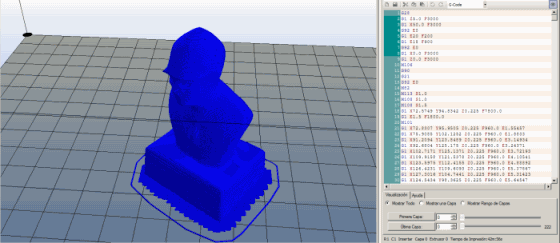
I opened the STL file generated by 123D Catch in the Felix Printer
Software (Felix Repetier - Host) and choose the printer settings before
slicing the model and generating the G-code for the printing. First,
the STL as the Software read it.
Before setting it up for printing, as for the settings, I only added
the raft for printing and used standard quality settings, after this,
the Software created the G code for the machine.
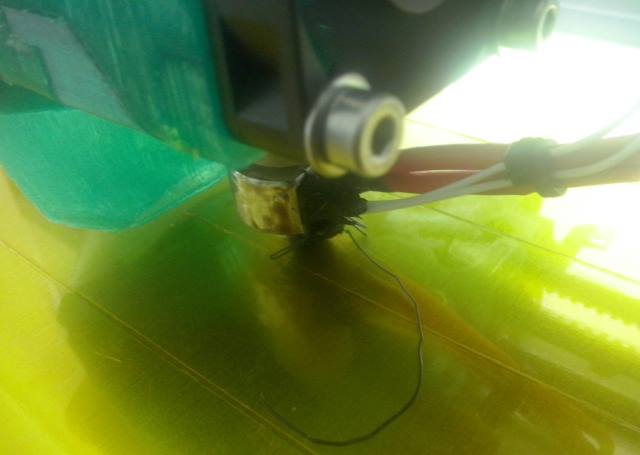
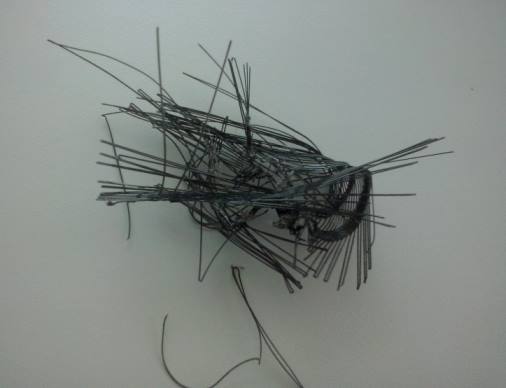
Printing was a very different matter, as already mentioned, it took
four attempts to get the printer to behave properly, after some trial
and error, including the PLA getting stuck on the extruder (below) or
the raft not bonding to the platform and being torn by the extruder's
support piece (below that)
I realized the printing tray was not properly leveled, so I
decided to move it to the right and It Worked. It took quite a while,
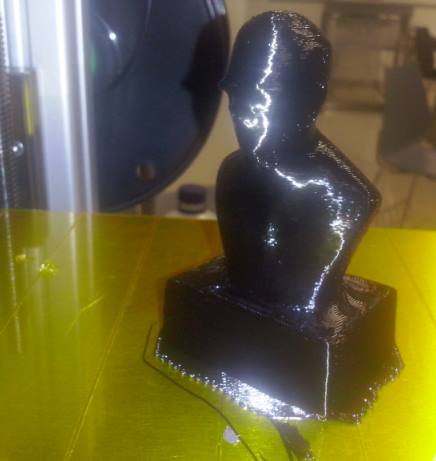
since the STL was solid instead of hollow. Finally, It was done:
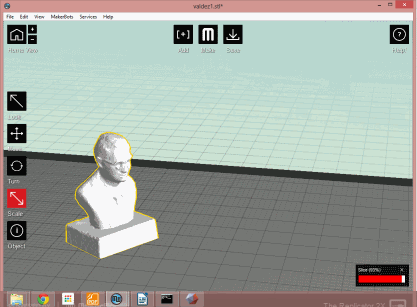
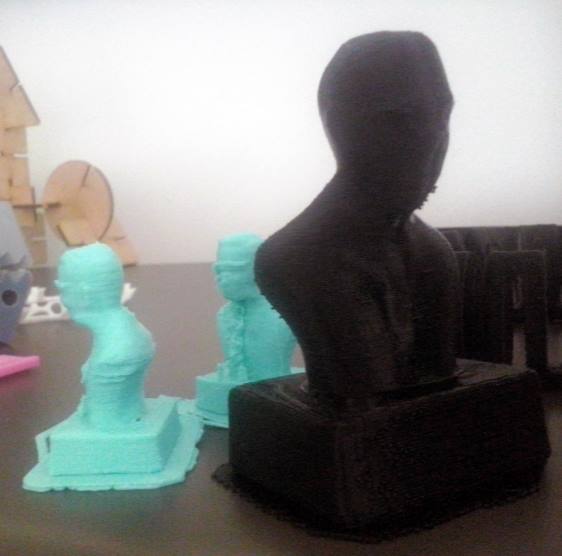
Printing in the Makerbot was a lot simpler, The Makerware app is very
friendly and the parameters configuration quite straightforward, the
printing parameters were: layer height: 0.25 mm, shells: 4, infill:
10%, speed: 100
I got the printer to finish in the second attempt, in the first, the
Printer LED panel displayed
"INVALID CODE: if this is the first time you print this model, try
again" Which I did, and this time it came out right. In
the picture the difference can be seen:
The
slicer it seems, tried to build for the details in the front of the
sculpture, no sucess, sometimes a better printer will not print it
better. Still, as every 3D printer, the Makerbot comes with its own
challenges, here is a comparative view of both prints:
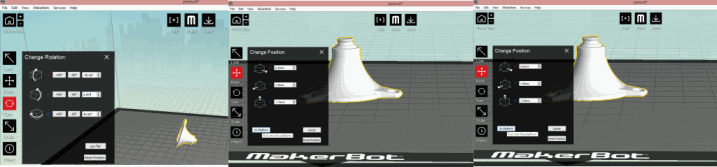
I did print the first scanned piece in the Makerbot, here, the trick was
positioning, since the mesh was tilted and tricky to set upon the
platform in the software, it was mostly trial and error, in the images
below can be seen, left,
the original positioning of the part, middle, rotating it
to get it to the platform and right,
done! (or so it seemed)
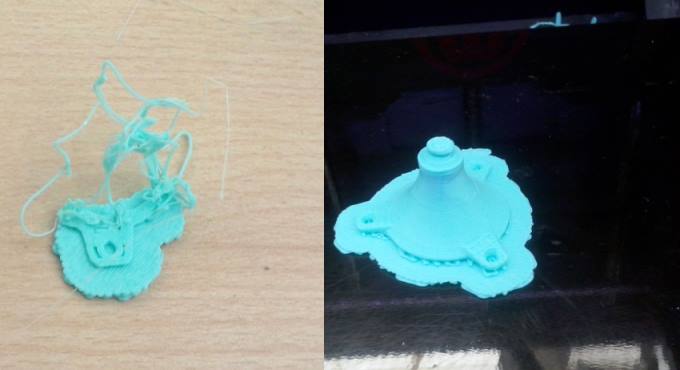
When I started Printing it became obvious that the model was still
slightly tilted, and the first attempt failed. I added an additional
support in the second attempt to compensate, and finally, it was done,
The printing prameters were the same as the Professor Model.
Finally, in order to illustrate the workflow taken in a more integral
manner. I made a couple videos, one for each workflow: the first with
the EXA-Scanner/Makerbot combination and the second being with Autodesk
123D Catch and Felix 3D Printer, the summarize all that's been written
so far.