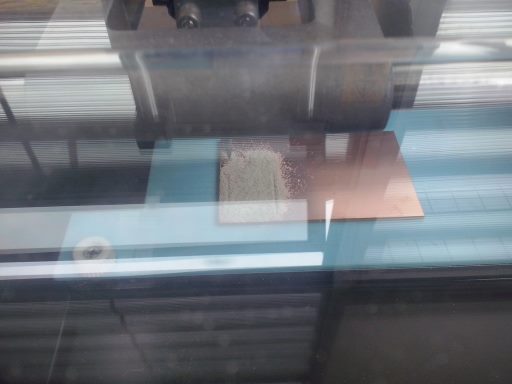
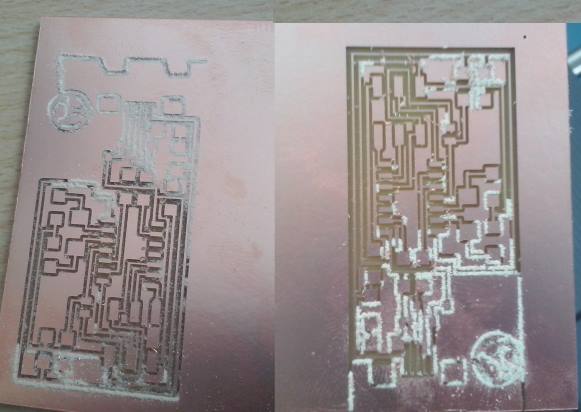
Above, the two
"failures" in the
milling process, the first one (left) the edges were not
milled,
and the second (right) the endmill was not properly position, so the
inferior part was just not milled, you need to make sure your xmin and
ymin values in the fab modules
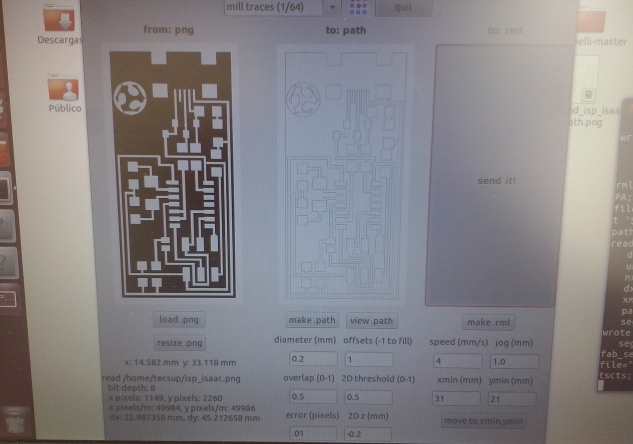
Before
actually milling anything. Below, one of the ones that got right, some
copper residues can be seen on the milled tracks, I had to remove them
using a cutter.
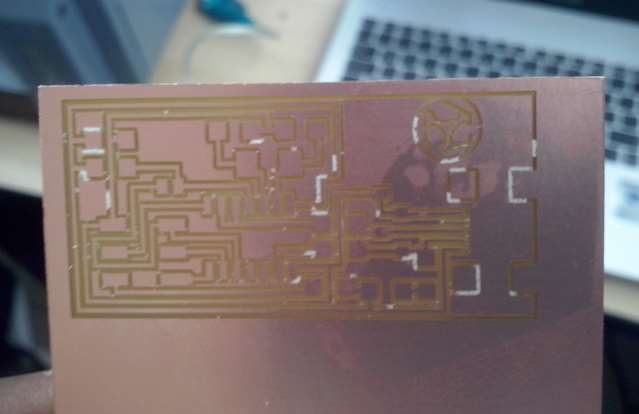
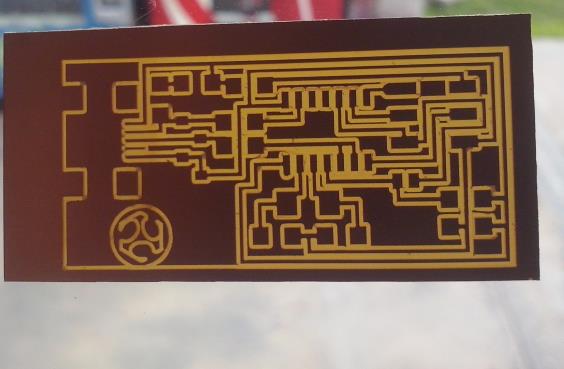
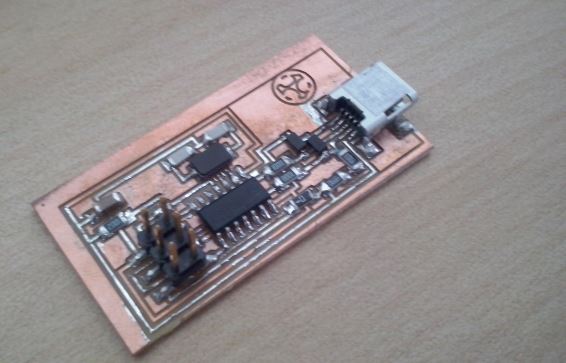
And after some work, the PCB was already done. I cut it using a
Guillotine Roberto brought into the lab, although I learnt later that
the plate actually needed to be heated prior to cutting, anyway it
turned just fine. Why three? Well, I thought that a back-up plate would
be needed just in case the soldering would not turn right.
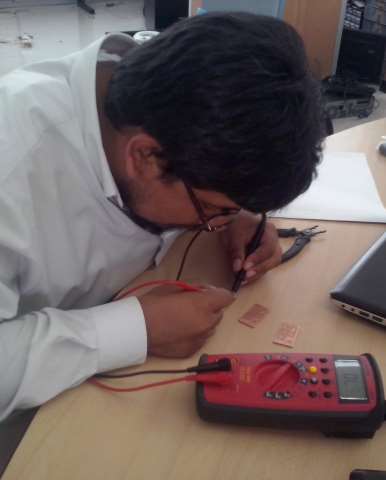
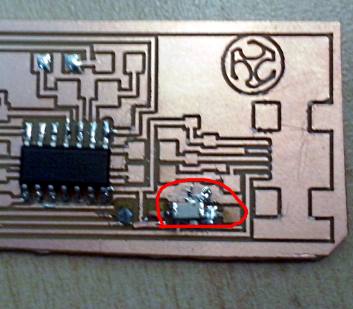
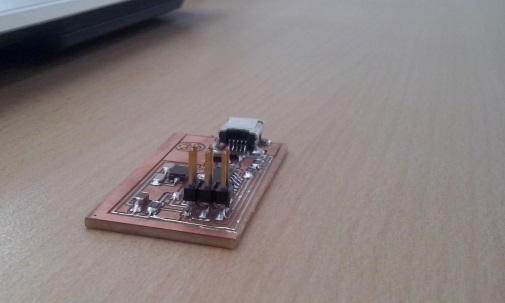
I did some
continuity testing before starting to solder:
Soldering turned out to be a messy affair, and quite time consuming,
many mistakes were made.
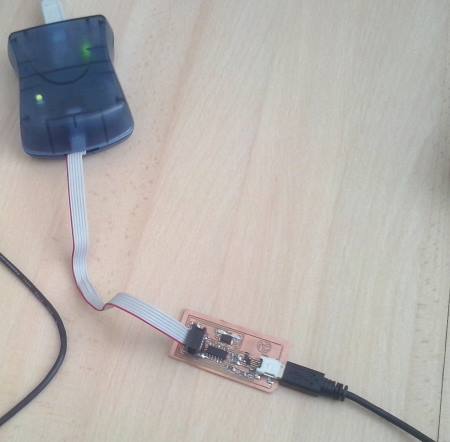
While AVR testing, the
USB connector belonging to my first plate got desoldered and I lost it.
The second one got better.
In
the end, I got to solder all the components to the board, but, when the
AVR testing light came red, I checked, and after reviewing some
connections with the soldering device, I got the green light.
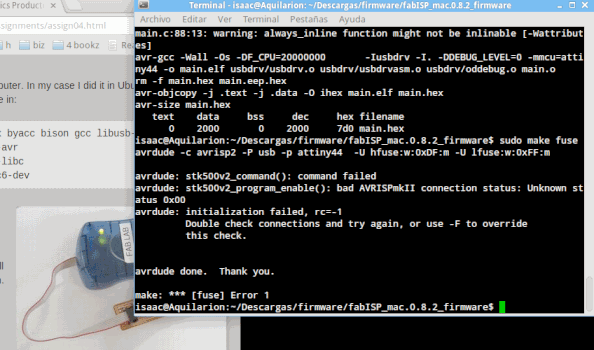
And then, drama ensued.
And the name of the drama was... fuse
I
could not get the fuse to work, rechecked the connections,
verified the soldering, reviewing with the microscope, no results. I
even got to my backup PCB s and soldered the parts again... still n o
success.
Trying to find the
cause of the problem, the lab staff suggested some additional
testing using the oscilloscope, which we did, conclusion: the circuit
had somewhere, one or several short circuits, and since all the parts
were already soldered, I had to start over and be extra-careful, and
finally, I was able to get it done. I cut and pasted the
command line results below:
root@tecsup-N56VZ:/home/tecsup/Descargas/firmware/fabISP_mac.0.8.2_firmware#
make fuse
avrdude -c avrisp2 -P usb -p attiny44 -U hfuse:w:0xDF:m -U
lfuse:w:0xFF:m


avrdude: AVR device initialized and ready to accept instructions


Reading | ################################################## | 100%
0.00s


avrdude: Device signature = 0x1e9207


avrdude: reading input file "0xDF"
avrdude: writing hfuse (1 bytes):


Writing | ################################################## | 100%
0.00s


avrdude: 1 bytes of hfuse written


avrdude: verifying hfuse memory against 0xDF:


avrdude: load data hfuse data from input file

0xDF:
avrdude: input file 0xDF contains 1 bytes


avrdude: reading on-chip hfuse data:


Reading | ################################################## | 100%
0.00s


avrdude: verifying ...


avrdude: 1 bytes of hfuse verified


avrdude: reading input file "0xFF"


avrdude: writing lfuse (1 bytes):


Writing | ################################################## | 100%
0.00s


avrdude: 1 bytes of lfuse written


avrdude: verifying lfuse memory against 0xFF:


avrdude: load data lfuse data from input file 0xFF:


avrdude: input file 0xFF contains 1 bytes


avrdude: reading on-chip lfuse data:


Reading | ################################################## | 100%
0.00s


avrdude: verifying ...


avrdude: 1 bytes of lfuse verified


avrdude: safemode: Verify error - unable to read hfuse properly.
Programmer may not be reliable.
avrdude: safemode: Fuses OK
avrdude done. Thank you.
Then, it was about time to make the program:
root@tecsup-N56VZ:/home/tecsup/Descargas/firmware/fabISP_mac.0.8.2_firmware#
make program

avrdude -c avrisp2 -P usb -p attiny44 -U flash:w:main.hex:i

avrdude: AVR device initialized and ready to accept instructions

Reading | ################################################## | 100%
0.00s

avrdude: Device signature = 0x1e9207

avrdude: NOTE: FLASH memory has been specified, an erase cycle will be
performed

To disable this feature, specify the -D option.

avrdude: erasing chip

avrdude: reading input file "main.hex"

avrdude: writing flash (2020 bytes):

Writing | ################################################## | 100%
0.70s

avrdude: 2020 bytes of flash written

avrdude: verifying flash memory against main.hex:

avrdude: load data flash data from input file main.hex:

avrdude: input file main.hex contains 2020 bytes
avrdude:
reading on-chip flash data:

Reading | ################################################## | 100%
0.58s

avrdude: verifying ...
avrdude: 2020 bytes of flash verified

avrdude: safemode: Fuses OK
avrdude done. Thank you.
avrdude -c avrisp2 -P usb -p attiny44 -U hfuse:w:0xDF:m -U
lfuse:w:0xFF:m

avrdude: AVR device initialized and ready to accept instructions

Reading | ################################################## | 100%
0.00s

avrdude: Device signature = 0x1e9207
avrdude: reading input file "0xDF"

avrdude: writing hfuse (1 bytes):

Writing | ################################################## | 100%
0.00s

avrdude: 1 bytes of hfuse written
avrdude: verifying hfuse memory against 0xDF:

avrdude: load data hfuse data from input file 0xDF:

avrdude: input file 0xDF contains 1 bytes

avrdude: reading on-chip hfuse data:

Reading | ################################################## | 100%
0.00s

avrdude: verifying ...

avrdude: 1 bytes of hfuse verified
avrdude: reading input file "0xFF"
avrdude:
writing lfuse (1 bytes):

Writing | ################################################## | 100%
0.00s

avrdude: 1 bytes of lfuse written

avrdude: verifying lfuse memory against 0xFF:

avrdude: load data lfuse data from input file 0xFF:

avrdude: input file 0xFF contains 1 bytes

avrdude: reading on-chip lfuse data:

Reading | ################################################## | 100%
0.00s

avrdude: verifying ...

avrdude: 1 bytes of lfuse verified

avrdude: safemode: Fuses OK

avrdude done.
Thank you.
So even when I was able to get it finally done, I must admit
that a lot of practice regarding soldering is needed in order to get
through the Academy, so let's get to it!
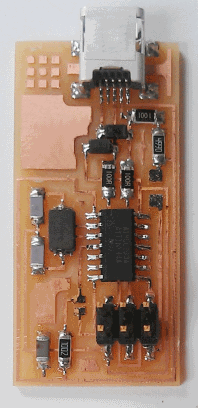
One Final Check Before desoldering the bridges... and it is done!