| Index About Me |
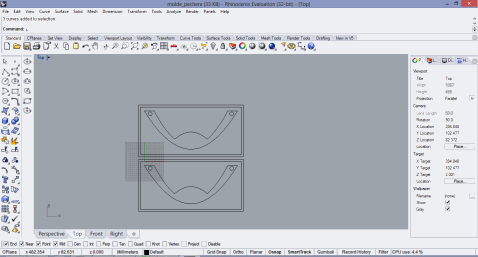
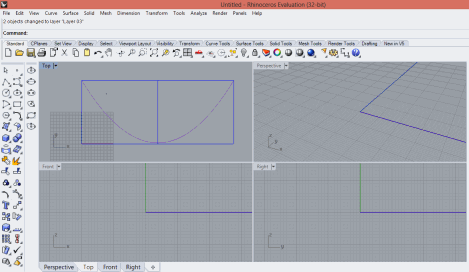
Composites AssignmentThis assignment was even though its simplicity, quite time consuming and really instructive, at this point the assignments and knowledge to be absorbed in a daily basis make it more challenging and interesting.The assignment was about creating an object around 1ft squared (30 square cm) in area, creating a composite material in the process, time to write a new workflow proposal : 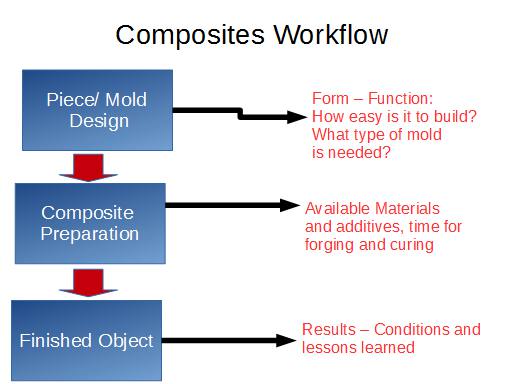 This time design was not so time-consuming as other assignments, building upon the lessons learned from previous experience, I used Rhino since it has more options on geometric shapes than inventor, the first inspiration for my design was an ancient moche (pre-inka culture, from the northern coast of Peru) jewelry piece, used in rituals and special ceremonies by the members of the warrior clans. this was actually worn as a nosepiece. 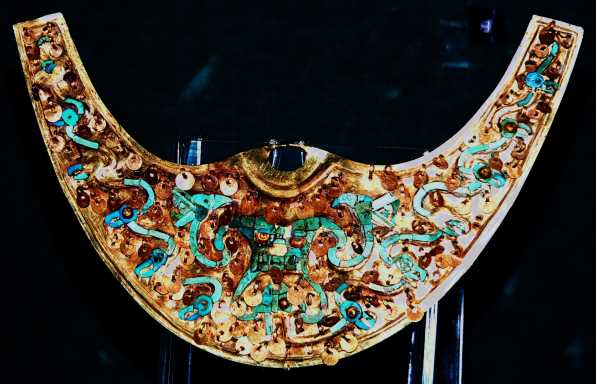 Since the assignment required to
build something larger, I used the orginal shape to convert it into a
sort of breast plate, esentially made out of two parabollic curves then
extruded, Rhino was very straightforward to work on this occasion:
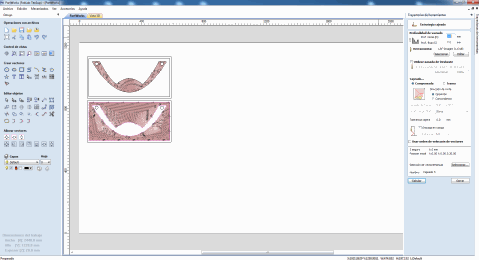
 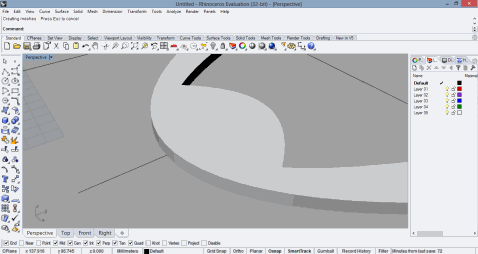 With the base design done, I returned
to 2D and duplicated the model in order to make a negative-positive
mold, as it can be seen below, I added "holes" in the sides of the
piece in order to be able get some cords through and make it wearable.
Design done, ready to export, next stop: shopbot.
because of this the milling took over an hour and a half for the positive, and that's when I realized the mistake made.
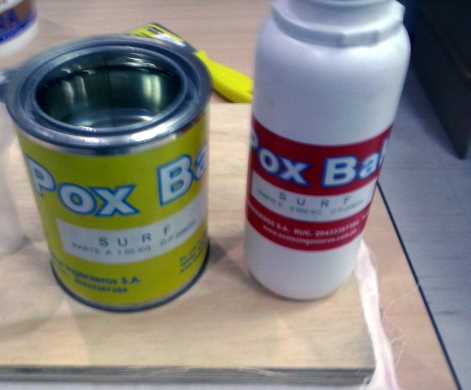
I used 10mm depth for the negative and 7mm for the positive part of the mold, the pieces would not fit because of an interior profile cut that was unnecesary, I had it removed with a pocket cut, time to make the composite, I chose two fabrics to go with the mold, burlap and tocuyo (a coarse cotton fabric widely used locally) and an expoxic resin we sourced locally: Pox Bak. It is mainly used in electric and electronic devices, but it would have to do. It is composed of a resin and a catalyst, and in order to be used it has to be prepared, the parts being added in a 2:1 ratio.
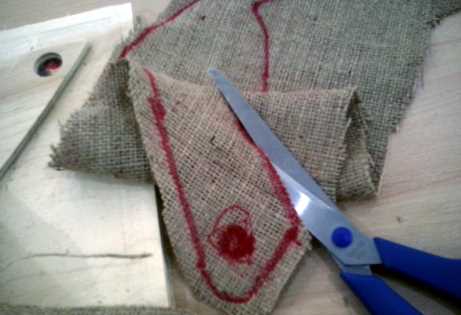
The first thing to do was to cut the fabric to match the mold. I started with the burlap.
I only had the burlap cut, and this would ultimately cost dear, as I added the cotton fabric and the resin on top of them.
And, in the middle, the burlap layer already cut: 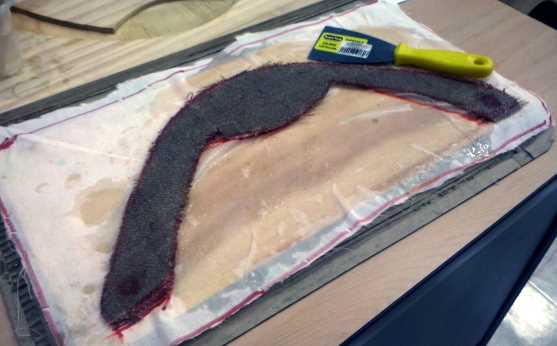
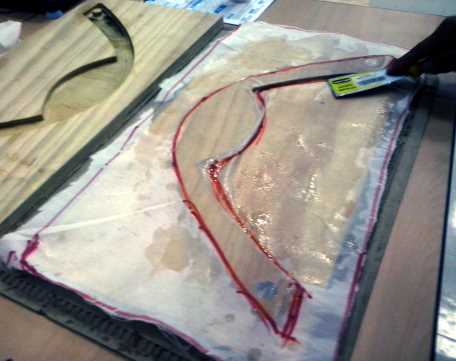
Finally, before casting the mold, I changed the order and put the burlap beneath the cotton, after doing this, I closed the mold and applied pressure, time to wait for the thing to forge:
Next monday, I would find the extent of my mistakes, as the fabric was absolutely bonded to the mold, unmolding would only result in the piece breaking, the mold did not remain whole, as the "hole" sections were severed due to the bonding (why was this? not cuttigng the intended holes into the fabric) It was time to give it another try.
So far, I could add three mistakes to the already listed, as responsible for the failure occurred: first, the demolder chemical used was absorbed by the plywood and was never really effective. Second, as I would later find out, the resin needs to be poured only when the composite needs to be cast and nowhere else, so, learning from past mistakes, it was time to start again, first, a new mold, this time I used the 1/4' straight end mill, so the pocket cut was made in no time: 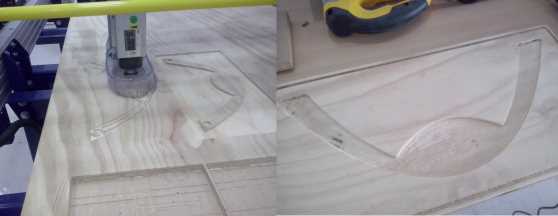 However, it would not be perfect, as the
surface finishing was rougher than expected and the cyllinders in the
negative (negative to the "holes" in the positive section) would not be
cut properly. so, after trying sanding and other means to make the mold
fit, I had to remove them altogether, no holes in the plate (in
retrospect, this slight change would very likely saved my first mold)
Also, I had to sand the positive in order to get it to fit, but it was
done.
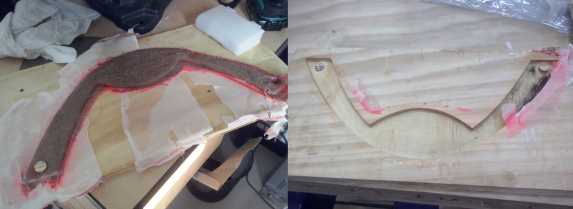
This time, building on the lessons
learned and The experience of Jose Lazarte in the lab, I decided to
change the way I was working, first, I added vasoline as a demolder to
the negative and positive sections, second, I used only burlap, four
layers, with a resin layer in between each of them, and as a separation
between the vasoline and the resin, I used a plastic foil layer, as can
be seen above.
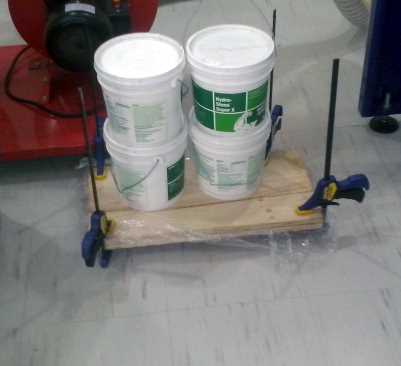
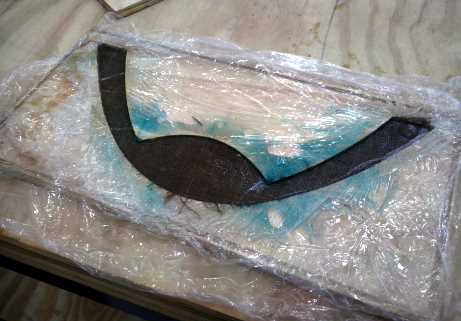
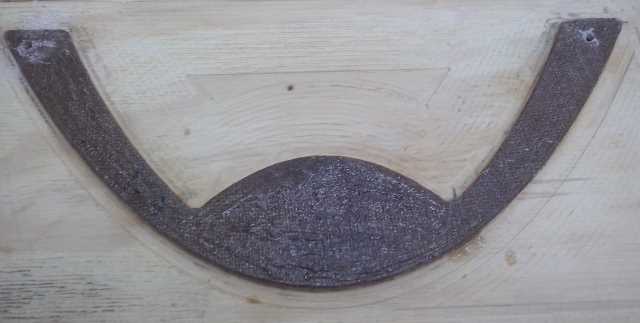
Then, it was time to let the resin
forge, we applied pressure clips and four buckets of Hydrostone on top
of the mold and let it forge overnight. There was no problem removing the piece from the mold, though it was a little sticky, probably because I poured too much resin in the burlap, another noticeable fact was that the vasoline was gone from the mold and demolding was made easy because of the plastic foil, and on some other parts of the mold that were not in contact with the plastic had some resin stuck to them, in the end, the model was done, however, in order to be able to wear it, a couple holes would have to be drilled. 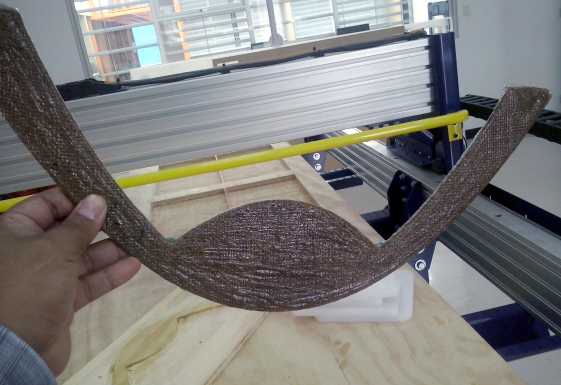 Finally, I had the plate drilled using the Makita Drill commonly used for drilling the screws to the wood planks in the shopbot, this time I changed the screwdriver with a shopbot 1/8' drill. 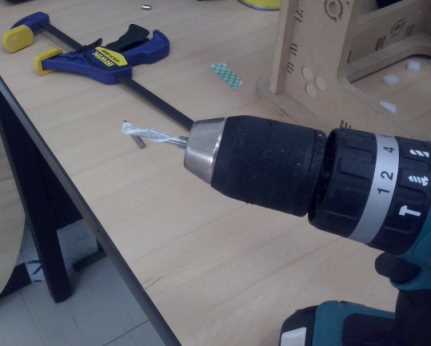 |