ASSIGNMENT
Read a microcontroller data sheet.
Program your board to do something, with as many different programming languages
and programming environments as possible.
WHAT I DID
- Programm my board with Arduino UNO.
- Programm and read back my board with FabISP.
MY BOARD - ARDUINO
My inspiration:
http://highlowtech.org/?p=1695.
How-to-do list:
- Download Arduino software version 1.0.1
- Download the ATiny master.zip file from the link above.
- Unzip the attiny master.zip file. It should contain an "attiny-master" folder that contains an "attiny" folder.
- Create a new sub-folder called "hardware" in the sketchbook folder, if it doesn't exist already.
- Copy the "attiny" folder (not the attiny-master folder) from the unzipped ATtiny master.zip to the "hardware" folder. You should end up with folder structure like Documents > Arduino > hardware > attiny that contains the file boards.txt and another folder called variants.
- Restart the Arduino development environment.
- Open Arduino Software IDE.
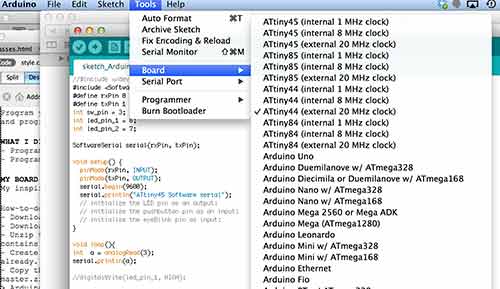
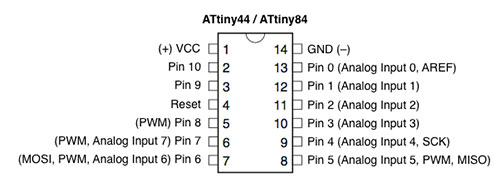
- From Tools menu select the board you are goign to program, ATtiny44 (exteranl clock 20MHz)
- Connect Arduino to your board.
- From Tools menu of Arduino environment select Arduino like your programmer.

- Now I can ready to programm my board.
MY BOARD - FabISP
- Setup the AVR development platform, I started from this tutorial learn/avr/setup-mac.html and chose the Option1.
In the new Terminal window, type in echo $SHELL and press return.
If the output is /bin/bash then type the following command: echo 'PATH=$PATH:/usr/local/bin' >> ~/.bash_profile all on one line. Press return.
If the output is /bin/csh or /bin/tcsh then type the following command: echo 'set path = ($path /usr/local/bin)' >> ~/.cshrc all on one line. Press return.
Close any Terminal windows and open up a new one. This makes sure the .bash_profile or .cshrc is reloaded. Now type in echo $PATH (for bash) or echo $path (for t/csh) you should get something like the following:
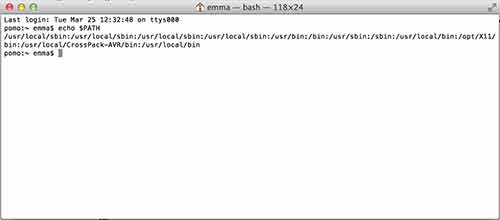
The important thing is that at the end of the line is /usr/local/bin.
- From http://www.obdev.at/products/crosspack/index.html I downloaded and installed AVR Dude.
- From http://digistump.com/wiki/digispark/tutorials/connecting I downloaded:
- "Micronucleus tiny85" bootloader version 1.02. From this directory copy micronucleus file (micronucleus-master -> commandline -> builds -> OSX) and paste it in usr/bin/loacl).
- DigisparkArduino environment for Mac
- From Zaerc http://fablab.waag.org/project/fabtinystar I downloaded the firmware for my ISP. To unzip the file: delete .txt and underscores from the name file and unzip it.
- Inside the directory of the firmware and from terminal send the command: "micronucleus --run vusbtiny.hex"
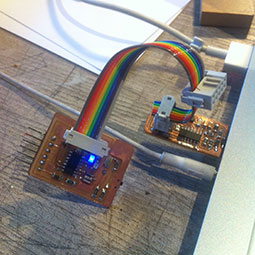
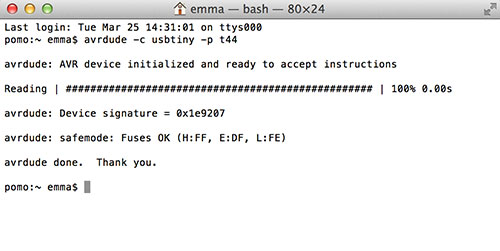
- To check if you can comunicate with the FabISP to your board:
- Connect all your hardware
- on terminal: ">avrdude -c usbtiny -p t44" and if everything is fine you get this:
- Open Arduino1.0.1
- From tools menu select: programmer->USBtinyISP, board->Attiny44 (external 20MHz clock)
- From tools select : click burnbootloader
- Now you can programm the board.
Reminder.
- The brown cable of the rainbow goes to MISO pin, so called pin 1.
- Use Arduino 1.0.1 environment.
- In the FTDI cable the ground is the black wire.
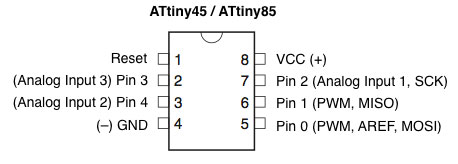
- Keep in mind the pinout of the ATtiny, for instance if you want use the PWM pin of ATtiny45 I will use pin1 or pin0. Take also care that in ATTtiny45-85 digital and analog pin has different names even if the pin is the same, for istance Digital pin 2 = Analog pin 1. The last name mismatch of the ATtiny45-85 doesn't exist in ATtiny44-84.
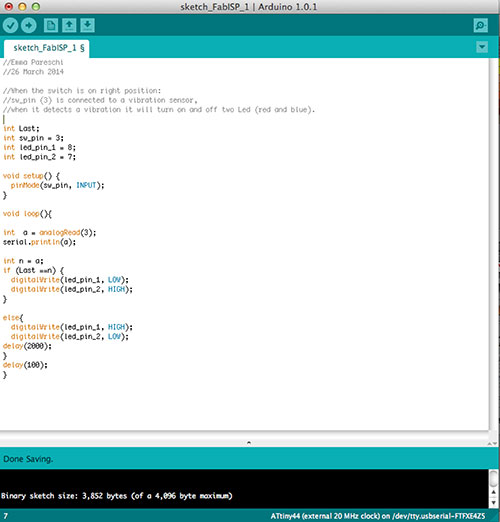
MY CODE
This is the code I loaded on the board developed during lesson 6.