
This
week we have tried 3D scanning in a variety of ways. We have
all made our own scans but because of the number of different
methods available we have decided to work together as a group
to explore using 123D Catch, Fabscan, the Modela,
I
started with 123D Catch using my ipad and iphone ( you can
also use a camera) I captured images from several objects
around the house. This was the fun part and surprisingly
simple as long as you follow the advice offered.
·
Newspaper
provides useful, busy and varied background
·
Don’t
use flash, have consistent lighting
·
The
object must stay still, only you move
·
No
transparent, shiny or glossy surfaces
·
Plan
your shoot carefully at 5 to 10 degree intervals
I
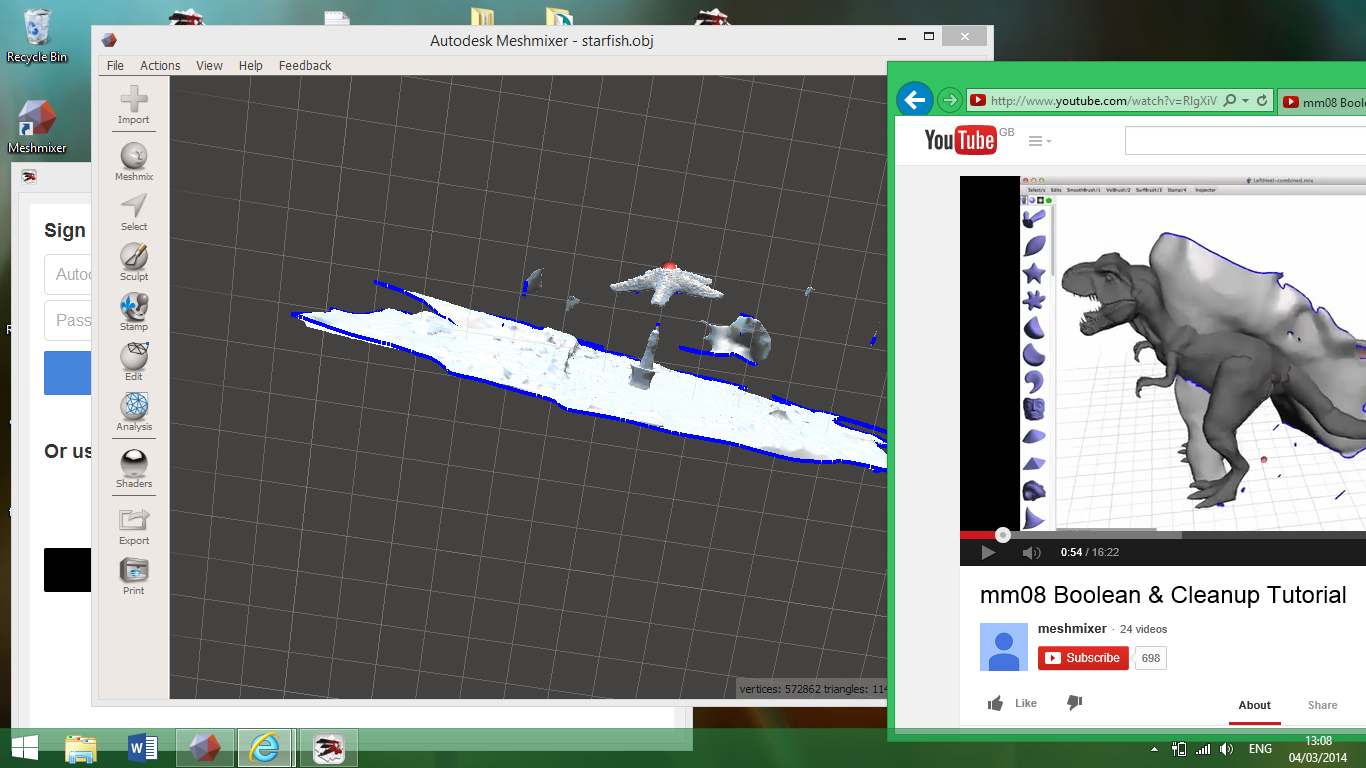
then emailed my catches to myself and downloaded them into
123D Catch software on my computer to tidy up the model and
things slowed down quite a bit!
It was frustratingly slow trying to edit the catches
and clean off the background shell. Next I saved the model as
an obj and imported it into Meshmaker, used the auto repair
function to repair holes in the mesh, smooth the surface,
scale the model and save as an stl file ready for printing. I
did not manage to get a good enough image for printing but
have spent some time following the meshmixer tutorial. I
found several useful links for 123 Catch and Meshmixer on
utube. Other software you can use for tidying up the images
are Netfabb and Meshlab. I have also had a go at editing the
mesh in Rhino but found it quite tricky as I'm new to Rhino.
Group scanning projects
Scanning with the Modela -
link to group file week
5 group modela scan

photo above showing the sharpener we scanned using the
modella and the resulting 3D prints in 2 sizes
NEXT
3D
Printing
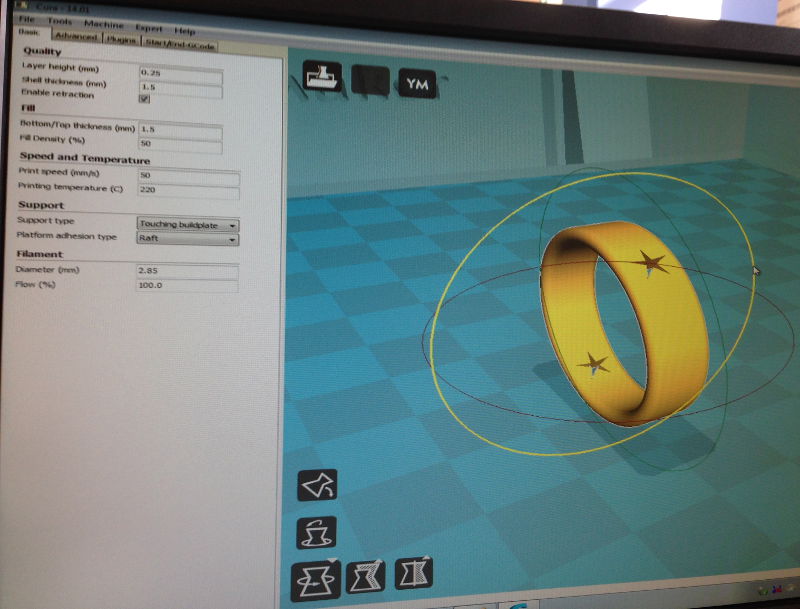
I
drew my design for a decorative ring using Rhino, ( I also
took this opportunity to practice my Rhino skills) saved it as
a STL file, downloaded Curo the software for Ultimaker and
imported my STL file then set up the printer as follows.
· Check surface of print table is flat pick position on the table
·
Open
file in Curo
·
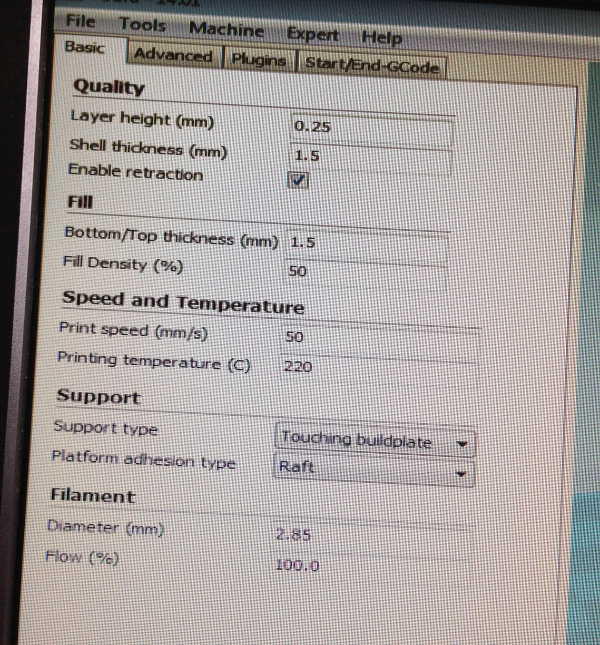
Input
settings, see below
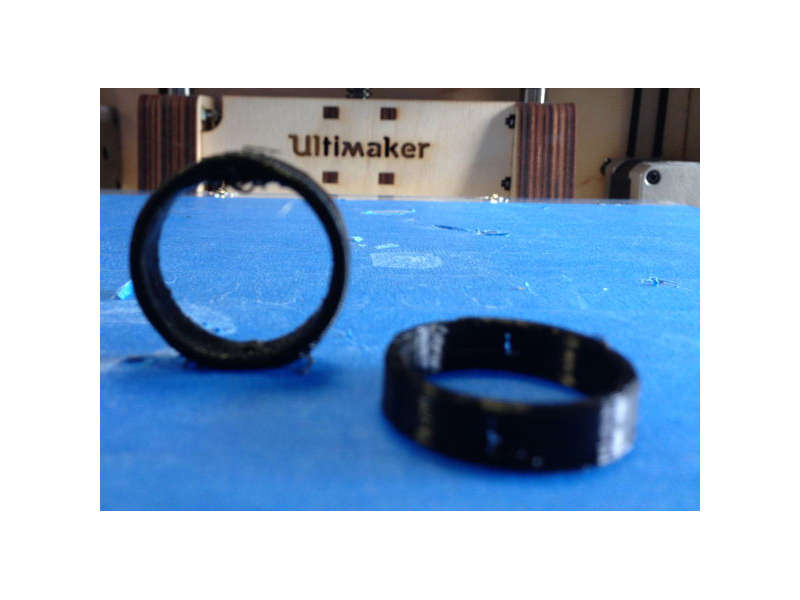
I
found it is important to consider the orientation of your 3D
printed object as it can effect the quality of your print. The
rings were printed upright and flat and there was a
considerable difference in the quality of the finished
product. See below
I
also printed another ring using the Dimension 3D printer to
compare the quality and learn how to use it.
Using a new design and the settings below
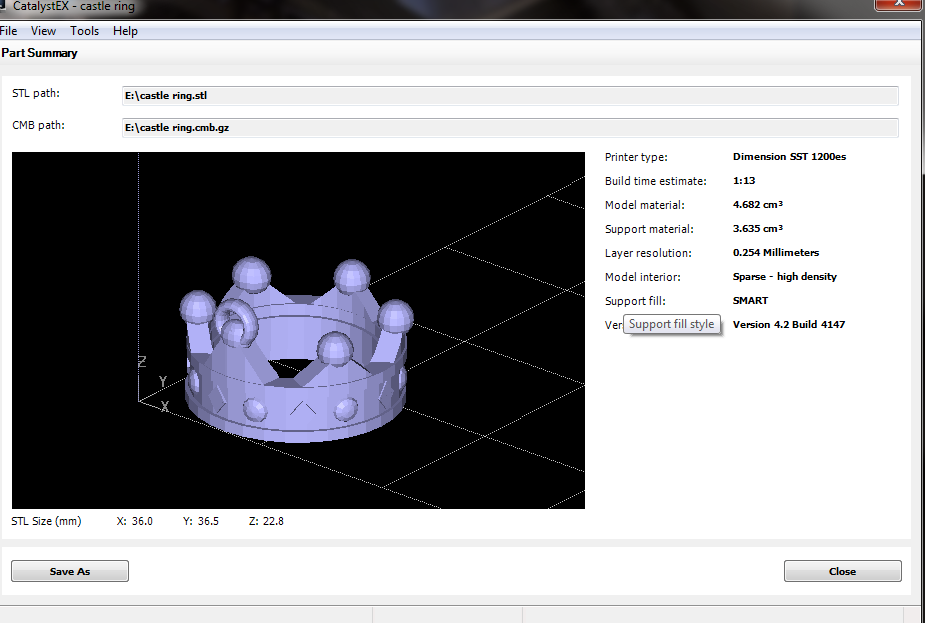
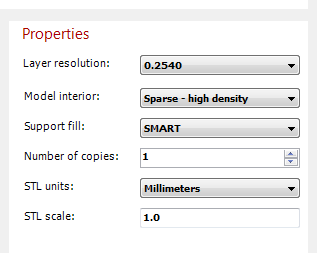
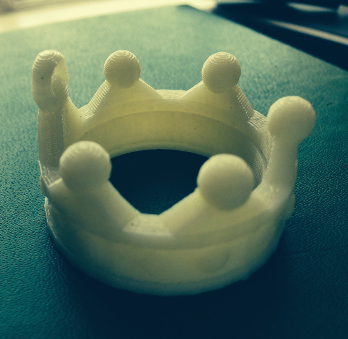 the crown ring printed successfully