 Fab Academy 2014 - FabLab Manchester
Week 5 - 3D Scanning and Printing, Group Work by
James Fletcher, Micheal Walsh and Annie Lynwood
3D Scanning with the Roland Modela MX-20 - Write up
by James Fletcher
In order to investigate as many 3D scanning methods as possible we
decided to work on some of them as a group and then take one each to
write up.
The Roland MDX-20 can be used for 'Tactile Scanning' of objects as
well as milling. The process essentially involves delicately
moving a long needle tip around over the model and prodding it to
work out where the surface is at any point.
1. What Object to Scan?
We decided to try and find an object that we would be able to scan
with as many methods as possible. This proved quite awkward as
the different methods we planned on trying all work best with
different scales of object. We settled on a pencil sharpener
as it's quite an interesting shape, has some surface detail, has a
flat bottom surface so that it's easy to stick down and has a chance
of producing a scan with the Modela, 123D Catch and FabScan.
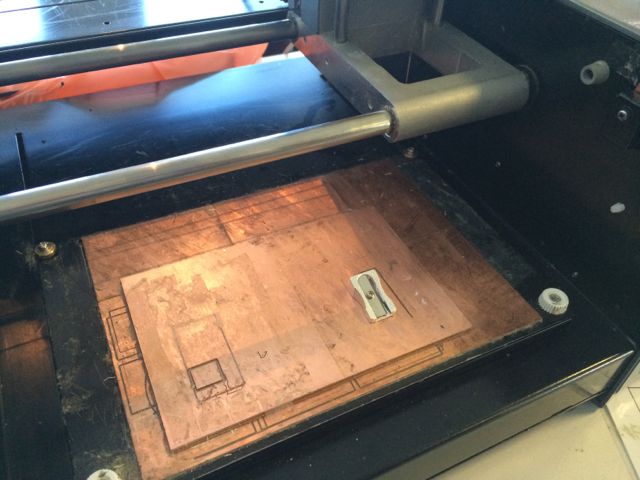
2. Modela Setup
The machine requires a small amount of setup, basically the milling
head needs to be replaced with the scanning head. The heads
are only held in place by 2 'alan' screws so this is a fairly quick
process.
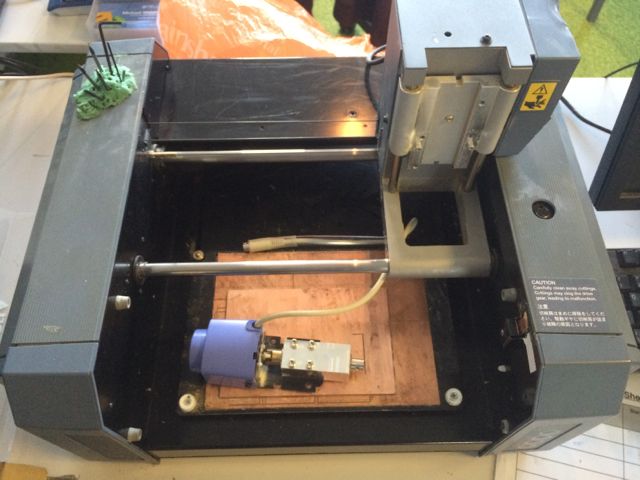
Once the machine was setup we stuck our object down on a flat part
of the Modela bed with double sided tape.
3. Software Setup
We had been using Fab Modules in Ubuntu for all the milling work
with the Modela, unfortunately scanning with the Modela is currently
only supported by the official Roland software called 'Dr PICZA'
which only runs under Windows.
Dr PICZA proved to be quite intuitive to use and after 10 minutes
fiddling around with it, investigating, we were happy we knew how it
worked.
3.1. Setting Scan Area
First thing to do is tell the Modela the area of the bed that
requires scanning. Getting this as close as possible to the
boundaries of the object will reduce the scanning time. Our
initial estimate was by measuring from the lower left corner of the
Modela bed. We put these measured numbers for x-min, x-max,
y-min and y-max into the scan area dialog and then used the 'Begin
Area Test' button to check them. The software gives you a
visual representation of the scan area with drag handles that can be
used to adjust it. This gives a quick initial visual check of
the area to be scanned.

For the 'area test' the Modela moves around the boundary of scan
area lifting the needle up as far as it will go and dropping it at
each of the corners and mid points of the of the boundary in turn
(these are the same points as shown by the drag handles on the
image).
This test allows us to refine the scan area from our initial
measurements, moving the boundary in closer to the object so that
the modela has less area to sample. We iterated this scan /
refine boundary a few times until we were happy that we weren't
scanning a large area of the flat bed but our scan was still well
clear of the edges of the object.
3.2. Z Upper Limit
One thing that was obvious to us from watching the 'Test Area'
process was that it takes an appreciable amount of time (around 15
seconds per cycle) for the Modela to lift the test needle as high as
it will go and then rop it back down again. Obviously with no
other information about the object being scanned the software has no
choice but to do this. We realised that if we use the 'Z Upper
Limit' function we could tell the Modela the upper extent of the
object on the Z axis and it would know that it only needed to lift
that far to clear the object as it moved around.
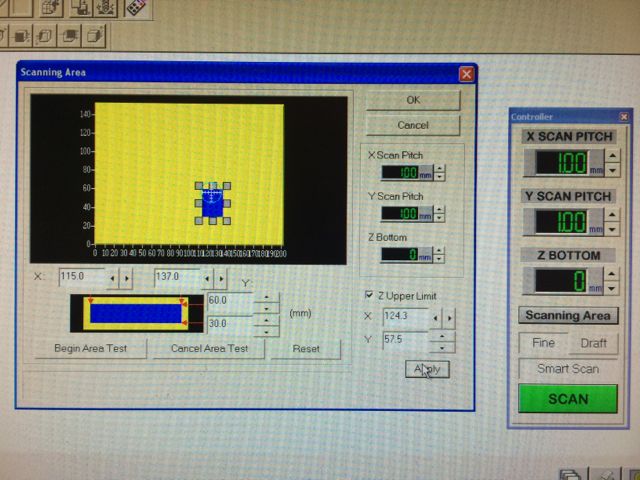
Setting the x, y position of the highest part of the object and
clicking 'Apply' causes the Modela to move the needle to this
position and drop it down to test the actual height at this
point. By watching closely as it did this we could refine the
x, y co-ordinates to get an accurate measure of the maximum
height. hopefullyy this would save some time in the scan
process as the Modela wouldn't need to lift the needle the whole way
up as it moved it around. Watching the Modela actually perform
a scan later showed us that even without this info it seems to be
slightly more intelligent than this.
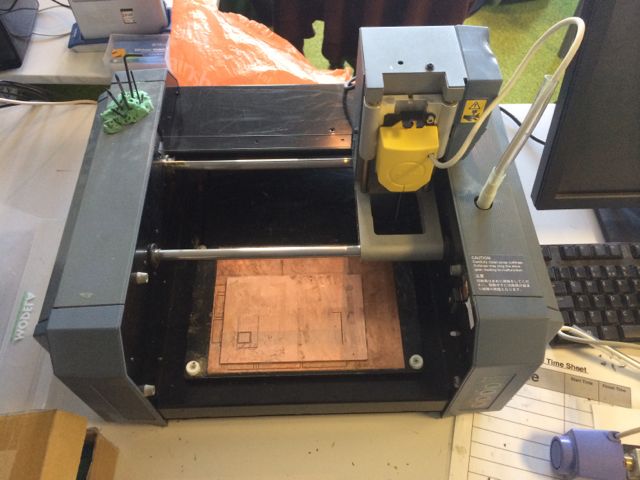
4. Scanning
Once the scan area had been set up we set the x, y scan pitch and
clicked scan. The software defaulted to 1.00mm for the x, y
pitch when we launched it, so even though this didn't sound like it
would give us a very accurate scan we decided to start with this to
watch how the machine worked and then refine it later.
The image below shows the scan in progress.
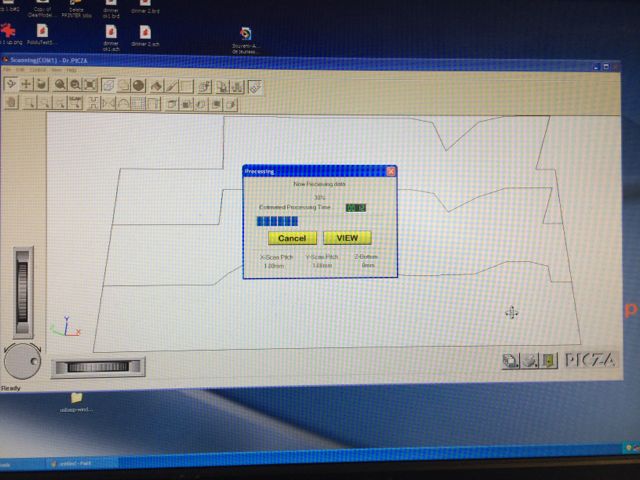
You can see from the image above that this scan is about a 3rd of
the way through and still has about 12 minutes remaining until it is
complete, so a total scan time of about 15 minutes. Our scan
area was 22mm by 30mm, at 1.0mm pitch this is approximately 713
points including the boundaries. At 15 seconds per point
samlpe this is around 180 minutes. So it looks like setting
the z upper limit has had a significant effect (Or maybe the machine
is cleverer than we think!).
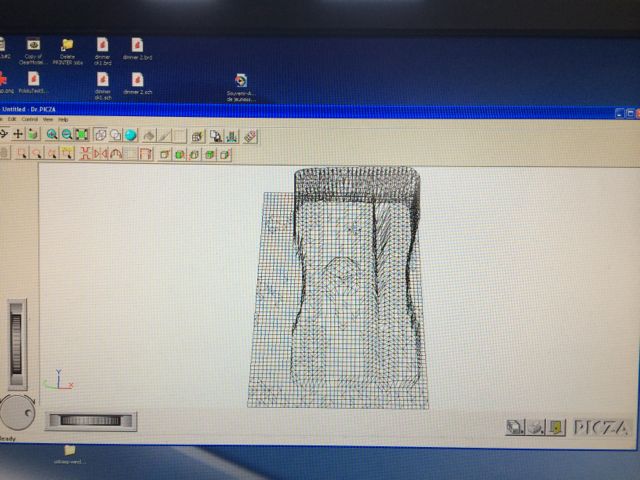
And finally the mesh generated with our initial 1.0mm pitch scan.
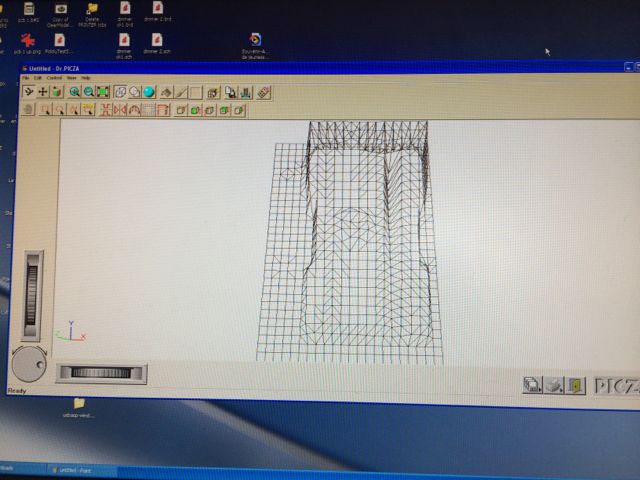
You can see from this that even though the pitch was only 1.0mm, the
scanned object is still clearly identifiable. However it's
missing all of the finer detail such as the ridges on the finger
indentations and the texture on the upper surface.
So we decided to refine the scan pitch and see how the detail
changed. Below is the final mesh at 0.5mm pitch.
And this one below at 0.25mm scan pitch, this took around 2 hours to
complete the scan.
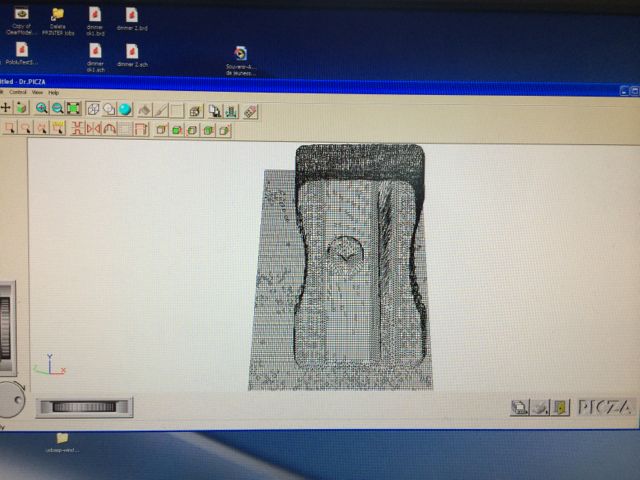
At 0.25mm detail in the object is becoming clearly visible.
You can see the following features:
- Dimpled texture on the upper surface of the sharpener body.
- Cross head screw holding blade in place.
- Difference in height of blade and body.
- Cutting edge of blade.
- Knurls on finger grips at side of body.
We did set off an overnight maximum resolution scan at 0.01mm pitch
that estimated 12 hours to complete. However when we came back
in the next morning the PC had crashed and our scan had
failed. Given time we may attempt this again as we would like
to see what this machine is capable of.
STL Files for the 3 scans that worked are here, here and here.
5. How does it Scan?
The simplistic way to scan would be to step across the scan area in
pitch step increments completely raising the scanning tip each time
and then dropping it back down again. Based on our quick time
to scan estimate earlier on vs. the actual time it took to do a scan
and on observations of the machine scanning the process appears to
be much more intelligent than that.
The first thing to note is that t needle doesn't operated a simple
switch when it drops down and touches the object. It is
actually a piezoelectric sensor. This means that it will
resond to deflections in the x and y directions as well as the
z. With this the machine appears to sweep the tip across the
object at a constant low height until it touches an edge. When
it touches it lifts up until it clears and then continues it's
sweep. with this information it can work out a better
approximation of the boundary of the object than that provided by
our simple scan area estimates and z upper limit. With this
better boundary information it returns and performs a high
resolution scan of the object only just lifting the scanning tip
just enough to clear the object and saving a lot of time moving the
head on the z axis.
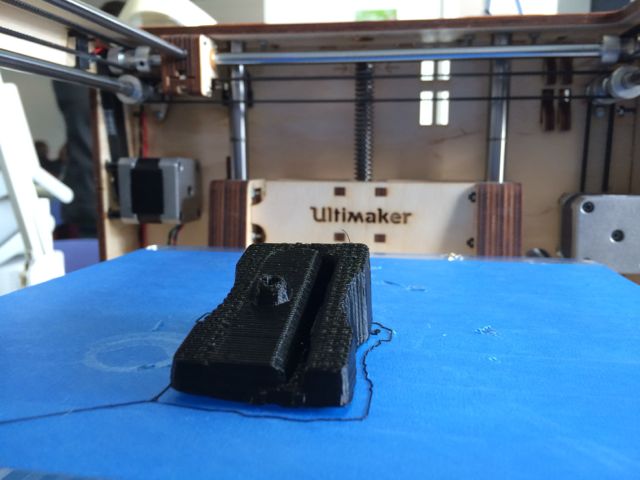
6. Printing our Scans
Having scanned our pencil sharpener we decided to try and print a
copy and see how close to the original it looked. Our original
print was at 1:1 scale, but at this resolution the printer (our in
lab Ultimaker) wasn't capable of reproducing some of the detail that
was visible in the mesh, so we decided to scale the print up to
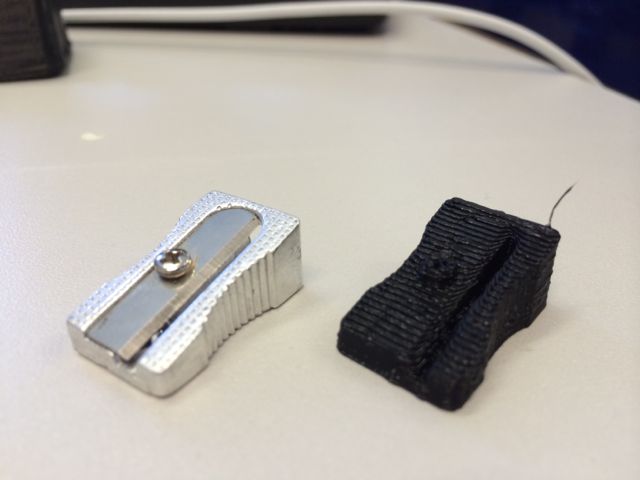
2.5:1 to see how much detail had actually been captured. The
original and both models are shown together in the image below.
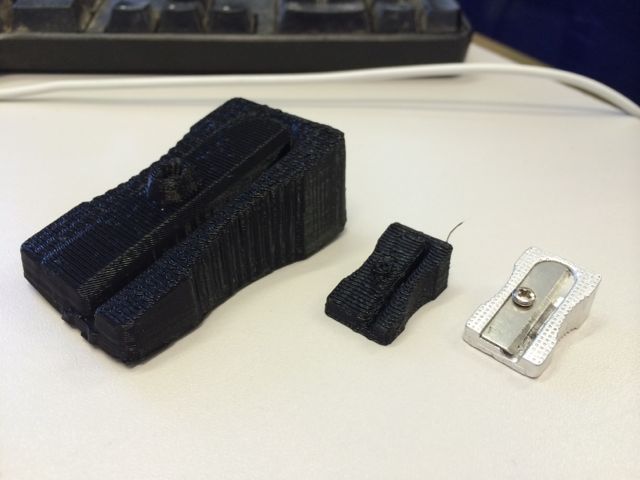
Close up of the largest 2.5:1 print.