

The discussion today focused on embedded programming. I did my MS and PhD work in Electrical/Computer Engineering with a focus on Embedded Systems. I have plenty of experience with this.
Here are all the files I wrote for this week, and you can get the AtTiny Arduino libraries here.
If you ever have a question about a chip, the datasheet can be
your best friend (or worst enemy depending on how well it is
written...) The AtTiny44 datasheet falls in line with other Avr
datasheets in that it is very well written and description of the
different hardware and example techniques are very easy to
understand.
Some neat things I learned about the AtTiny44 for the datasheet are
I've been programming AVRs for years, more specifically the ATmega128 using C, ASM and Wiring. I am familiar with many of the tools such as AVRStudio, Codevision AVR, avr-GCC, Win-AVR, AvrDude, PonyProg, etc.
In fact I even wrote my own super minimalist AVR IDE years ago (In 2005-6ish).
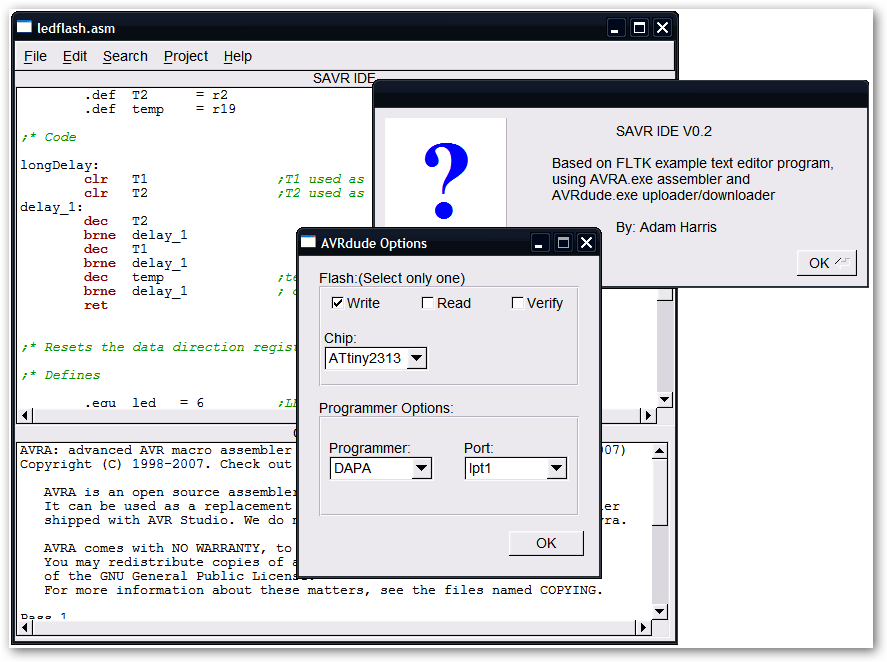
Feel free to download
it for Windows and test it out, it is quite old so it only
supports a few serial and parallel port programmers, mainly the DAPA
Programmer. Honestly, I should update this project since it
uses FLTK and is cross platform. I think that by updating it to allow
USBtiny it could be a useful tool for FabModules (even though it isn't
written in python).
I gave Terence
Fagan tips when he attempted to write his assembly code program
which
can be found here.
Here are some other tools I typically use when writing ASM for AVR
chips.
Delays are incredibly useful, but calculating them can be an annoying
task in ASM (you are limited by the size of a memory location, 256
loops) so you have to have nested loops of NOP statements. These are
some websites and tools I find useful when writing loops.
At some point I wrote a tutorial on how to write your own precompiled
libraries for AVRs. I'll try to dig that up and post it if I can find
it.
In linux, there are many setups that work well for development.
Personally, I find kate or gedit text editors with a terminal plugin
the most useful. But I've used Eclipse which works well too, though I
find it rather bloated for AVRcoding.
In Windows, AVRstudio is hands-down the best tool. It supports ASM and
GCC and has a great built-in graphical debugger. Win-AVR is also a
usable setup. You can even roll your own with notepad++ or SciTE. I
just learned about VisualMicro
for VisualStudio which seems to have a nice GUI debugger for
arduinoif you are into that sort of thing (M$ products that is).
OK, so for the "trying something new" part of the homework, I
looked at pyMite (python on a chip) but it didn't seem useful at all
since it doesn't support python libraries (which would be the only
reason I would actually want to use it) and it isn't actively
developed.
In the end, I opted for trying to install the ATtiny
setup for Arduino. I have never used any of these ATtiny series
chips in Arduino (well, years ago I hacked together a custom solution
for ATTiny2313, but that was barely useable at the time, had to
generate the hex file, then use avrdude manually to upload it. I
eventually came up with my
own drag and drop block system for visually coding for the
ATtiny2313. This was back in 2007-2008, years before
modkit or the others out there). I also had not really used an ISP
programmer with the Arduino IDE, I always used the serial connection.
Installation was simple, but not being super familiar with windows, I
hit a couple of stumbling blocks. Here are the steps I got to work on
Windows 7.

Once you are ready to program the chip, first select
"tools-->Board--> Attiny44 (external 20MHz clock)"
Then select "tools-->Programmer--> USBtiny" (Or FabISP if you
changed your programmers.txt file)
Now burn the bootloader Tools --> burn Bootloader
And finally you can program the chip the typical way (Click the -->
icon next to the check mark on the IDE)
When done, you should have
successful blinky!
I enjoy using Arduino to sketch concepts out and now that FabAcademy
has shown me how useful some of the ATtiny series chips can be, I'll
definitely start using them more often in my preliminary designs,
especially since I don't have to use a serial programmer of any kind.
From time to time I might still use ASM on AVRs for time-critical
designs or when ASM makes something easier or faster. In general I
think my workflow is the following:
1. Arduino/Wiring IDE for "sketching" concepts in Atmega/Attiny chips
2. Depending on my OS, I'll use either Win-AVR or AVRstudio for C/ASM
in windows or Gedit or Eclipse in Linux
Here are all my design files for this week.
Reference: