The discussion today focused on cutting with the large format machine (ShopBot in my case). I made a long video tutorial showing how to go from a concept design to a final product and all the steps in between. I also wrote out the steps and have pictures of my particular project below this video.
You can download all of my design
files for this week here.
(Click this link if embedded video is not working)
I attempted to use the fab modules, but the only ShopBot options
it gave me were to use a 1/8" bit cutting in wax. I also didn't
design tabs into my parts and couldn't figure out how to do so in the
fab modules.
I ended up using Sketchup (Design then export to SVG using a plugin)-->Inkscape (save as PDF) -->PartWorks3 (to join lines and create toolpaths and add tabs) --> ShopBot software -->Cut on ShopBot.
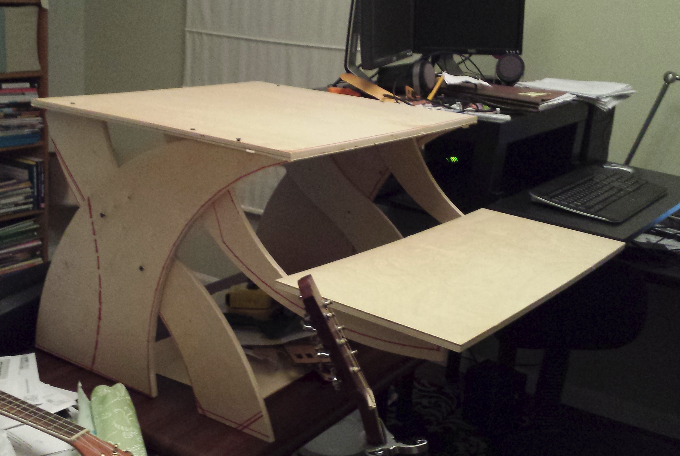
I have been using a standing desk at home for at least a year or so and I've really grown to love it. At work, I have a desk and a chair. I can tell that my posture has suffered from using the chair at work so I decided to make a small table to sit atop by desk to make a standing desk. I began by measuring my work desk and comparing it to my desk at home. Then I used large graph paper (with 1-inch squares) to design a desk based on a drafting table design I had seen online. I scaled it down to fit atop a desk, and I removed the hinged top. (Click images to see them enlarged).

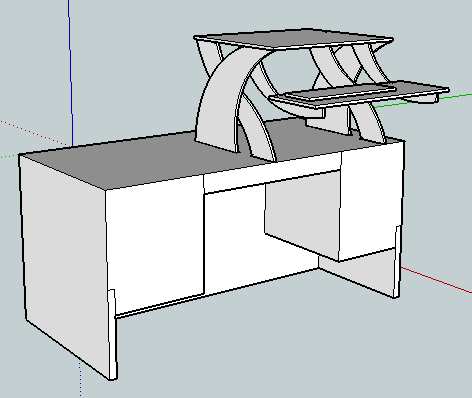
From here, I wanted to see how this would look at different widths on my desk at work, so I drew everything up in Sketchup. I decided on having enough space for both my keyboard and my mouse, the keyboard shelf had to be about 29inches wide. This matched my desk at home. I wanted it to be just a fraction of an inch taller than my desk at home. Once I had decided on the final dimensions, I exported the parts from Sketchup to an SVG file using the FlighOfIdeas SVG export plugin. To use this plugin, you have to copy it to the "plugins" folder inside the "Sketchup" program file folder, then restart Sketchup. I then added a new layer in Sketchup to hold my final design and exploded all the pieces and laid them flat. Then you have to highlight the objects you want to export, then click the dragonfly icon.
 SVG-->
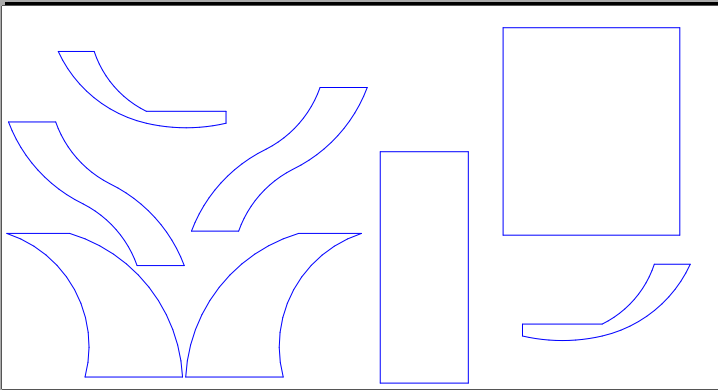
Open the new SVG file in Inkscape, Clean up the design and
arrange it however you'd like. It works best to separate all the
parts by a lot of space. Space them so that none of the bounding
boxes overlap so they will be easier to edit in the next step of the
process. Export it to a PDF. Use 600DPI resolution. Then open the
PDF inside Partworks3.5. This software will allow us to set up our
toolpaths and create tabs so the design doesn't flop around once it
is cut free from the stock material.
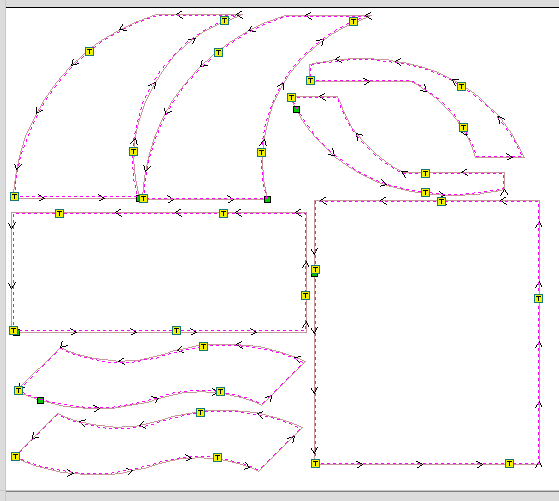
The interesting thing here is that when you import the PDF into Parkworks, each line is separated. The first thing I cut was a test of a 4" diameter circle and it took a long time. Since Sketchup doesn't do arcs, and it instead makes a circle or arc from a bunch of small lines, the result was that the ShopBot did all 4 layers of a single line before moving to the next line. This was not desirable and tool a very long time. Playing around with the tools in this software, I found that you can't just GROUP line segments, you must JOIN them. This made for a much quicker cut.
I actually made 2 different toolpaths for my design, one that didn't have tabs and only did 1 pass (for a marker to draw out the shape on the wood) and then one with 4 passes and tabs built in. I then taped a piece of PVC pipe to the front of the router and let a sharpie marker just sit in there and ran an air cut.
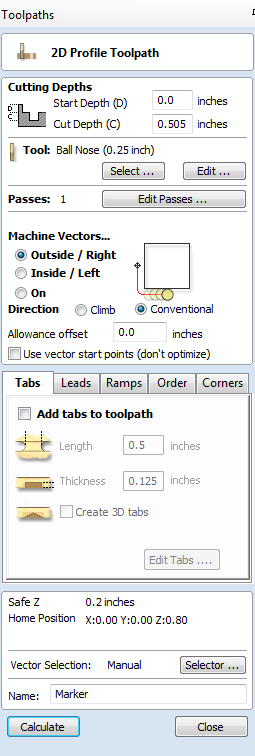 Marker toolpath on the left, Actual on the right.
This was a good idea because it showed me that I had laid out my parts incorrectly. I had gotten the X and Y axes switched on the machine. I also used the outline for figuring out where it was safe to place the screws to secure my stock to the sacrificial bed. Once I had the stock secured, I began my cut.

After about 10 minutes, the machine stopped. Checking my computer, I had a BSOD!!! This was my brand new laptop and I couldn't figure out why that had happened. I rebooted and recut, but I had lost my X and Y offsets and couldn't find the origin I had used previously, so I just completed the job starting as close as I could to the first origin I had used, then I later recut the 1 part that was messed up. I determined that my computer went to sleep while cutting and that the ShopBot dongle was still transmitting and requesting data from the computer. This only happened 1 other time when I removed unplugged the laptop from the machine while it was sleeping. Determination: Don't let your computer go to sleep while connected to the ShopBot!!!

The marker outline was a good idea, except now I have sharpie doodles all over my nice wood finish. I assume I can try to sand through it without damaging the thin veneer. I had planned to stain the desk, but now I might just paint it. I screwed my parts together temporarily and took it home to compare the desk with the one I have there. Overall, I think it came out pretty well. I might want to put a single bar bracing across the middle of the two sides because it is just a little bit wobbly, but it works well without it.