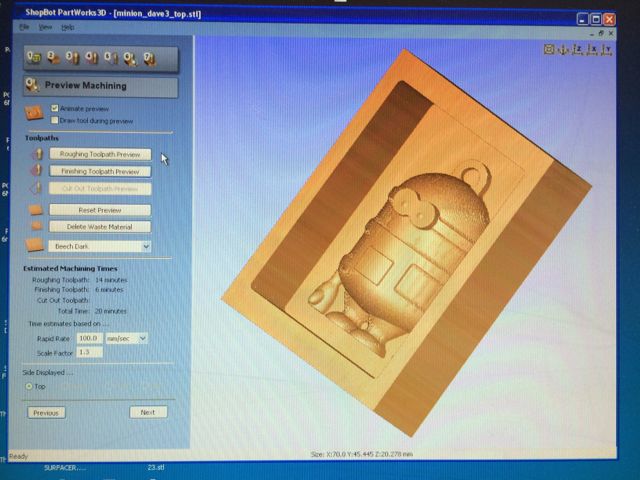
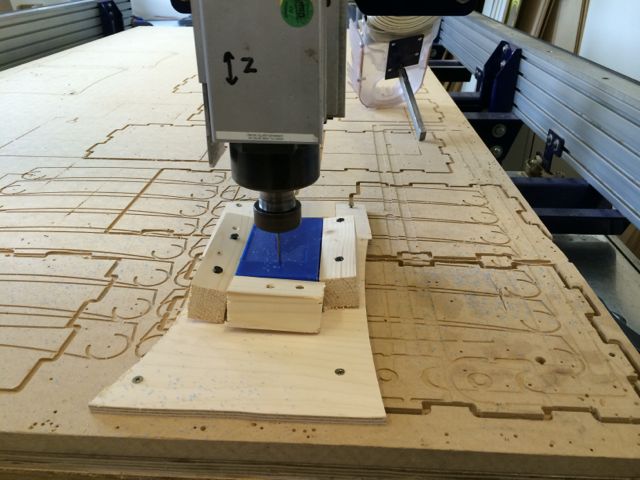
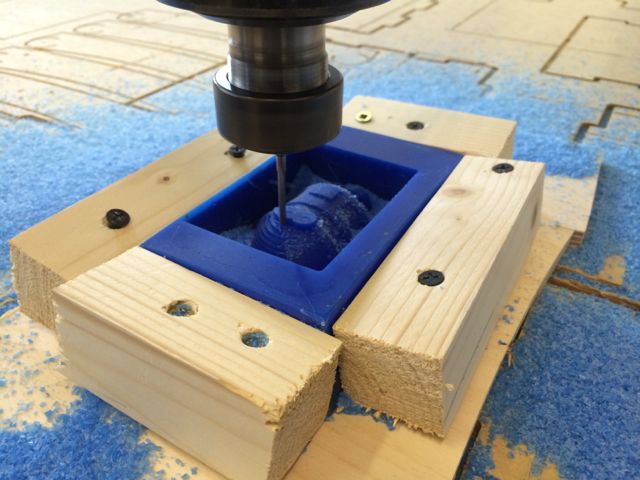
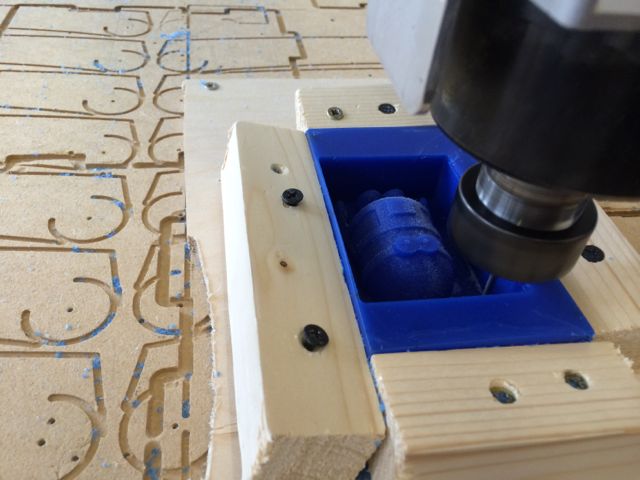
Fab
          Lab LogoFletch's Fab Academy 2014 Blog


09. Molding and Casting

This weeks assignment is to design a 3D mold, machine it and cast parts from it.

09.01 Choosing Model and Machine Process

I've decided to mold the 'Minion' that I designed in the 3D printing week.  This would give me the opportunity to compare the same object from different manufacturing processes.  I'm interested to see what the surface finish and structural properties are like, escecialy compared to FDM.

My original intention had been to make a two part mold to make a complete minion, however I decided to initially keep things simple and test the workflows / processes by making a one part mold and making just the front half of the minion.

There are 3 workflows / processes that I'd like to investigate:
  1. Modela MDX20 using Modela Player
  2. Modela MDX20 using Fab Modules
  3. Shopbot using Partworks 3D
Although I'd like to investgate all of the workflows and machines, the next issue I had was selecting an appropriate machine for the dimensions of my model and the feature sizes I wanted to achieve.


Modela
ShopBot
Pro's
A selection of very small bits allowing fine internal features to be cut.
High accuracy on small models.
Fast to cut large areas.
Standard tools have good clearance.
Can machine larger wax blocks.
Con's
Small bits have a poor clearance.
Slow to cut large areas.
Can only fit smaller blocks of wax onto cutting bed
Accuracy is good, but not sure it's as good as the modela.
Bits are larger, however apparently modela bits will also work in shopbot.

Ideally I would like to have made my minion at the same size that I printed it on the FDM machines for a more direct comparison.  The problemm is that at this size (around 40mm high) I would need to use the smaller Modela milling bits in order to be able to fit the bit between some of the features of the model and these bits don't have the clearance to be able to reach all of the way into the model.  In an ideal world I need a milling bit smaller than 1/8th inch and with a clearance of 20+mm.

For this reason I decided to scale the whole model up to the largest size that would fit into my block of wax (roughly 125mm x 75mm x 40mm).  Then machine it on the shopbot with the smallest bit avaiable with a clearance > 40mm, this was the standard 1/8th inch flat end mill.

09.02 Making the Object Files

I already had the minion designed in Kokopelli, so I simply subtracted a cubiod from the back of the model so that I only had the front half.  I then exported as both an STL and PNG.

Minion splitup in kokopelliMinion exported as png


09.03 Machining the Wax Positive

As discussed above I have choosen to use the shopbot.  I choose the 1/8th inch flat endmill for the roughing pass.  I also choose to use this tool rather than the 1/8th inch ball end mill for the finishing pass as I wanted to get sharp internal edges on my models features.
I used Partworks 3D and just followed the steps that the software leads you through to setup my roughing and finishing toolpaths.

1 Select model orientation and size:
Partworks Orient Model

2 Select material size and model depth below surface (the model depth is important as it dictates how much rubber will be on top and therefore the strength of the base of the mold):
Partworks Material

3 Setup roughing toolpath (make sure you double check the feeds and speeds in the tool database as people have a habit of changing them!):
Partworks tool database
Partworks roughing

4 Setup finishing toolpath:
Partworks finishing

We don't need any cutouts etc so ignore that step.

5 Preview toolpaths and save them:
Partworks save

I saved the roughing and finishing tool paths individually even though I don't need to change the tool between them.

09.04 Machine the Wax

Next I used a rough wooden jig to hold my wax block down on the shopbot bed before machining it in exactly the same way as I did for the 'Make something big' week.  Even though I didn't need to do a tool change I still zero'd the z-axis on a section of wax that would be left behind after the roughing cut.

Setting up the wax block and zero'ing the z:
Shopbot setup

Roughing cut:
Shopbot roughing

Finishing cut:
Shopbot finishing

09.05 The Finished Wax Positive

Looking at the finished wax positive, I wasn't very impressed.  On close inspection the finish was very 'hairy' and contained steps. 
Hairy wax
Possible causes were:
I decided to make a quick test half sphere object in kokopelli and test each of these to see what the issue was.

09.05.1 Wax Quality 

Looking at my block of wax it was a different colour from the others in the lab, so I decided to machine one of the others.  Image below Is my simple test object with the same tools and tool properties as the 'Minion' but machined in a different type of wax.  The results were identical, the finish is still 'hairy'.

Test flat end mill

09.05.2 Speeds and Feeds

I double checked the speeds and feeds for the milling bit I used and they were OK.  Ideally I would have liked to experiment with a variety of slower feed rates but I didn't have enough blocks of wax available.

09.05.3 Finishing Bit Used

Finally I decided to use the 1/8th inch ball end bit for the finishing pass.

Test ball end mill

As you can see from the image above the ball end mill finishing pass (image on left) is much smother than the flat end mill. However the internal corners where the sphere meets the base are far less sharp.

I would like to see how much difference the 'hairyness' amkes to the surface finish of the final object but in future I think I would always use the ball end mill for the finishing pass.

09.06 Make a Mold

I used silicon as my negative mold material.  It takes 8 hours to set.  For the first 20 minutes I placed it in a vacuum box that to try and 'de-air' the silicon, then I left it overnight to cure.
Vacuum boxFinal mold

You can see from the image above that there are some small bubbles in the final silicon mold.  More care is required when mixing the silicon next timeand a much slower pour into the mold would also help.

09.07 Cast in Crystcast

I did a quick test cast of my minion in Crystacast from Formula.  It's a hemihydrate plaster that we have here in the lab.  It only takes around 20 minutes to cure so was perfect to test the mold.  I filled my mold right to the top and then 'scrapped' of the excess material.

Casting withg crystacast

Final object, nite that one of the legs broke when I was removing it from the mold, not suer it had completely cured.:

Object in crystacast

The steps in the wax positive are visible, however none of the 'hairyness' has really come through in the final object.

09.08 Cast in Clear Embedding Resin

Finally I wanted to cast my object in clear embedding resin with something 'set' inside it.  I chose to use 'EM400PA Shallowcast' as it was available in our local art supplies store. 
The process was to pour a shallow layer, wait 15 minutes for it to start to cure, place the object to embbed, then pour the rest of the mold.
The clear resin can also be tinted and I intended to add a thin (1mm) tinted layer to the back of the object to add a bit more interest.  I didn't have any of the official tints for the casting material, but we did have some urethane tints here in the lab, so I used some of the spoil from the first pour to test that the material cured properly when these tints were added.

It took longer than I expected for the first pour to start to cure.  The datasheet says that it takes around 15 minutes, but after around 30 it suddenly went from very runny, to jelly like.

Pour first layer:
First pour

Test tint with spoil (it cures OK):
Tint test

Embbed object (I went for a Lego man):
Embbed object

Final pour:
Final pour

Demold:
Demold

You can see from the closeup below that the steps on the finish have really effected the optical properties of the cast.  In future I think I would sacrafice detail on the internal corners and use the ball end mill to give a better finish on the curved surfaces.

Closeup of surface finish

Updates 1

I remade the minion mold with the ball end mill.  The result is a much smoother surface finish, but a slight lack of detail.
Ball end milled mold
Comparison of the molds made from exactly the same STL file, upper picture is 1/8 inch flat end mill, lower picture is 1/8 inch ball end mill.

Updates 2

My 11 year old son popped in one day during his holidays and we made the following:
Vader faceAbe in Vader

It's a Lego Abraham Lincoln cast in a clear Darth Vader head, I'm sure that there's a political statement in there somewhere!  The STL file for this just came from Thingyverse.  We used Neils idea of accelerating the curing of the silicon in the oven to complete the entire process in one day.  

Updates 3

I've made some 3 part molds as part of my final project work.

ToDo

Possible future molding tests include:

Other Thoughts

Tool details? Vortex 1312 (2 flute, flatend 1/8th inch)
Tool tip? Inspected under microscope and it looks OK.