Week 18: Final Project Development
HELLO EVERYONE! I'm so happy today Fabbers all over the world, because I'm pleased to announce that this will be my last documenation of this stupendous adventure I had on the past six months. It has been a journey of knowledge and practice every week of each month where I've learned so much with all of you. Thank you for everything!
This page is all about my final project documentation where you've already had some glances at it on the past documentations. I'll divide my writting in three chapters: SMW (shape memory wire), Electronics and Molding and Casting. These three stages were a battle until the end and besides how everything turned out, I'm really happy with my work and my findings.
As you've read on previous documentations, Mechanical Design and Applications and Implications, my final project is a soft robot made out of silicone with the electronics embedded inside. The idea behind all this project is based on jellyfishes' movement principle, they contract their muscles in order to gain jet propulsion and thus swim faster, so I thought about trying to replicate that movement trough shape memory wire that could, attached to a structure (inside the silicone), bend its structure everytime current passes trough the wires, because this type of wires work that way. The control of this pass of current will occur digitally with the control of a MOSFET.
Shape Memory Wire
First let's tell something about this wires. Shape memory wires are alloys that "remember" their original shape and that when deformed returns to its predeformed shape when heated. So, everytime the wire receives current (by analog or digital methods, like a short circuit or a MOSFET), the wire contracts and then returns to its original state when current is not passing by anymore.
The first I needed to do was to test this contraction and, in fact, see if I could "turn it on". Another curiosity is, since SMW is not solderable how would I make current pass trough it? Thanks to Neil's documentation, Intro to shape memory alloy actuation using Flexinol I could find the way to do so. The trick rests on trying to find a way to connect the wire to the current. For that, I've used some silver crimp beads to pin the wire inside, so I got some silver crimp beads from a friend of mine and with some pliers, crushed the wire inside so hard making it impossible to escape. With the wire stuck inside the bead, you can now solder that bead to a jumper wire and this way whenever you run current trhough the jumper wire, it will pass it to your shape memory wire as well. Next you can see a montage of photos of my process:
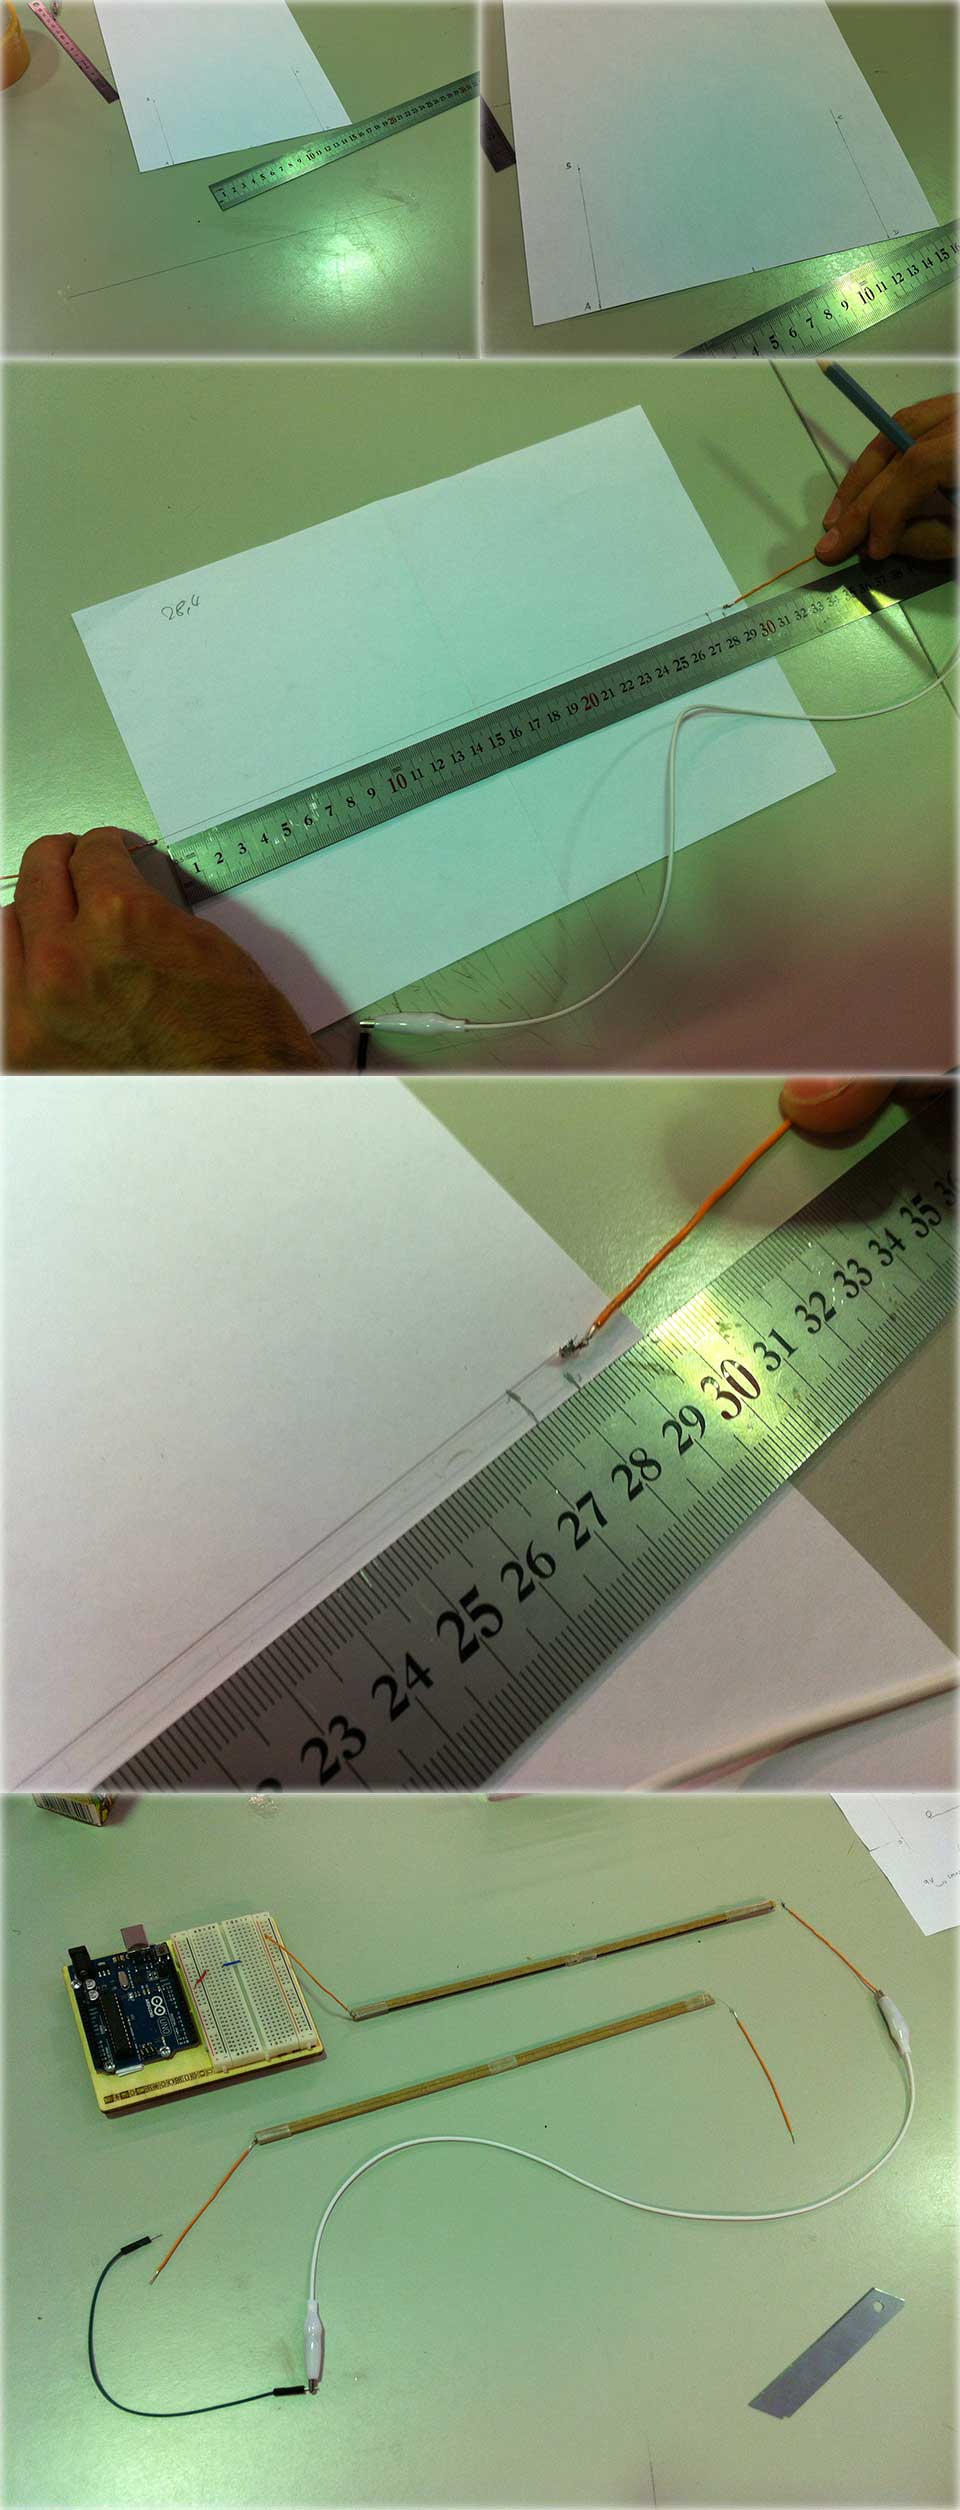
First I tried to follow the example Neil gives in the page, but I was not getting anywhere, the sheet of paper was not moving, I think the its assembly to the paper was not well done. Then I simply tried to connect the wire to the circuit and measure the length of contraction to get a note of was going on. So, after crushing each end of your SMW to the beads and then solder them to jumper wires, one end connects to VCC and the other end, when plugged to GROUND, makes the short circuit and the wire contracts.
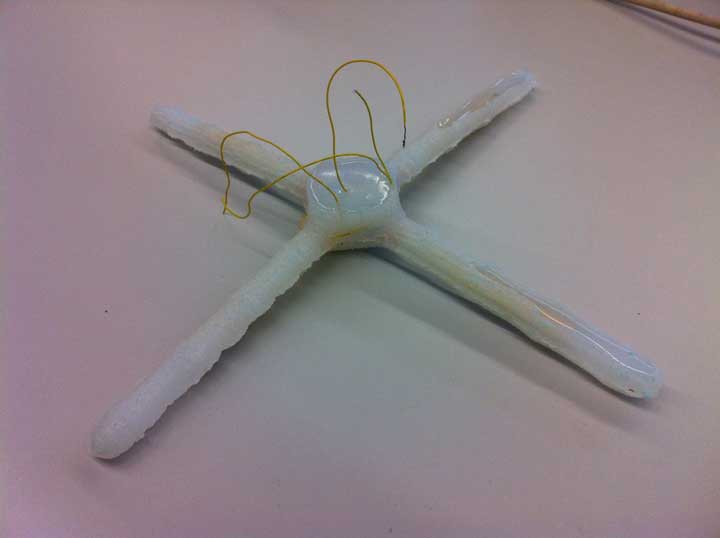
On the final image, you can see all the connections. In order for the structure to bend, I had to break in two and simulate our body. At one end of the structure, the SMW is behind the tape. At the middle joint, the tape is only connecting the broken slab, and at the other end, the ssame happens as on the first end. This was a clever way to simulate the structure of our body and make something like a rudimentary arm made of cardboard.
Below there are two videos. The first one was a test I made to test the wire pull strength and I was very happy to see it working. The second video is the result of the work developed so far and described above:
YEAH!!! First chapter completed. Everything turned out fine and the findings and experience were irreplaceable. I'm surely in love by SMW (laughs).
Electronics Production
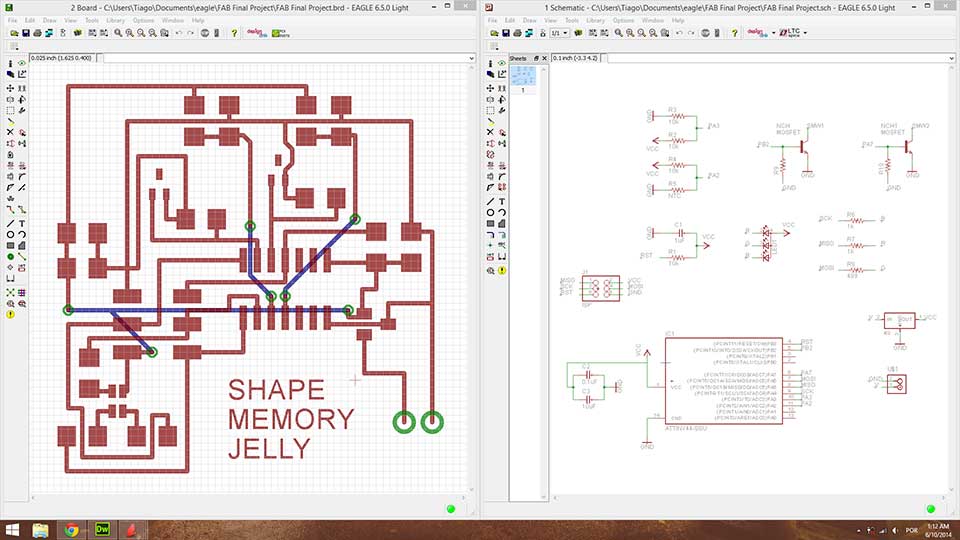
The second chapter of this saga begins. Now was time to start working on my final circuit. My final circuit was designed thiking about the following:
There had to be a temperature sensor, a RGB LED and two MOSFET. The idea is that the temperature sensor can record the heating and cooling of the SMW and output it trough the RGB LED, giving different colors to the silicone and make a psychedelic soft robot while the MOSFET turn ON and OFF the SMWs. A simple and interesting idea (in my point of view). Below is another montage for this process:
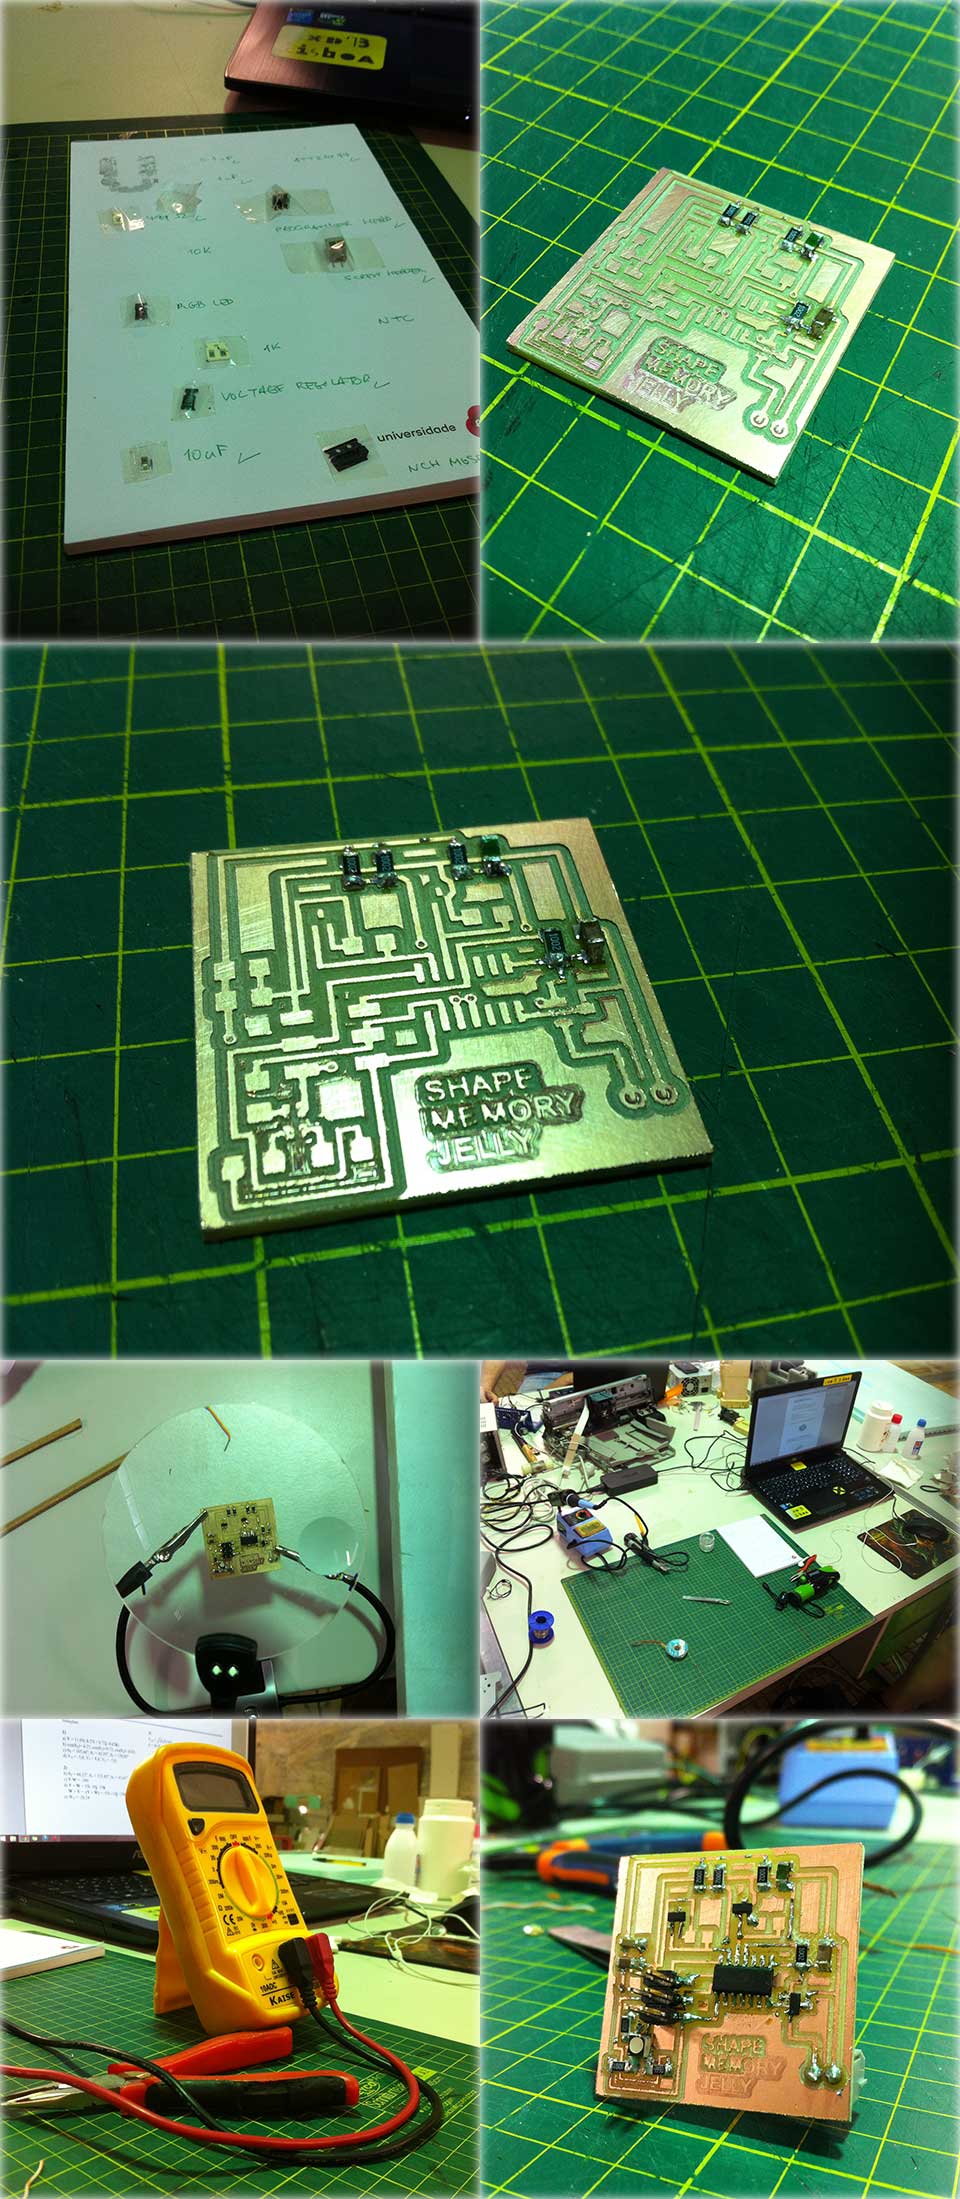
After a day of work, everything was ready to go to the next stage, programming the board.
To my unfortunate luck, something really strange happened to my board that I cannot explain and my instructor didn't find the problem as well. As soon as I pluged my board to power (with 6V) the voltage regulator that was there immediately burned, so the smoke test was not passed. After that, me and my instructor decide to take the voltage regulator out and try to connect it again and, this time, the ATtiny44 burned out as well. We really don't know what happened with all of this, but since I could not find a solution for this problem, I could not program it either. I'm really sorry for this, but I'm planning on solving this matter as soon as possible. I don't have more time to do it until final project documentation updates on the server because I had other issues to solve, so I can tell this is one of the things that got wrong with this final project.
Making the Soft Robot Body
This is the penultimate stage of this project, the time to make the soft robot body with the mechanical structure inside it. You can read a more accurate documentation on this step on my Molding and Casting week.
I'll explain it one more time here but shortly. First I had to design the molds in a 3D software so that then I could mill some material to fabricate the molds. My weapons of choice were Cinema 4D for the modelling part and ARTCAM for the files preparation for the milling process. After completing the molds' design, it was time to prepare everything on ARTCAM. It took me almost an hour to complete the milling process of the molds. Everything turned out okay reasonably.
Here is another montage of this process:

After a day to let the silicone dry, this was the final result:
It was a curious finding discovering that the silicone takes the shape of every structure is in contact with when drying.
Some things turned out okay, others didn't, but this was the final result of this project development. I'm sorry for somethings not working properly, but the time was short and I did my best to try to finish it. Hope this documentation could be of any help and I hope all of you will like it and take advantage of it.
Project's Files
Here you can download all the files for this project:
THANK YOU FOR WATCHING EVERYONE! IT WAS A PLEASURE TO RIDE THIS JOURNEY WITH ALL OF YOU. THANK YOU ALL!!!