I filled out the Job Setup screen and then imported my design. I then decided to change the width and through you did this through "Material Setup". It turns out that's a completely different screen and after talking to James R I realized that you need to do everything through the Job Setup.
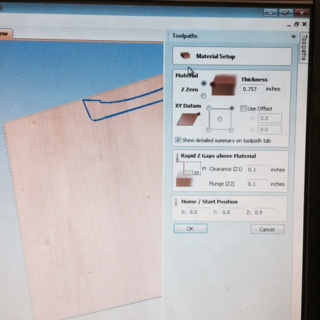
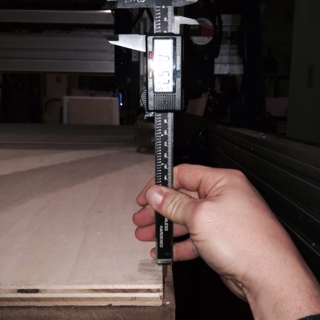
I was the first to go in our lab and I was stressed about giving other people time to go. That led me to move a bit faster than I should of so I went ahead and placed the sheet of plywood on the bed (and screwed it down) before taking the width measurements. I figured it wouldn't be a big deal to measure it while screwed down to the ShopBot. Nope! Bad idea. First, there were two values for the width...0.735 and 0.757. At the time we thought this was because of warping and we just figured it would be ok if we set the depth to the largest value. As I later found out, we were wrong.
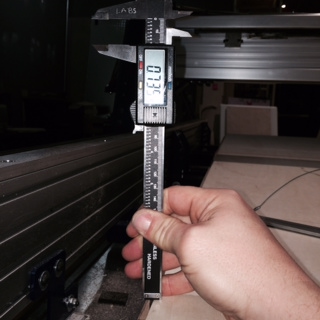
Don't Measure Vertically:
It turns out we were wrong about the different values coming from plywood. It could have caused part of the problem, but it wasn't the entire thing. When I showed this to someone else they explained the obvious to me...
I was measuring vertically and I didn't account for the fact that the calipers may have been at an angle. Bottom line: the way I measured it is NOT the way to do it.
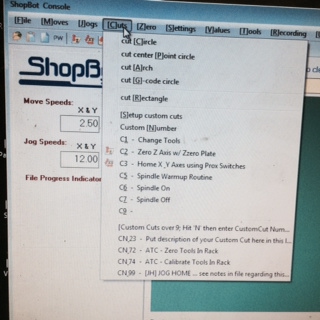
We thought we were ready to "auto ground" the Z axis, but we couldn't find it in the ShopBot program. After searching for five minutes we finally found it in the "Cut -> C2 menu item. (See screenshot on the right)
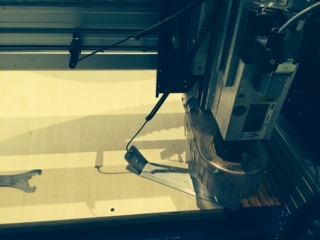
Grounding Auto Z:
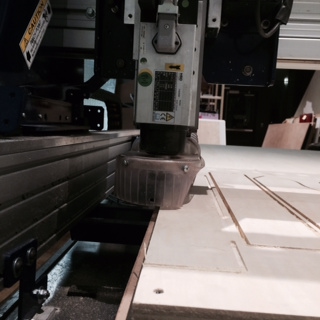
We setup the ground by connecting it to the spindle engine. DOH...I guess that isn't a value ground because it just kept running into the metal. We quickly stopped it and realized we needed to ground it to the carriage that moves the motor. (See screenshot showing where we finally ended up attaching it).
I made two mistakes with dimensions, but the root issue was that we put the x,y zero about an inch from the top and 1/4 inch from the side. That caused two problems...
1) I tried to fit all my pieces in EXACTLY 48" area. This meant that the tool ended up going off the end of the board and the piece isn't the right size (it is missing that 1/4 of an inch. (See screenshot on left to see where the spindle went).
2) I don't have a picture of it, but I screwed the board down at the 30" mark. I did this because my parts were 29" wide. It was after that that we decided to put the x,y zero an inch from the edit (ironically because we wanted to avoid the screws at the top). This meant that we ALMOST hit the screw at the far end.
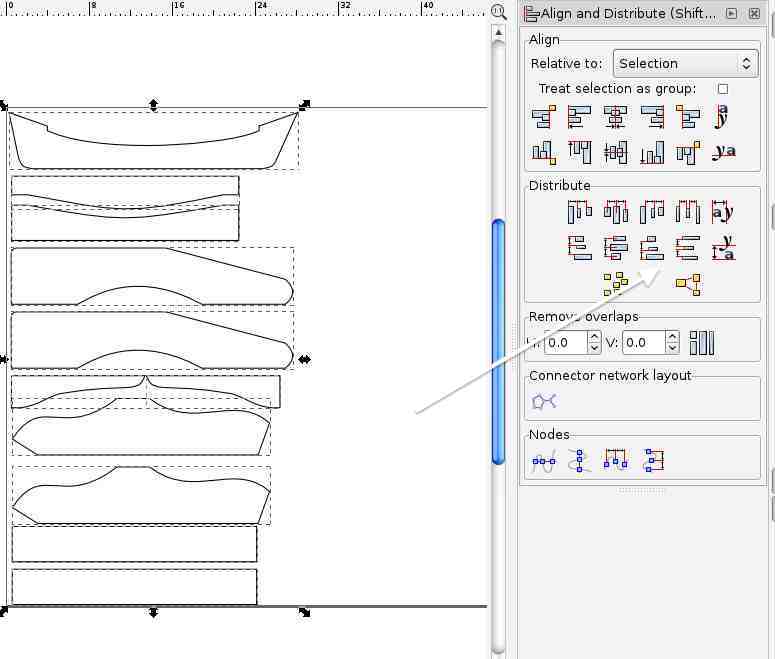
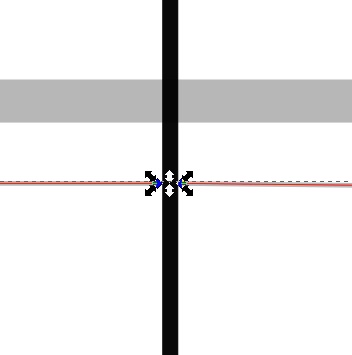
My first draft of the chair had the parts poorly placed. They were too close to one another. I spent a bunch of time moving things around to try and fix it and then I realized something...the InkScape "Align and Distribute" options allow you to balance our the gap between items (see arrow on right).
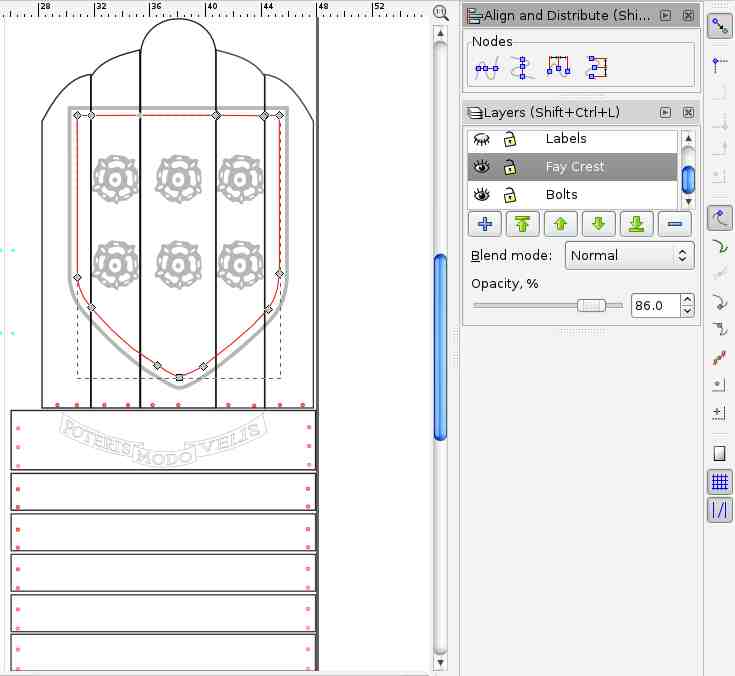
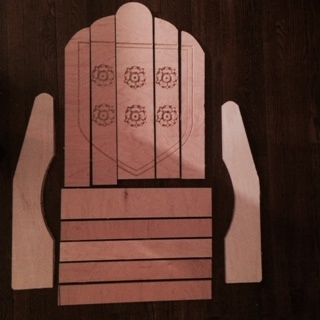
Once I learned how to use vcarve, I realized I couldn't do the crest and the backing the way I had planned (see lefthand picture). So I needed to break up the crest so that I could put the gaps between the parts for the back.
FIX: I ended up spending a bunch of time splitting and separating nodes so that the crest went into five different slices. See right hand for zoomed in example.
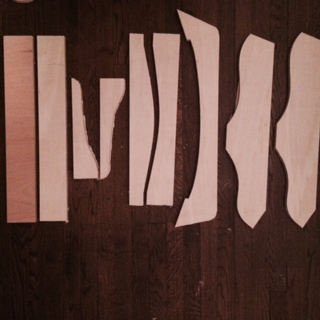
Because I ran out of time (and there were occasional issues with the ShopBot), I ended up needing to use the machine three different times. And I generally just grabbed the wood that was available thinking that it was all ordered at the same time. DOH! As you can see from the picture on the right, I ended up using two different kinds of plywood with different veneers.
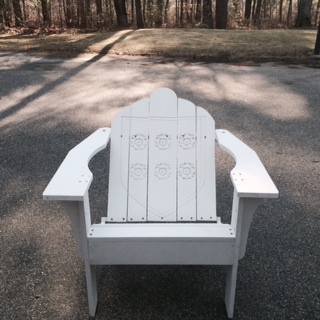
FIX: I am going to have to paint the wood, which I likely needed to do anyway given it isn't outdoor wood. But still...
I ended up doing many different cuts using many tools. Here were some examples of things I tried...
- Simple Profile cut with 1/4" end mill tool (for the piece cutouts)
- Profile cut with V Carve tool (for the crest shield)
- VCarve cut with V Carve tool (for the crest flowers)
There were any hardcore learnings as most cuts went well, but my eyes were opened to the fact that there were many different options and you didn't need to use the specific tools for specific cut.