3D Printing and Scanning
Assignment
Design and 3D print an object (small, few cm) that could not be
made subtractively. Also, 3D scan an object (extra credit: print
the object and make the scanner).
Ideas and Approach
I have been fortunate to have been able to make a few items this
year with our school's Replicator 2X and Digitizer. That
being the case, I decided to work on three different challenges
this week...
1) Create a part for a new "exploratorium" wall at the school
where PK/K students will build marble wall for constructing a cool
sculpture.
2) Scan, cleanup print/generate a simple 3D object (a Dunkin
Donuts cup), and
3) Take a 123D Catch scan of myself and, after cleaning up the
model, printing it.
Files
Steps Taken
Marble Parts
For the first part of the assignment I decided to help a fellow
teacher who wanted to create a "marble wall" for students.
|
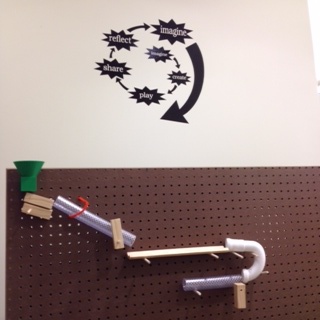
Here's a creative "marble wall" that our
primary school librarian is building. Her goal is to
make a wall where students can create a contraption that
will move the marble down the wall. Her hope is to
make this a way to explore everything from angles to
probabilities to simple physics.
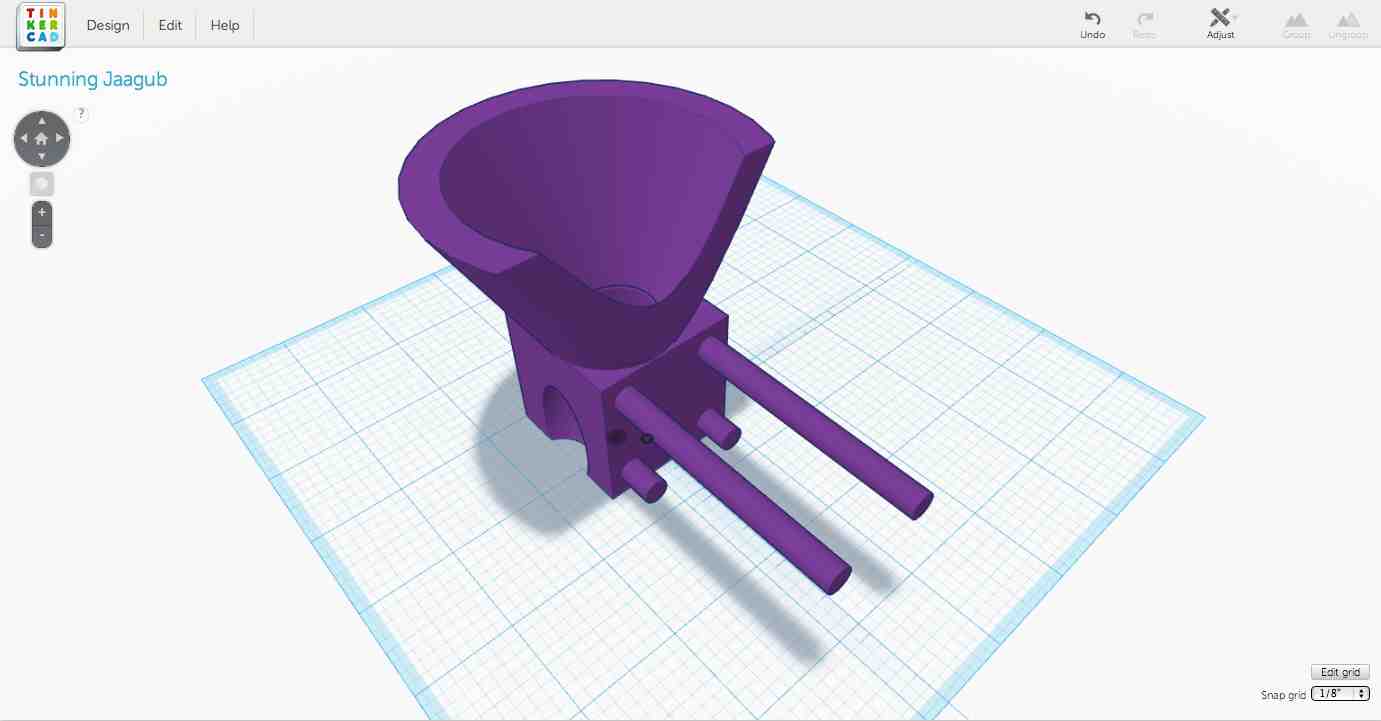
Given this week's assignment, I thought it would be cool to
make something that would catch the marble and redirect
it. It needs to have a hole for the marble to fall
through and then a path that will redirect the marble back
or straight down.
|
|
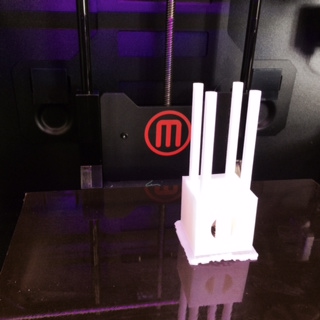
Here's a printout of my first draft. It
has a few issues...
1) The prongs are long because there are two sheets of
pegboard (they put one behind the first to make the pegs
more secure). The thing is, they aren't perfectly
aligned, which I didn't realize until I tried to mount
it. FIX: In the next round I am going to shorten the
bottom ones so they only need to go through the first piece
of pegboard.
2) I felt like a total idiot, but I didn't realize the
bottom hold pushes the marble out "the front" rather than
through the side. FIX: Rotate the hold to the left or
the right.
3) The hole is the right size, but the marble flies right
over it. FIX: I need to add a backstop that acts like
a funnel.
|
|
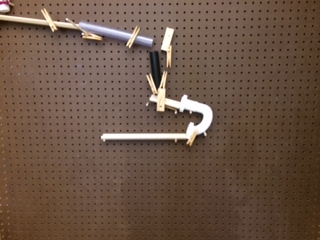
Here's another picture of the first draft
mounted on the board. Some of the issues mentioned
above are more easily seen here.
|
|
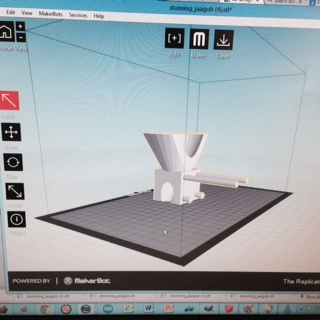
Here's the STL file / version 2 with all of
the changes proposed above...
|
 |
|
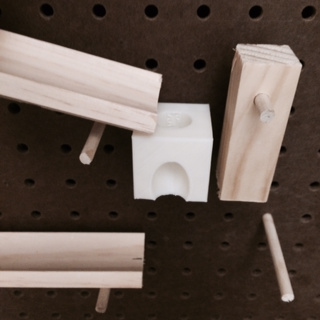
When all was said and done (and after four different revisions of
the part, here's what we we finally ended up with (with the entire
Marble Mover) pictures. Checkout the green starter part in
the top :->...
Dunkin Donuts Cup Scan
Using the school's MakerBot Digitizer. I scanned a Dunkin
Donuts coffee cup. I had two goals with this: 1) show
different ways of outputting the model once it was done , and 2)
learn to do simple editing of a mesh.
|
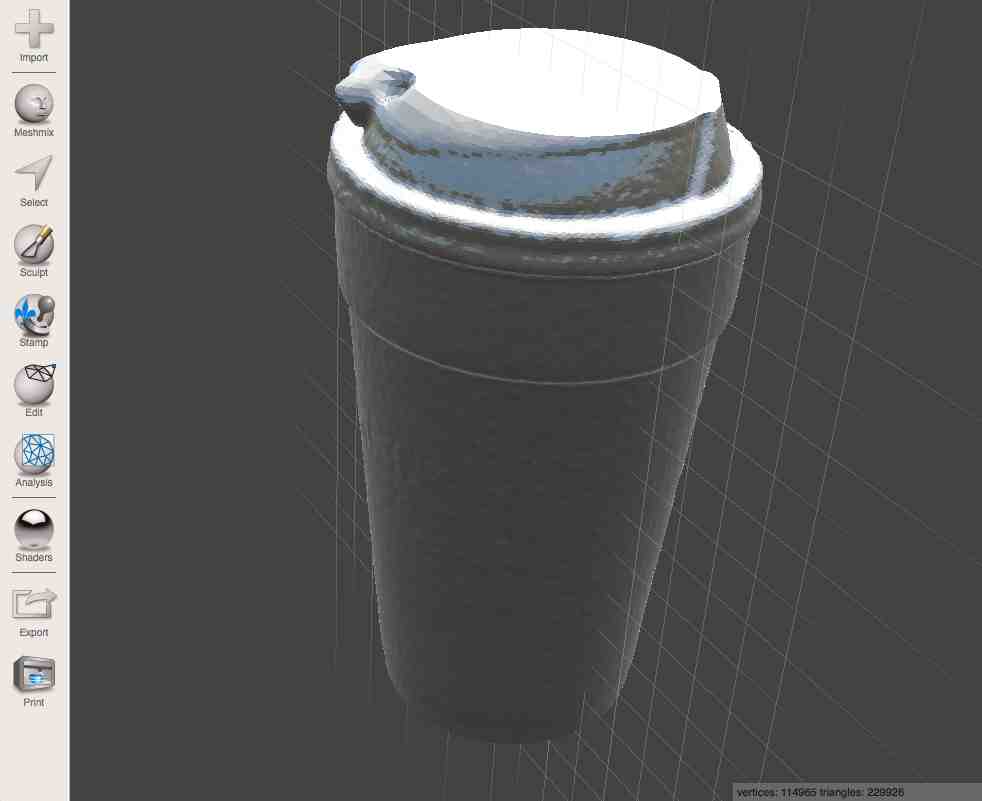
Here's what the coffee cup looked like right
after it was scanned in using the MarkerBot Digitizer.
Notice the strange growth on the left side of the cup.
That's what I will eventually try to get rid of.
|
|
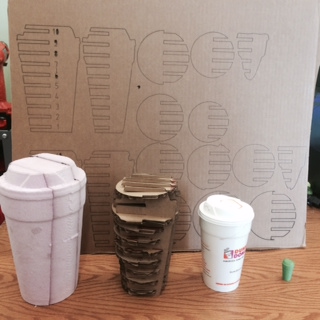
Here are three different kinds of output that
I generated once I had the STL file of the coffee cup (from
left to right):
1) 2Bot Subtractive Cutaway: Using the 2Bot milling machine, I cut three
pieces of 2" think foam insulation out into the three pieces
of the coffee cup. The cup is just under 12".
2) 123D Make Cutaway: Using 123D Make, I was able to get the
laser cut plans that would turn the coffee cup STL into
linkable parts. The cardboard behind the
different coffee cups shows how the parts were laid out on a
piece of cardbard after they were cut (I didn't use enough
power so this cut didn't go through).
3) That's the original
4) That's the shrunk MakerBot version of the coffee
cup.
|
|
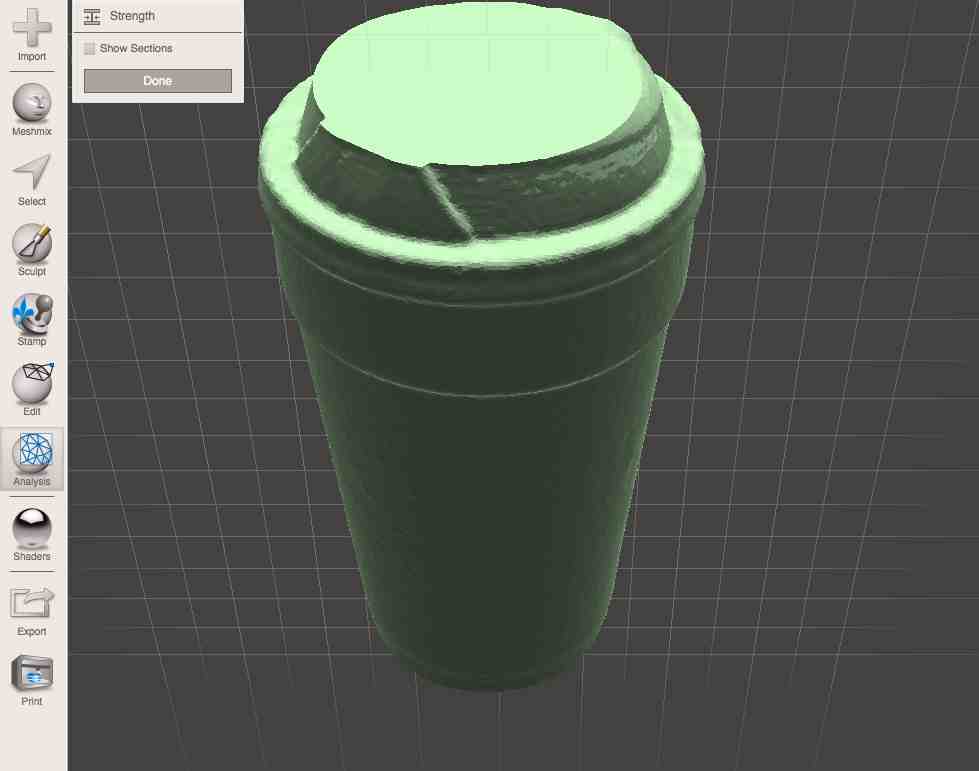
Using MeshMixer, I was finally able to clean
up the lid (a bit). While it wasn't perfect, I did get
it much better so there isn't as big a growth on the far
side.
|
Scanning using 123D Catch
Once I had the simple coffee cup cleaned up a bit (and I was
starting to understand the basics of MeshMixer), I decided to try
something more difficult. So using the iPad (and the 123D
Catch iPad app), I tried to make a funny scan of myself.
Then once I had that scan I tried to fix many of the
problems.

|
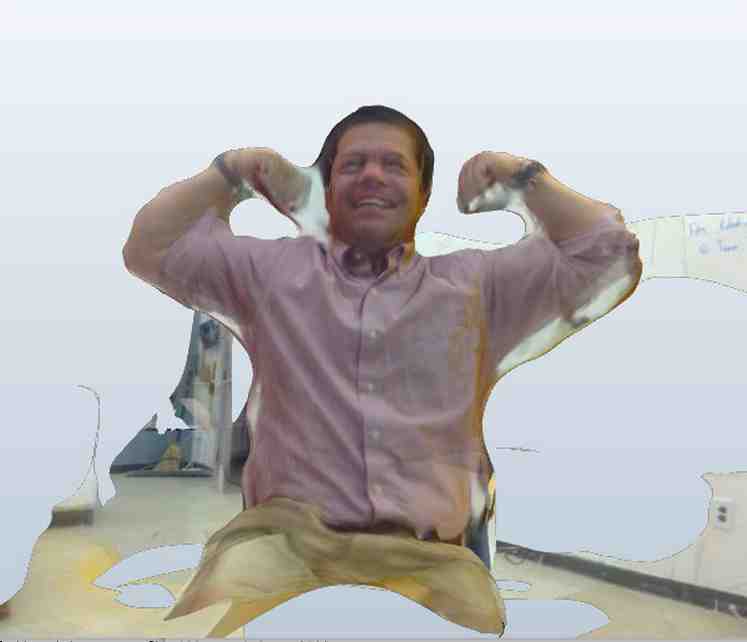
OK, I admit it...I was messing around to see
how it would handle the overhangs. I also thought my
brothers would really enjoy my attempting to flex.
|
|
While my first reaction was that 123D Catch
did a wonderful job of generating the model, I later started
to see many flaws that I realized I was going to need to
fix. Some examples:
1) My right hand is merged with my head.
2)The background is included and mixed in and I need to get
rid of it.
3) My body is hollow on the inside
4) I need a flat cutoff on my torso so it will rest on a
table
5) There are many extra growths in my model. For
example, my left arm has some extra
While there were many extraneous parts on the perimeter, I
later found out that these are easy to delete in tools like
MeshMixer.
|
|
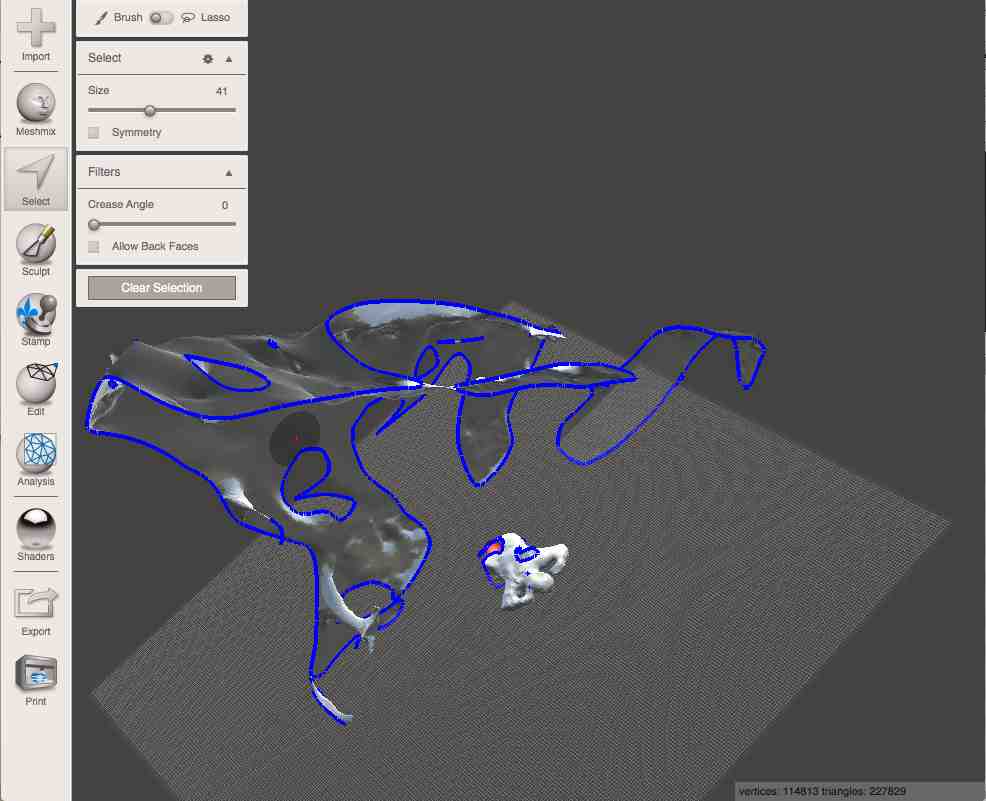
Wow...here's the model after it was imported
into MeshMixer. What a hot mess! You can see how
small I am when all the walls and surrounding mesh are
included. Fortunately, this was quite easy to get rid
of.
|
|
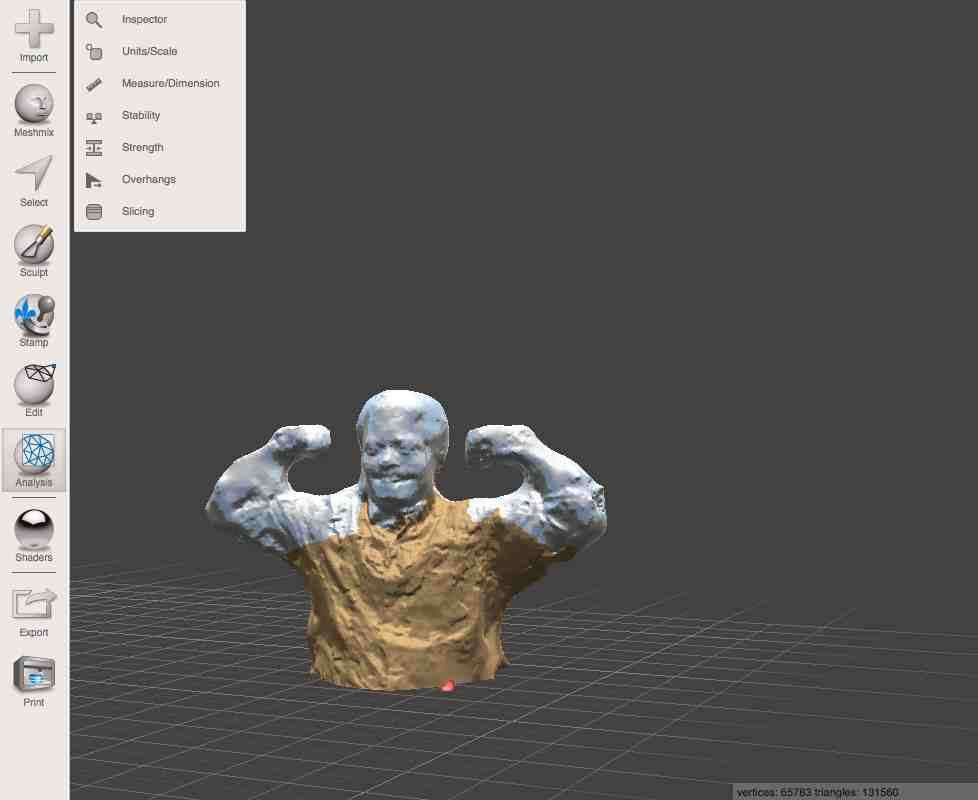
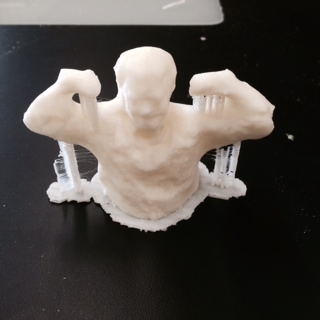
After 90 minutes or so of trying to learn
MeshMixer, I ended up with a halfway decent model of my
silly pose. Here's how it looked in MeshMixer.
|
|
...and here's how it showed up on the
MakerBot print bed.
|
Learnings
Here are my key learnings from this lesson:
- Label Output: Label the parts as you take them out of
the laser cutter. You'll notice that the cutouts aren't in
the perfect order (and we are missing one at the top).
This was because I was speeding through all this and I thought I
could figure out which one went where...I was wrong and I ended
up breaking a piece because the fit was so tight it
ripped.
- MeshMixer (and other mesh editors) will take some
getting used to. I really struggled with learning some of
the basic concepts. For example, there were so many ways
to smooth items and none of them did exactly what I
wanted. I found the quick videos interesting, but a bit
useless because they were all based on an old version of
MeshMixer.
- Planning Pays Off: I made some dumb mistakes with the
marble project. I was rushing and didn't bother drawing
this on a piece of paper first. That was silly so I wasted
a bunch of time. It really pays to draw the pictures on a
blank piece of paper first so you don't waste time.
- 123D Apps are good, but platform matters. Many of
the 123D apps work across all the platforms (Mac, PC,
iDevice). The thing is, some of them are pretty
buggy. The 123D apps seemed to crash a bunch on the
PC. I did have good experiences on the iPad.
- Save Often: Many of the programs I used (123D and
MeshMixer) crashed a bunch. It was a bit of a
bummer. You need to save often.