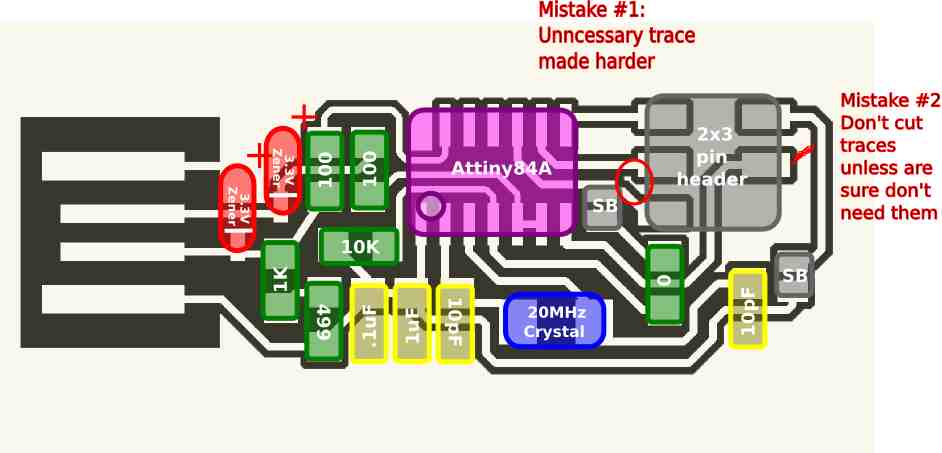
Make the FabISP in-circuit programmer. FabISP is what you use to communicate between the circuit boards you build to the computer. Itís the equivalent of the USB port on the Arduino.
I knew this one was going to be a stretch to me. I had
never soldered such small components and when I've done big
components the solder job wasn't great. Doing this project,
while it was painful and frustrating in the moment, increased my
confidence that I can do things close to this. As for my
"approach take"...I just jumped in.
I did two boards. The second board seemed to work (at least
it was successfully programmed). Here were the two iterations and
what I learned (or the mistakes I made).
Files
I thought I had this one made. We missed it. That
seemed to go well. I started soldering and I was moving
right along...until the last piece. I started to put in the
six-pronged part where the cable would attach. It was a
little off (aka it had a small tilt to it). To get around
that, I tried to melt the solder and turn it. Bad
idea! The solder wasn't melted enough and it pulled the
trace right off the board. It hadn't occurred to me that the
trace might come off. I tried to recover it and tried
re-soldering, but to no avail. So as far as I know, that was
the only mistake.
Again, I was moving along after milling the second board and I
messed it up at the last step.

Here are my key learnings...
- Boards are sensitive: I didn't occur to me that the slightest bit of pressure would pull the traces. I figured they were attached quite well.
- Equipment matters: I have soldered before. Generally it is with breadboards and large circuits. When I saw the size of the resistors and the circuit boards I thought there was no way I could do such small parts. Then I learned about the fact that the right equipment makes it possible. Flux, Wick, a magnifying glass and bright lights all make it DRAMATICALLY easier.
- Test as you go: One incredibly useful thing I learned in this was how to use the basics of the voltmeter. I had tried to use it before, but nobody has explained how so I was a bit in the dark. Once I learned how, I started using it to test my traces as I went. This helped me make sure I had things right as I went. It also gave me more and more confidence.
- You can recover: I made MANY mistakes with my board. I pulled traces off. I cut a trace in half because I thought it would solve a different problem. I burned the heck out of one area. On yeah...and this was all on Board #2, which is the one that eventually worked. But with a jumper cable I made out of a small piece of wire and a glue gun, it is now sturdy and in locked in place.
- Give yourself space: So I love the fact that these are small and compact. I don't understand why they had to be SOOO tight and compact. I supposed I wouldn't care if I were great at soldering, but as a starter board I would separate things a big more. If/When I build my own boards I plan to add a bunch more space. Additionally, I plan to scrape additional traces out when I am sure I don't need them.