Design, make, and document a press-fit construction kit.
For this assignment, I wanted to push myself to work on new kinds
of joints and flexible wood. We have had our laser cutter
for a few months and already we've done tons of projects with
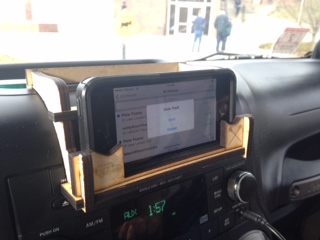
cardboard. For example, I had already created my Jeep iPhone
holder with the following plans using press-fit
construction. Another teacher at our school also made a
press-fit kit for Pre-K and Kindergarten students to make
sculptures.
|
|
So...because I've already built or seen these things built with
press-fit construction, I wanted to try something that would be a
bit harder with different kinds of joints used throughout...so I
decided to try to build a charging station that will hide the
wires using no glue and only press-fit joints. Here's my
inspiration...
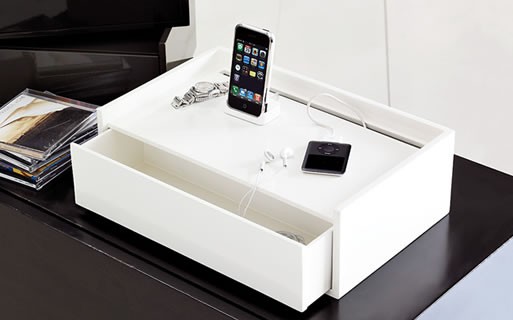
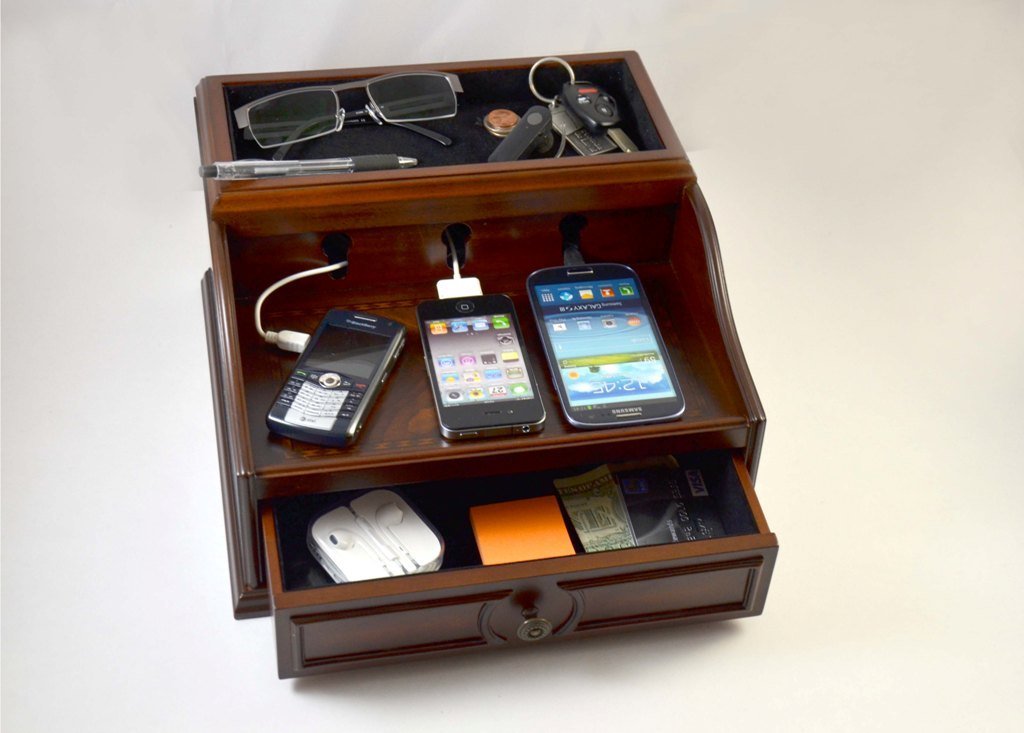
First, I decided to look for inspiration for different designs
and ways I could put it all together. I found the following
designs that helped me figure out what I was going to like/not
like...
 |
 |
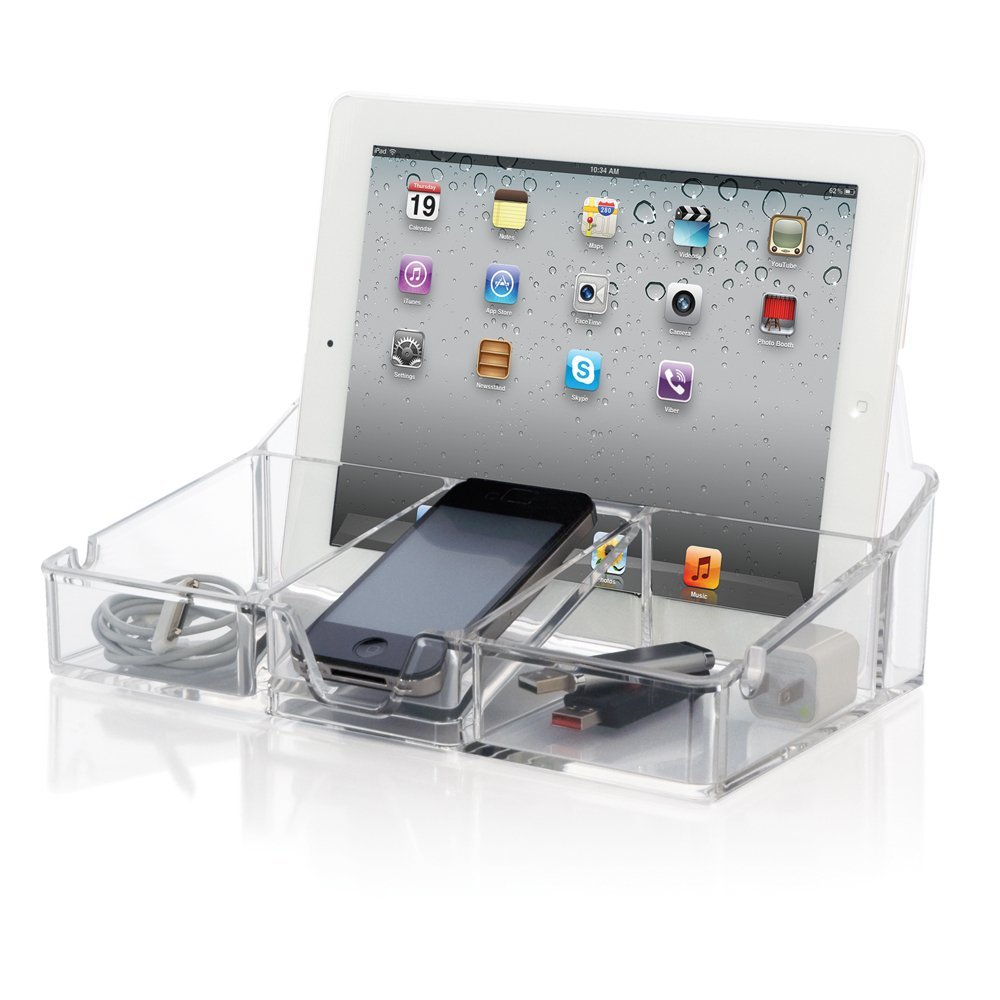 |
From these designs, I realized the following:
Second, I went to find some cool joints and designs for how to
put it all together. That brought me to these two sites and
example joints that impressed me. I want to find ways to use
each of these in my design...
Kerf-Bending
Joint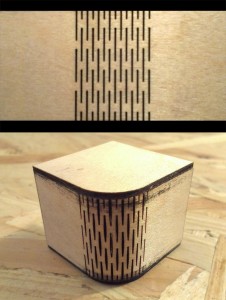 |
Cross-X
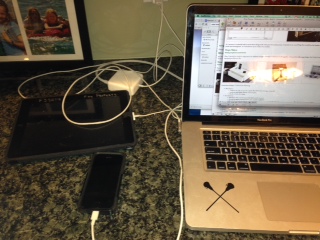
Joint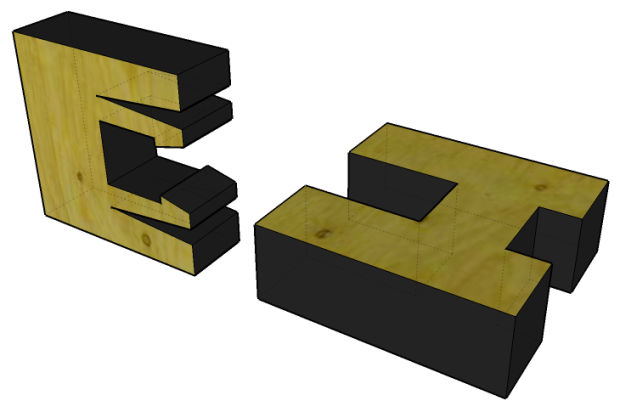 |
Third, here are the measurements of each of the devices (with
covers):
| iPad |
h: 9" 7/8 (875) w: 7" 3/4 (0.75) d: 3/4 (0.75) |
| iPhone: |
w: 2" 5/8
(2.625) h: 5" 1/4 (5.125) d: 9/16 (0.5625) |
| MacBook |
w: 14" 15/16 (14.937) h: 10" 1/8 (10.125) d: 15/16 (0.937) |
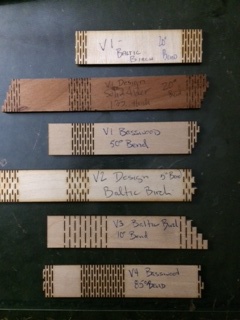
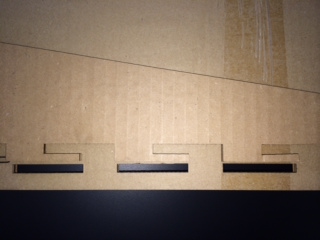
I started experimenting with different kinds of kerf
joints because I'd like to have the joints in the corners of the
charging station. The first joint I made ended up breaking
when I bent it more than 15 degrees. So I started changing
the variables...the wood type (soft basswood and solid plywood),
the width of the wood (1/8" and 1/4"), the pattern (different
lengths of cuts) and the width / length of the pattern (1" or
2"). Each time I'd run the cut through the laser cutter and
then would measure how far it would bend. Here's a picture
of the different cuts when I tried three kinds of wood (solid
alder, alder plywood and soft basswood), two depths (1/4" and
1/8") three patterns (wide gap and small cuts) and two
widths/lengths (1" and 2").
At the end, what I came to learn/realize is that the
thing that matters most is the width/length of the pattern on the
wood. And then it dawned on me...depending on the wood
width/type and the pattern, each instance of the pattern gives you
some flexibility (e.g. 5 degrees of bend). Example: if you
want 90 degree bend, you need the pattern (90/5 = 18) 18 times as
each instance of the pattern adds a bit more bend. So, once
you settle on the kind of wood and a pattern you want to use, you
need to find a way to extend the pattern as far as you need to go
to get the complete bend you need. While the physics of all
this might not be perfect, it's a framework for thinking about it
that I think might be right.
When all was said and done with this, I realized
that I would need a REALLY long piece of wood that would be bigger
than my laser cutter if I was going to do the Kerf joints.
So I decided it wouldn't really work to use these in my
design...doh! But, I did learn a ton from trying these and I
expect I will use these in the future in other projects.
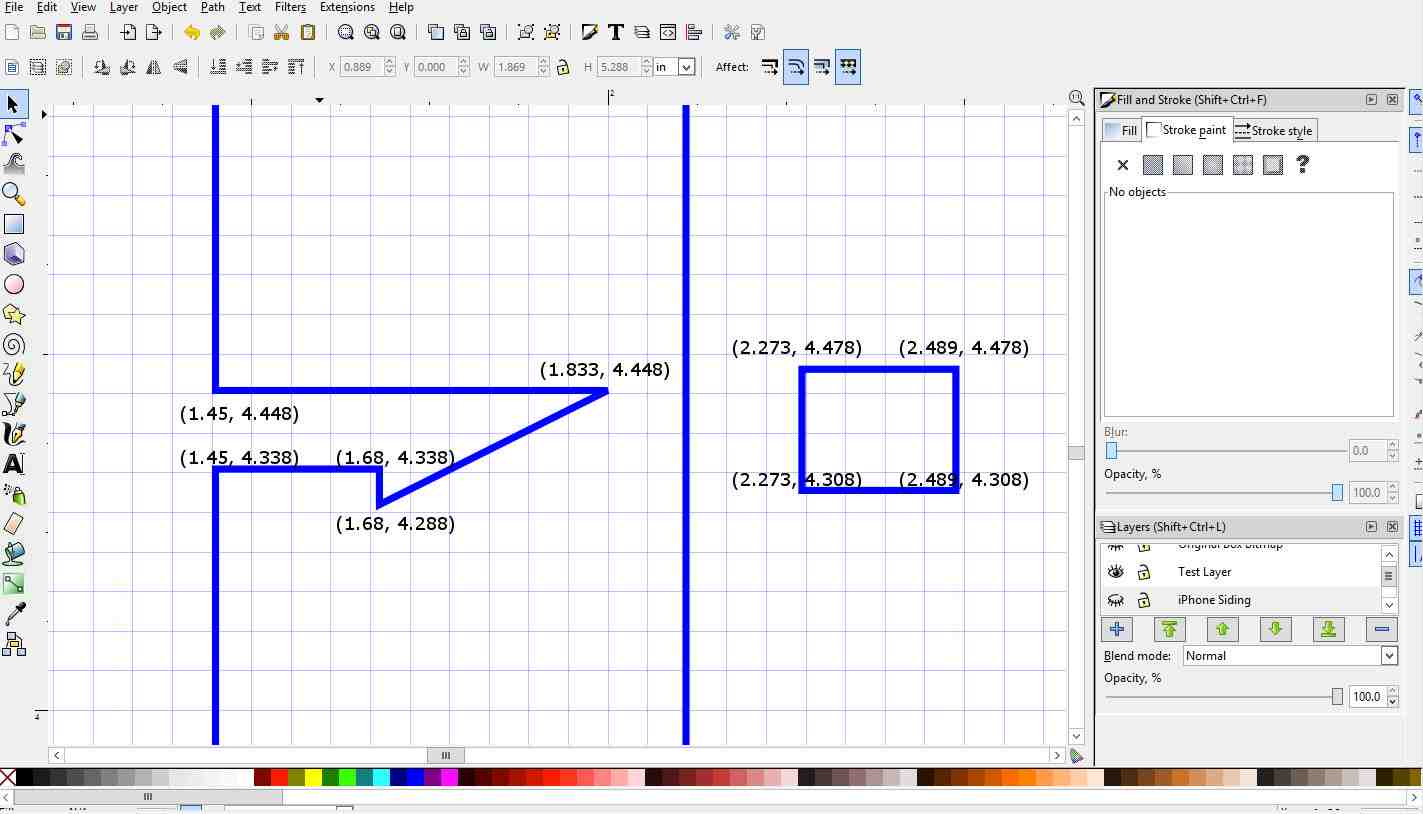
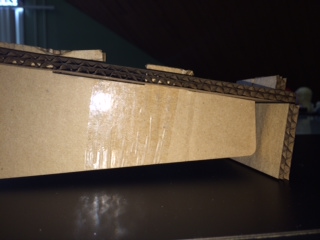
I spent a bunch of time trying to get the joints right. After
three different tries, I ended up getting it right. Here is
a picture of the different versions that I tried and the final
plan with the different coordinates and measurements.
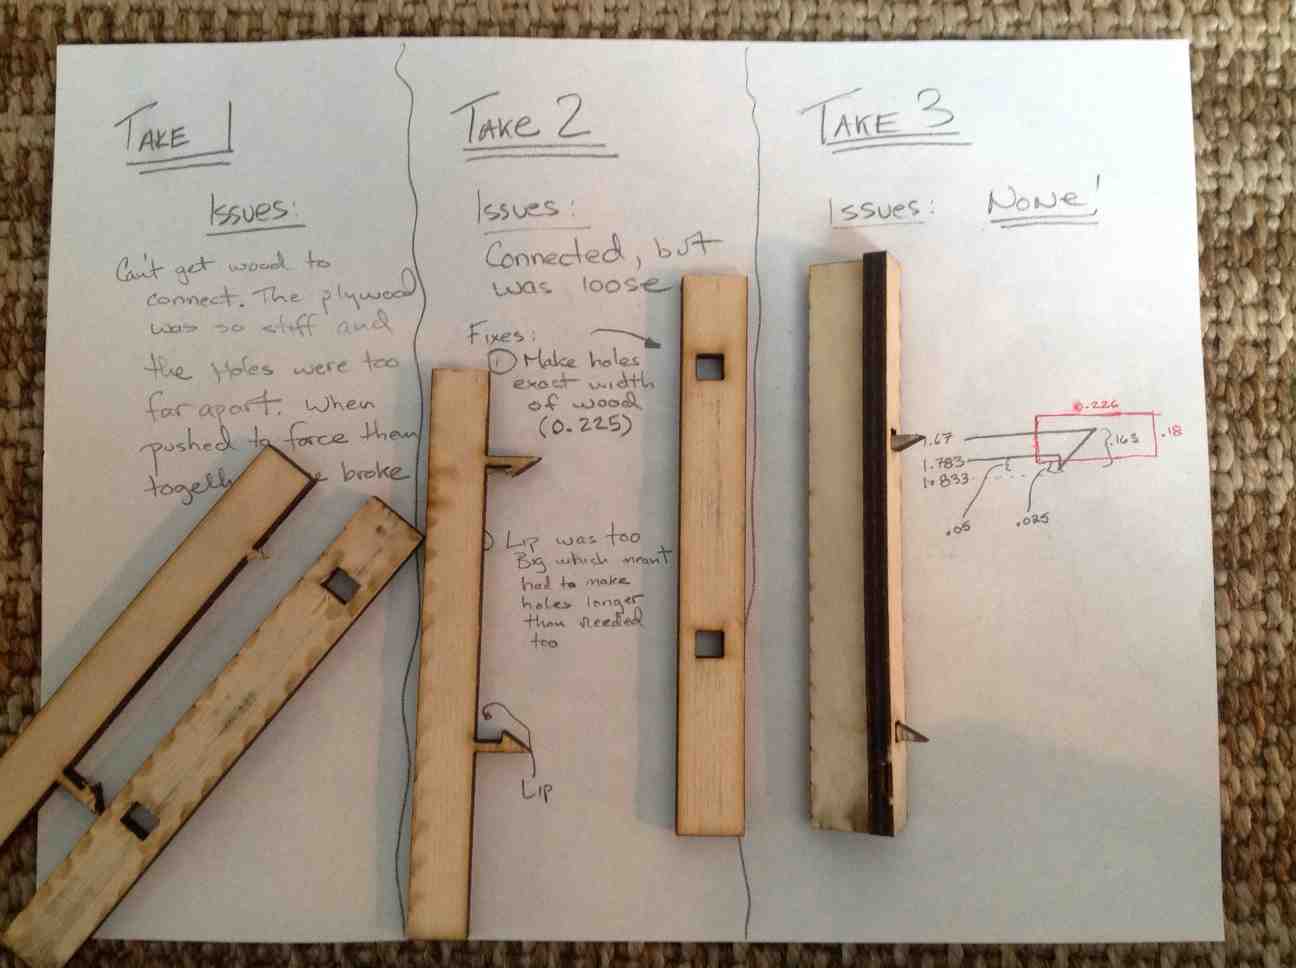
 Issue #1: When shift siding with joints, the front gets shifted way off to one side. So need to lengthen on right side and shorten the left side. Fix #1: Make siding 0.713 in long on right side and 1.25" shorter on the left side. |
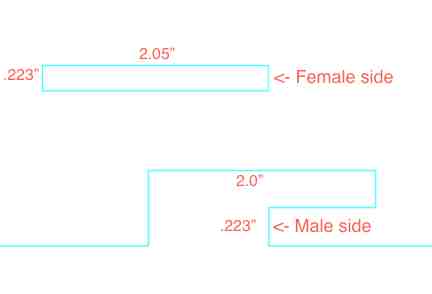
 Issue #2: The holes for the joints were EXACTLY the same size as the parts that were going to have to fit through. I realized given my Jeep iPhone holder that the wood needed some extra space. Fix #2: Make the holes 2.05" rather than 2.0". THANK GOODNESS I CLONED THEM...IT MADE FIXING THIS MUCH EASIER :-> |
 Issue #3: Angle is all wrong where siding meets the front. Issue #4: Front is too long so need to shorten. Issue #5: On the high side of the siding (not pictured here), the bottom needs to be lengthened and the top needs to be shorted ++++++++++++++++++++++++++++++++++++++++++++++++++++++ Fix #3: Make it 0.281" longer where siding meets top and 0.117" longer where rounded corner meets bottom Fix #4: Make the front 0.268" shorter. Fix #5: Make the top 0.134" shorterand the bottom 0.336 longer |
Once I made the above fixes, I did a second
version. Unfortunately, on the second revision I still had a
problems with the angles...and...it made me realize I had other
problems. Here's a picture of the second version.
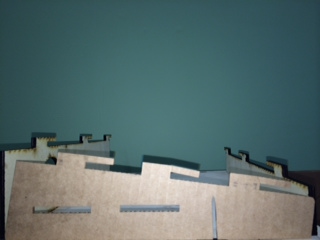 |
Issue #1: The angles still weren't
right. I wanted the siding to be flush against the
front (the right side of the picure) and the back (the left
side of the picture). I thought I had fixed this, but
apparently not. Issue #2: It didn't occur to me till I saw the sides, front and back attached to the top, but because of the angle of the side, I realized that the joints I created would work. The joints I made are so precise that the wood needs to be attached by sliding the wood in at a 90 degree angle, which isn't possible for the front and back if the sides are at an angle. Fix #1: I measured the gaps between the sides and the front/back and then extended them. Fix #2: I got front and back off so that the bottom won't attach to them. They will only be attached to the sides. |
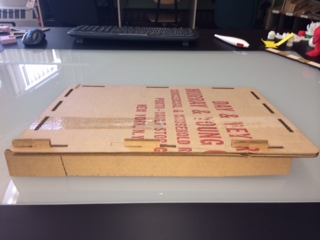
After making those changes, I finally had all the
parts that fit together. I ended up with final project that
had cutouts for the cables and a place for both the MacBook 15"
and the iPhone (on the right). The final project
is pictured below. Now I just need to get my wife to agree
to keep in on our kitchen counter.
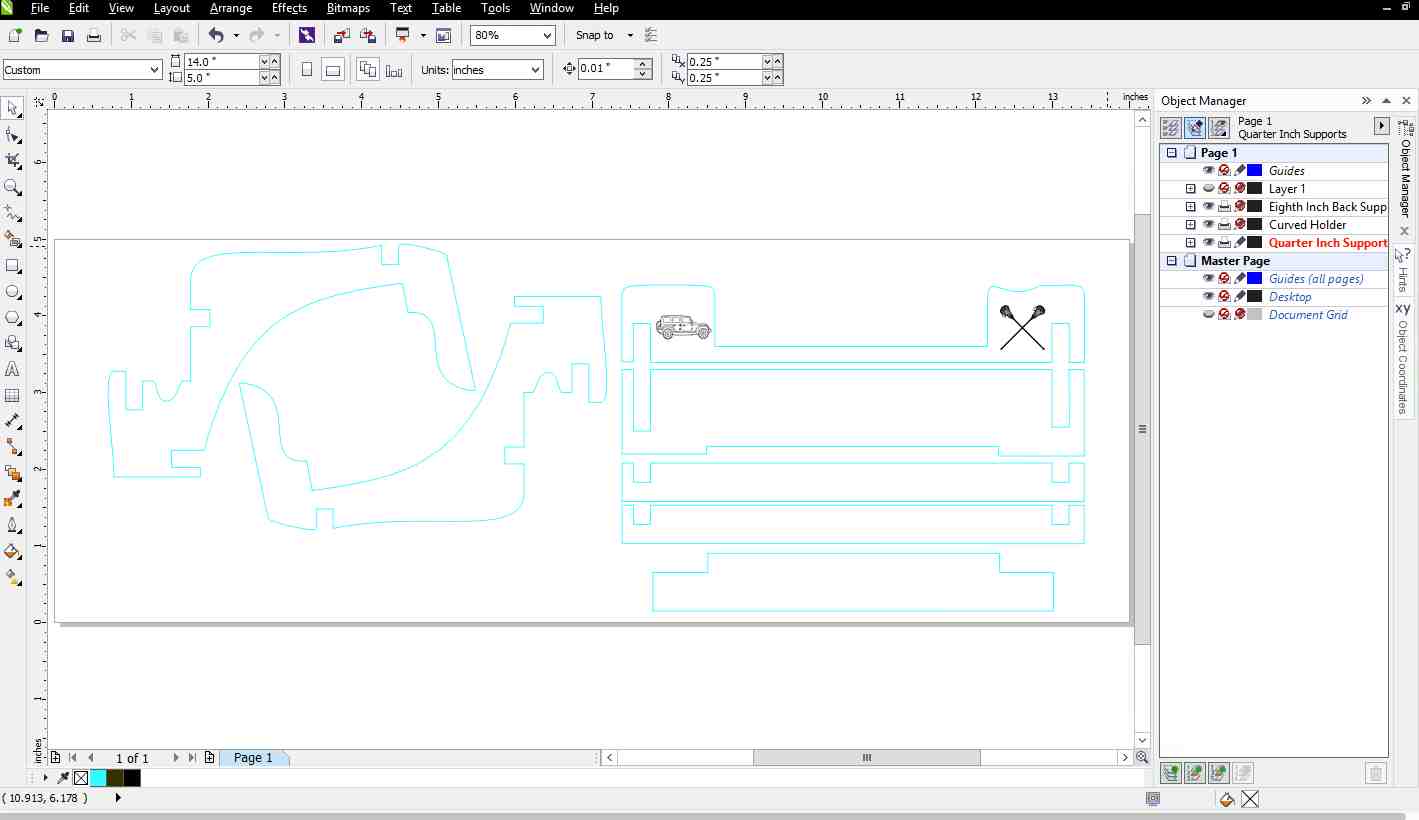
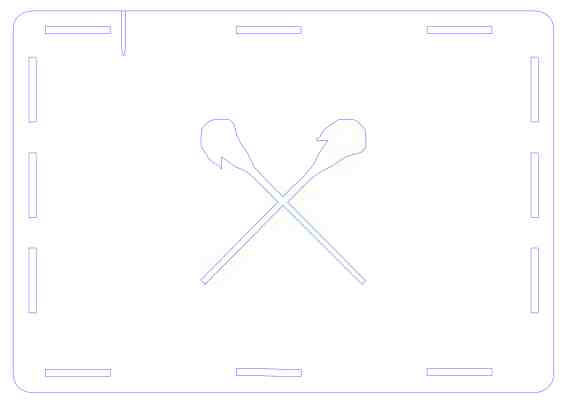 Plans for the top and bottom (with gratuitous carving of lacrosse sticks) |
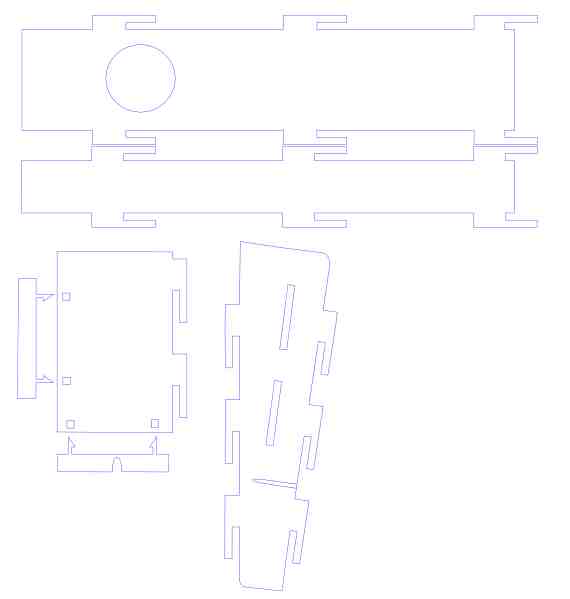 Plans for back, front, iphone holder and sides. NOTE: the top and the sides don't include the shaving of the bottom joints. This is because I ended up marking and laser cutting them off. |
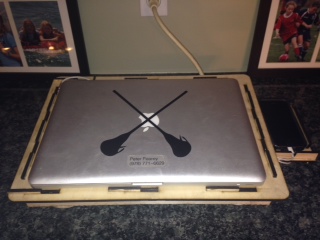 Below is the final project with the wires organized under the charging station. |
I learned a great deal doing both my Jeep iPhone holder and the
FabLab charging station- two press-fit construction
projects. Here are some examples of key learnings: