

week 9.
This week's assignement was to...
Design a 3D mold, machine it, and cast parts from it
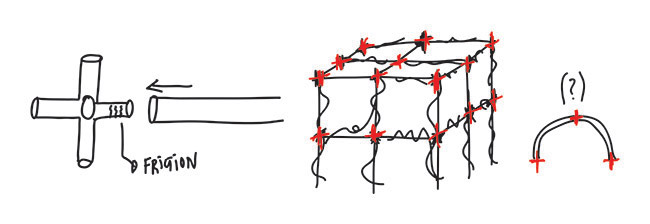
For this week's assignment i decided to work on a longtime necessity that i had.
I have a small horta and there are some vegetables (like tomates, or green beans) that need some vertical support to grow upon.
The traditional way of doing it in Portugl is to use canes, in the way present in the next photo.

It always seemed like a ecological way of doing it, but of tremendous inefficiency.
First, you have to harvest the canes. Then let them out to dry for some weeks. Then scrapp off the leaves, cut them in the desired lengths and tie them togethter in vertical position next to the plants. And every year you have to get new canes (they decompose) and do every step again.
Of course sometimes it's nice to go over those preocesses, cause it's really relaxing to be out in the garden but toher tomes you just want it all done in the couple hours that you have available between family and work and whatever.
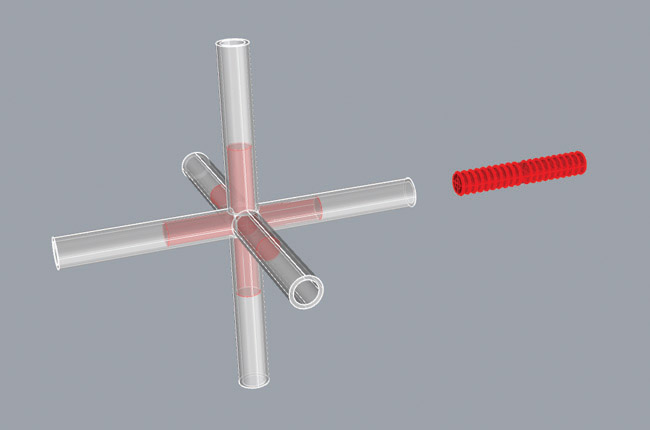
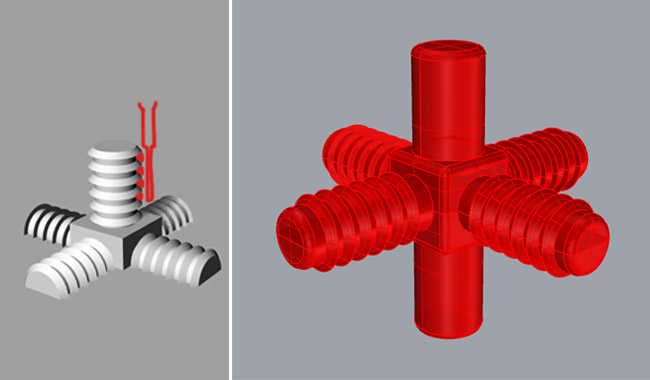
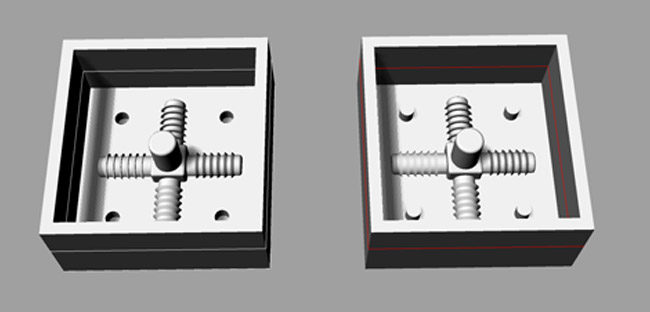
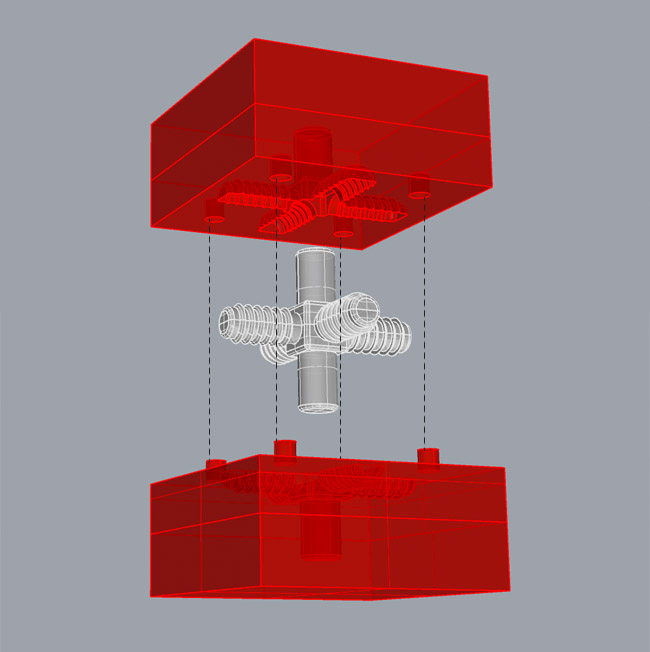
What i tried to develop was a part for a modular vertical support for climbing plants.
The system has two main elements: the tubes and the connecting parts (and this is were the molding and casting comes about).
Here are the first drafts for the project:
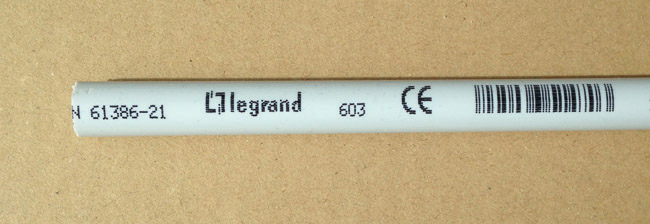
I tried to find cheap plastic tube so i went to Leroy Merlin. The cheapest tube was this Legrand one, used for electricity cables, that costed me around 1.20 euros for a 4m long tube. (so the price/m was 0.30€ - i'll be looking for cheaper tubes in the next days).
3d design
rhino - first drafts
just before heading to do the negative for molding, i realized the difficulty of the mill and decided that the vertical ones would no ave the fritcion rings
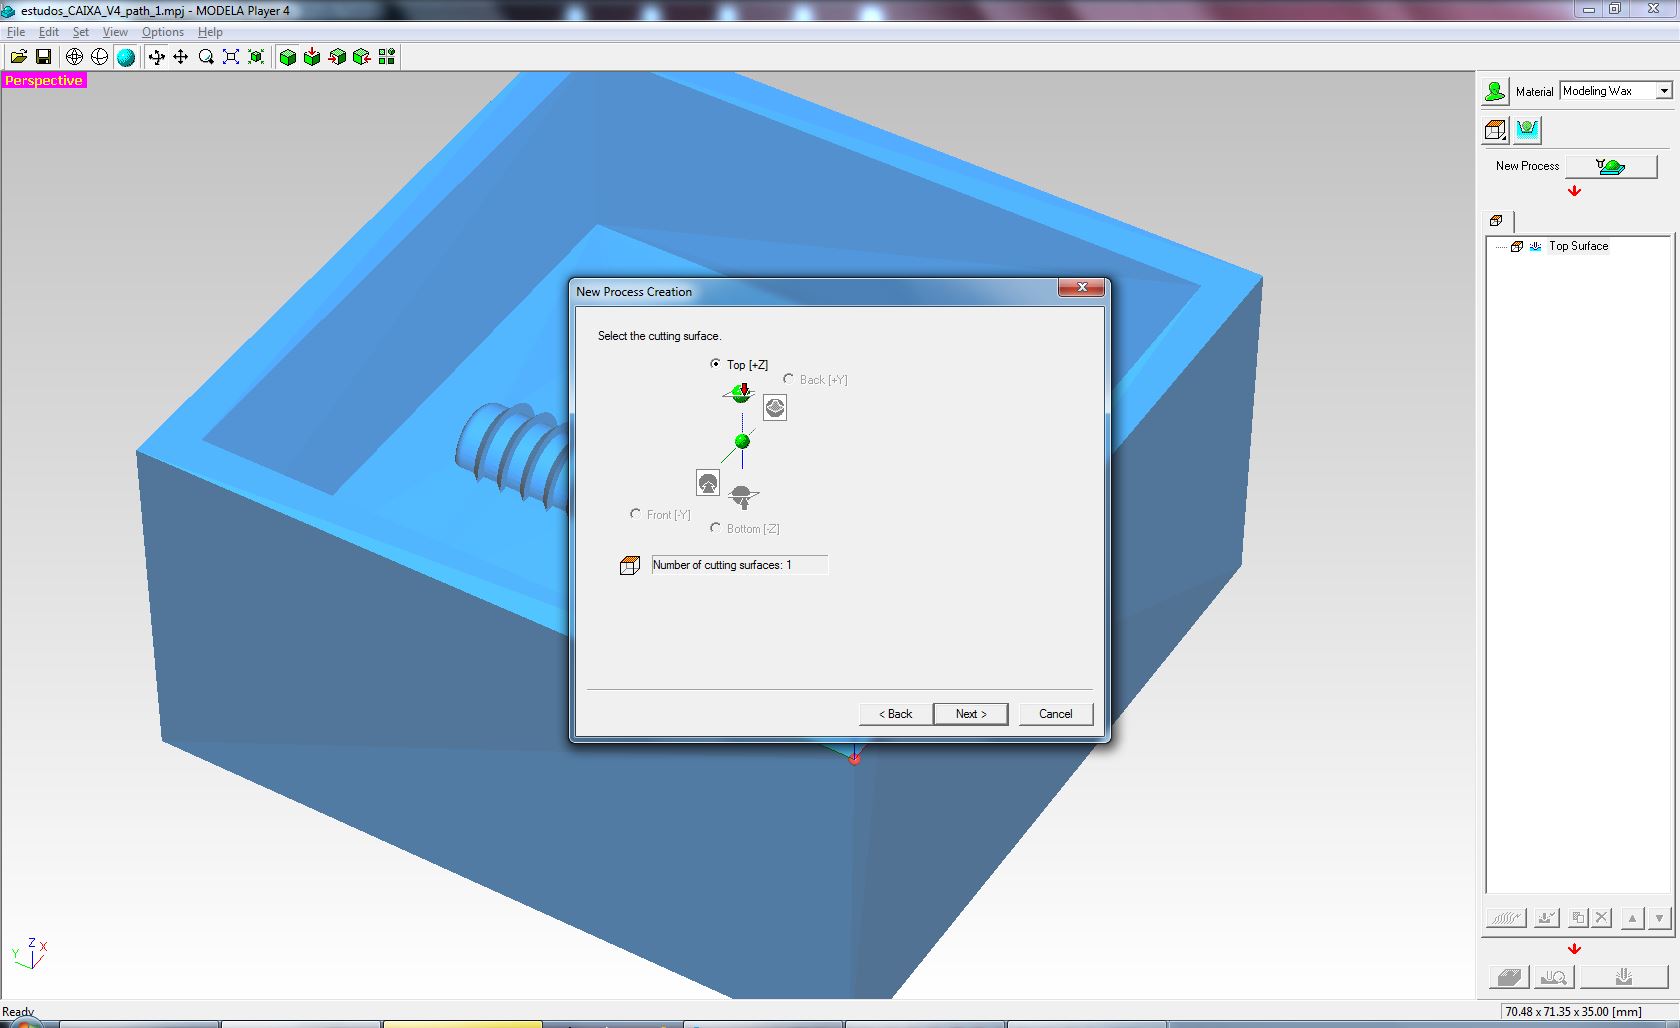
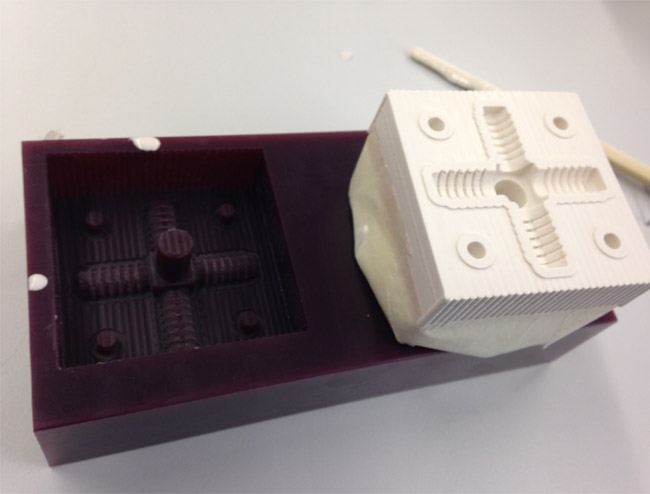
After having all the modelling completed, i exported the file as a .STL file and opened it in Modela Player.
Machining the mold
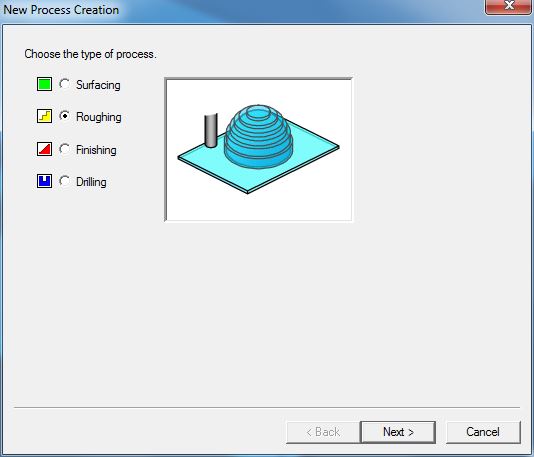
When you open your .stl in the 'Modela Player' software, you have 4 work processes involved in 3d carving materials:
1 - Surfacing (for surface-aligning materials to be carved, so that you have a aligned Z surface troughout your material)
2 - Roughing- milling around your design with a thicker mill , and lessa detaisl, in order to fasten your milling time by reducing the time spent with detailed carving in areas not occupied by the ficnal piece
3 - Finishing - millng with thinner mills and more detail, usually takes longer because detailed milling takes a lot of time in this machine
4 - Drilling - specific process for drilling your piece
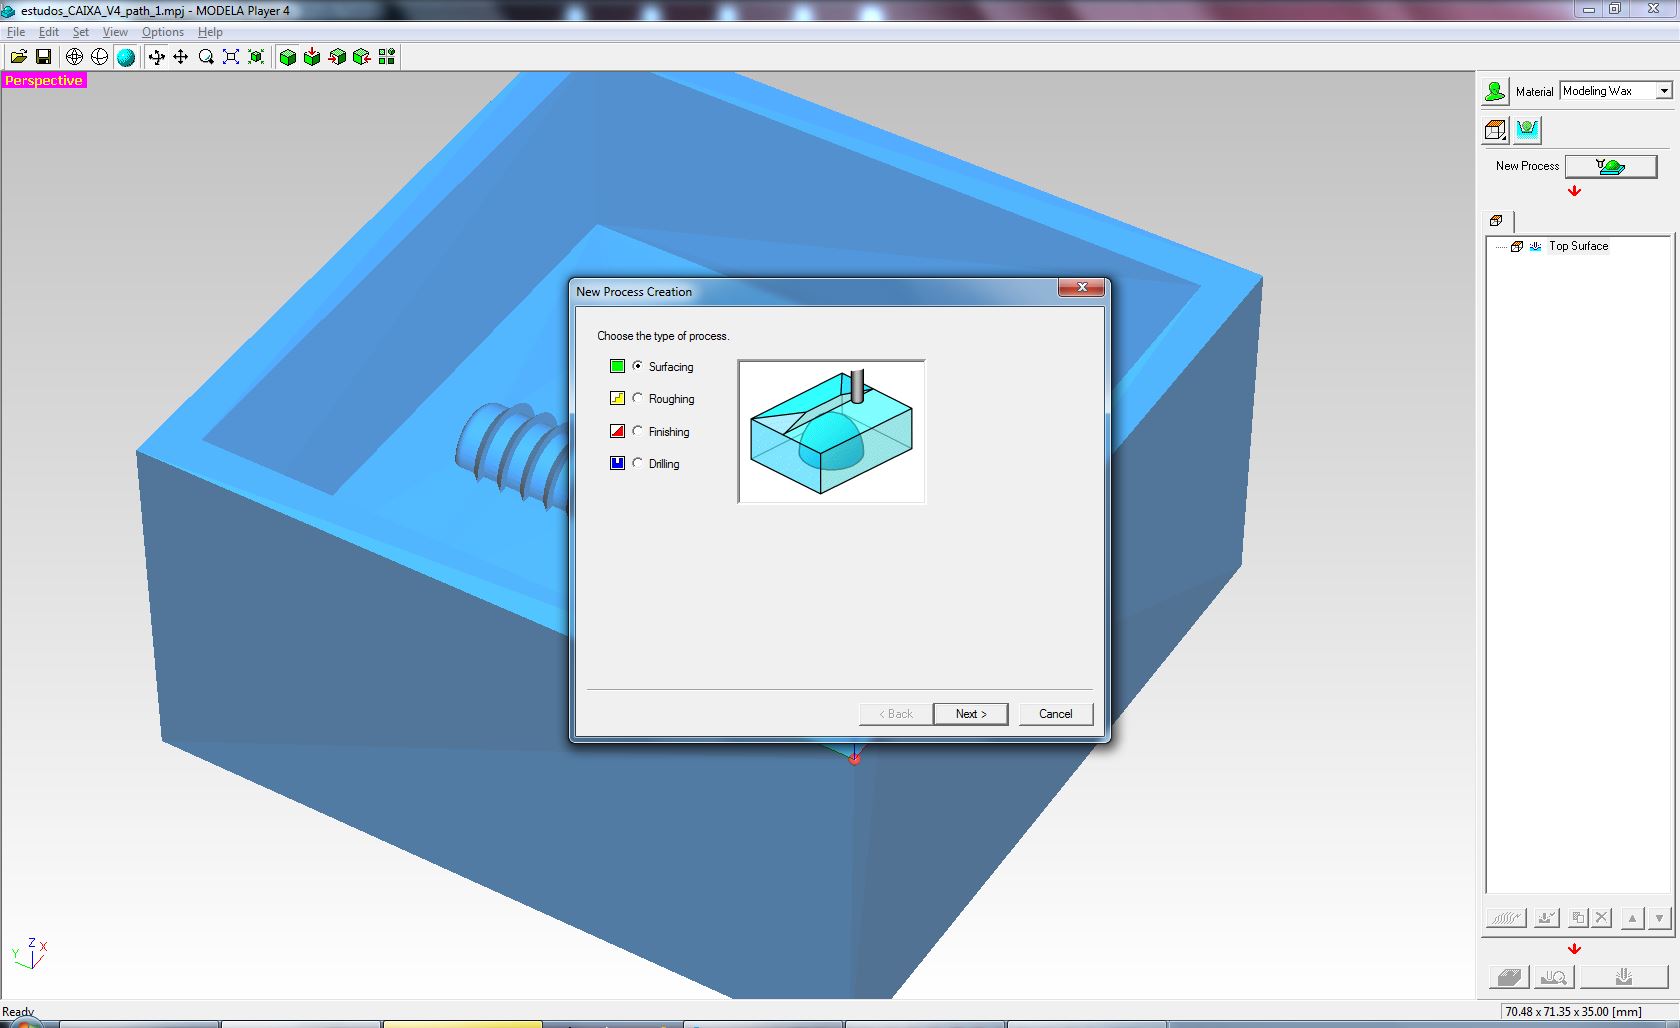
I didn't need SURFACING because i was to carve in a beautiful new bar of casting wax.
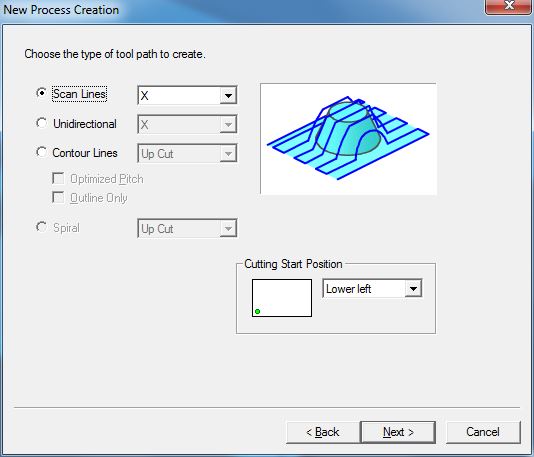
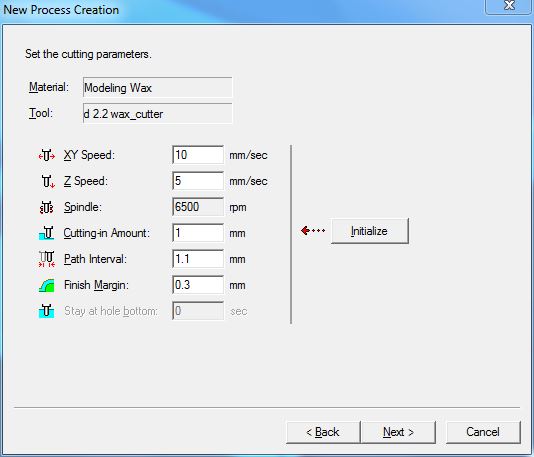
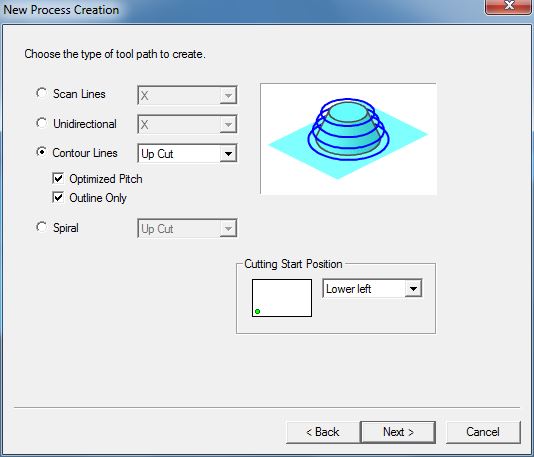
So i went straight to defining a ROUGHING process:


----------------
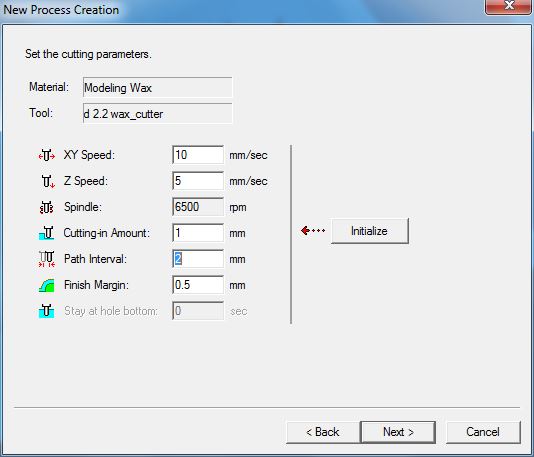
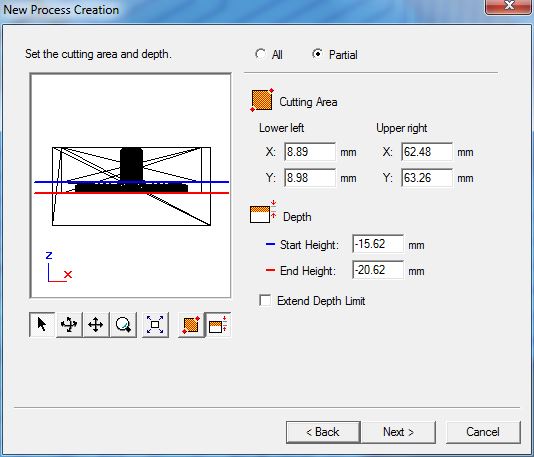
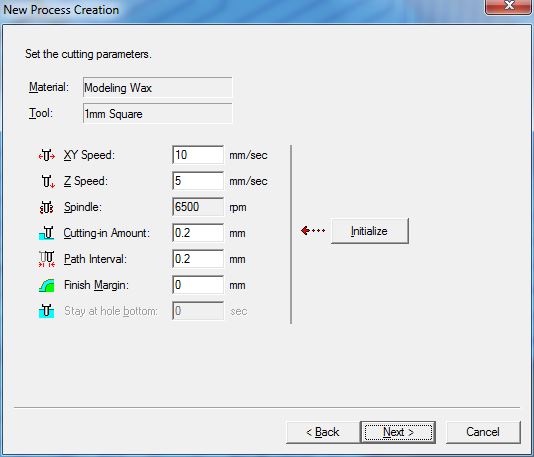
Then i established a FINISHING process:

----------------
Very important: Partial mode is a very important stime-saver
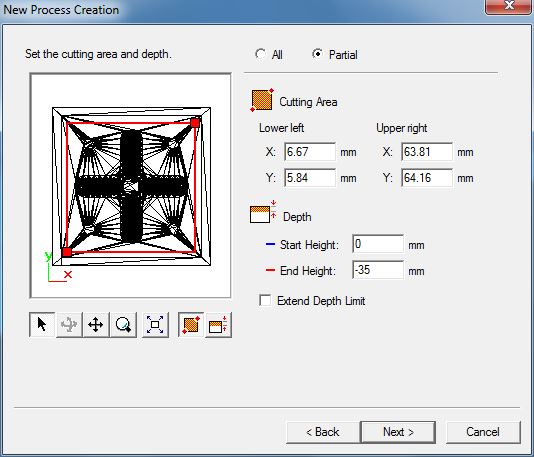
----------------
After a lot of time fine-tunning the steup, these were the shortest drilling times for the processes we created:
- Roughing - 1:40
- Finishing - 0:30
- Finishing 2 - 0:40
(this one was created for the mill to avoid bumping into the central part of the design, wich was rather high and for the mill to go deep as needed, it couldn' be in the way.
----------------
it was now the time to start milling, so i just had to set the cutting-position
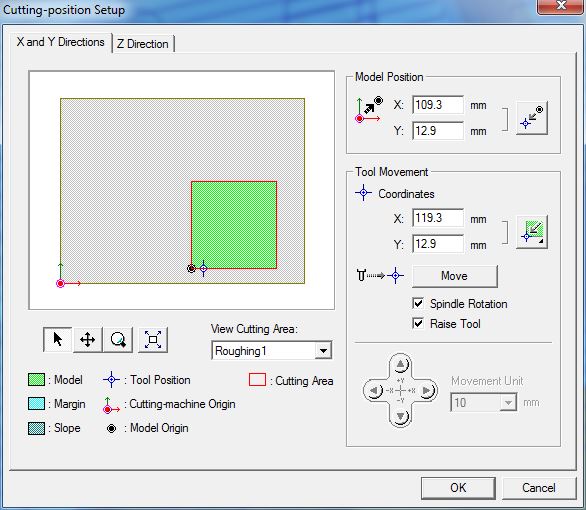
----------------
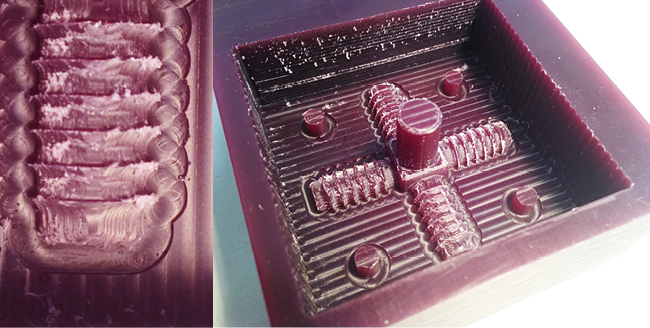
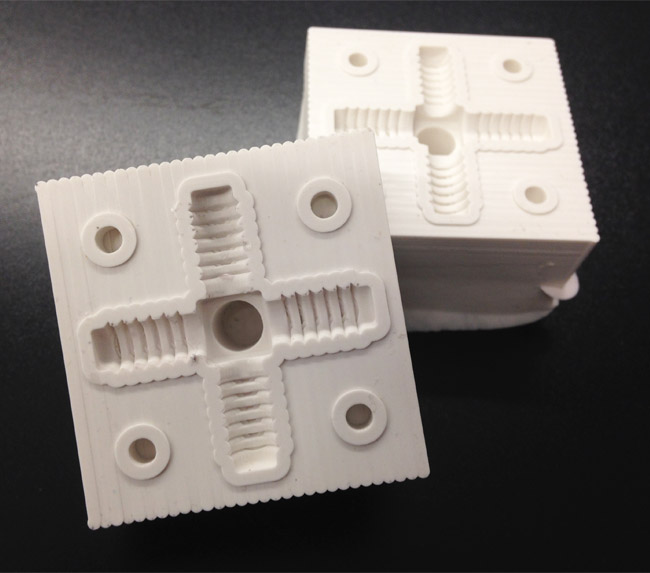
After some hours of machining the results were coming:
(clockwise from top left)
- the 3 processes
- after "Roughing1"
- after "Finishing1"
- after "Finishing2" (with detail of very admirable precision of the Modela)

Note for myself:
when you send a file to print in the Modela and it doesn't start it, chances are there is a job still to spool, so you have to eliminate it. In windows it's just a trippy procedure, that i will very soon document HERE
(c: > windownx /system32/spool/printers/eliminate the files in that folder/ go to services, etc- - - - - -- -)
Time to fill the mold
For this stpe of the process i bought:
- silicone rubber (+ hardener 5%)
- crystal resin (+ hardener 1%)
- filler (that i didn't use yet)
_ _ _ _ _ _ _ _ _ _ _ _ _ _ _ _ _ _ _
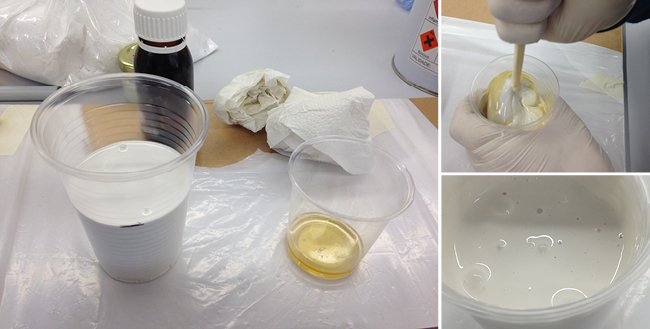
PREPARING THE MOLD

clockwise from top left:
- the working area with all the chemicals, plus a plastic right under the mold for protection of the table
- to obtain the volume of silicone i had to prepare, the fastest way is to fill the mold with water and replicate the volume in silicone, in a plastic glass.
- since my part was rather deep in the wax bar, i had to make retaining walls with painter's tape to have 1cm thick silicone in the base of my part.wich is recommended
_ _ _ _ _ _ _ _ _ _ _ _ _ _ _ _ _ _ _
MAKING THE SILICONE MIX
clockwise from top left:
- with the help of a digital high precision scale, i separated the necessary amount of silicone and hardener
- then i mixed it up, with a chopstick, strongly but not too fast (for air not to go into the mix and end up as bubbles inside the silicone).
- when the mix seemed ready, i waited some extra seconds for bubbles to come out and burst as many as i could with the help of the chopstick
_ _ _ _ _ _ _ _ _ _ _ _ _ _ _ _ _ _ _
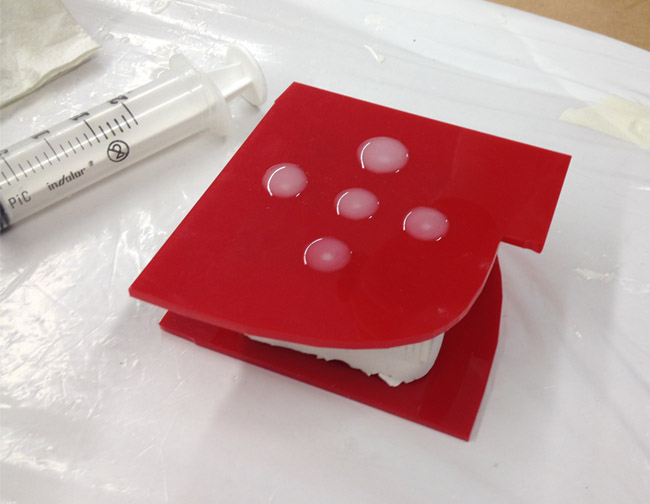
FILLING THE MOLD
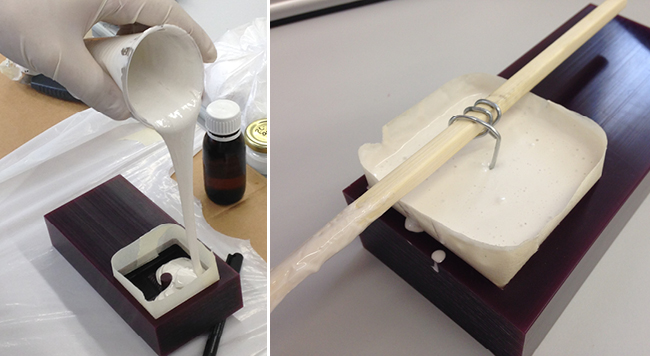
(left) Filling the mold should be done with the mold leaning a bit, and pouring always in the higher point, with a thin flow of the silicone. The thinner it is the less air it carries, because bubbles will get liberated.
(right) I let the siclicone dry for an entire night, and left a little thin cable dipped, for inserting the resin and for air to have a way out aswell.
_ _ _ _ _ _ _ _ _ _ _ _ _ _ _ _ _ _ _
EXTRACTING THE AIR WITH VACCUM
Right after filling the mold we put it in a improvised vacuum machine we have in our fablab, to remove some air it might have inside. Here's a little video of that. It reminds me of a souflé.... :)
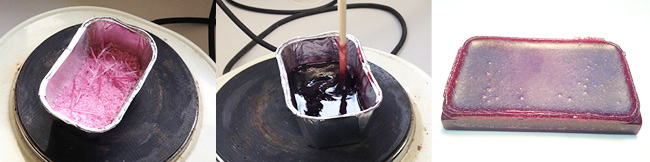
Experiment on recycling the wax that was removed during machining
While waiting for the silicone to dry, i had the time to tryand melt the wax. We didn't really control the temperature, we just had it melt and poured in a little acrylic pressfit box. The result was as pictured: millions of bubbles inside the wax (making it worthless for precision molds).
Lesson learned: next time, i have to do it more scientifically, or at least try to find totorials online, otherwise i'll learn very little from the process....

Casting parts from the mold

You can download the design files here