

week 6.
This week's assignement was to
1. - Redraw the Echo hello-world board,
2. - Add a button and LED (with current-limiting resistor),
3. - Check the design rules, and make it.
1.Redraw the Echo hello-world board
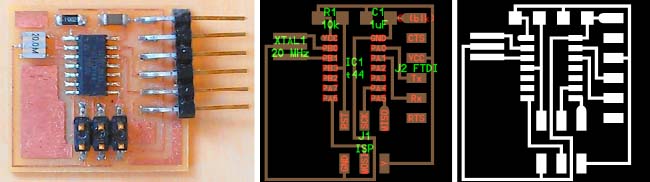
This is the original ECHO HELLO-WORLD board to redraw and make:
For this purpose the recommended software was EAGLE.
Eagle is a professional electronic circuit drawing software, wich has a student/non-commercial license that is free, so it’s perfect for this assignement at Fabacademy.
Interesting features:
- loads of components librariies, organized by supplier, that allows you to draw your circuit using actual and precise measures of components
- possibility of ordering components by extracting a list of those components
- ERC (Electrical Rule Check)
Because the suggested software for drawing our electronic circuit was EAGLE, Luis, our instructor, recomended that we saw these tutorials by Jeremy Blum, wich are super:
- - - - - - -
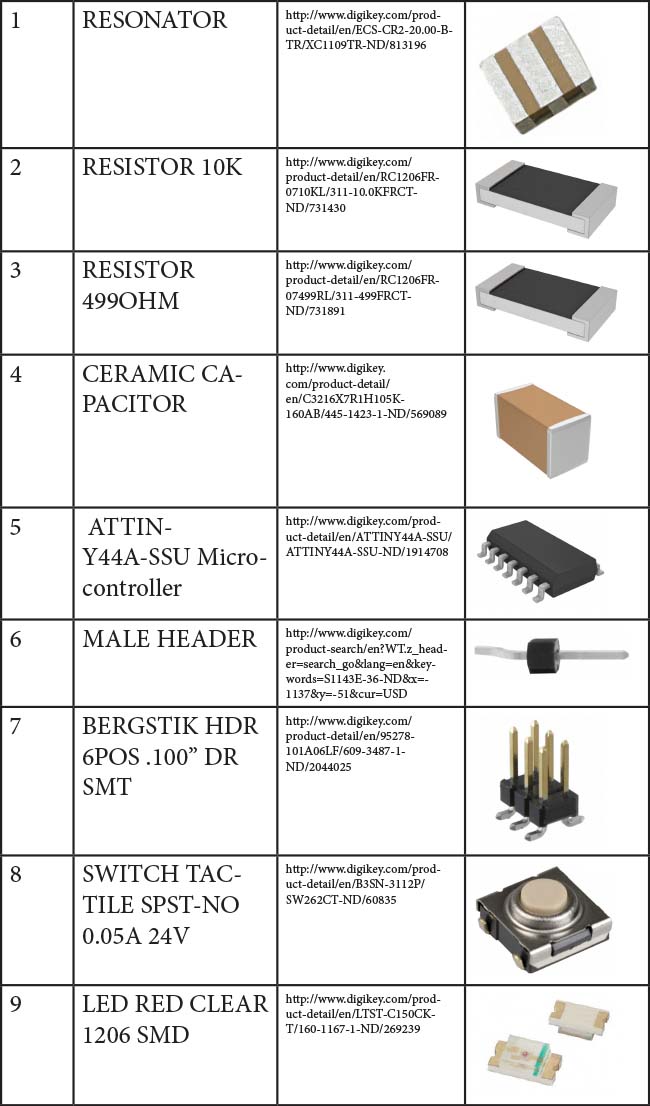
For my own organization i made a table with the necessary components, with a visual reference and a link to its page at Digikey.com, for specsheet-checking if it becomes necessary.
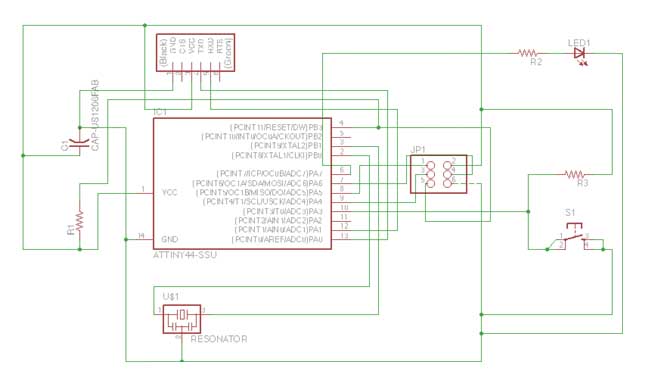
The software EAGLE is pretty forward, you have 2 separate viewing modes for editing your board:
- 'SCHEMATIC view' - where you establish the connections between components
- 'BOARD view' - where you establish the positioning of components and vias
IMPORTANT COMMANDS:
ADD - for adding components from the inumerous libraries into your schematic
MOVE
DELETE
ROTATE
LAYERS
JUNCTION (sometimes you want to join some routes and the software doesn't understand it, so its better in those cases to make a manual joint with this command'
DRAW ELECTRICAL CONNECTION
change - many tools to build your circuit
IN BOARD VIEW, there are some important commands, to edit and tune the connections between components.
- RIPUP ROUTE
- DRAW ROUTE
2. Add a button and LED (with current-limiting resistor)

3. Check the design rules, and make it.
After correcting the errors found through ERC (tools/ERC) in Eagle, i exported the final drwaing as a MONOCHROME png, to be opened by Fabmodules into the Modela, for milling and cutting.
IMPORTANT NOTE: The .png should be exported with 1000px resolution
FABMODULES UPDATE!!
FabModules has been updated, so i'm re-documenting the procedure for milling and cutting using fabModules and the Modela:
- - - - - - -
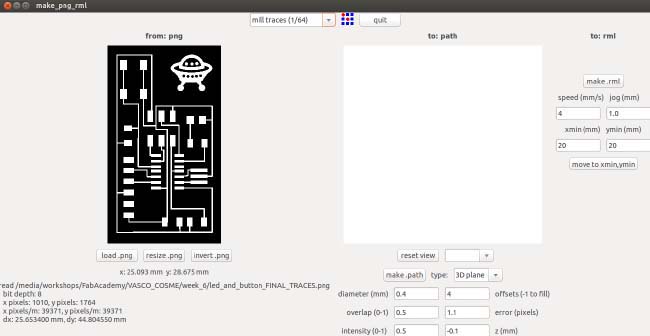
Open FabModules and select the conversion from .png to .rml

- - - - - - -
you then get this screen and have to press load .png

- - - - - - -
A thumbnail of your board shows up in the left side and in the top of the screen choose mill traces (1/64)
- - - - - - -
Press make .path and the path will show in the right side. Take the mill to the XY position where you want the milling to start, using the insert boxes in the right of the screen and pressing move to xmin, ymin

- - - - - - -
When you press send it a pop-up window will appear and you you press start

- - - - - - -
CUTTING Repeat the same operations for cutting, but select, in the top of the screen, cut out board
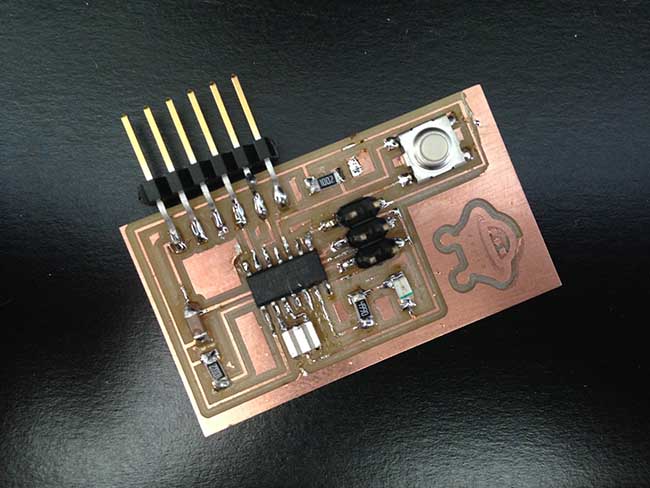
Last step: soldering the components
This was the last task of the assignment. this second time soldering those tiny components revealed easier than the first time. (but they're still very tiny!)
THIS BEAUTY WAS THE FINAL RESULT!:)
You can download the design files here