
week 5.
1. Design and print a object that could not be done subtractively
1.a) Design showerholder in RHINO (+ export as .stl)
2.a) Print showerholder in Prusa Air (CURA + P)
2. Scan and print an object
2.a) Scan copo de quilha in MODELA with DRPICZA
2.b) Preparing meshes - AutodeskMeshMixer + Blender
2.c) Print it in Dimension (own software)
3. Experiment with some more 3d scanning tools
3.a) 123D catch iphone App
3.b) 123D catch online app
3.c) Kinnect + meshlab
1. Design and print a object that could not be done subtractivel
1.a) Design showerholder in RHINO (+ export as .stl)
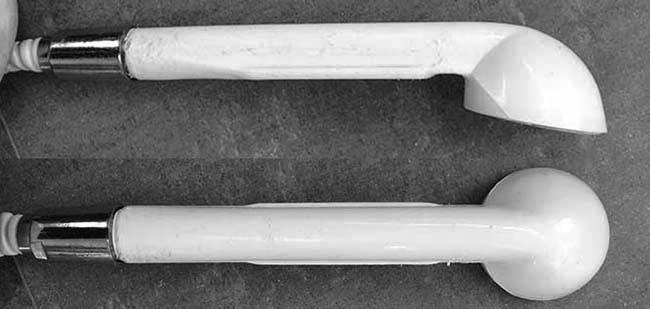
While talking with Ferdi, one of our instructors, i got to know he was missing a shower-holder in his bathroom and he always had to hold the shower while shoewring.
So i talked with him and we decided it could be a good idea, since it met the goals of the assignement, and at the same time it would be an object with a real use. He brought his shower and i started drawing the object that will make his baths more comfortable!:)
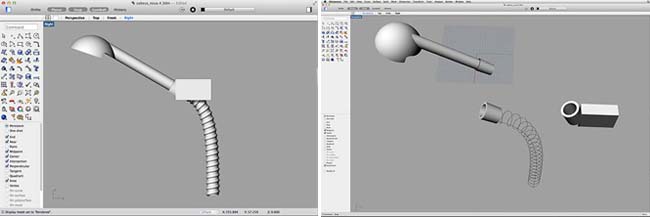
Here are some screenshots of the modelling process, i wasn't using Rhino since the 'computer-aided design' assignment, in wich i started my first attempts on 3d modelling, so i had a lot to learn, since i had just a couple of days working in Rhino. But now i'm definitely on my way to improve in Rhino, i can start to feel that i can start to deliver 3d models in it, maybe not the best ones but i'll get there.


- - - - - - -
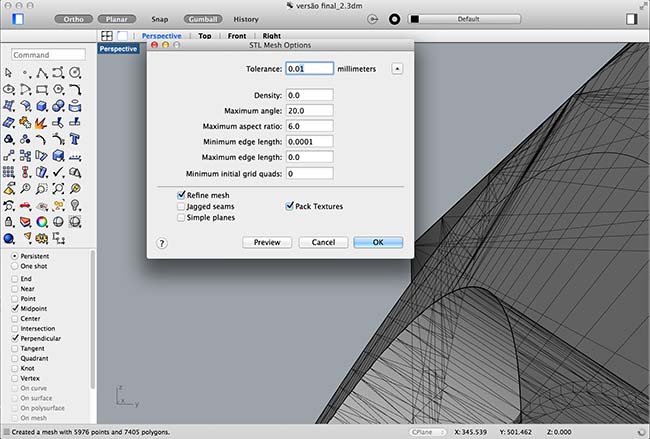
After conclusion of the model, i exported the file as .stl, in order to have it sent to the 3d printer, but had to make some adjustements to the mesh:

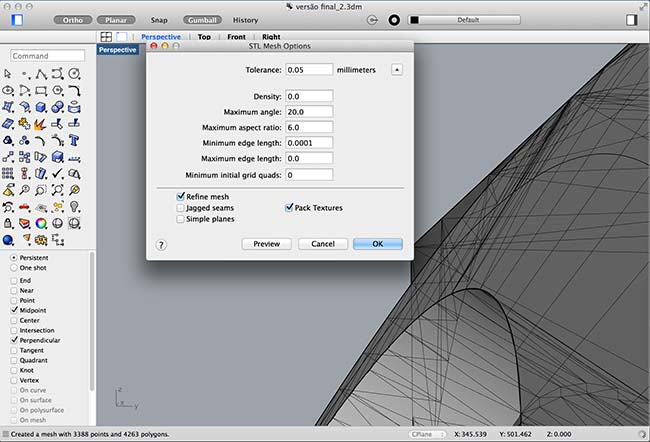
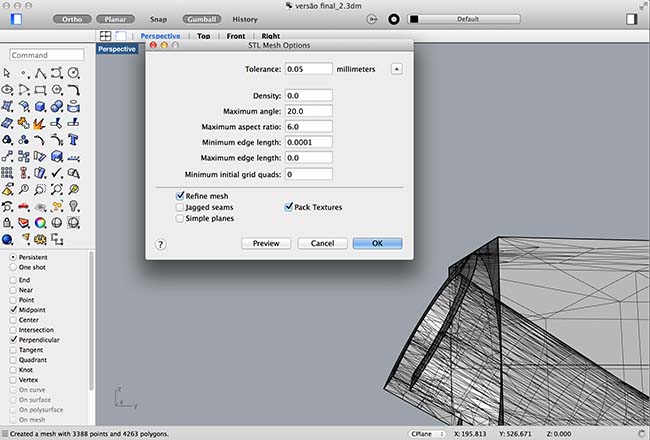
Note for myself:
Some commands that were useful in this task and that i should remember later:
zoom - extents - all
surfaces - extract isocurves
picture frame
2.b) Print showerholder in Prusa Air (CURA + P)
For this task i used an opensource printer, the model I was printing in was a RepRap, the model Prusa Air 2 , an acrylic structure version of the original Mendel printers.
The first step was to open a software called Pronterfaceb>, wich was presented to me as the easiest way to have the printing bed heated properly.
In Pronterface I pressed CONNECT, and then SET (head 185º and bed 60º)
Waited for some minutes to give it time to heat up an openend CURA, a software developed by Ultimaker for their printers, but that is used for many other printers, this Prusa Air2 included.

Soon after checking the printer we discovered the PLA filament was broken, so it was a good time for me to learn how to insert the filament in the extractor.
Fisrt, and because the filament was in the end of the roll it was curling a bit too much, so we unrolled some 3 to 4 meters and tried to have it straightened.
It wasn’t easy and produced very weak results, but in any case it was now in a better condition than before, so we moved on.
It was time to push the filament into the extruder tube, and soon as it arrived in the printer head, we reopened Pronterface again, for it to turn on the extractor motor, I inputed 10/ 100 (10mm/100speed).
Notes for 3d printing:
- the denser the printed volume, the more chances you have warping (kind of a curling provoqued by retraction of the plastic.
- if you have layers with very few content, go to Advanced/cool/ and set a minimum 10 seconds, otherwise it will produce weak results in that content (blob)
Here are some pictures of the printing operation and of the final result:
2. Scan and print an object.
2.a) Scan FIN-PLUG in MODELA using DRPICZA software
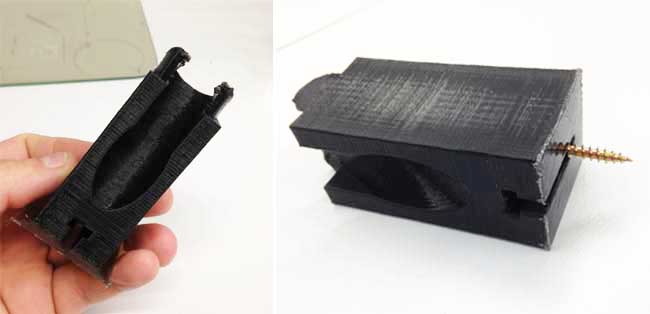
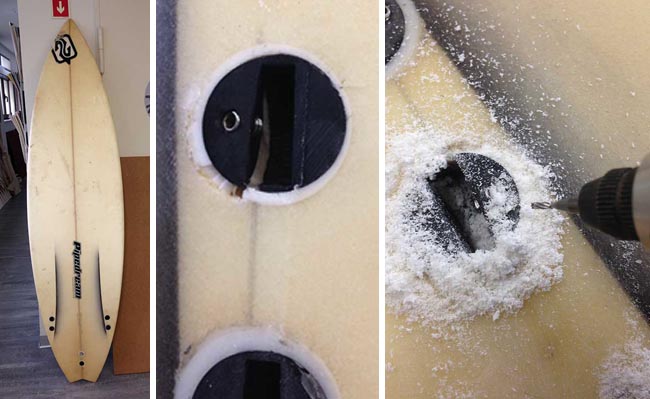
I have an old surfboard with a broken fin-plug (FCS system). So i thought it was a nice idea to get a new one, scan it and have myself a printed version inserted in the surfboard.
- - - - - - -
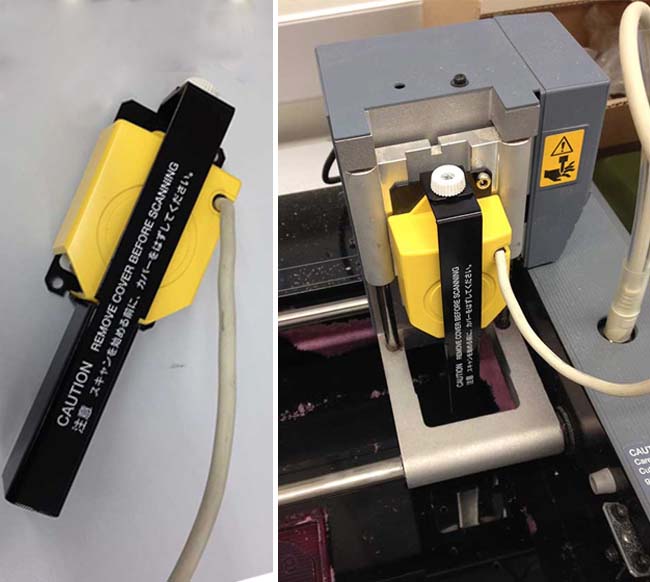
For the 3d scanning part of the task i used the Modela that we have in our fablab.
I started by changing the heads. the one that was in the machine was the milling head (blue color), and i had to install the scanning head (yellow colour). Important note: don´t remove the protection of the scanning needle before it's fully mounted in the modela, otherwise you might damage this very sensible part of the machine.
http://127.0.0.1:53003/img/week5/new_modela_1.jpg

- - - - - - -
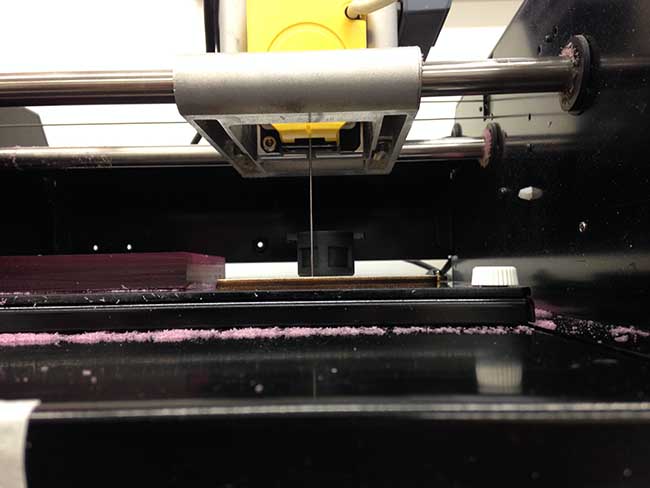
The way the machine works is by moving a thin metal needle in XYZ axis around the object, and thus determining its measures.
- - - - - - -
In order to speed up the scanning process, one should reduce the scanning area to the mininimum otherwise the machine will be scanning air and you loose a lot of machine time. Even the Z axis is important, so you should place something solid and thin on top of your ojbject for the machine to recognize the top z coordentaes of the object).

- - - - - - -
I didn't restricted the doublesided tape to the bottom of the object, so the neddle was sticking to it and not reading the measurments quite right. So i removed it and cut a shorter pice of tape to hold it to the holding board.

- - - - - - -
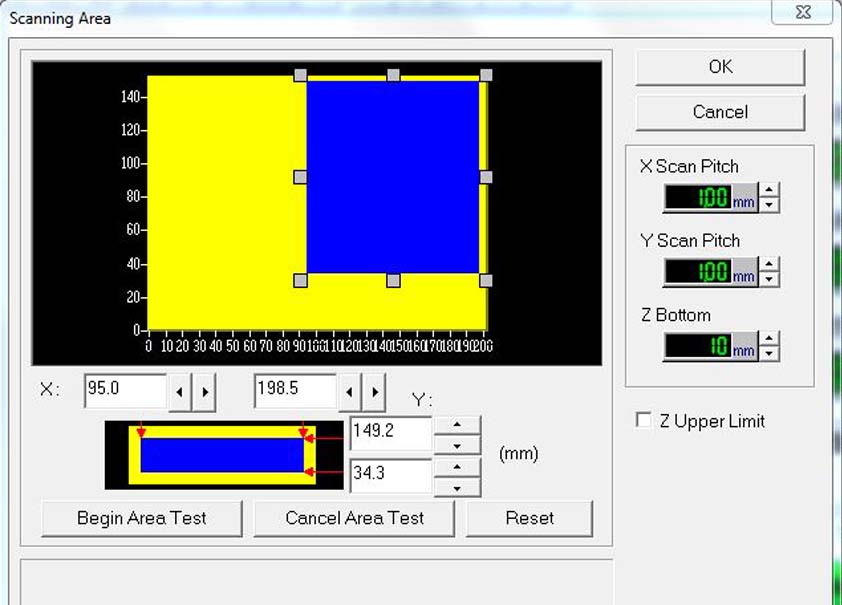
DR. PICZA is the software that the modela uses for scanning, and it's rather simple to function with.
Press SCANNING AREA

- - - - - - -
Adjust scanning area draging the blue box holders (XY)
- - - - - - -
Adjust Z axis with 'Z upper limit' (don't forget to put something n top of the object for better time efficiency.)

- - - - - - -
The final scanning!

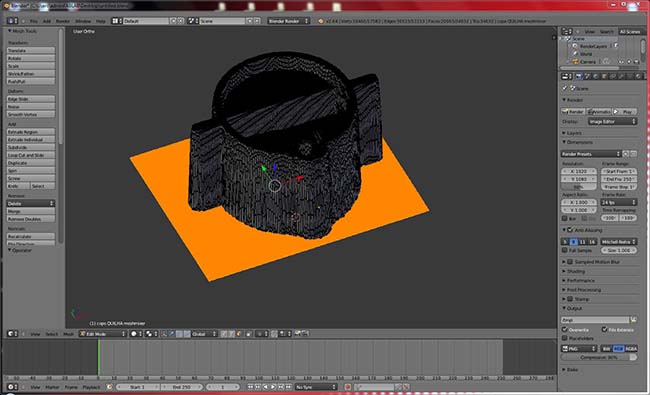
2.b) Preparing meshes - AutodeskMeshMixer + Blender
AUTODESK MESHMIXER
Crashed 2 out of 2 times, so I exported to .stl and moved straight away to BLENDER
BLENDER
The file came from meshmixer with a base surface (kind opf a ‘brim’ in CURA), so it had to be removed in blender. Then:
- selected all the unnecessary faces (right click)
- delete those faces (command X/faces)
- enter vertice selection mode
Also it wasn’t closed in the bottom, so:
- select non-manifold
- scale(S)+Z+0 (for all vortex to go to 0 and then get aligned)
- make face (F)
It was now ready to be exported as ready to print .stl


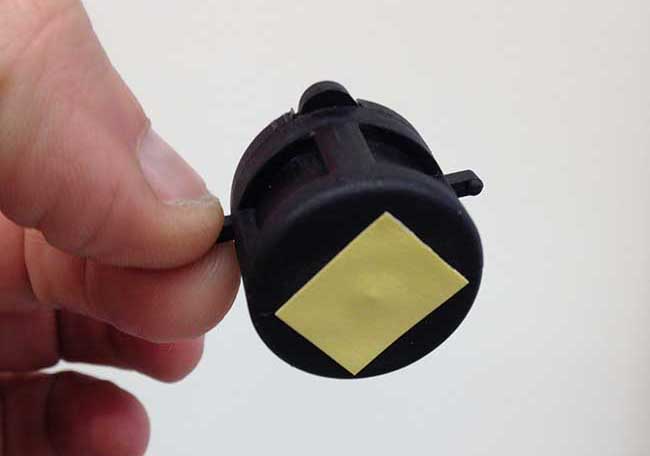
2.c) Print it in Dimension (own software)
Theses were the steps taken:
- open Dimension sofware
- general tab - view - layer resolution - 0,1778 / model in
- orientation - change or mantain, then 'process stl'
- with page up and page down, you can go through the layers
- pack (to see if there is anything else ready or printing in the software)

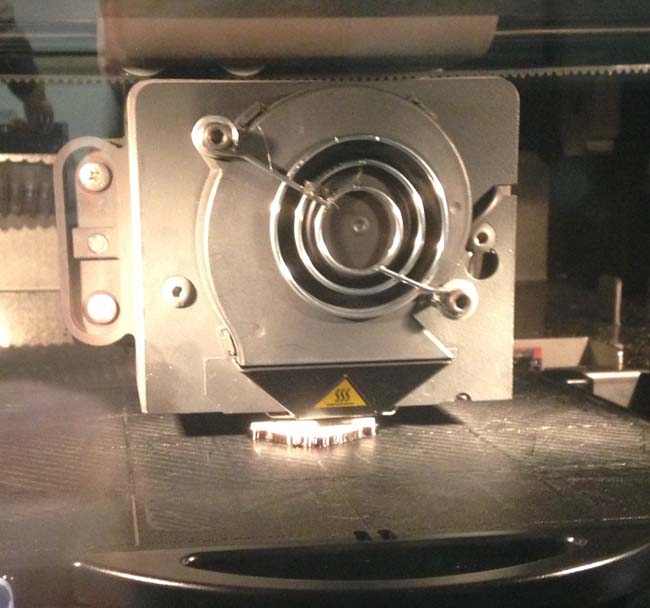
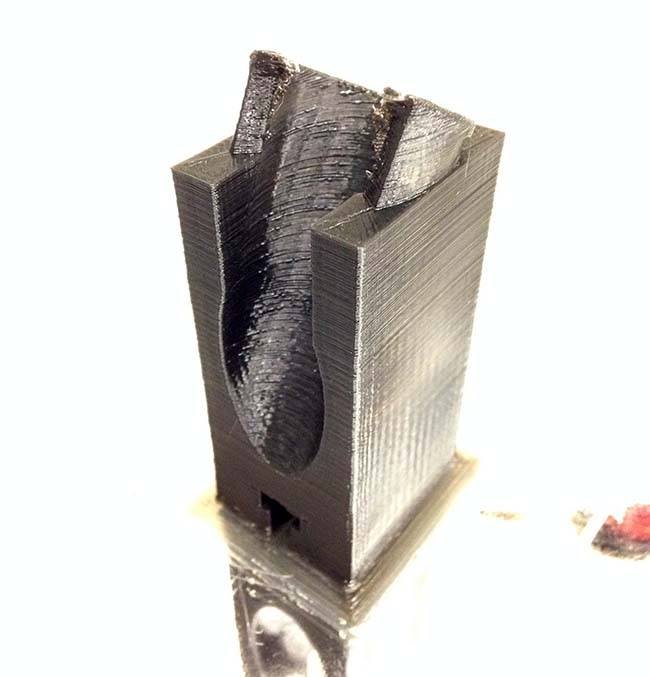
The printed result:

3. Experiment with some more 3d scanning tools
3.a) 123D catch iphone App
I started the scanning experiments with 123catch app on my iphone. I photographed a wheel cart that my kids have at home, and the scanning failed miserably: the app wasn't able to build the 3d model from the pictures i took. I couldn’t determine the exact cause for it, but the most probable cause was bad lighting i some of the pictures. The lesson i learned was that you have to have pretty constant lighting or it will confuse the processing of the images into a 3d model. I got frustrated and didn´t continue with the process, i needed a better camera and probably the online version was more powerfull, so i moved on.
123DCatch Online App
Then i took some pictures of my son, to try and have a 3d model of him to later print in a 3d printer, and uploaded them to 123dcactch online. They were 40 pictures and were taken early in the morning in a rather cloudy day, before getting him to school (poor kik, it was rainning and everything, lets hope he doesn't become a socipath because his father went to fabcademy :)), so there was constant and difuse lighting, wich revealed to help the app to deliver a 3d model. After i uploaded the pictures in the website. It takes a while to process the pictures (you should just be doing something else at the same time, while it processes the pictures, otherwise is just plain anxiety and waste of time).
In the end the app delivered the 3d model, it looked ok but not perfect, but it probably was because my son moved a bit.
I didn't have the time to go into Meshlab with the model to try and work on this model, but i intend to. Anyway i tried some editing in 123catch online and it seems very friendly interface-wise, but i didn't had the time to explore it properly.
One information to reatin is that the website alowws you to download the files in a multitude of formats: .stl, .3dp,.mtl, .obj. So you can edit in the software you want, wich is a good feature.

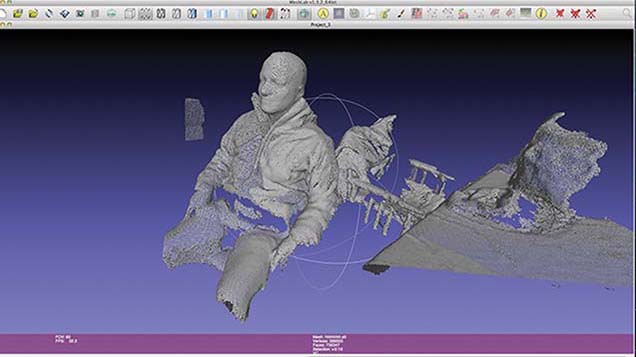
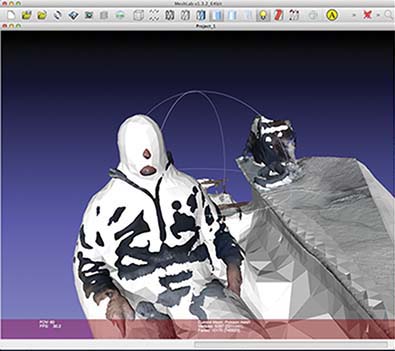
Scanning with Kinnect
Some weeks ago i was in FabLabLisboa and made a 3d scan of myself with the Kinnect with the help of a fellow faber (he was the one holding the kinnect). I seated in a turning chair for the purpose, and the process took around 10 minutes. The result was not great due to bad lighting (it's a bit obvious in the 3d model that one side is far better than the other, because each one was hit by different lighting. I exported it in .ply, .obj and .stl.This week's assignement was a good oportunity to try and edit the mesh so i took the model to Meshlab and tried to experiment with some filters.

You can download the design files here