
week 3.
This week the assignement was to experiment with machine cutting.
INSPIRATION
For many years i’ve been wanting to have an Artichoke lamp, design by the danish designer Paul Holsen in 1958. It’s a tremendously expensive piece, and i never had the 7000 euros availability to have one. So now it could be a good time to both honour Paul Holson and build my own pressfit artichoke-inspired lamp.

FIRST APPROACHES
I’ve started with some skecthing in Adobe Illustrator, trying to understand how the lamp structure works.
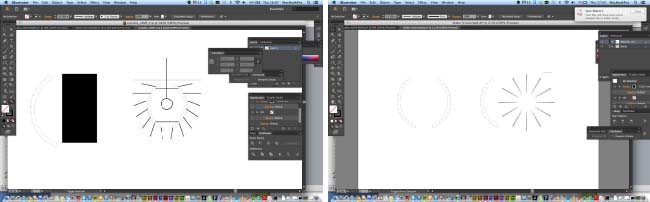
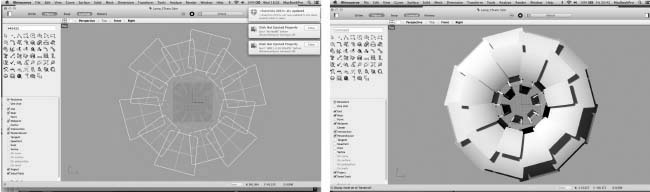
Very soon i was confirming it was a bit complicated piece, so i tried to find online some technical drawings of the lamp. I ended up finding a 3d model in www.GRABCAD.com (online free 3d model sharing site), so it was now more accessible to understand the structure of the lamp.
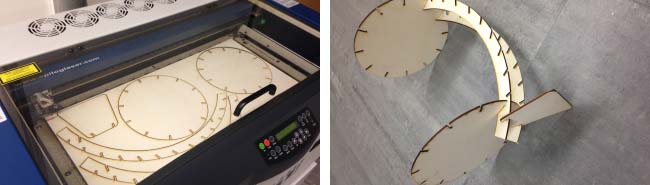
i made the first drawings in Adobe Illustrator and started doing some tests in cardboard. It was my first time using a lasercutter and i found it magical, to have such precision right there at my reach.

I was planning on making the lamp in plywood so i went to buy some boards at LEROY MERLIN ALMADA. It a big home improvement store, doesn’t have the best prices or variety, but it’s open until late (9:30 to 23:00) and they don´t charge for simple wood cuts. I bought a board of 3mm thick plywood with 2440x1220mm and had it cut down to 300x600mm boards, wich is the biggest size that our Fablab laser can cover. It costed me around 16€.
(note: always confirm board thickness when you’re about to cut (these boards where sold as 3,0mm thick, but ended up beeing 3.5mm thick)
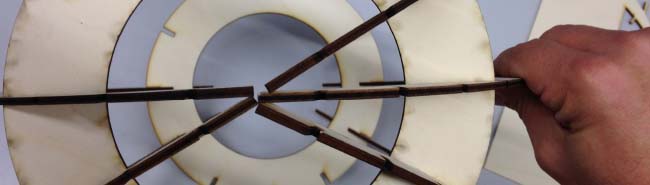
I made the first laser cuts with plywood to test the the fit, and found that it takes a lot more testing than you would expect. From the original thickness of 3.5mm, the testing determined that a press fit would have to make fitting parts to have 3.1mm thickness. (multiplying by the two fitting parts, it’s a surprising 0.8mm)
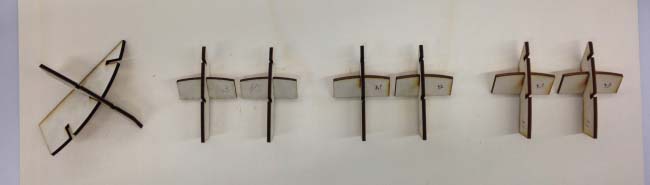
Sooner than i should, i started testing some pieces, for final dimensions and fit tunning, in plywood...
... but it didn’t take no time for errors starting to appear.
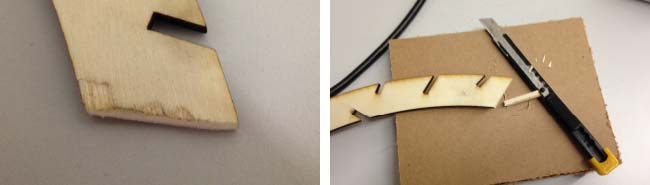
Trying to correct the mistakes with a electric saw showed me that you should first cut the upper layer of the plywood with a x-act knife before putting the saw to work, otherwise it will crack the outer layer of the plywood board.
Lessons learned:
- test with cardboard
- test with cardboard
- and test with cardboard

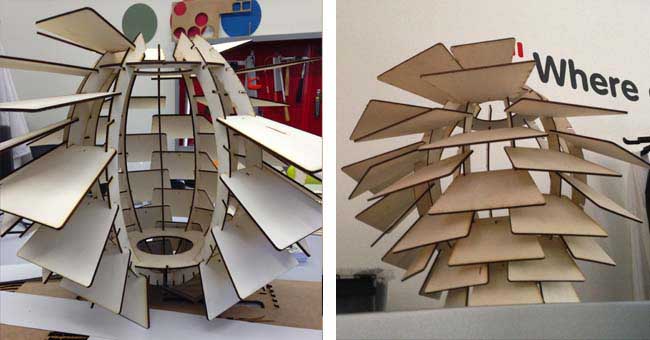
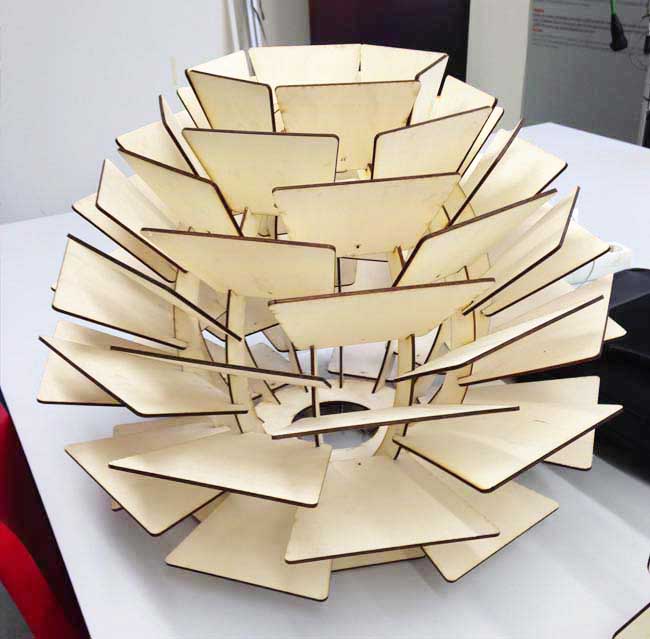
Results, at last!....
After a lot of trial-and-error, results where starting to appear....
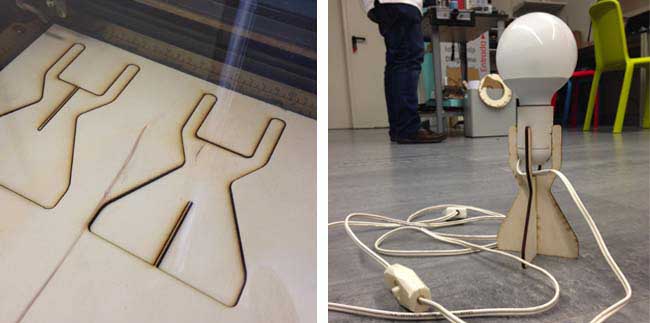
The last part was to salvage an old lightswitch and cable , design and cut a suport for the lightbulb, and the project was (almost) done!
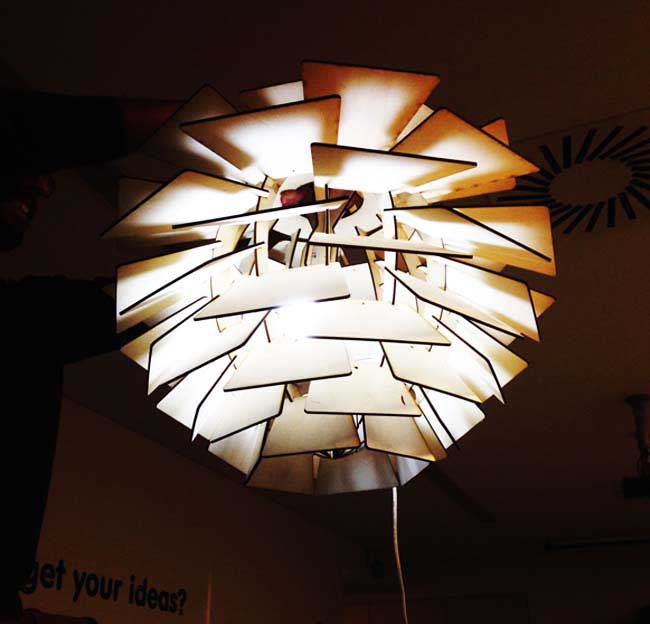
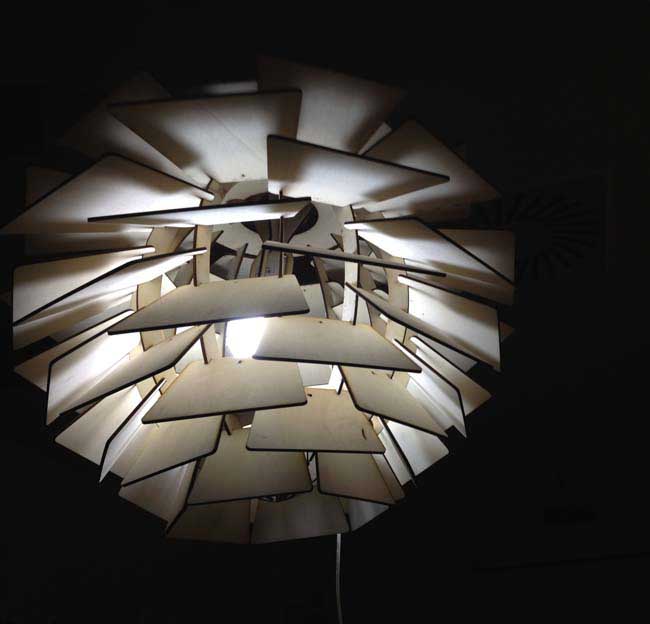
FINAL RESULT
Some tuning must be done regarding the hanging of the lamp, but for now it works wonderfully as a desktop or ground lamp!
Here are the SVG files for everybody to use and specially improve: final_drawings.svg
You can download the design files here