

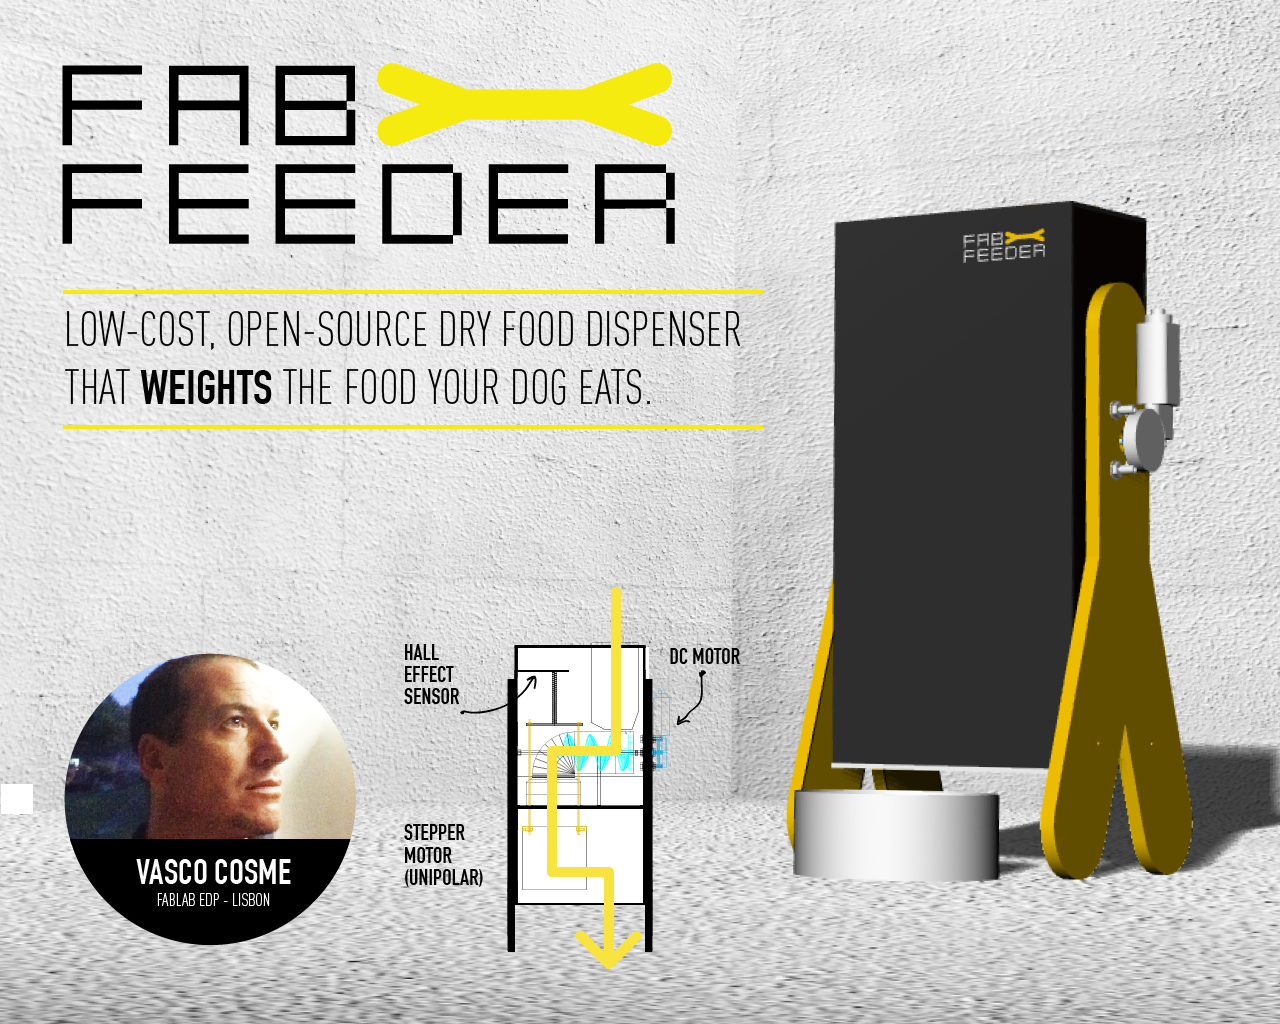
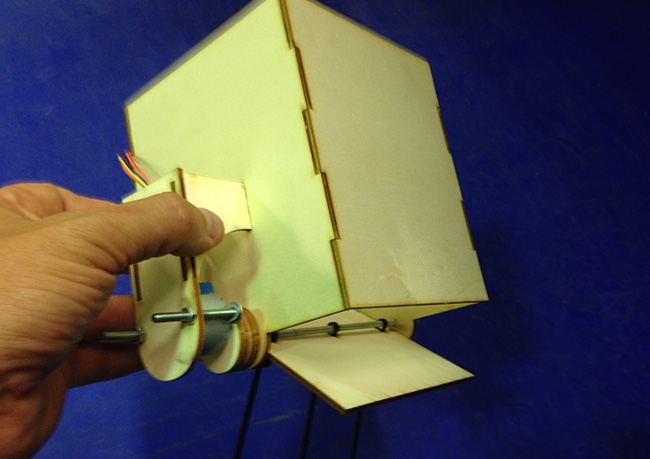
FAB_FEEDER
Since the begginning of Fabacademy this project had been contained on its dimension and functionalities. I've soon realized i couldn't do a do-all machine, so i concentrated on it just storing, weighting and dispensing my dog's dry food.
I'm yet far from the conclusion of this project, but i believe i've come a long way and learnt a lot by developing this project.
WHAT DOES IT DO TODAY?
On the touch of a button , it starts a cycle of the machine's basic functionalities:
- The DC motor rotates the helix and this moves the food sotred in the storage compartment into the weighting box.
- At that time, the hall effect sensor is sending out values that are read by the attiny, evaluating if it is already time to release the fod in the weighting compartment.
- When a certain value (=weight) is reached, the bottom lid rotates 180º, thereby releasing the food.
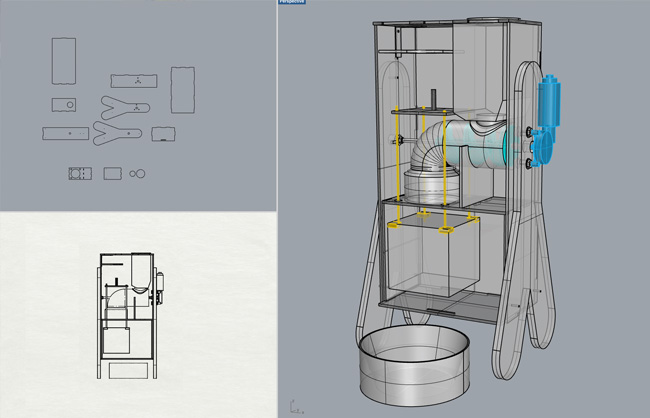
MECHANICAL AND MACHINE DESIGN
I consider myself very comfortable working in Rhino now, and in this project i learnt a lot, but mostly i got faster and a lot of processes in building in Rhino are now optimized in my workflow inside Rhino.
You can download the RHINO files here
- - - - - - - - - - - - - - - - -
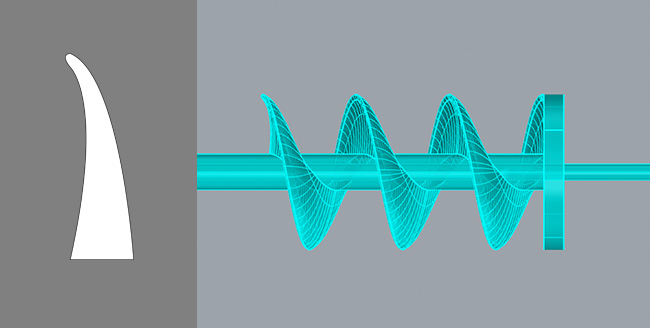
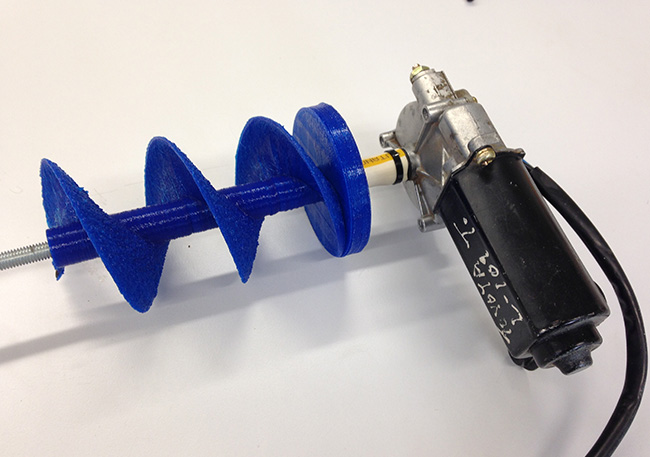
3D printing some parts
I 3d printed the HELIX and the pipe/deposit connector. The helix , wich i thought was to give me some serous trouble when 3d printing, didn't go bad at all, but the connector got some overhanging to be corrected in a later stage of this spiral development.


- - - - - - - - - - - - - - - - -
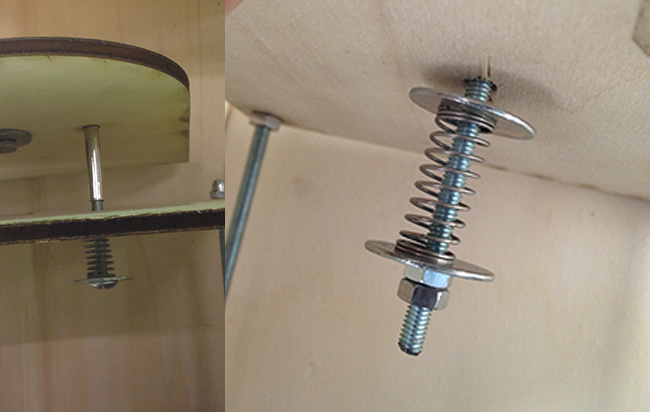
Spring/Load system

- - - - - - - - - - - - - - - - -
Weight recipient rotating-lid release system
- - - - - - - - - - - - - - - - -
Fooling around with some color....

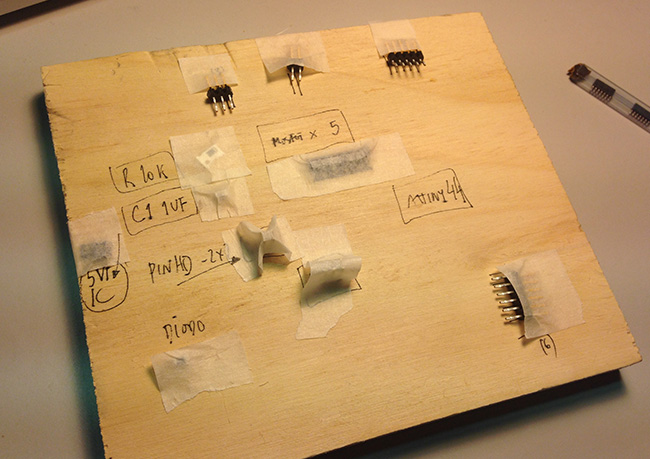
ELECTRONICS
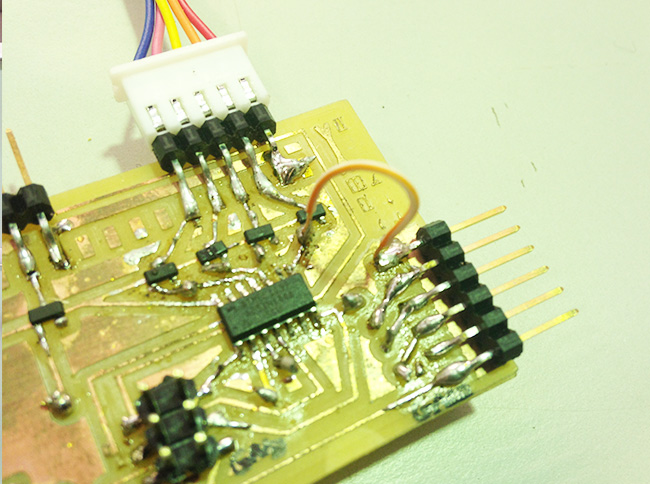
I started by designing a board that would integrate circuits for all the inputs and outputs that i wanted to have working:
- INPUT - Hall effect sensor
- OUTPUT - DC motor + Stepper Motor
Here is the result of my circuit design in Eagle:


You can download the EAGLE files here
- - - - - - - - - - - - - - - - -
MILLING THE BOARD
Things didn't go very well in the beginning. The copper board wasn't, for some reason, completely flat, so i had to re-mill the board some 3 times.

- - - - - - - - - - - - - - - - -
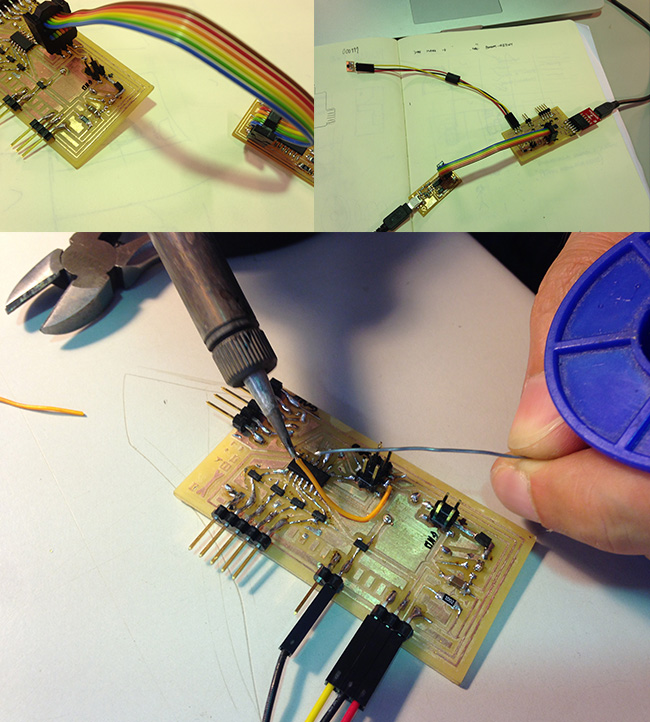
I was afraid of the trough-holes to remove the copper around them, but it turned out pretty fine. I picked the components and started assembling the circuit.

- - - - - - - - - - - - - - - - -
The soldering part of the process went well, but as soon as i started programming the board, it just didn't got recognized by the computer and i couldn't do anything.... i spotted some connections that weren't fully working, but even after i fix them the board wasn't working.
- - - - - - - - - - - - - - - - -
I started stressing because milling and soldering another board right away would disturb my schedule, so i decided to start testing using the Echo hello-world board i had built in WEEK_6 of FabAcademy.

- - - - - - - - - - - - - - - - -
Things moved on at good speed, and the echo helloboard was now turned in a sort of FEEDERUINO ;)

- - - - - - - - - - - - - - - - -
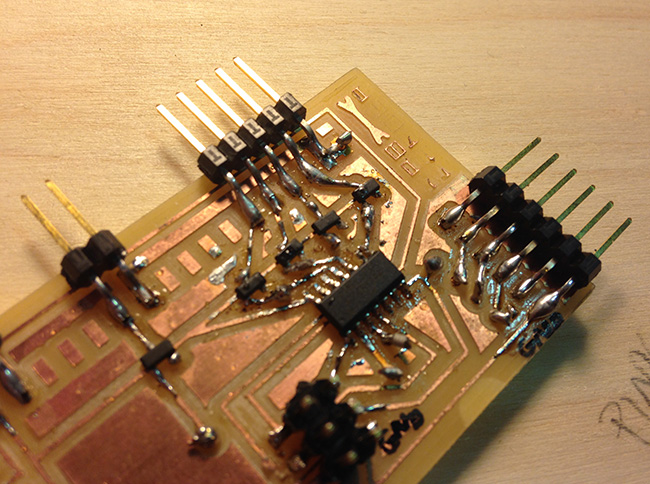
Because i needed, for the stepper motor, of 4 mosfests, i decided to use the part the mosfets in the board that wasn't functioning. tested the mosfets with the stepper motor and it worked. Great!

- - - - - - - - - - - - - - - - -
THE RECICLED DC MOTOR
For the helix motor i decided to get me a carwindow motor, wich are rather slow but have a lot of torque. I went to a nearby 'car parts shopping center', in a place called QUINTA DO CARMO. They have dozens of small shops filled with used car parts, so i got me a couple motors, for 10€ each (Ferdi, my guru, got his for 5!!!)

- - - - - - - - - - - - - - - - -
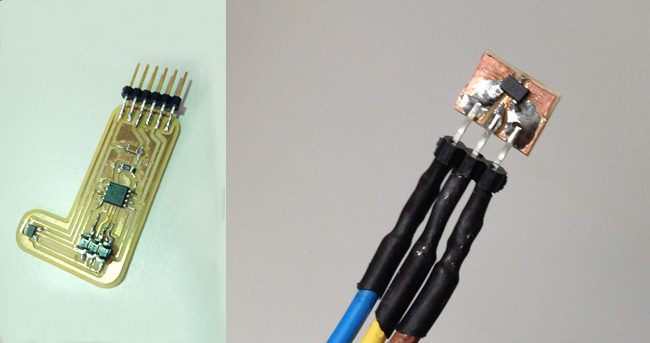
HALL EFFECT SENSOR
i thought about using the board i designed for the input devices ' assignement, but ultimately i just made a macgyver-style pcb with the sensor, due to problems with the dremel we use in the Modela.
- - - - - - - - - - - - - - - - -
The fabfeeder original board was still trying to escape from the project, but i kept it around.... ;)
- - - - - - - - - - - - - - - - -
EVERYTHING WORKING PROPERLY, BUT TOO MANY CABLES....
I learnt , unforgettably, why a PCB is so useful. When you just try to connect cables you get a very confusing desk!!!

- - - - - - - - - - - - - - - - -
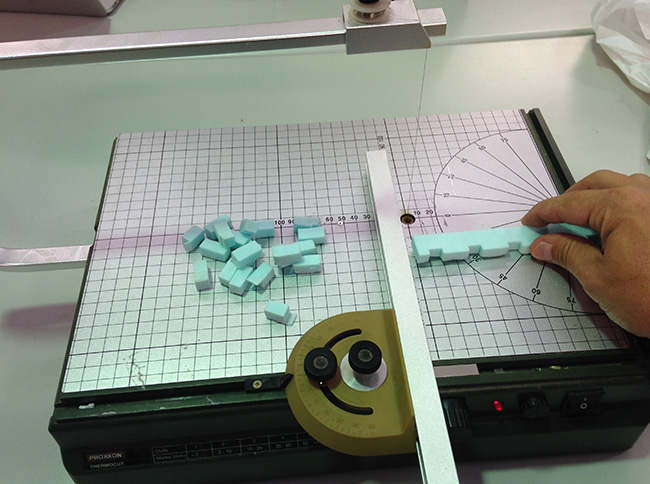
FINAL TESTS
For the final tests i made some polistryene squares to act as dry food.
- - - - - - - - - - - - - - - - -
EVERYTHING WAS WORKING NOW!
This was the code used for putting the fabfeeder to work in this demo:
int sensorPin = 6; // select the input pin for the sensor
int ledPin = 7; // select the pin for the LED
int sensorValue = 0; // variable to store the value coming from the sensor
int ButtonPin = 3; // V - select the pin for the BUTTON
int DCMotorPin = 8; // V - select the pin for the DCMOTOR
int buttonState = 0; // variable for reading the pushbutton status
////para o STEPPER MOTOR
int motorPin1 = 4;
int motorPin2 = 5;
int motorPin3 = 1;
int motorPin4 = 0;
int delayTime = 8;
int emfuncionamento = 0;
void setup() {
// declare the ledPin as an OUTPUT:
pinMode(ledPin, OUTPUT);
// V - declare the MotorPin as an OUTPUT:
pinMode(DCMotorPin, OUTPUT);
// V - declare the ButtonPin as an INPUT:
pinMode(ButtonPin, INPUT);
pinMode(sensorPin, INPUT);
//
pinMode(motorPin1, OUTPUT);
pinMode(motorPin2, OUTPUT);
pinMode(motorPin3, OUTPUT);
pinMode(motorPin4, OUTPUT);
}
void loop() {
// V - read the state of the pushbutton value:
buttonState = digitalRead(ButtonPin);
// check if the pushbutton is pressed.
// if it is not , the buttonState is LOW:
if (buttonState == LOW ) { //&& sensorValue > 50
// turn MOTOR on:
emfuncionamento = 1;
while(emfuncionamento == 1){
digitalWrite(DCMotorPin, HIGH);
delay(5000);
sensorValue = analogRead(sensorPin);
if (sensorValue > 500){
digitalWrite(DCMotorPin, LOW);
stepforward();
emfuncionamento = 0;
}
}
}
else {
// // turn stepper off:
// digitalWrite(DCMotorPin, LOW);
// digitalWrite(motorPin1, LOW);
// digitalWrite(motorPin2, LOW);
// digitalWrite(motorPin3, LOW);
// digitalWrite(motorPin4, LOW);
}
//
// read the value from the sensor:
sensorValue = analogRead(sensorPin);
// turn the ledPin on
digitalWrite(ledPin, HIGH);
// stop the program for
delay(sensorValue);
// turn the ledPin off:
digitalWrite(ledPin, LOW);
// stop the program for for
delay(sensorValue);
}
void stepforward(){
////
for (int i=0; i <= 255; i++){
digitalWrite(motorPin1, HIGH);
digitalWrite(motorPin2, LOW);
digitalWrite(motorPin3, LOW);
digitalWrite(motorPin4, LOW);
delay(delayTime);
digitalWrite(motorPin1, LOW);
digitalWrite(motorPin2, HIGH);
digitalWrite(motorPin3, LOW);
digitalWrite(motorPin4, LOW);
delay(delayTime);
digitalWrite(motorPin1, LOW);
digitalWrite(motorPin2, LOW);
digitalWrite(motorPin3, HIGH);
digitalWrite(motorPin4, LOW);
delay(delayTime);
digitalWrite(motorPin1, LOW);
digitalWrite(motorPin2, LOW);
digitalWrite(motorPin3, LOW);
digitalWrite(motorPin4, HIGH);
delay(delayTime);
}
//
//
}