Final Project FAB DOLLY
by Moritz Begle
Posted on June 03, 2013 at 15:00 PM
Introduction
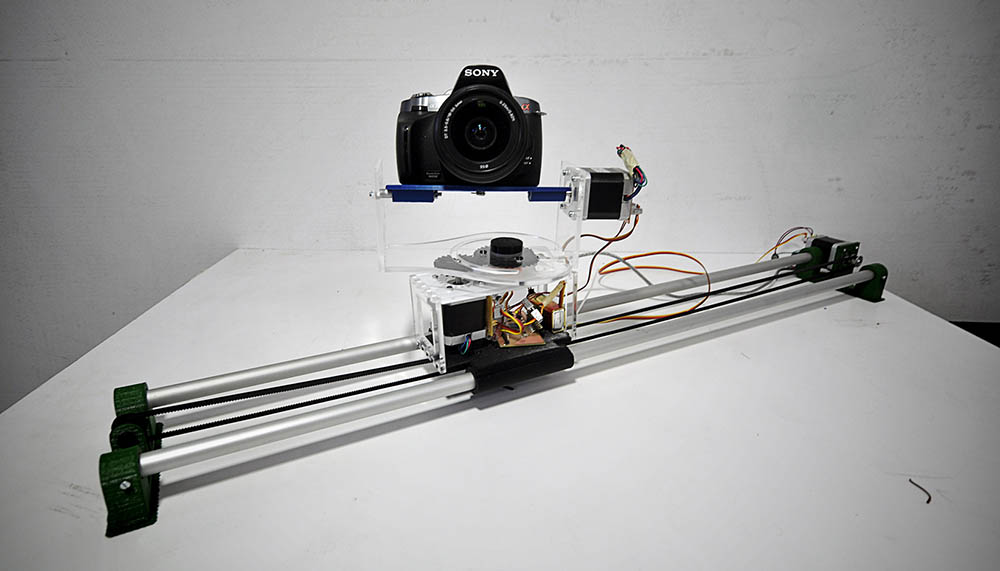
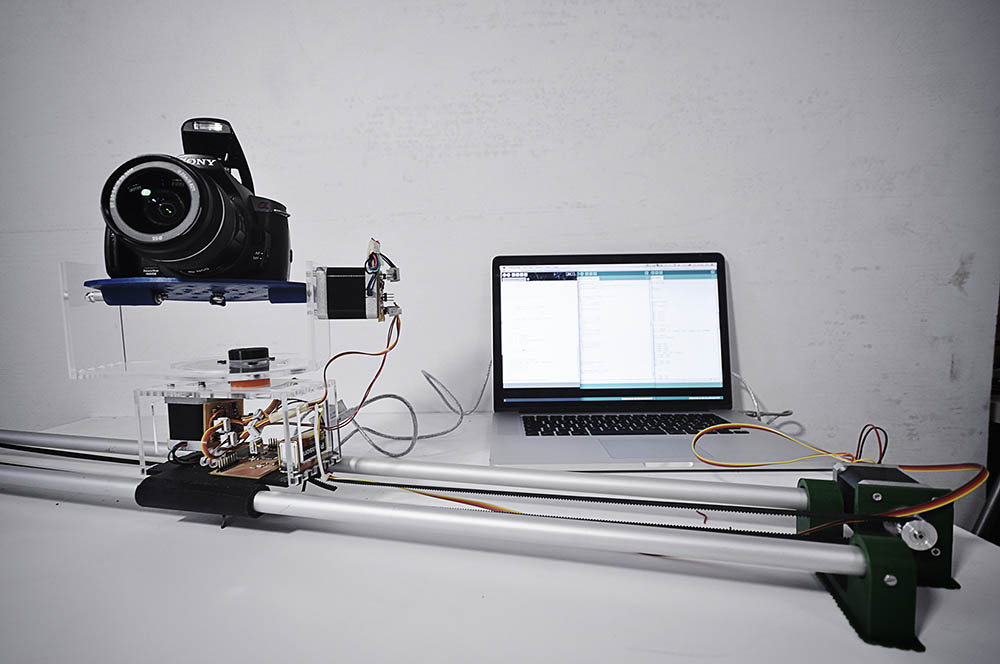
From the beginning on I decided to create a small little "robot" as this will involve a lot of the topics like 3d printing, Lasercutting, Electronics Production & Programming. I liked the idea of creating cameradolly as i havent really found a complete open source project with all three topics combined (slide, pan & tilt). In general Camera-Dollys are quiet expensive (500.- up to a couple of thousands of euros), and now I can understand why :) A lot of electronics on programming skills are required. The Final Project (developement time 2 weeks) is the first prototype of creating an automated camera dolly system that is easy to create, use, and alligned with the idea of being affordable at the same time (~100.-).
Process
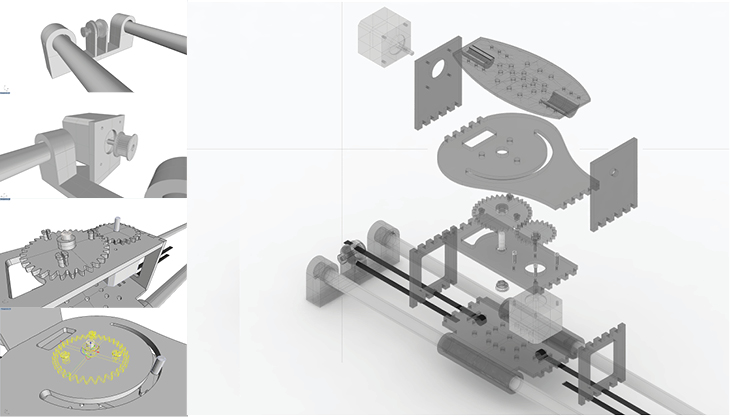
Desginphase The whole model has been created in Rhino and partially in Grasshopper. After testing the first prototypes, I realised that it is absolutely necessary to draw it down to the last screw, otherwhise you can be sure that somethiung is not working matching or fitting properly. The challenge about the design is the mechanical part. The whole system has to be balanced out, as otherwise friction will cause a lot of problems on the movement. As no screws and no glue where allowed, the combination of the steppers and the cameras weight has to be balanced out perfectly (which has to be improved on the second prototype)
Fabrication
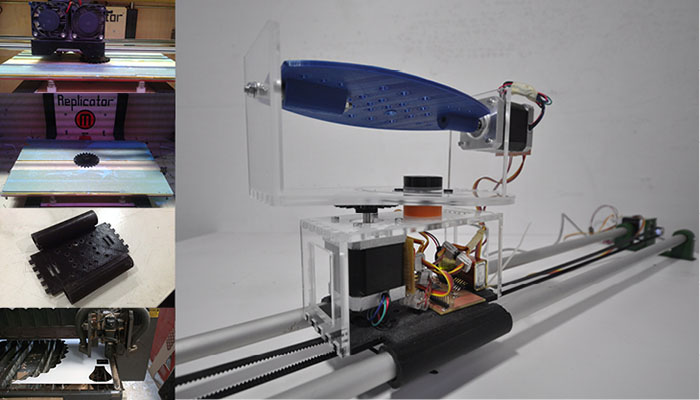
The project combines two fabrication methods lasercut, and 3d printing. The 3d-printing parts had been exported from rhino as stl files and put into the makerware which is an open software that creates the x3g.files for the makerbots. Diffrent fillaments PLA & ABS had been used, which require diffrent settings in terms of surface and extruding temperature. This part took a lot of time as the printer wasn`t working properly (Fillament got stuck, the model bended during the printing process, disassemble - clean- assemble the extruder and so on...) 3d printing really takes time and patience. Lasercutting the parts are out of 5mm Plexiglass, cut with a power of 300 and speed 20, cut preassure 9 and pierce preassure 3 which was the easy part of the whole fabrication process.
Electronics
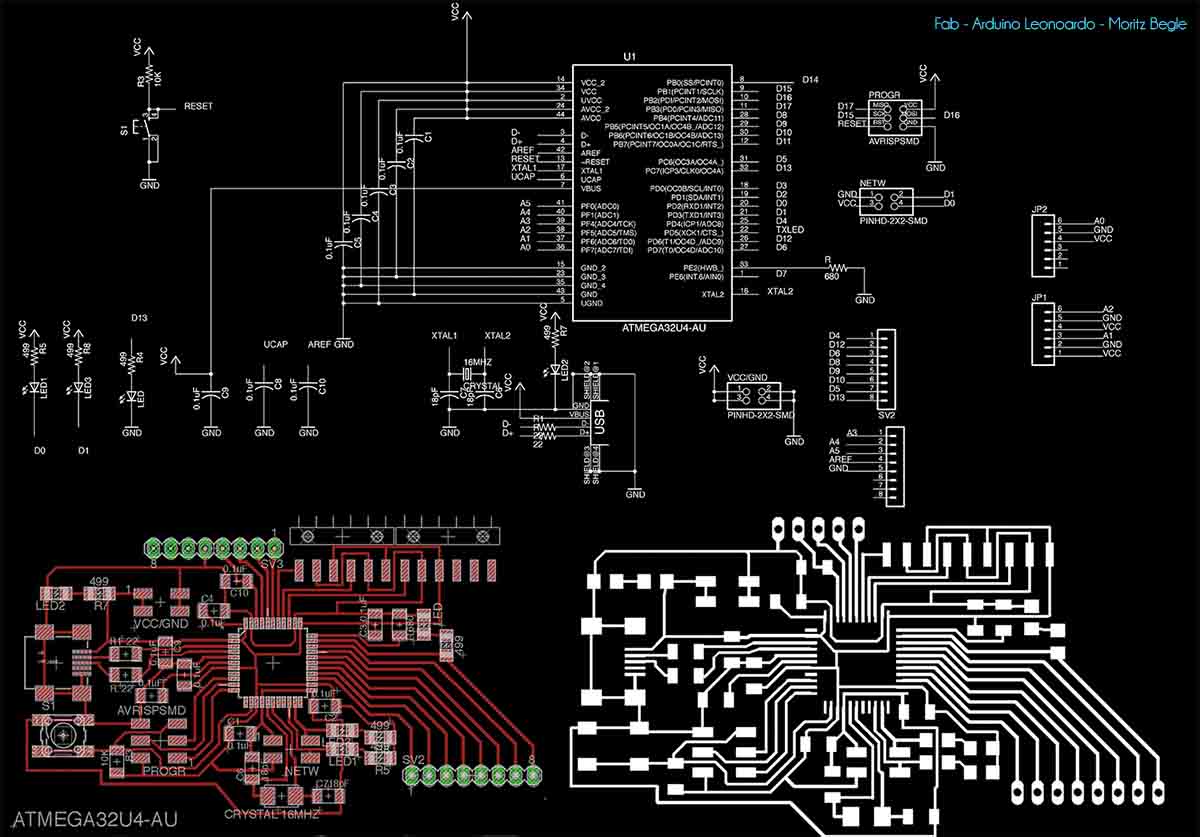
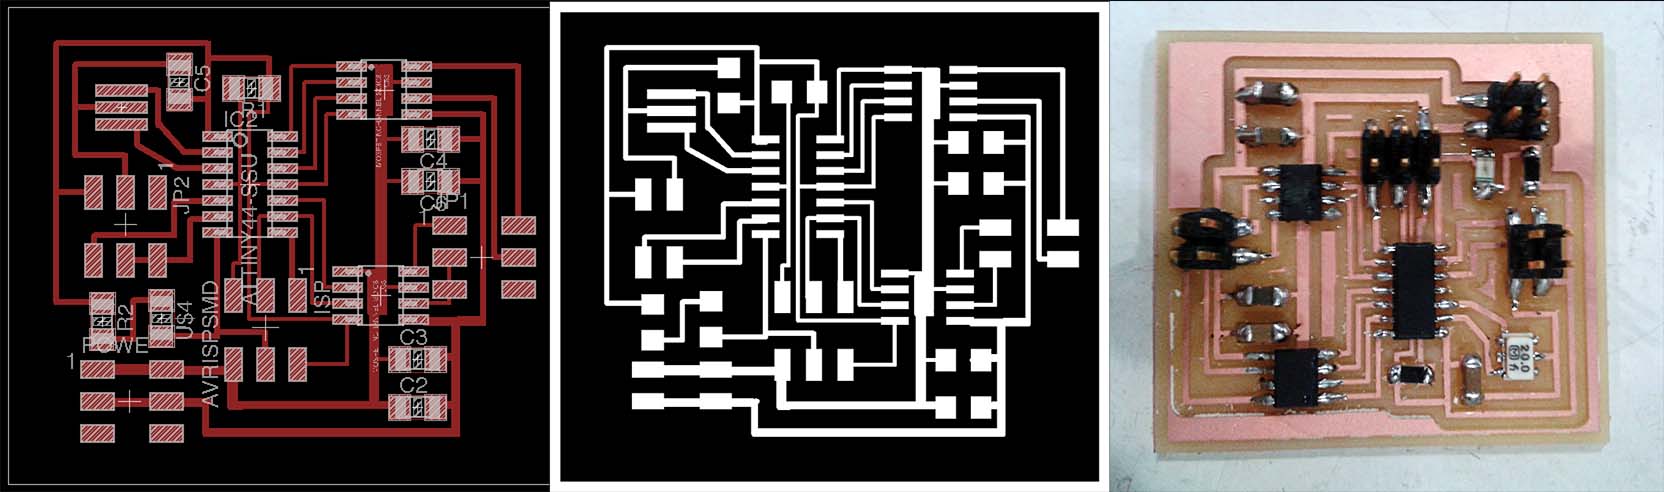
As a Output device I decided to order 3 Nema 17 Stepper Motor (cookinghacks) to move my camera dolly in 3 axis. These are driven by 3 bipolar stepper bridges connected to a Leonardo. The leonardo still has some tx connection problems so I had to run the final prototype with the normal barduino or the commercially available one. They are all drawn in eagle and milled with the roland. For burning the fuses I used my FaB ISP I created at the beginning of the semester. The pcomponents are ordered from Cookinghacks and Digikeys

Programming
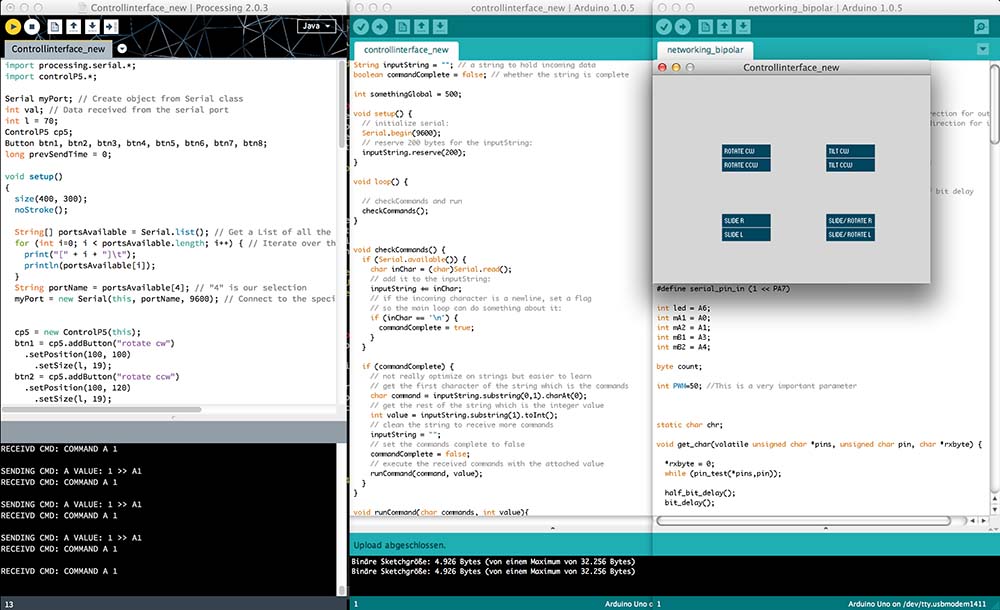
To program the diffrent microcontrollers I used Arduino and Processing. For the Attiny 44 bipolar stepperdrivers, I finally had to start from Neils code and adapted it to my needs as I couldnt make any other code work on it. Each Node has its own identity and listens to the values preset for its rotation direction (cw or ccw). I couldn`t manage to adjust the speed and as a result it doesn`t move as smooth as I was hoping. The values are being received through the networking pin TX from the Mainboard. This is transforming the commands comming from the processing script. In Processing I created an ControlP5 interface including 5 buttons. Each button is designated to a specific function. The advantage of the script is that it is modular system and can be added as many times as wished. I will continue scripting as I also haven`t included the joystick controll as well as defining automated programs.
Wrap Up
All overall I am quiet happy with the result of my project. The overall system is working and "just" needs adjustments to work more precisely. I got a good solid understanding in terms of electronics, the way they work and can be created & programmed. Thanks to Guillem Camprodon, Luciano Betoldi and Francisco Sanchez I managed to improve my programming skills on the C+ Arduino and Processing side, as the bipolar stepperdrivers with the tiny44`s caused a lot of problems. I probably would redesign my nodes and get rid of the microcontrollers, just using the drivers and directly linked to the pins of the mainboard. Therefore I simply could use one code, which would make the programming much easier. The disadvantage --> it is not modular anymore.
Video
- 3 Nema 17 - Steppermotors
- 3 bipolar Motordrivers Tiny44
- Fab Arduino Leonardo or Arduino
- (Joystick)
- 2 (10x 1500mm) aluminium Pipes
- Plexiglass 5mm Structure
- Plexiglass 2mm Parts being attached to the rail
- Programmer Fab Isp
- External powersource: 12V
Blog Search
Keywords
Web development; blogs; content management; videoconference;remote dektop; project management