|
|
It
was interesting to hear
discussions regarding resins and
reinforcements relative to making composite
items. I have been working
with reinforced glass fibers
using polyester resin for a number of years when
rebuilding my boat. Respirators and protective
clothing are important to
maintain one's
health as they work in these
environments. I personally would
not use epoxy resin without a
respirator and good
ventilation. Part of the
danger of using the
resin is that it does not
smell.
The health
effects of
using and
inhaling epoxy
resin still
results in respiratory
issues.
|
|
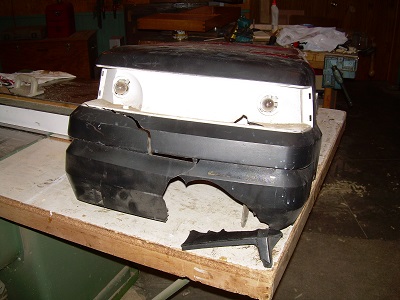
I
am going to struggle when trying to make a reinforced
composite that will help repair this lawnmower grill. The
grill has a lot of depth do it so I will need to figure
out how to make a mold that is this deep.
I am considering making a male plug instead of a
female mold. That would help me maintain inside
tolerances. However, I would need to make sure the
bagging system was created a smooth enough surface in
order to avoid having to do an inordinate amount of
sanding.
|

|
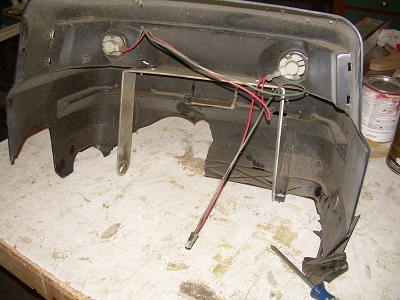
I was concerned about tolerances on
the lawnmower grill. I started
drawing a mold in Inventor but decided to try a scan
one more time using 123D Catch. I read that you needed at least 20 photos to make the stitching work,
In the past I hadn't used that many photos.
This time I took 54
photos. I need to work on the
image but details on the reverse side of the
grill were captured.
I am not sure if I will
end up
doing a drawing or if I
will get the
scanning to mold
process figured out.
|
|
|
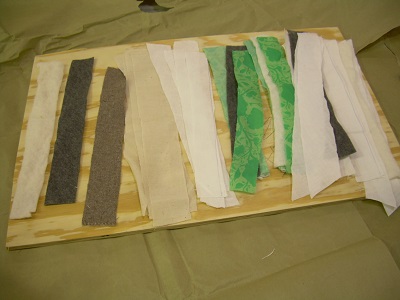
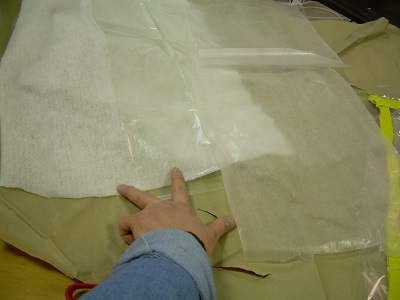
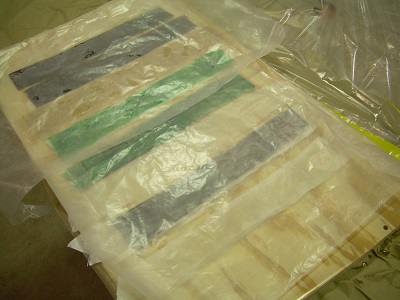
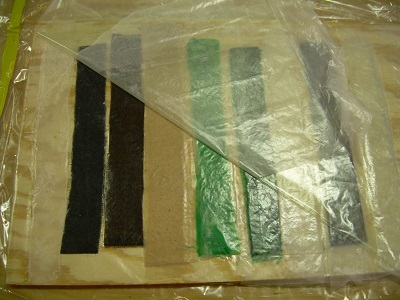
I have decided to do a number of test
strips. In boats they use balsa
core to increase stiffness and to provide some rigidity to the hull. In this
application I need to build up a housing that
is about 1/8 inch thick. Experience
has taught me that using
individual layers of cloth adds weight and
can be expensive if using
glass fibers. I also know that mat
is used between layers of cloth to increase bonding between
layers. So, I chose a number of layers to
experiment with. From left to
right they are: 1 layer of bamboo
batting (used in quilts); 1 layer of gray felt; 1 layer of
brown woven wool; 4 layers
of muslin; 4 layers of white
linen; 1
layer of wool sandwiched
between 2 layers of
green cotton; 1 layer of
bamboo batting
sandwiched between 2
layers
of cotton; 1 layer of
gray wool sandwiched
between 2 layers
of linen on each
side; 1 layer of
bamboo batting sadwiched
between
2 layers of
linen
on each side.
|
|
|
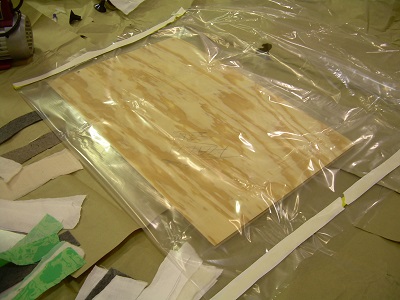
My mold
was a simple piece of plywood. I needed something flat to mold to and to get the basic
process down. I bagged the whole piece of plywood
in case there were voids in the wood.
|
|
|
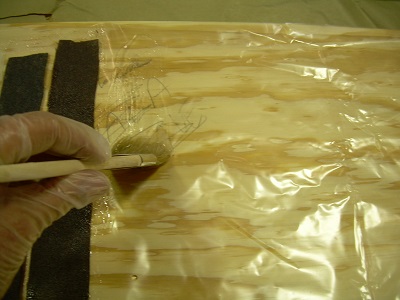
I cut
the three necessary layers or vacuum bagging.
I used wax paper as
the release. It works on polyester resin and I assume it will work
on epoxy as well.
The bleeder fabric and
breather fabric are cut to size as well.
|
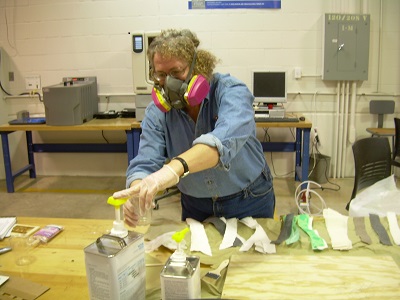 |
In order
to model best practices I have donned the
safety gear I use when
working with resins. This includes the
respirator and vinyl gloves.
|
|
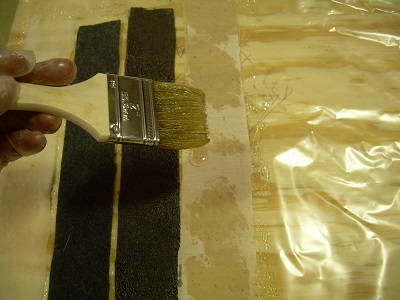
I use
a cheap bristle brush (chip
brush) to work with resin. I find that it is
easier to pull resin through the
fibers by laying down a coat of
resin, laying the
reinforcement over the resin, and using the
brush to pull the resin through successive layers of
fibers.
|
|
You can
tell where more resin
needs to be added by observing how
"wet" the reinforcement layer
looks. The white parts of this strip need more
attention.
|
|
After
all of the test strips are laid up the wax paper release layer is
placed over the epoxied strips.
|
|
The bleeder fabric layer is added.
|
|
The breather layer of fabric is
added.
|
|
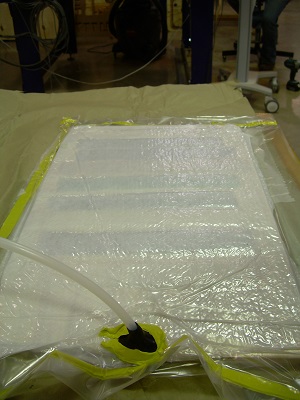
The mold is placed in the vacuum bag. Air is sucked out of the bag and
pressure is left on the mold while the resin cures.
|
|
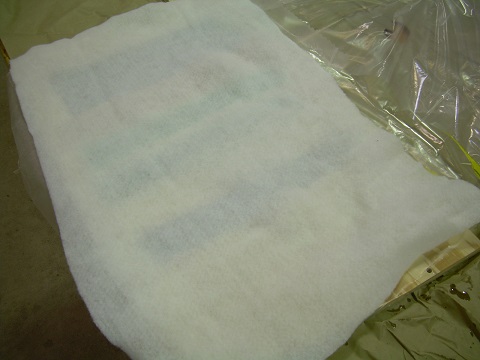
The next morning I checked the samples.
Note that the wax paper did the
job.
|
|
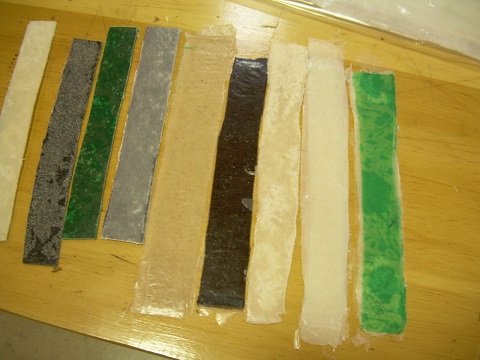
Most
of the samples look good. I took them on a bandsaw
to cut the ends off of the test
strips. For the most part they
look good. In an attempt to get the perfect
composite (using the right proportion
of resin to cloth) I skimped on the
resin. There are some voids particularly
in the felt and bamboo
batting samples.
I will need to attend to this in
the final product.
|
|
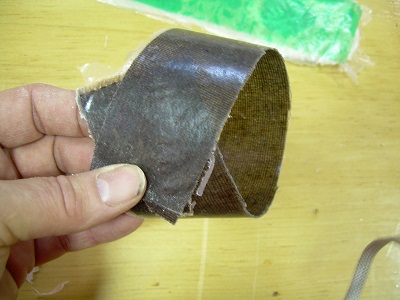
Almost all of the samples are
flexible to some degree. A
single layer of woven wool material is shown here. The
best composite I found was 2 layers
of linen, a core of bamboo batting, followed by 2 more layers of linen. This
composite is about the correct thickness that I need, holds it shape with some give, and will be easy enough to
work with.
|
|
|