My Final Project: Ping Pong Ball Launcher
For my final project, I set out to digitally fabricate a ping pong ball launcher. I wanted to make a machine that, acting independently, could shoot out ping pong balls at various speeds and spin rates--and also from different angles.
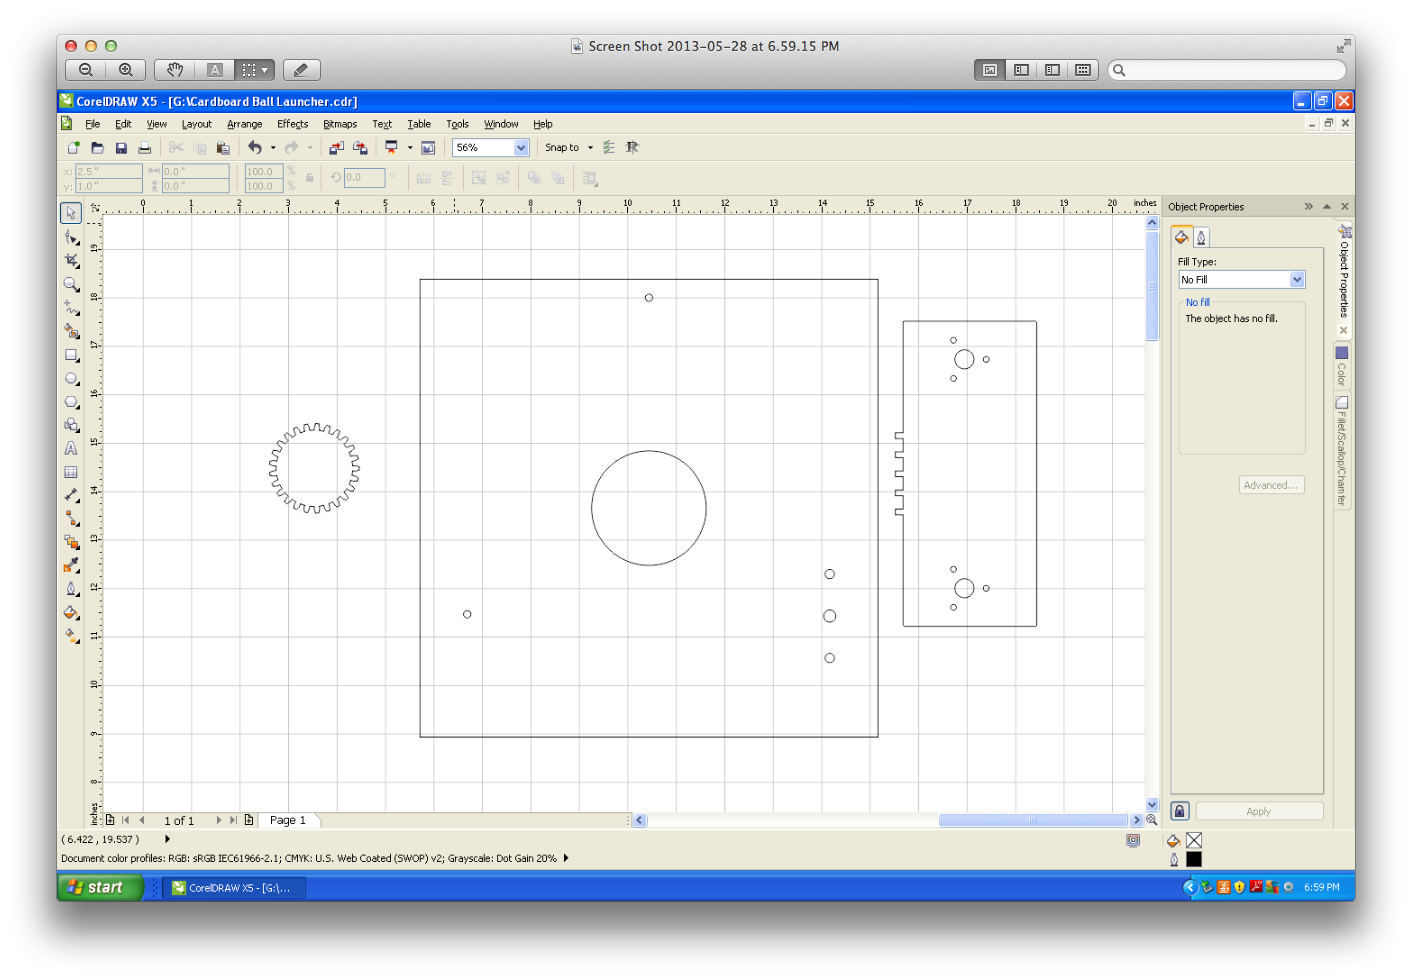
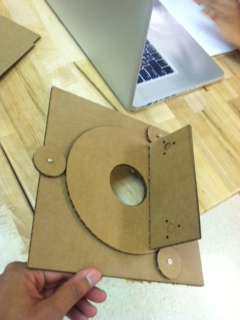
I used CorelDraw for the majority of my 2D CAD. I initially used the laser cutter in order to create a cardboard prototype of my design.
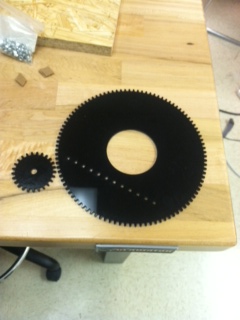
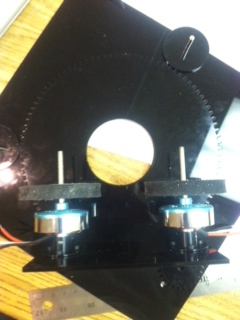
After I was happy with my initial design, I began to cut out pieces using acrylic. I wanted to have a ball launcher that could rotate around a hole so that the ball could hit the wheels at different angles in order to produce different "spin effects." I settled on creating a rotating gear that would spin against one smaller gear and rotate between two other smaller circles. I used the gear generator in Inkscape and then imported the gears into CorelDraw for modification.
I modified a code in OpenSCAD that one of my colleagues in the lab initially designed in order to 3d print my wheels. Here are the STL Files: STL File 1 and STL File 2.

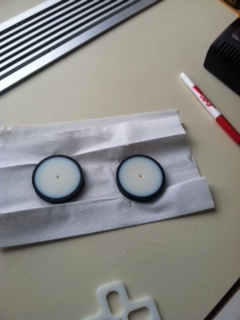
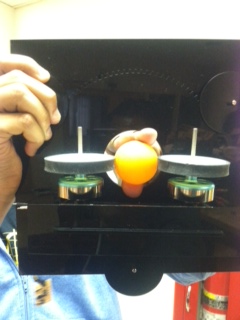
The entire design came together with the holding apparatus for the wheels able to rotate around the hole for the ball. I attached the 3D wheels to the brushless motors and screwed them onto the holding apparatus.
The ball was then able to fit through the wheels smoothly with slight resistance.
I then began working on programming. I first attached a stepper motor to my board in order for the gear to be able to turn automatically and rotate the ball launcher.

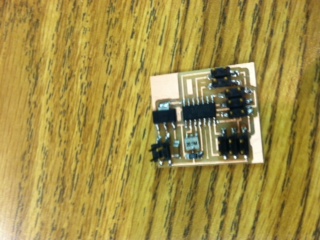
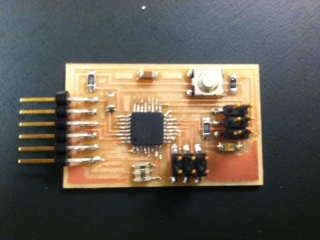
I then milled a mixed node and servo board (based on the designs from networking and communications and output devices) in order to drive my brushless motors.
After this initial progress, I went back and redesigned certain aspects of my mechanical and electric design. I was still unable to get the stepper motor to work properly.
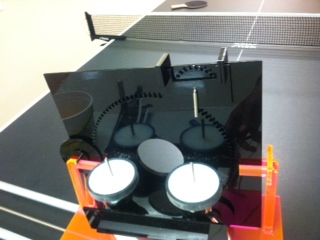
Mechanically, I designed two pieces that would hold the stepper motor upright on the launcher so that the wheels could move along the degree plane smoothly.
Electrically, I altered the design of my servo board in order for it to communicate on a network with the motherboard. I modified the .CAD file in order to add an RX/TX connection for the SPI. I then worked on coding the board so that it could connect to the network. I was able to get the wheels to run by themselves at a determinted speed; however, I was not able to do it while controlling them with another board. I worked with a lab partner on coding the board since he was designing the motherboard; however, we had issues with having the motherboard successfully call a node id and have it respond with reliable information.
After many revisions, I was not able to have a stepper that could move the ball launcher at various angles; therefore, I made sure that I could hold the spinning part of the launcher on mechanically while being able to rotate the launcher and wheels around the hole at different angles manually.
I then focused all of my attention on just being able to have the brushless motors move at varying speeds in order to produce different speed and spin rates for the launching ball. I first got the wheels to turn reliably using a manufactured arduino. Once, I was able to control the motors using the arduino, I then milled my own arduino, using the design found on the website for embedded programming week (hello.arduino.168).
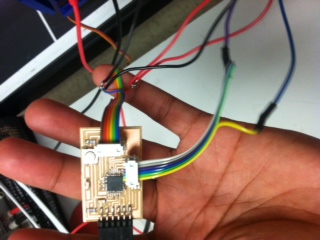
I then soldered wires together in order to be able to connect the board with the proper signal, ground, and power inputs for the speed controllers and the arduino.
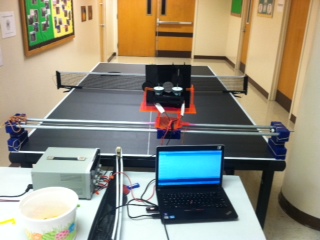
In order to test my ball launcher, I placed in on top of an apparatus for panning/tilting that was designed by another lab member. This allows the ball launcher to be able to stand up and shoot balls onto a ping pong table.
I then uploaded the code that I wrote onto the board. The code allows me to use the serial monitor in order to input the characters, represented as the letters "a" - "n" in order to make the motors rotate the wheels at various speeds. The character "x" stops the wheels. Here is the code.
Once I connected everything, I was able to shoot balls out of the ping pong launcher successfully.