Fab Lab Barcelona SuperNode /Fab Lab Sevilla /Jose Perez de Lama
Week 11 / composites / 03.04.2013

[assigment]
Make a 3D mold, and produce a fiber composite part in it
Class syllabus::
http://academy.cba.mit.edu/classes/composites/index.html
[summary]
The goal of the assignment was to digitally design and fabricate an object that would take advantage of composite materials. A second goal was to test vacuum bagging processes to produce composite materials. An object was designed and fabricated with a thin, light and strong surface that shows the potential of composite fibers. Materials used were epoxy resin and natural burlap fabric. Future tests and improvements should include demolding process, fiber placing, use of other types of fiber and production of larger objects and more complex geometries.
[assignment development]
This was again a nice week. Some mind readjustment had to be made to move from the input hello boards, to something much more manual and craft like. Supply chain was an issue, because this is a new class to the Academy and we were not son well prepared as in other classes. Understanding the process and workflow was again the first thing to do, to be able then to look for and buy whatever needed, and that could be found locally.
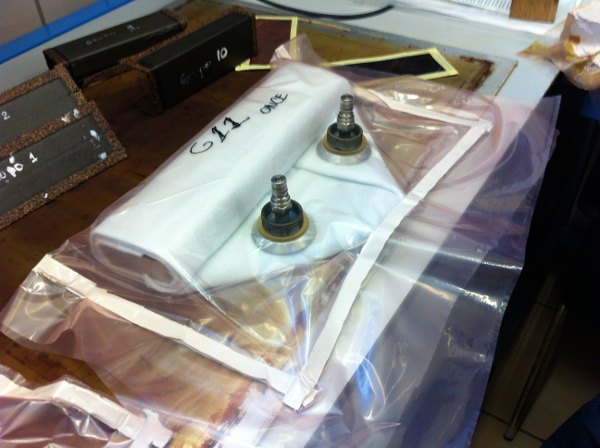
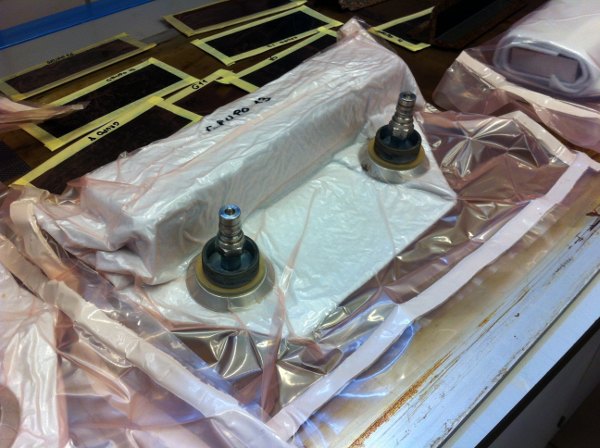
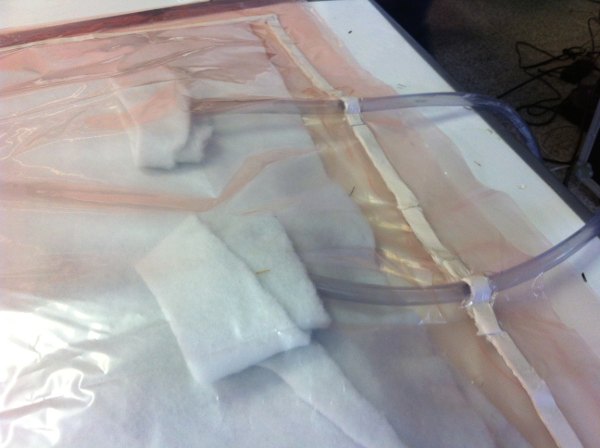
It was very helpful being able to visit another lab at the School if Engineering University of Sevilla which is one of the most outstanding laboratories in Spain testing composites materials for aeronautics, especially carbon fiber composites. We could see some of the processes we wanted to develop, done in a hight tech environment, and they even facilitated us samples of materials that have been very helpful: teflon bleeder and peel-ply films, polystyrene breather blanket and mastic tape. Here are some images of some vacuum bags that were being processed in the lab.
These are the items / materials specified in the updated fab inventory and some comments on local equivalents for Sevilla / Spain, and how we have sourced them and/or we might source them in the future.
| [1] Bleeder film:
Airtech Dahlar Bleeder Bagging Film 125 http://www.jamestowndistributors.com/userportal/show_product.do?pid=51576&familyName=Airtech+Dahlar+Bleeder+Bagging+Film+125 |
[1]
Film
/ lámina de sangrado: Lámina exterior de la bolsa de vacío Alternativa, polietileno de un cierto espesor. Usado film de teflon cedido por Lab Universidad |
| [2] Breather fabric:
Vacuum Bagging Breather Fabric http://www.jamestowndistributors.com/userportal/show_product.do?pid=3752&familyName=Vacuum+Bagging+Breather+Fabric |
[2]
Tejido
respirador Manta ligera de polyester con excelente permeabilidad al paso del aire; debe absorber la resina sobrante de la pieza, y bloquear la salida en la válvula del tubo de vacío. |
| [3] Vacuum bag sealing
tape http://www.jamestowndistributors.com/userportal/show_product.do?pid=3751&familyName=Vacuum+Bag+Sealing+Tape |
[3] Cinta de vacío; “dog
meat”; cinta de mastic, para sellado al vacío: Alternativa
barata aunque menos eficiente cinta americana... Usado cinta mastic
cedida por Lab Universidad. |
|
[4] Vacuum film; Clear
heat-stabilized modified nylon resin vacuum bag film. Can be used at
temperatures up to 350 F (176 C) for typical composite cure cycle
times. A tough stretchable film for high vacuum pressures.
http://www.jamestowndistributors.com/userportal/show_product.do?pid=4236&familyName=Vacuum+Bagging+Film |
[4]
Film
de vacío; film de resina de nylon poroso. Usado film de
base de teflon cedido por Lab Universidad. |
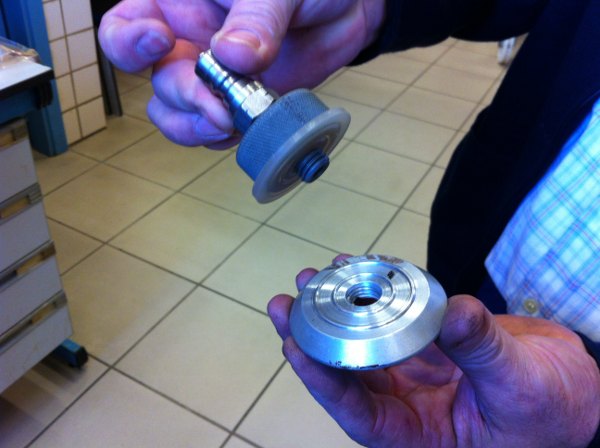
| [5] Vacuum tubing; tubos
polietileno, y vacuum bagging cups; http://www.jamestowndistributors.com/userportal/show_product.do?pid=57767&familyName=West+System+Vacuum+Cup+and+Tubing+Kit |
[5] Tubos de vacío,
diámetro 6mm; y conectores tubo-bolsa de vacío tipo
"válvula bicileta". |
| [6] WEST System 105
Epoxy ResinWEST System Epoxy cures to a high-strength plastic solid at
room temperatures, by mixing specific proportions of liquid epoxy resin
and hardener. http://www.jamestowndistributors.com/userportal/show_product.do?pid=3760&familyName=WEST+System+105+Epoxy+Resin |
[6]
Resina
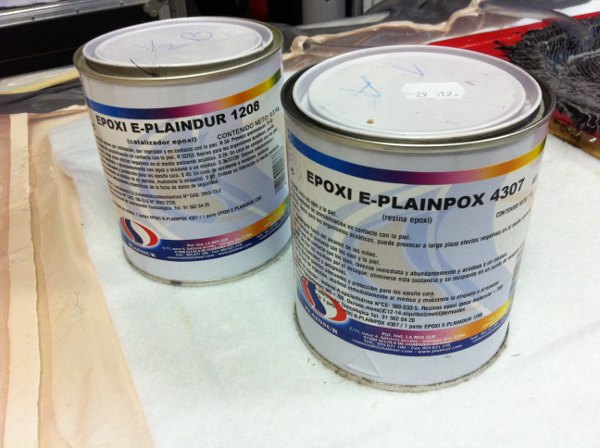
Epoxy [bicomponente] Cura a temperatura ambiente. Transparente, color amarillo claro, líquida de baja viscosidad. Especialmente diseñada para impregnar fibras de madera, firbra de vidrio, tejidos reforzados... Usado: resina Epoxy 4307/1208 sumbeart.com |
| [7] WEST System 207
Special Clear Hardener http://www.jamestowndistributors.com/userportal/show_product.do?pid=2032&familyName=WEST+System+207+Special+Clear+Hardener |
[7]
Endurecedor
[segundo componente resina Epoxy 4301/1208 |
| [8] Sew Classic
Linen-100% Linen http://www.joann.com/sew-classic-linen-100-linen-solids-many-colors/prd46473/ |
[8]
Tejido
de lino. Usado tejido de algodón y arpillera. Fibra "armadura". |
| [9] Vacuum Compressor /
Venturi Vacuum Generator + Two Stage 15cfm 90psi Compressor http://www.jamestowndistributors.com/userportal/show_product.do?pid=3755&familyName=Vacuum+Bagging+Pump http://www.harborfreight.com/air-vacuum-pump-with-r134a-and-r12-connectors-96677.html |
[9] Compresor o bomba de
vacío tipo Venturi + sistema de aire comprimido. |
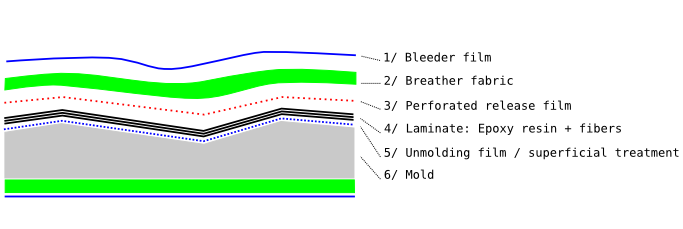
Typical vacuum bagging process after Weston:
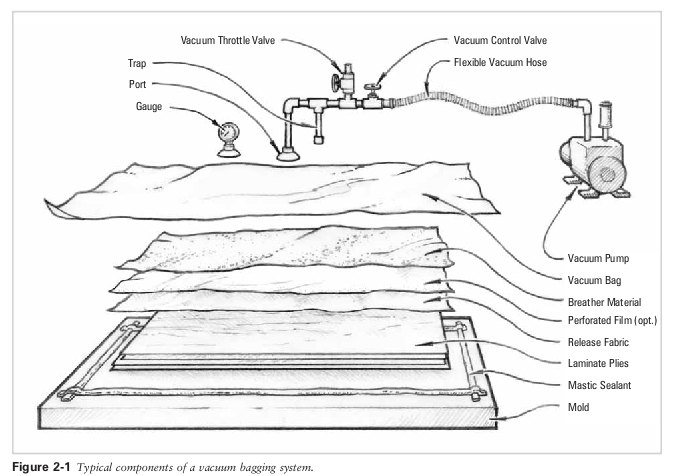
Simplified components for the present assignment:
[design and mold laser cutting]
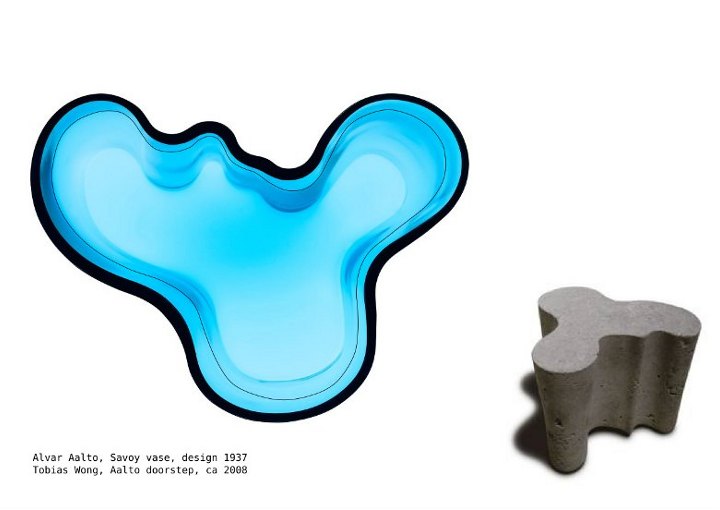
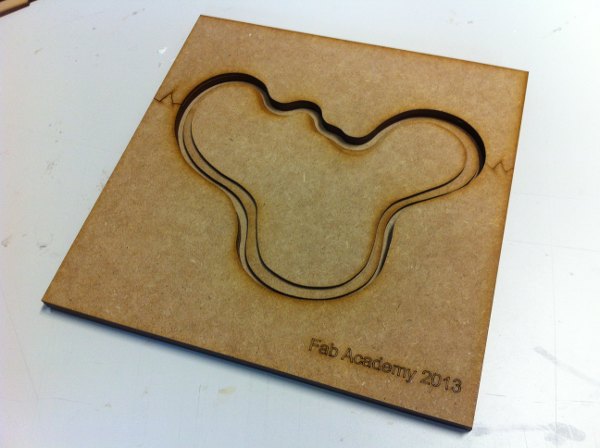
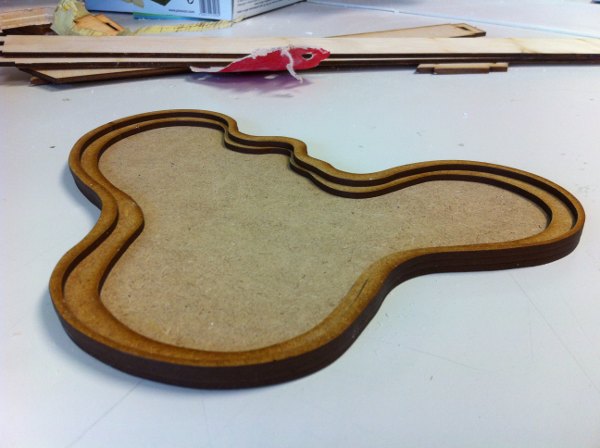
Initially i was thinking of some kind of light beam for my final project, somehow connected to so many carbon fiber bycicle structure that Jose Buzon is researchin online. I tried a couple of designs, but didn't arrive to anything nice. Then somehow, Alvar Aalto's Savoy vase design came to my mind, and started looking at example of it in the Internet, and decided eventually on an easy variation that i could even laser cut instead of mill. Time as usual, i mean short time, is a relevant parameter in all this assignments... I even visited once the Alvar Aalto dorm at MIT, so it makes additional sense. I was actually there, in the late 80s, flew all the way back from UCLA where i was at the time, to accompany a professor of mine, Jaime Lopez de Asiain, who was giving a lecture of our environmental design works for Expo 92 in Sevilla. Anyways, here are the drawings and eventually cutting files of my Aalto vase version. It will be a small tabletop platform to put keys or writing tools or something like that. As the original design is one of my favourites i thinks it will become something quite cool.

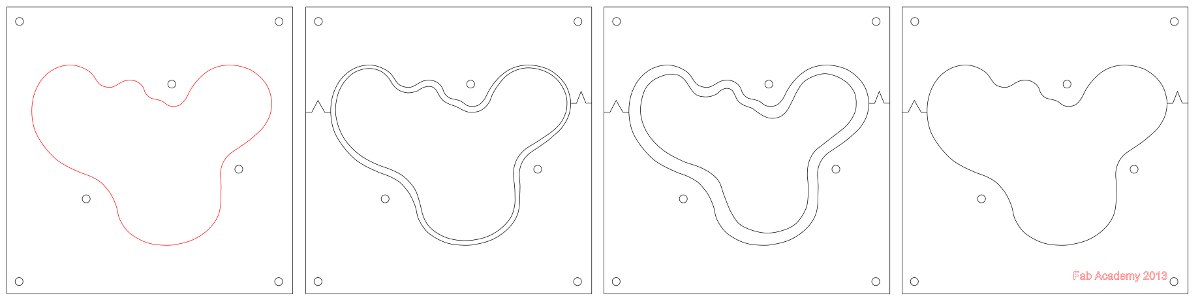
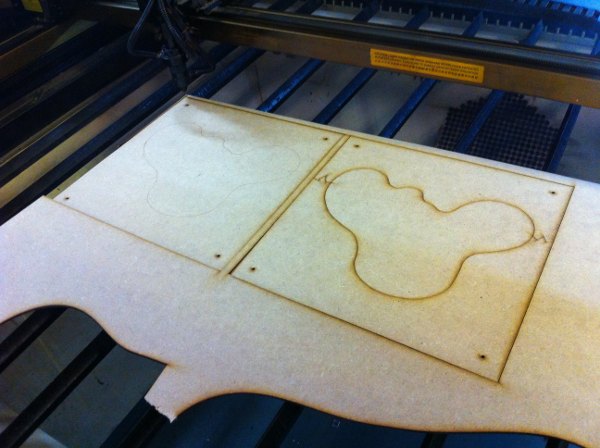
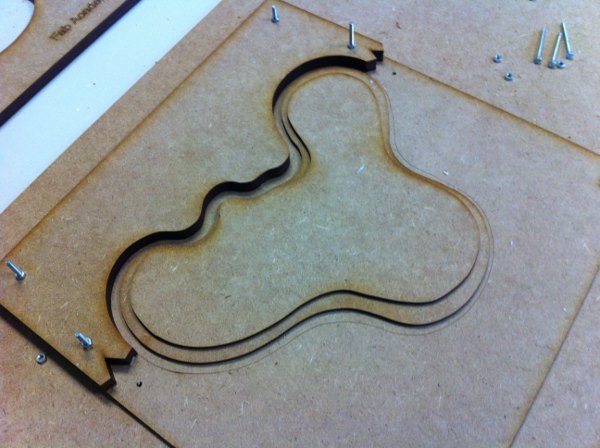
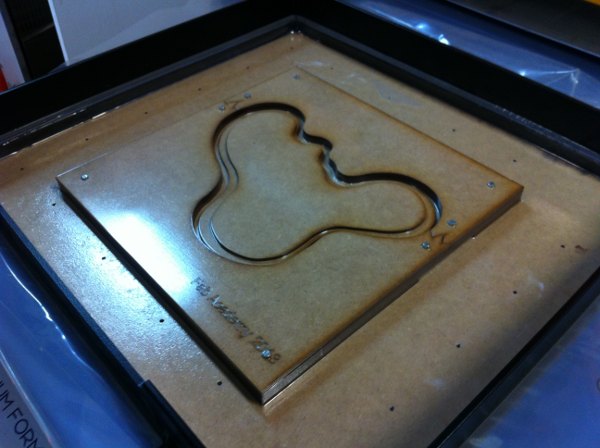
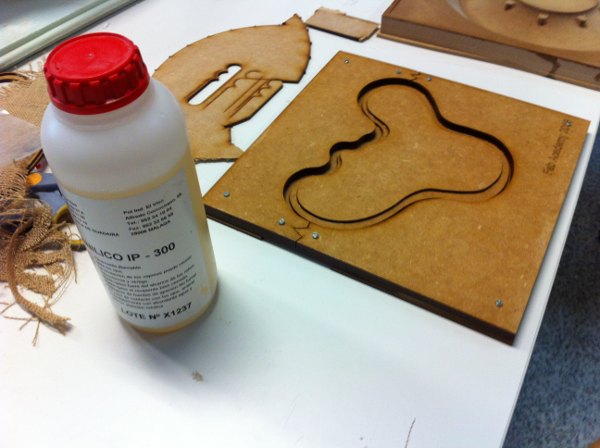
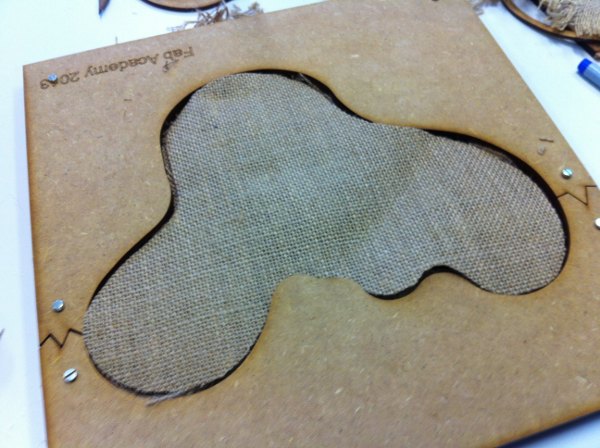
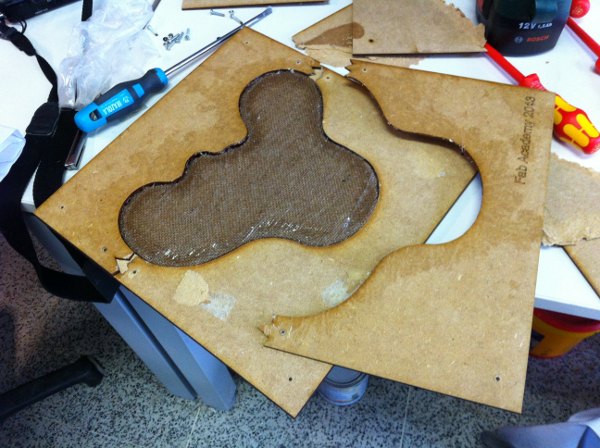
As can be seen in the pictures the mold is laser cut in [3mm] mdf. It is made out of four layer, the lowest of them forming a continupus base. Thinking about unmoulding i cut the upper part of the mold in two oarts and put it together with screws. The central parts, making some sort of "topography is glued together. The "negative" cut-outs were used as a guide to glue the central part, and make a prototype by themeselves of the final piece.
[unmolding superficial treatment]
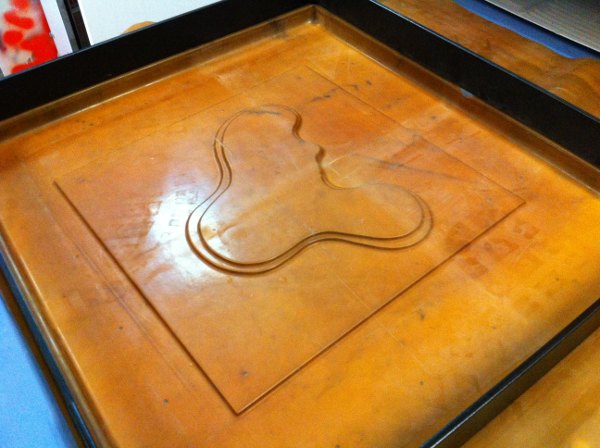
Then we began thinking and making some test for a superficial treatment for unmolding. One of the ideas was to vacuum form, with a machine we have in the lab, a plastic surface. Here are some images of the tests. The first test [image 01] was with a sheet of latex and no heat, just to see what kind of surface we might be getting. It did look nice. Then we tried with polyetilene, but there were some creases and i didn't like it so much [image 02]. As Jose Buzon was going to use this technique, i eventually decided my self for something else: two coats of polyvynil alcohol [image 03], that we had seen in some youtube tutorial. We imagined alcohol would evaporate, and a film of vynil would remain on the surface. The first layer was absorbed very fast by the mdf. The second one however took sometime to dry. We did use masks to apply it.
[fibers]
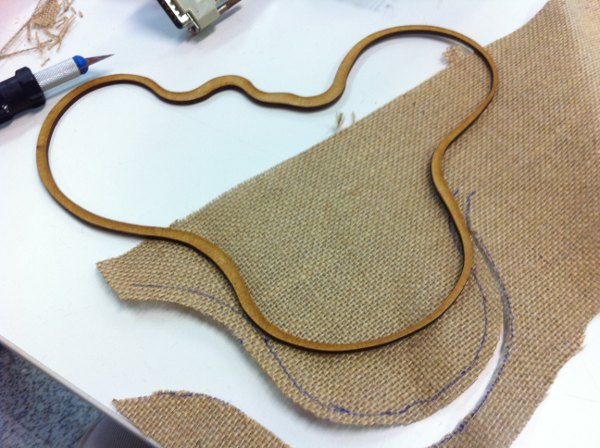
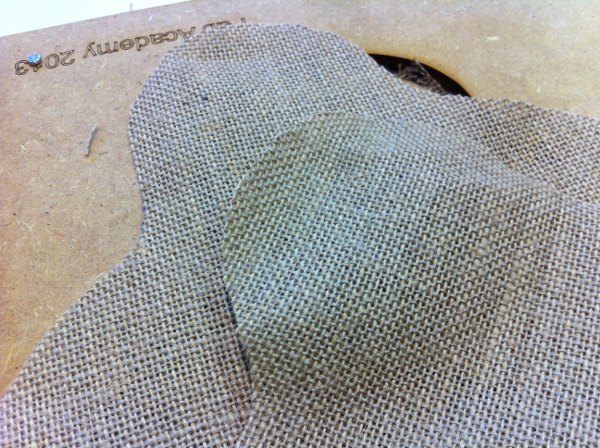
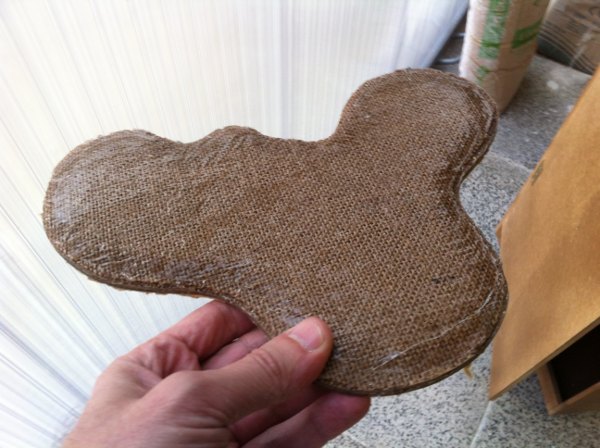
Then i started working on the fiber patterning. The fiber i had chosen was "arpillera", a traditional natural, kind of rough fabric, that is still used to make sacks [my dictionary says: burlap, sacking cloth]. Variations of it were used in construction to fiber-reinforce various kinds of plaster and stuccos. And i do like the idea of combining traditional and contemporary materials. We has also bought some cotton, as we couldn't find linen in our shopping trip thursday evening. I was testing various ways to place the fibers [image 01 below], and eventually went for three layers, somehow corresponding to the three physical layers of my model. I used the cut-outs as patterns to cut the fabric which was quite convenient [image 02&03]. Just for fun, - cause this is just a small piece that i don't thing it would be needed, i changed the waving direction of the final layer, so that i have fibers at 0/90º in layer two and 45/135º in layer three [image 04].
[vacuum bagging]
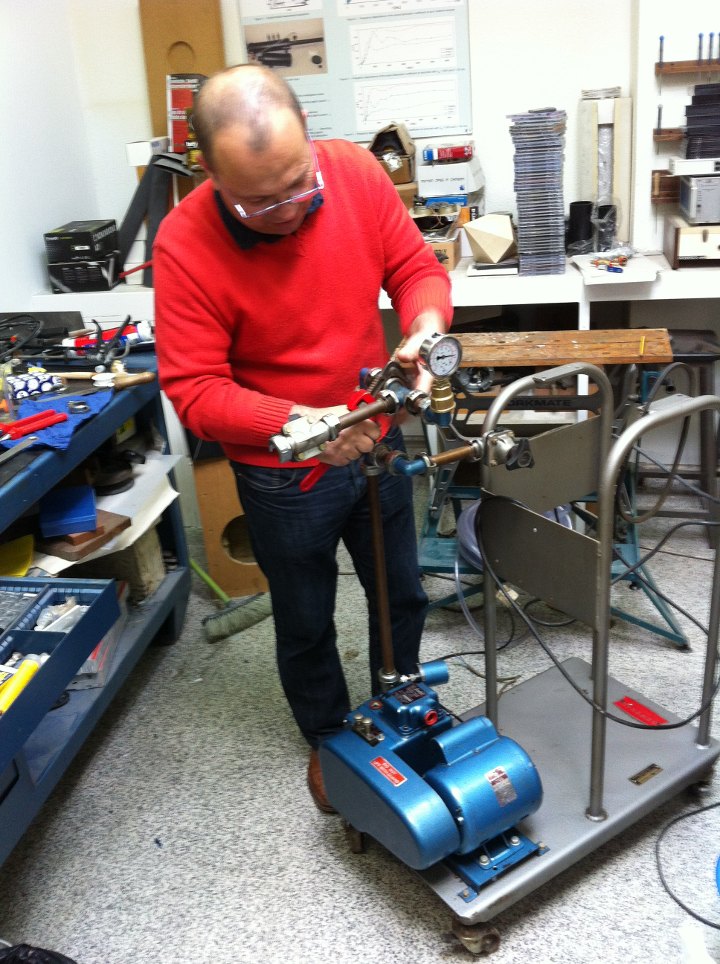
This is our colleague and guru Aureliano Gómez who fixed an old vacuum pump for us to use in the aasignment. He was not completely happy with the fix, and we will improve it soon, but it did make the project happen.
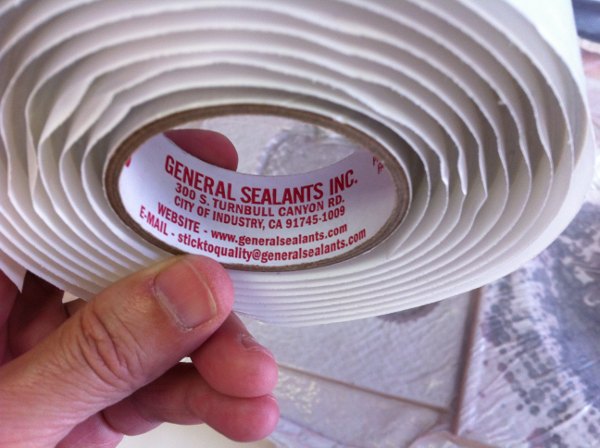
So here are the pix of the process that i developed together with Jose Buzon, one piece each, with the materials that we were donated by another lab in the university. As mentioned above, they are high end materials: teflon base bleeder film, polyester breather blanket, teflon based perforated release film and mastic tape. As the main media i used Epoxy resin and hardener, Epoxy E-PLainpox and Plaindur 4307/1208 by Plainsur, plus arpillera [burlap] fabric.
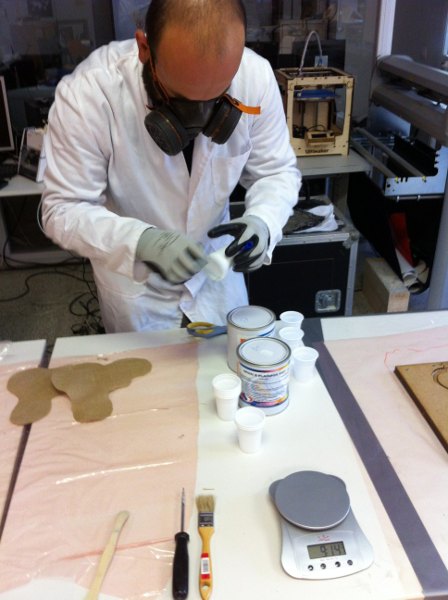
Weighing and mixing the Epoxy component.
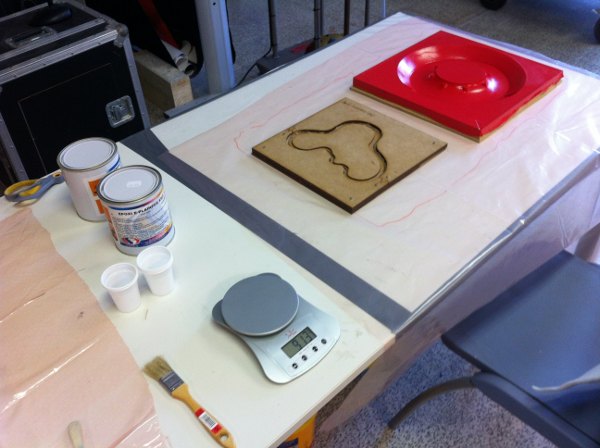
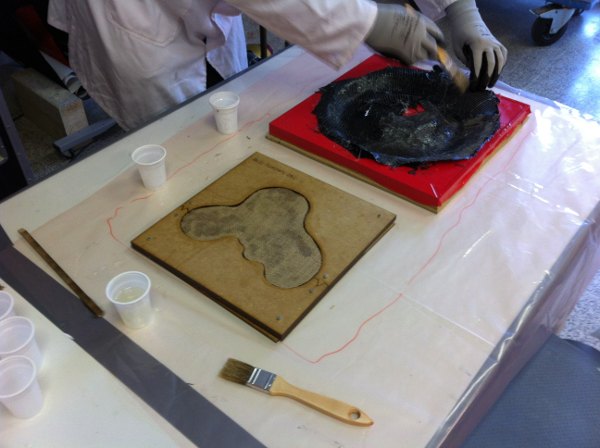
Epoxy resin cans; placing the molds on the work table; applying the resin and fiber layers; placing the release perforated film. While i was working with Epoxy and burlap, Jose Buzon was testing Epoxy plus some carbon fiber that we have had in the lab for some time waiting to be used.
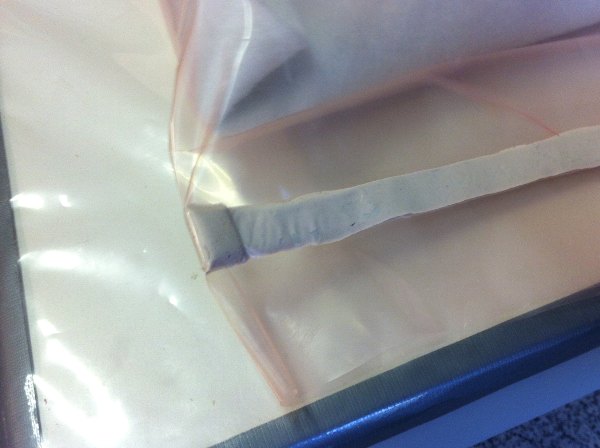
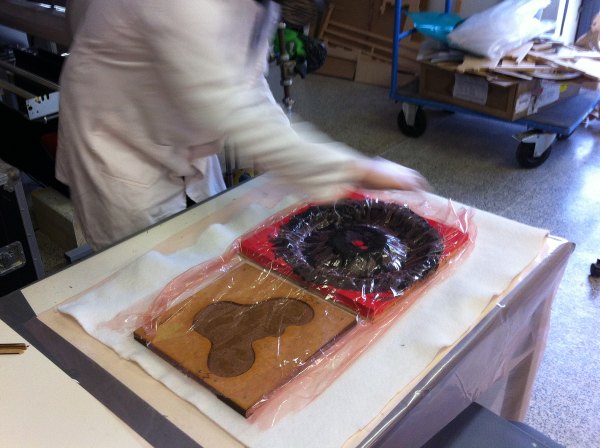
Setting up the vacuum bag; connectors and sealing details; masti tape.
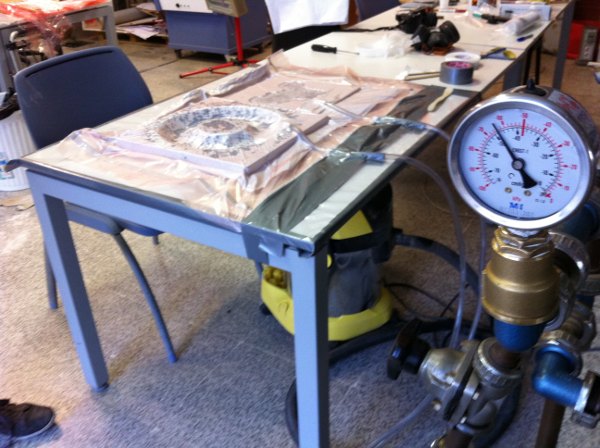
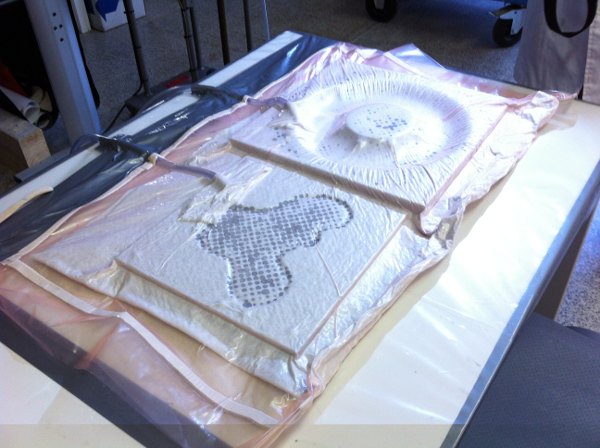
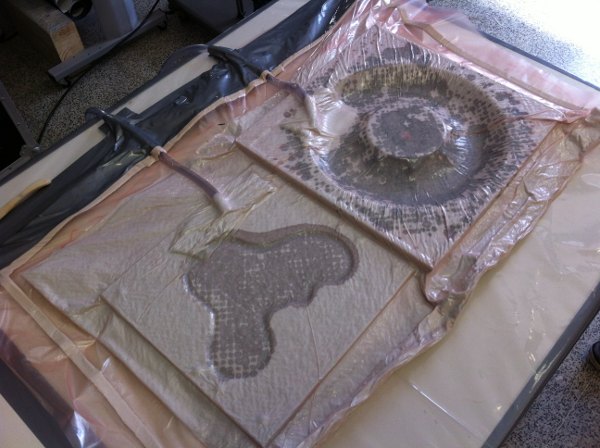
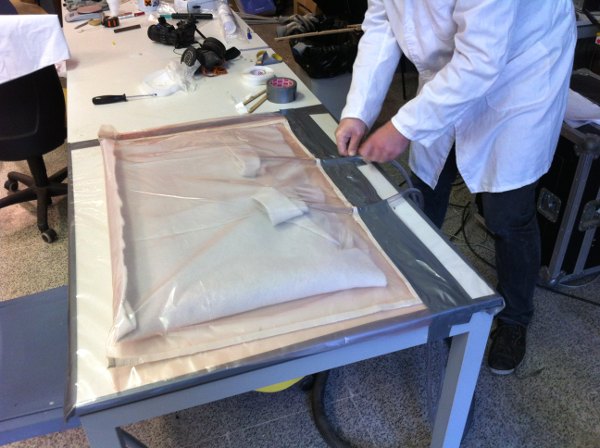
Applyng vacuum to the bag. Our vacuum was not quite perfect. We had to keep the pump working as long as we wanted the pressure up. We kept it for about two hours. The lower image shows the state of the molds towards the end of the process. Then we left the pieces in the bag to cure for a full day.
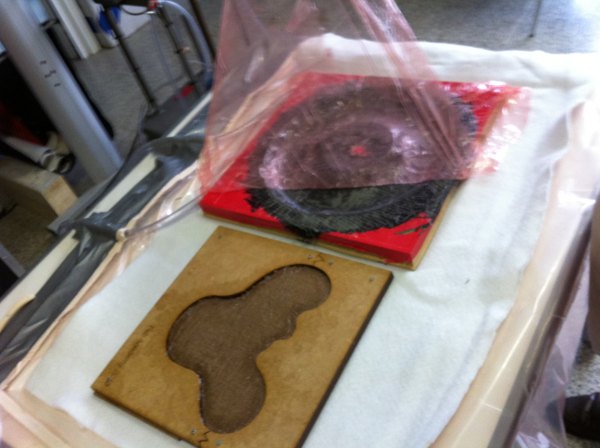
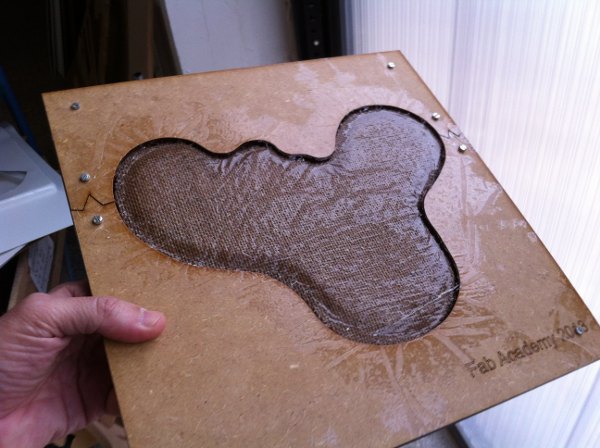
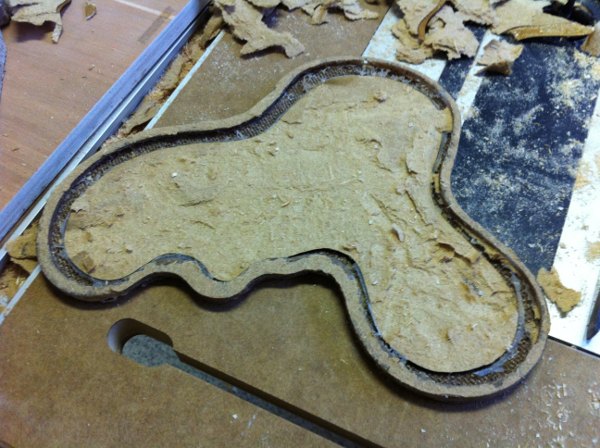
The bleeder. breather and release layers came out without any trouble. Unmolding however was not so easy. The mdf and especially the demolding agent that i had tried, polyvynilic alcohol showed to be not such a good solution for this combination of materials. I had to literally carve out the interior part of the mold.
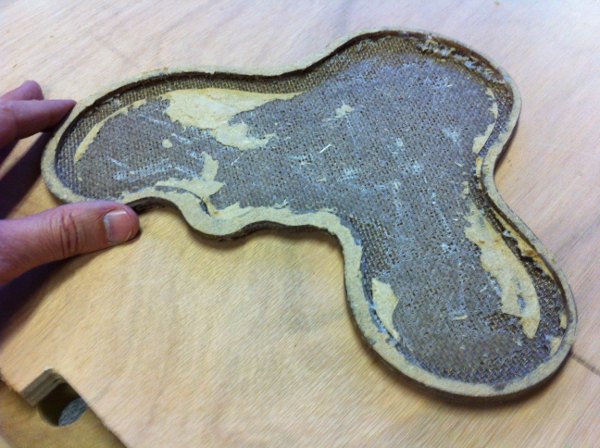
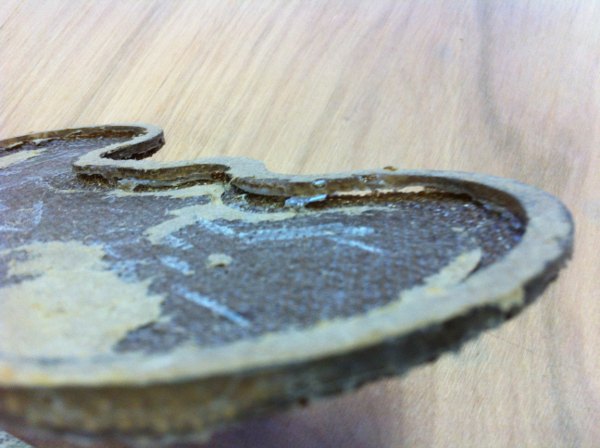
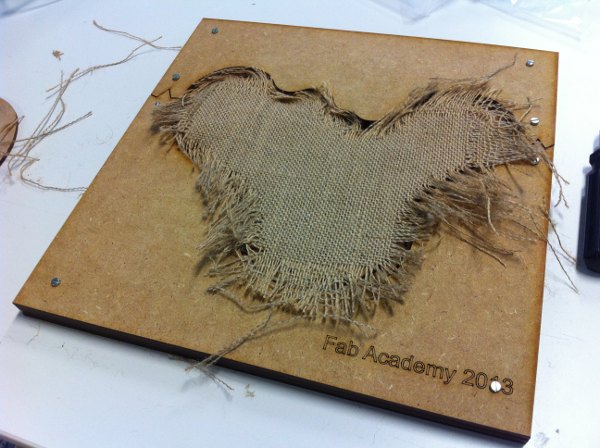
The result evenutally is not as successful as i had wished. The main surface has nice strength plus flexibility. However some of the detail in the perimeter got lost. It looks like it would have needed a larger amount of fiber and more thinly cut in order to fill the geometry of the steps that were in the mold perimeter. I had only used three layers of fabric, and it looks like i should have used one or two, or maybe three more, in the indentures to be able to get the precise shape as was achieved in the outer perimeter. It looks too like the vacuum has pulled up the second layer which i tried to place carefully filling the indentures. The fabric used seems to have too high a "resolution" for the size of object that i have fabricated on this occasion. Linen os suggested by Neil, that we couldn't find, or a light cotton could have been a better choice for this piece.
Once again, as i suggested by Neil, it would have been extremely useful to test multiple samples with various mold and unmolding materials and fiber placing techniques before going for a final piece. For this however, one would need a bit more time.
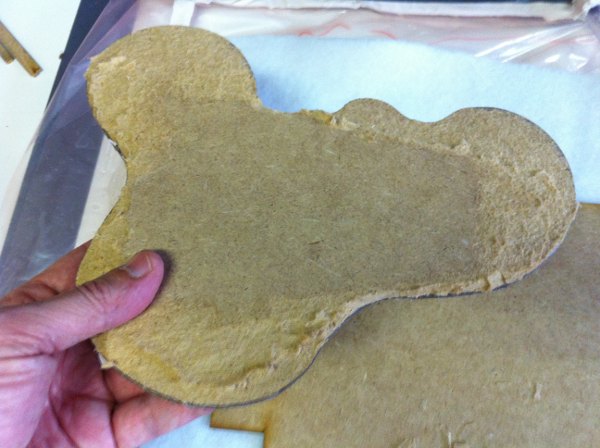
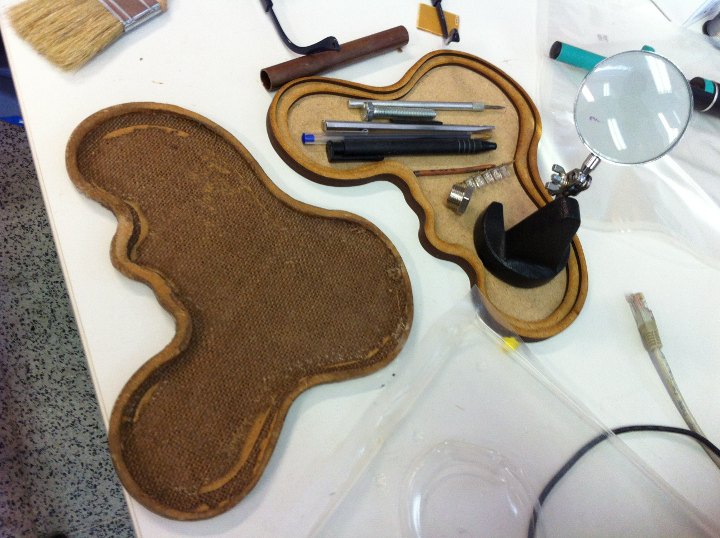
After some further sanding and washing the piece is ready to be painted, maybe filling some minor gaps with putty. We have used some other times a material that is called in Spanish Rocadur that you apply and sand, which gives excelent results. Below the composite piece with the one that i made with the left-outs of the laser cutting.
[files download]
Unless otherwise stated, information and files in this page are downloadable under a Creative Commons Attribution-Share A Like license; attribution: Jose Perez de Lama / Fab Lab Sevilla / Fab Academy 2013
Coming soon

# ... [.svg]
# ... [.dxf]
Software:: Inkscape; Corel Draw [laser management]
Hardware:: Laser cutter; vacuum former; vacuum pump
Materials:: mdf, 3mm nuts and bolts; epoxy resin, "arpillera fabric", polyvynil alcohol, teflon film, teflon peel ply film, polystyrene breather blanket, mastic tape [see table above for further details]. Epoxy and polyvynil alcohol bought at a local supplier, Sumbeart. The teflon films and mastic tape were donated by a local lab.
previous class:: 10 input devices / next class:: 12 interface application programming
return home /perezdelama.jose