Academy 2013
This weeks assignment was Embedded
Programming. Two weeks ago, in Electronics
design week , I made a echo hello-world board
with a button and a led light. I decided to begin
programming that board with a AVR micro-controller
and when I was plugging in the ftdi cable it ripped
up and the board looked ruined. I wanted to do
something so I took my hello.txrx board I made some
weeks ago.
This time I plugged the AVR controller in it and I tried to be more gentle with the ftdi cable. I got a green light on the AVR and I opened a Terminal.
Frosti, my teacher, pointed me on an old Fab Academy student called Mercedes Mane
In there I got some great instructions on how to program this step response board.
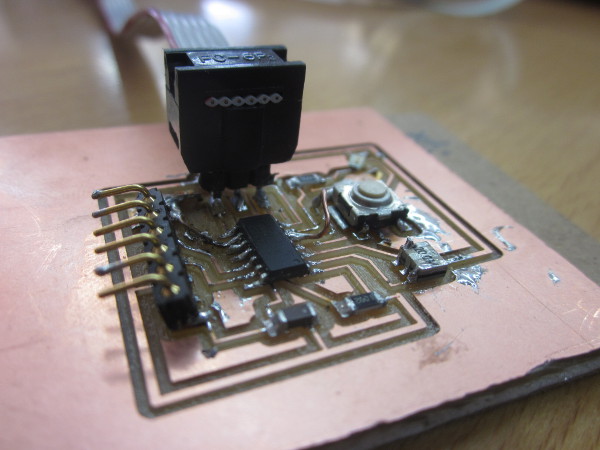
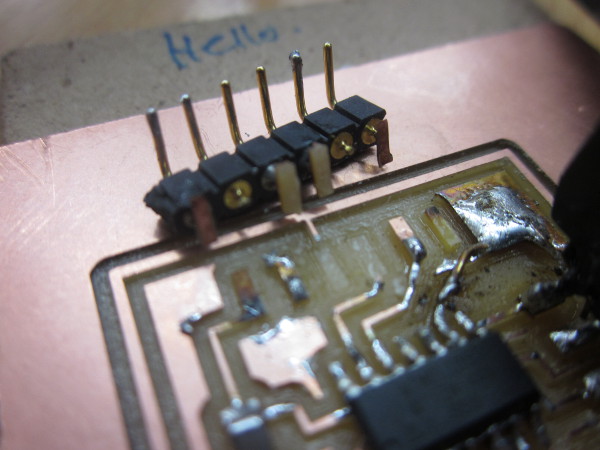
And here you can see the ftdi plug in ripped off
This time I plugged the AVR controller in it and I tried to be more gentle with the ftdi cable. I got a green light on the AVR and I opened a Terminal.
Frosti, my teacher, pointed me on an old Fab Academy student called Mercedes Mane
In there I got some great instructions on how to program this step response board.
Here is my echo
hello-world board
And here you can see the ftdi plug in ripped off
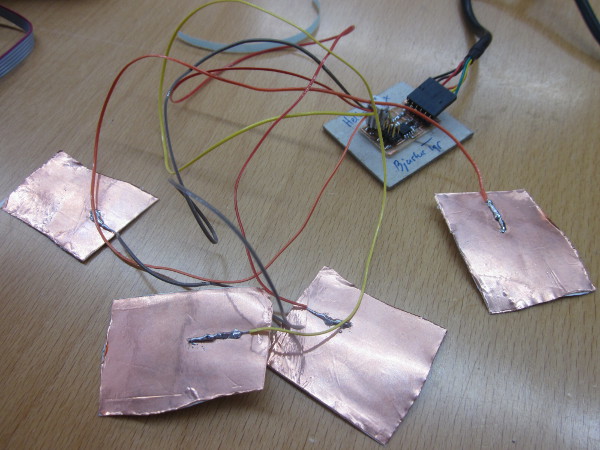
After I sent the
program to the txrx board I took four
copper stickers and I soldered them to
four wires. Now I ran the program and
I got a window with line and numbers,
when I touched a copper sticker with
another copper sticker, the numbers
either went up or down. This was
little bit of a victory but I still
wanted to see a light go on.
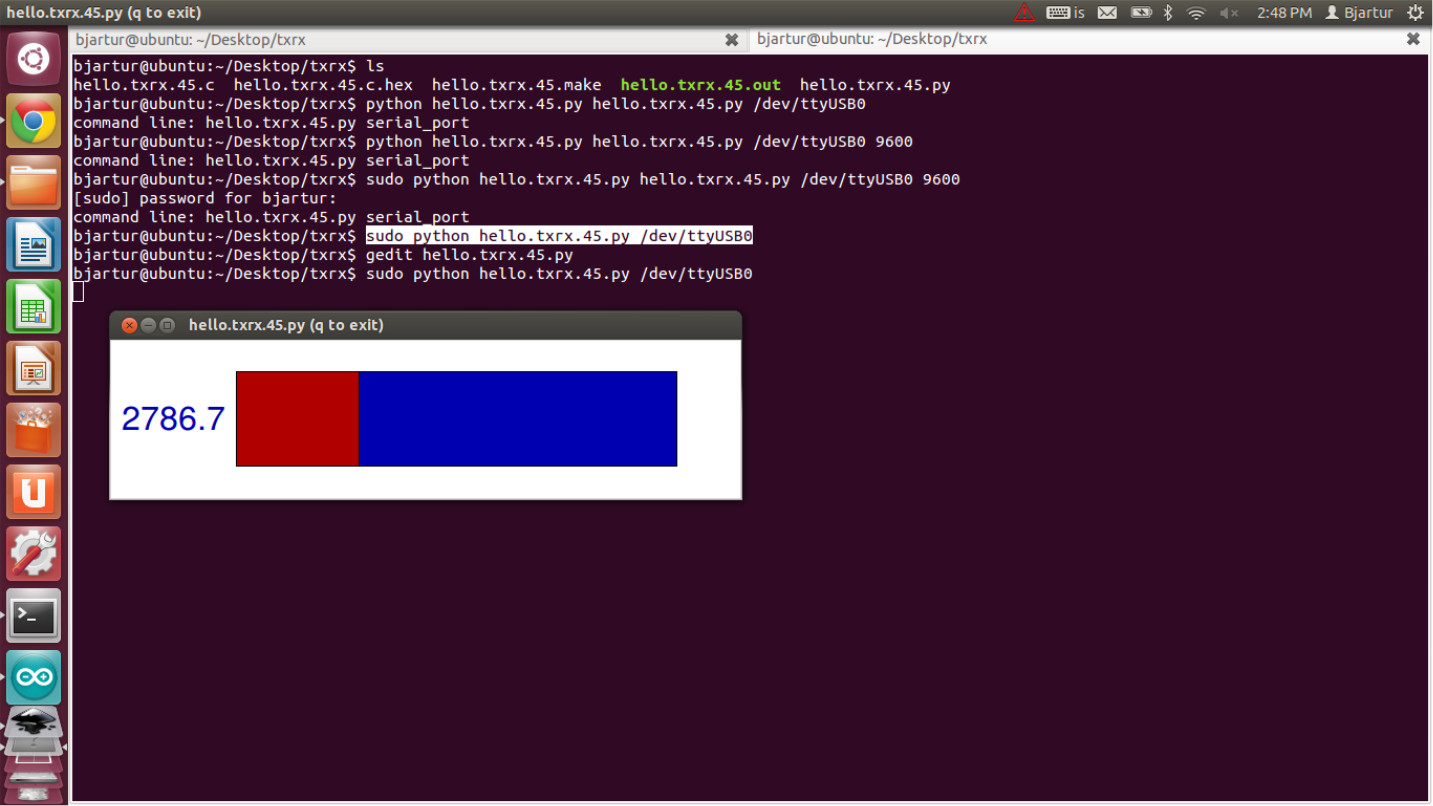
Here are the copper stickers connected to the txrx
At last here is the window hello.txrx.45.py showing numbers and the Terminal with codes I used in the background.
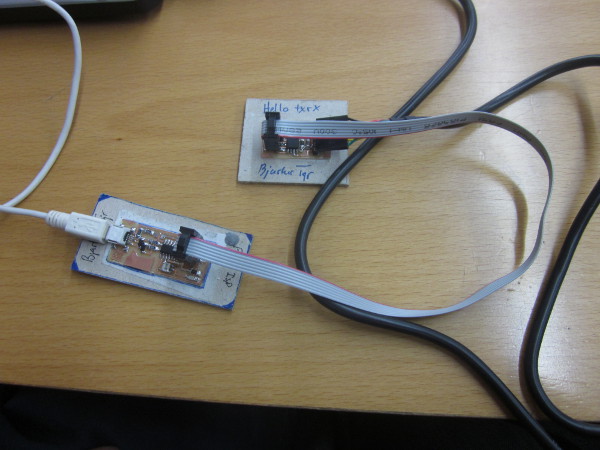
Here is my hello
txrx connected to my fab isp
Here are the copper stickers connected to the txrx
At last here is the window hello.txrx.45.py showing numbers and the Terminal with codes I used in the background.
After trying out
the hello.txrx I really wanted to
make my light work so I went into
Eagle and fixed my board like Neil
told me two weeks ago. I made some
lines thicker and changed the Grid
so I could move the circuits more
from each other.
I cut out the board and soldered it on with a green led light and a button.
I cut out the board and soldered it on with a green led light and a button.
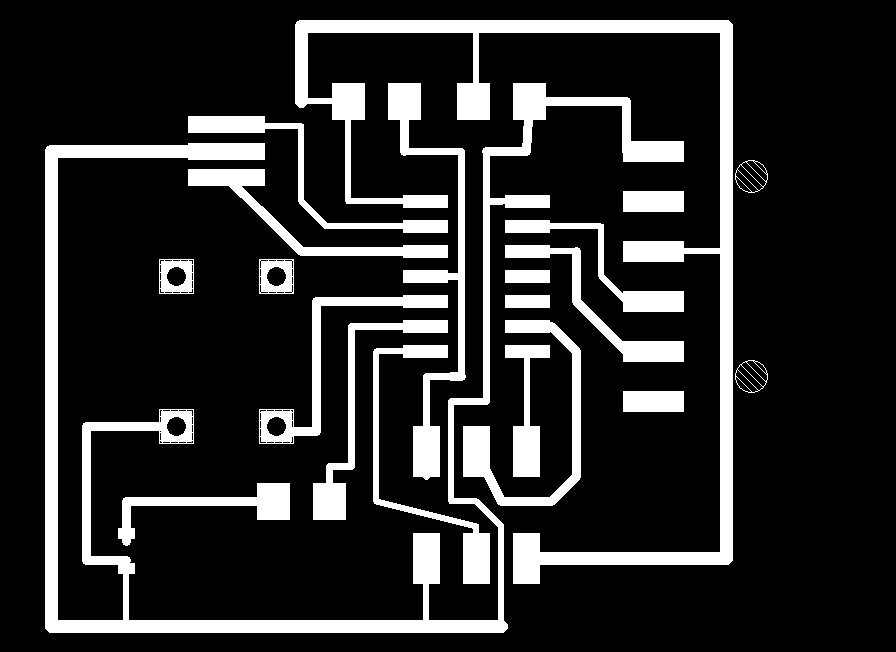
Here is the
board ready for the milling
machine
Now began the
most difficult battle of my
life, programming the board. I
got the hello_blink files on
the bottom of this
page
I then wrote:
~/Desktop/hello_echo$ sudo make -f hello_blink.make
~/Desktop/hello_echo$ sudo make -f hello_blink.make program-avrisp2
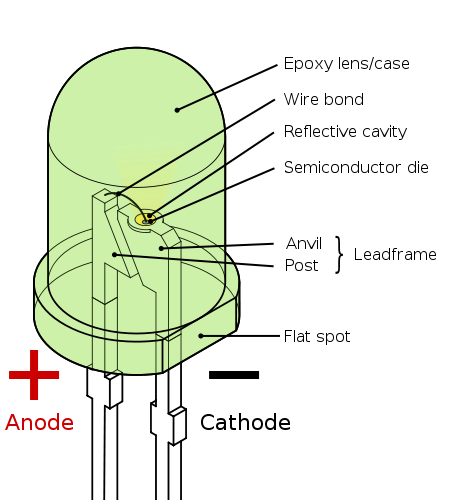
After that nothing happened. I double checked everything and then I noticed that I wasn't sure which way the led light was suppose to turn. I did some internet research and found a Data sheet for the Led light
there I saw that the little
green mark on the led was
marked CATHODE. I did some
more research and found this
picture on Wikipedia that
showed my that CATHODE stands
for minus and therefor Ground.
When I looked at my board I
saw that the Led was upside
down and I fixed that.
The next thing I did was to send the program again in to the board and see what happened. Again nothing happened and I was thinking about giving up but than I wrote:
gedit hello_blink.make
This opened a text document for the codes. After that I found a Data sheet for ATTINY44
and saw that Mercedes wasn't using the same pins as me. Also she had two buttons and two lights. I changes the ports in the file to PA7 which was the port I had connected to the led light. I saved it and then I went to the Terminal again and wrote down same commands I did earlier.
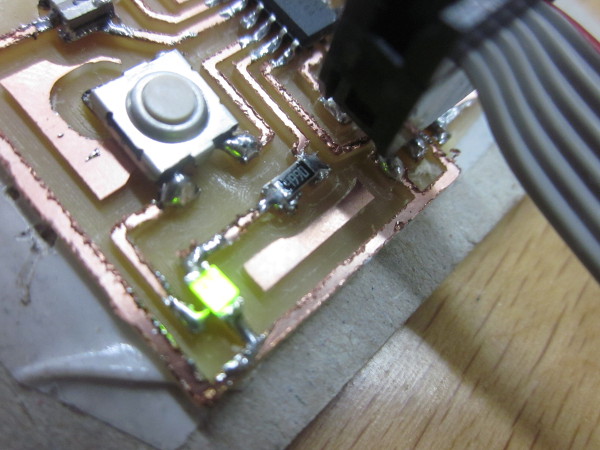
And believe it or not, It worked!
Here is my light shining like the sun
I then wrote:
~/Desktop/hello_echo$ sudo make -f hello_blink.make
~/Desktop/hello_echo$ sudo make -f hello_blink.make program-avrisp2
After that nothing happened. I double checked everything and then I noticed that I wasn't sure which way the led light was suppose to turn. I did some internet research and found a Data sheet for the Led light
The next thing I did was to send the program again in to the board and see what happened. Again nothing happened and I was thinking about giving up but than I wrote:
gedit hello_blink.make
This opened a text document for the codes. After that I found a Data sheet for ATTINY44
and saw that Mercedes wasn't using the same pins as me. Also she had two buttons and two lights. I changes the ports in the file to PA7 which was the port I had connected to the led light. I saved it and then I went to the Terminal again and wrote down same commands I did earlier.
And believe it or not, It worked!
Here is my light shining like the sun
