Academy 2013
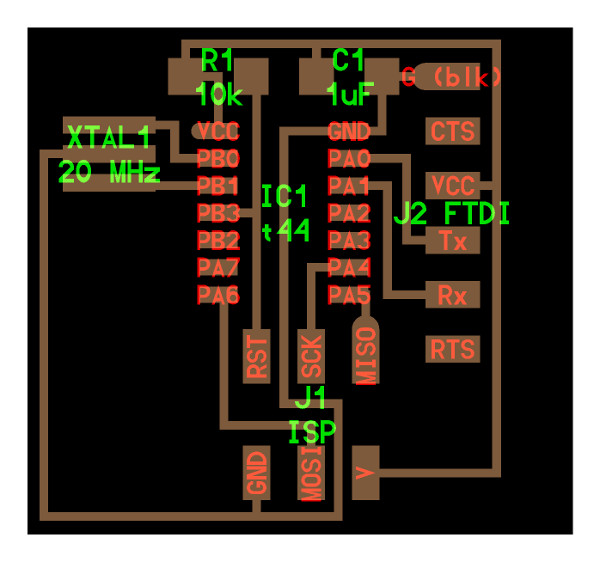
hello.ftdi.44
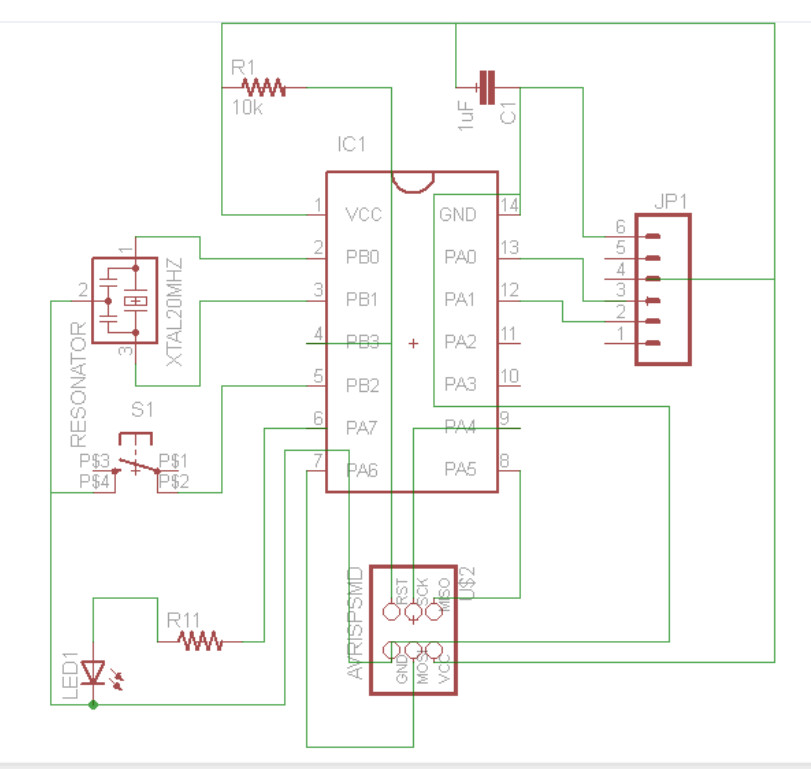
I began the week learnig how to use Eagle to draw circuit boards. I was trying to remake a board called hello.ftdi.44 (see on left side of the page). The most difficult part was to find each object I had to put on the board. To make it easier for someone in the future I am going to write down in wich library I found each object.
| Resistors |
01_ng.lbr - RESISTOR - RESISTOR 0402 |
| Capasator |
01_SparkFun.lbr - CAP |
| XTAL1 20MHz |
01_fab.lbr - Resonator |
| IC1 t44 |
01_atmel.new.lbr - ATTINY4414S1 |
| J1 ISP |
01_SparkFun.lbr - AVR_SPI_PRG_6 |
| J2 FTDI |
01_SparkFun.lbr - M06 - M06SMD |
| Led |
01_ng.lbr - LED |
| Button |
01_SparkFun.lbr - TAC_SWITCH |
After all the ojects where on the screen I had to connect them together. That took some work but I got it done and pressed a button that said Generate/switch to board. Then the board mode opened and in there I had to rearrange all the objects. After that I pressed Autorouter and then the program automatically connected each object and set the circuits on right place.
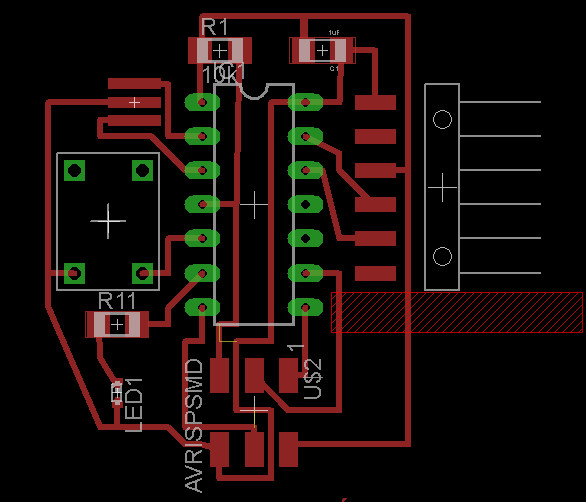
When I wanted to cut out the board I went into layers and selected the layers I wanted to see. I wasn't completly satisfite with the green circles and squares (see picture below) so I edit that in Gimp. Then I Exported the picture as an .png. I had the resolution 500 and checked Monochrome. I got all these instructions in this Youtube video
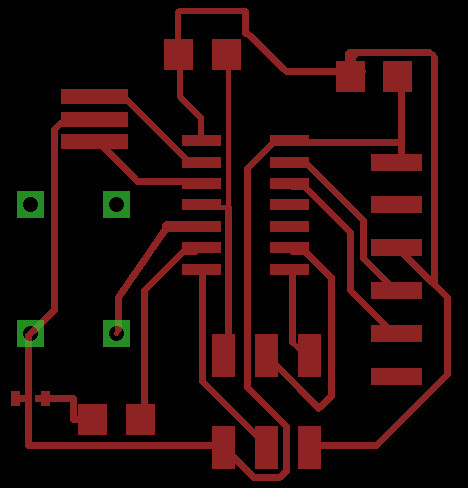
Now the circuit board was ready but when I wanted to solder it. I brougt out a ATTINY44 and noticed that it was way to small for the board. When I looked at the drawing again I realised that I had chosen a wrong t44. This was not good but I did some research and found the right one. Now I had to start over again.
Here is a picture of the ftdi with the
big ATTINY44
And here it is in board mode
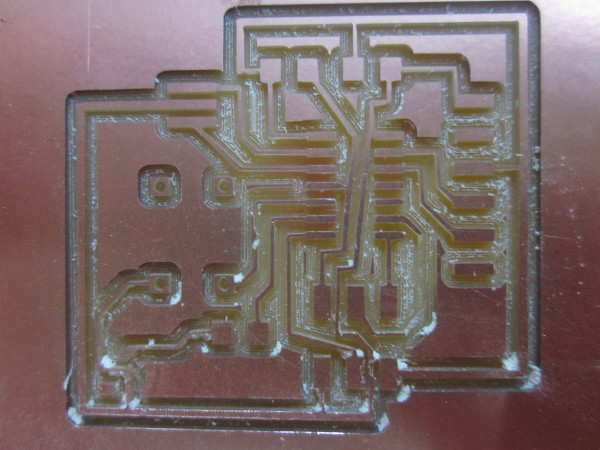
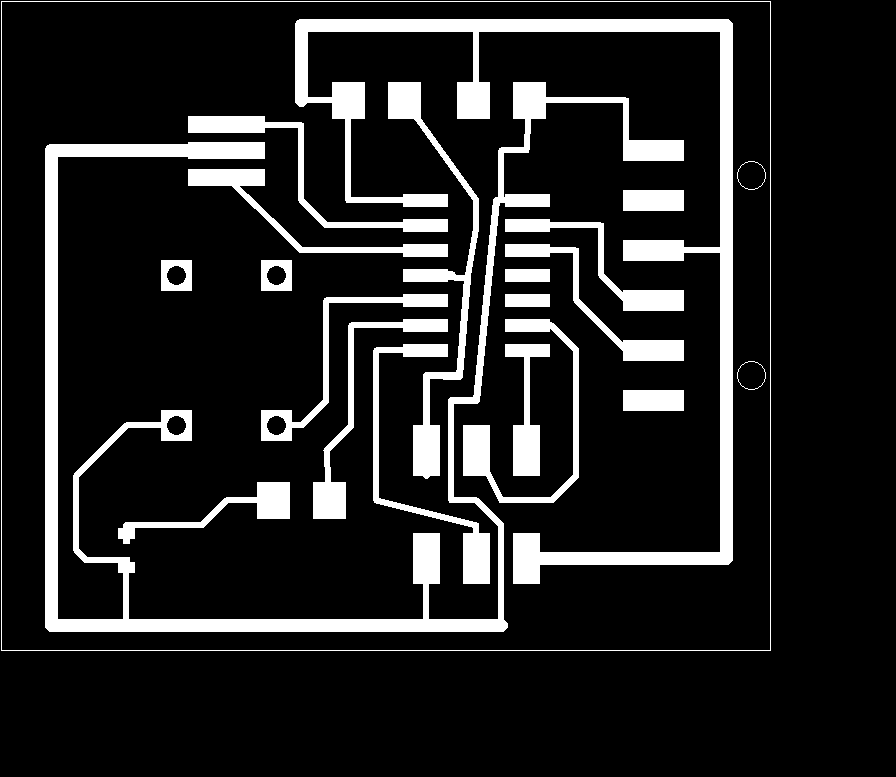
I finally found the right t44 and cut it out in the milling machine. Now I looked at the board and noticed that some of the circuits where connected where they shouldn't be connected. This was not a good thing so I decided to stop using Autorouter and drew the lines myself. I made sure that the space between each line was enough and set the width down to 0.012.
Here is is the circuit board with to
thick lines
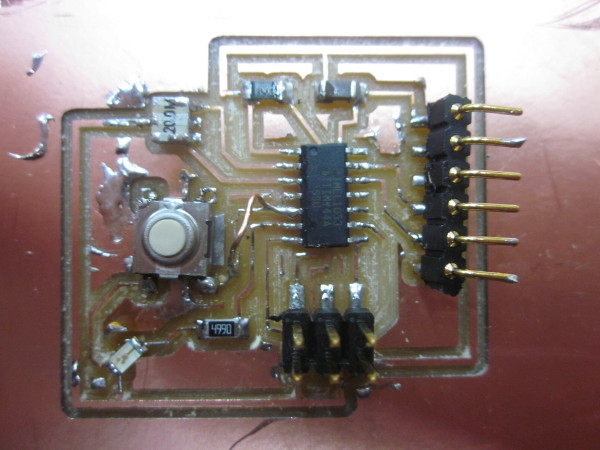
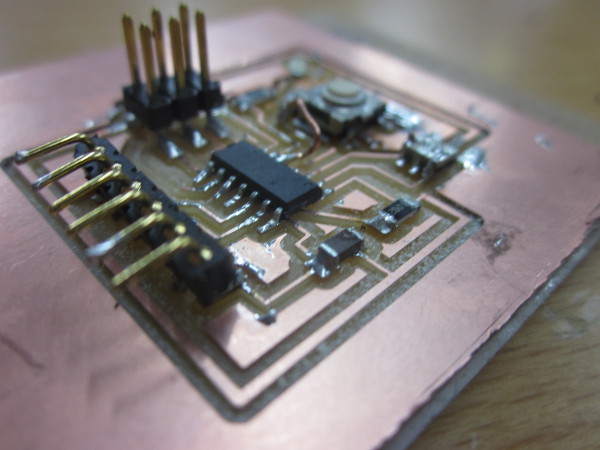
Here is the board ready
And here are some pictures of the
board after I cut it out