Final project documentation and thoughts
Wearable haptic interface with the ShopBot
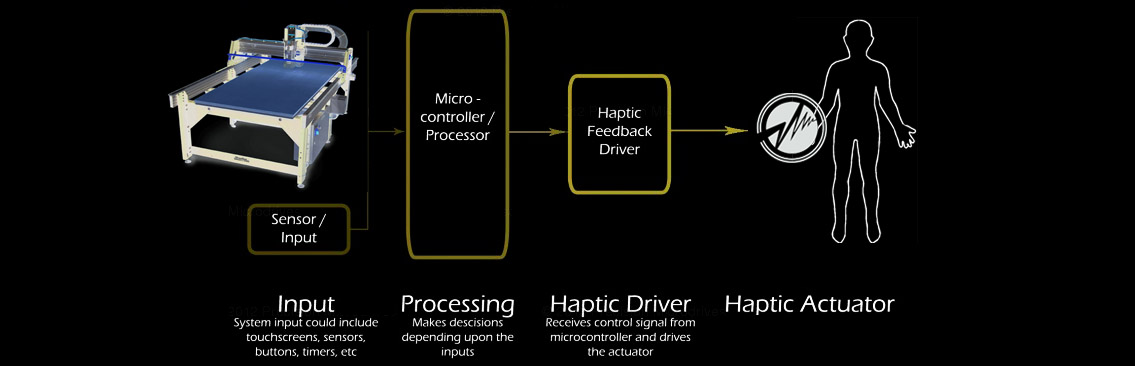
My blue-sky concept was to prototype a wireless wearable haptic interface with the ShopBot CNC machine. This interface was to offer vibration feedback from the cutter head, a pause button and potentially the ability to slow or speed up the cutter head.
What I have ended up achieving is a wired device where the haptic feedback device is worn on the upper arm. This connects to the output of a microcontroller with the input coming from a piezo sensor that can be connect to ShopBot bed or directly to the material being cut. The basic concept has been achieved. I hope to further develop the project as part of my research activates at Massey University School of Design.
Below you will find my project development and description of what I achieved and how I did it. Also find included all the design and fabrication files for those that may want to explore the potential of a haptic feedback system at a low-cost.
Bill of materials:
Connectors: 2 X RJ12 3meter 'coil' cords
3D printing: 25gms ABS
Vibration driver: P channel MOSFET, 1K resisitor, Schottky 1a 100v diode.
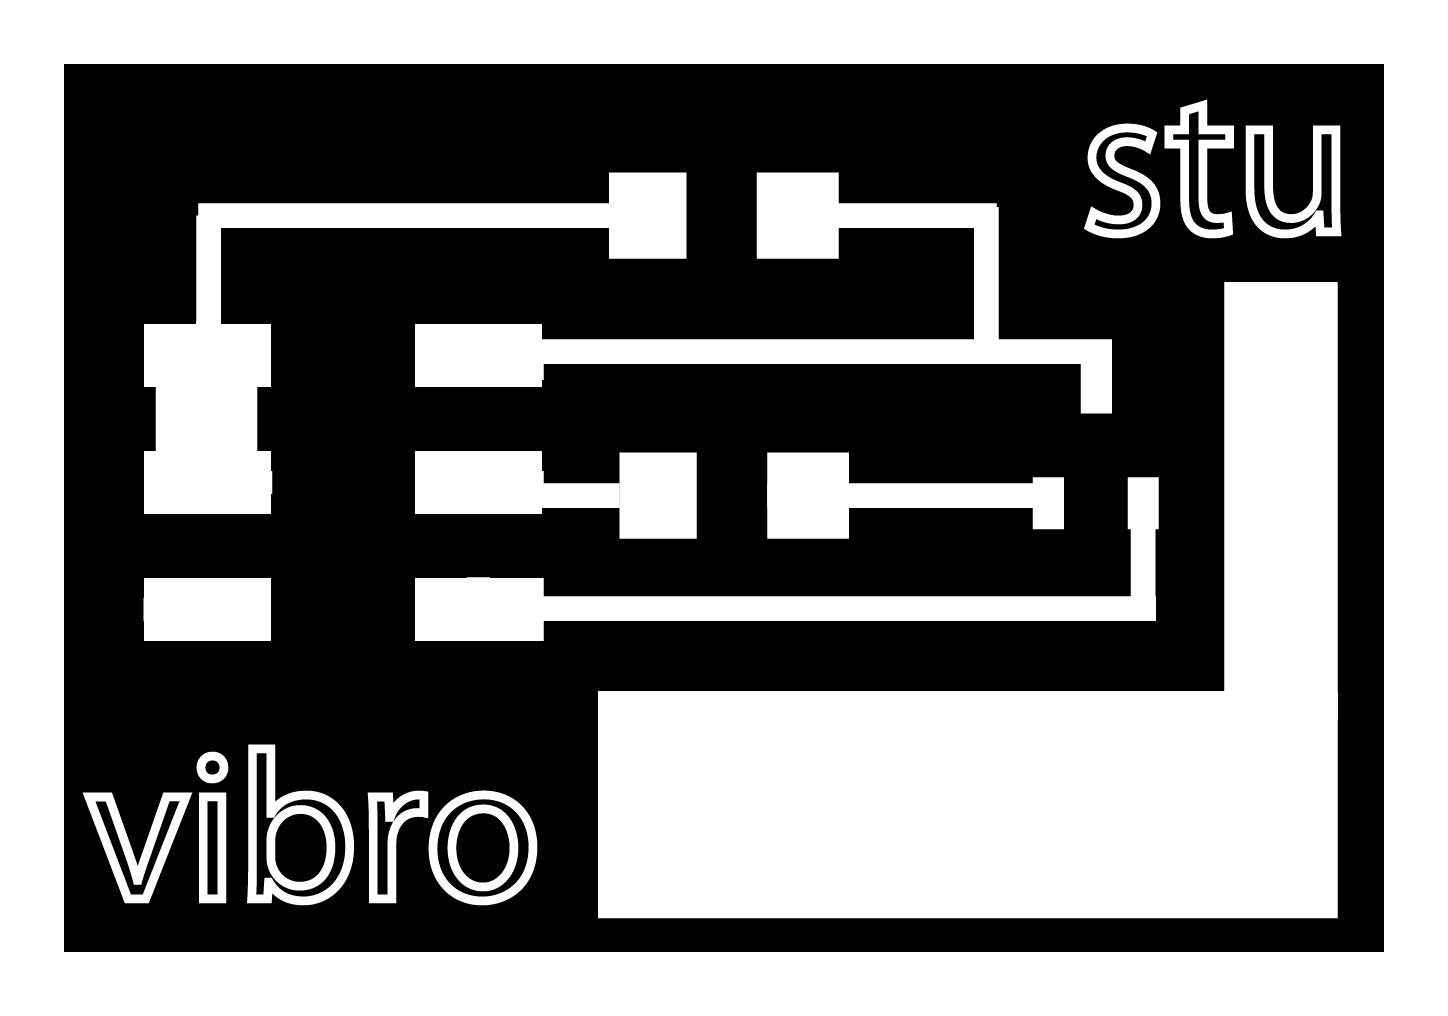
Microcontroller: Neils Fabduino design (hello.arduino) with a ATmega 328 running 8mhz internal clock
Fabrication files and code:hello.arduino.....haptic_code.ino..... vibration_driver_traces.png .....vibration_enclosure3dV2.stl
piezo_enclosure3D_V2.stl .....electroncis__enclosure3D_V4.stl
Why?:
With the latent development of digital fabrication processes where designers shift from the computer design environment straight into the fabrication of objects (additive and subtractive processes) there is somewhat of a loss of a tangible connection between the user and the materials been used. In the past the craftsperson/designer could feel the materials as they were forming them into objects, the potter with the clay, the carpenter with their plane and chisel. Through this process the craftsperson/designer understood the ‘nature’ and idiosyncrasies of both the material and the tools and machines they were using.
I perceive the loss of the ‘hands on’ connection as an aspect that is yet to be fully explored in emerging digital design and fabrication practices.
Potential solution and advantages:
The use of haptic feed back systems could potentially help reduce waste and push digital design processes further to the limits of both machine and materials.
If you can develop an intuitive sense for how material and machines behave you can reduce errors and waste. What if you could feel the CNC machine tearing up the edge grain of the material you are cutting? What if you could start to teach the machine that’s cutting the material the particular idiosyncrasies of materials?
Development:
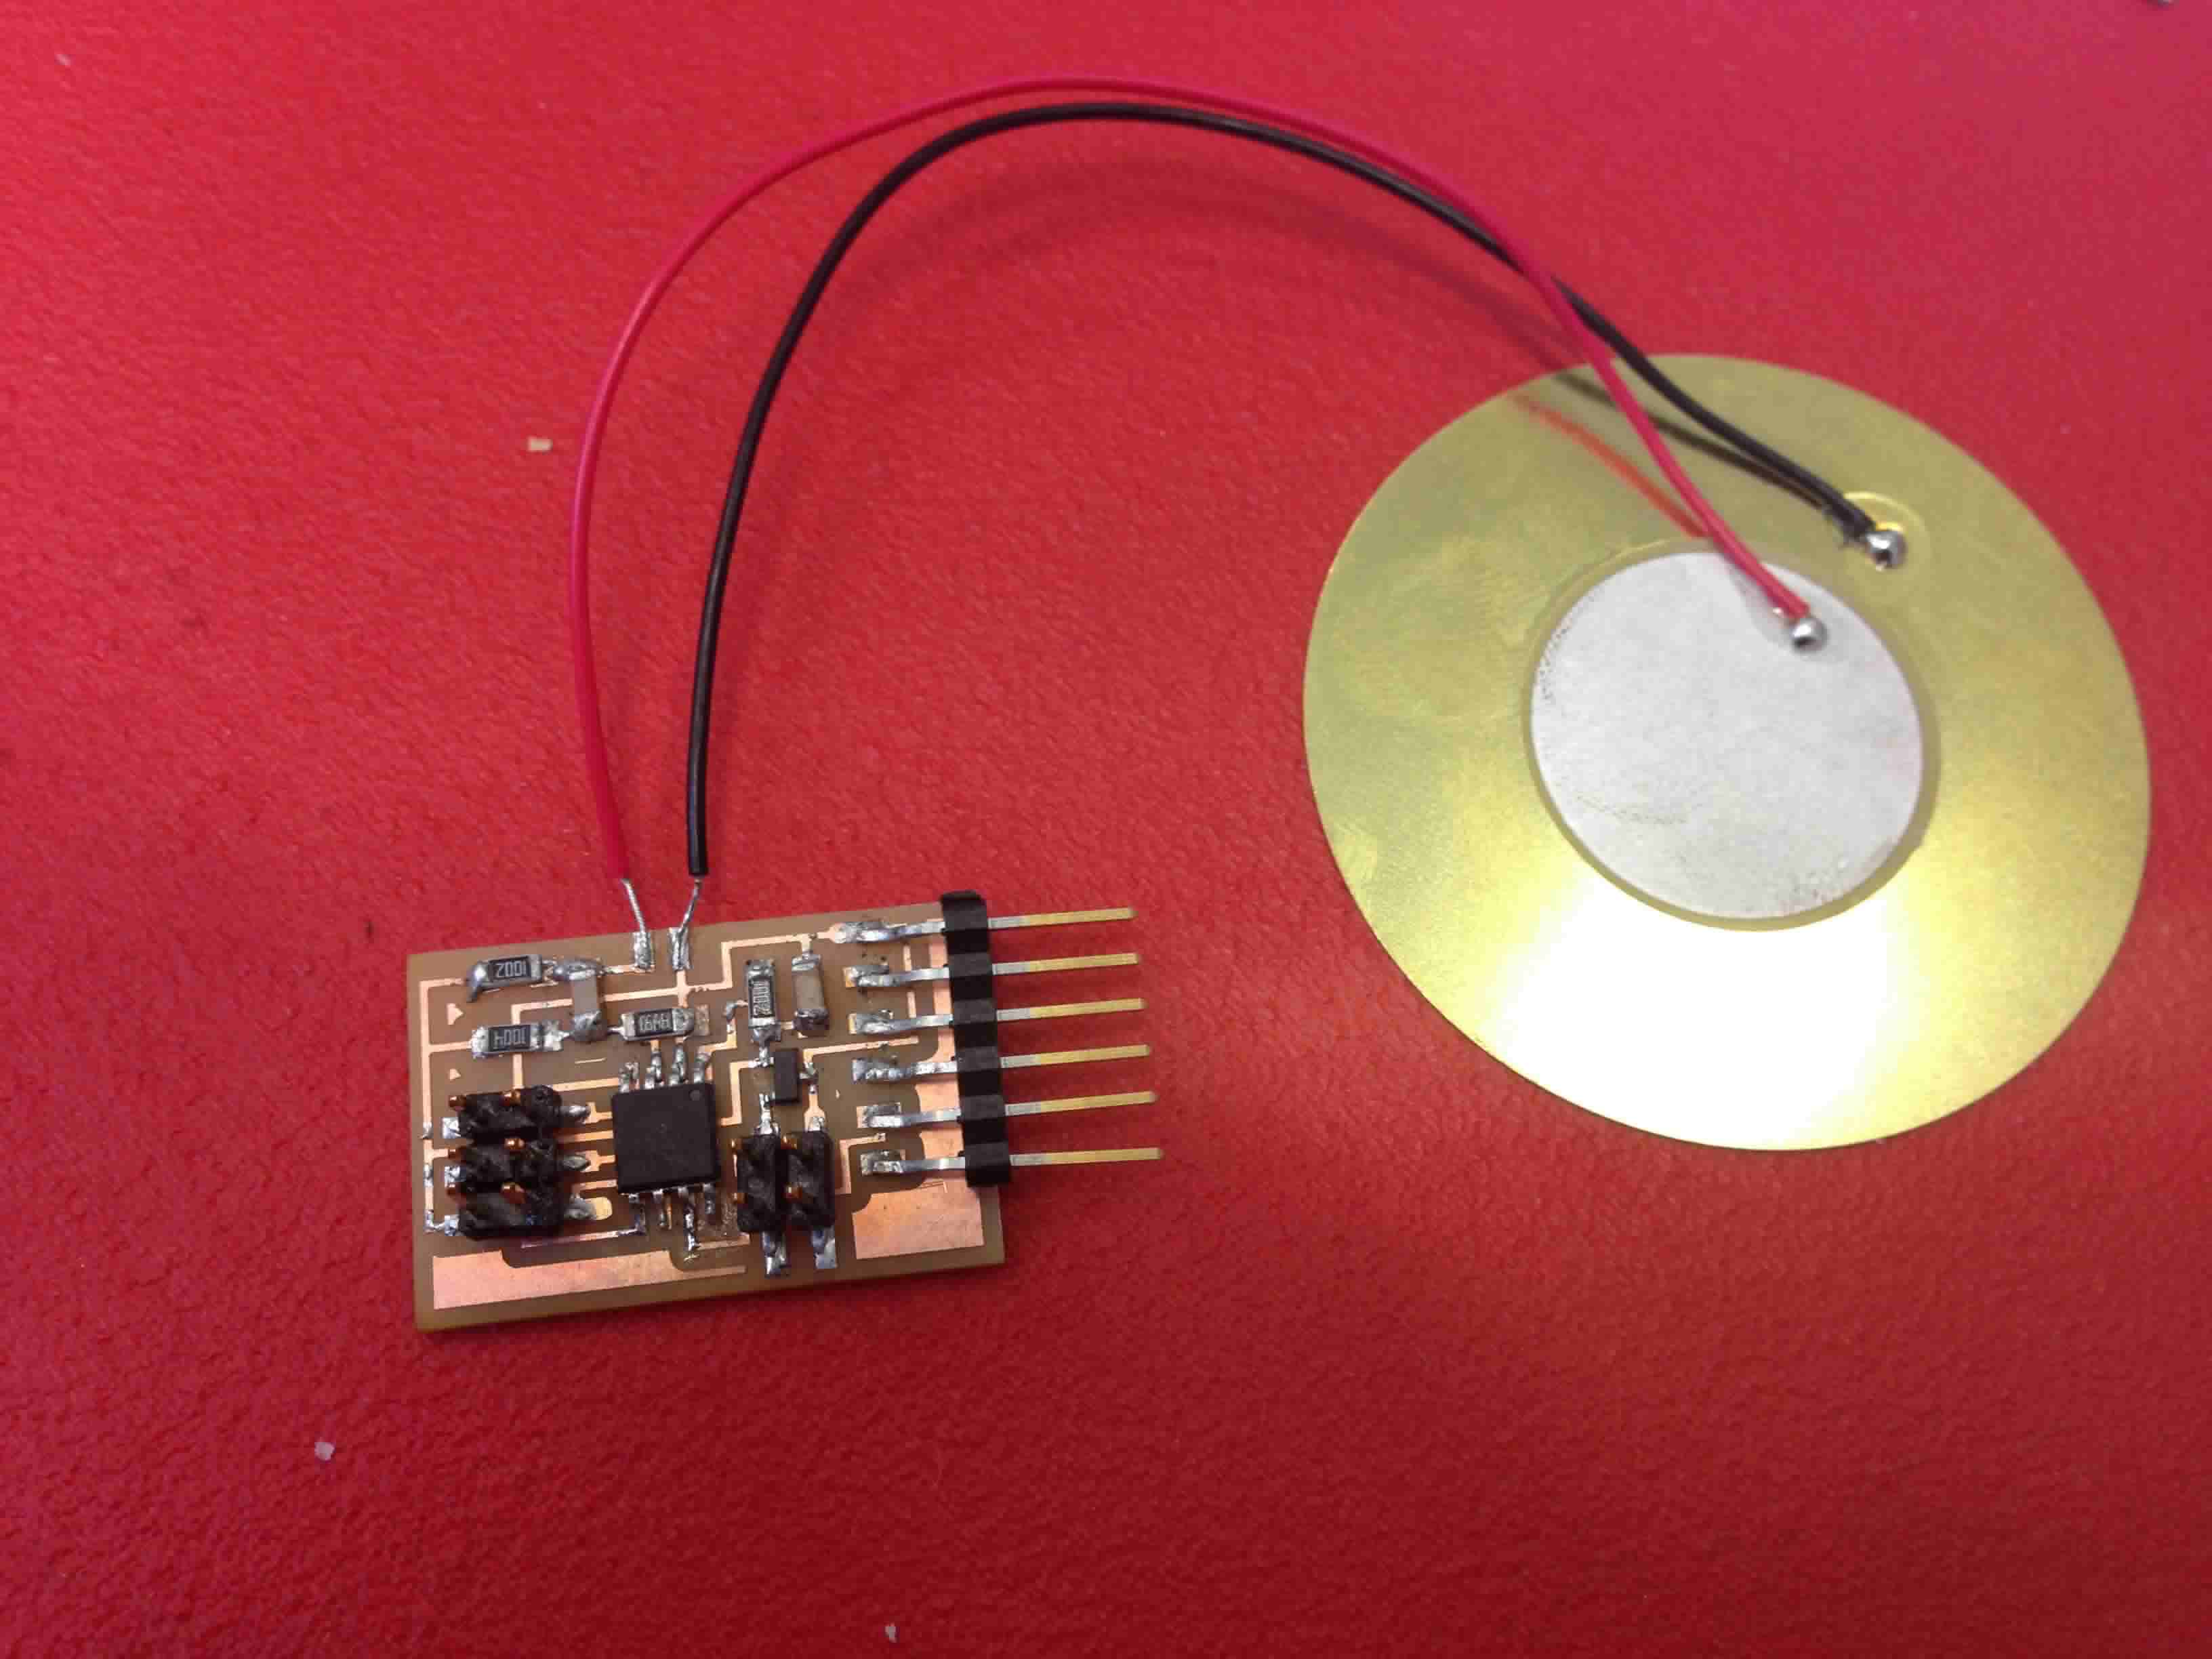
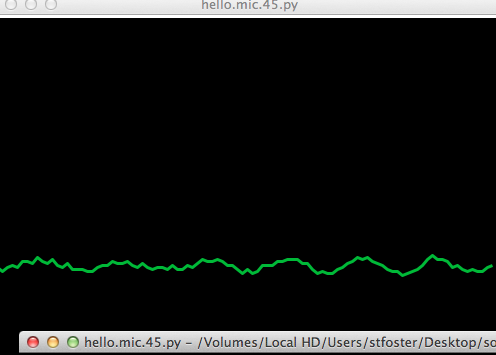
I started this project by testing the vibration sensing ability of the Piezo sensors we have in inventory at the FabLab, I used the sample code and board from the Hello_ Microphone example I used for the input device assignment. By swapping out the Microphone for the Piezo I was able to visualize and measure the level of sensitivity. Proof of concept was that it had a fair degree of sensitivity for a prototype system.
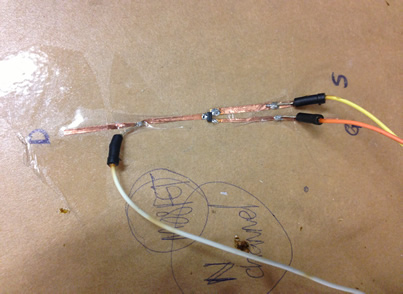
Next step was to breadboard a basic circuit and programme to get feedback from the piezo input to a motorized output. This took a lot longer than I hoped it would. TIP Bread boarding flush mount components is tricky, I found that by making traces with copper foil on stiff cardboard was the easiest way to work like this.
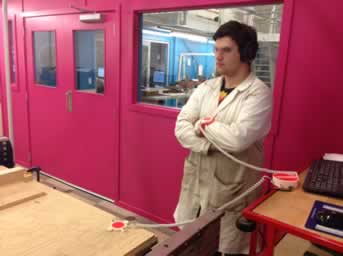
Below you can me testing a N channel mosfet into the circuit.
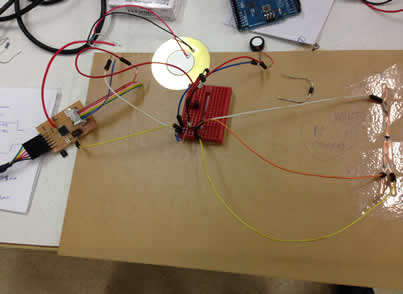
I removed the vibration motor from a spare Nintendo Wii device to test the circuit. I actually ended up using this little motor in my final design.
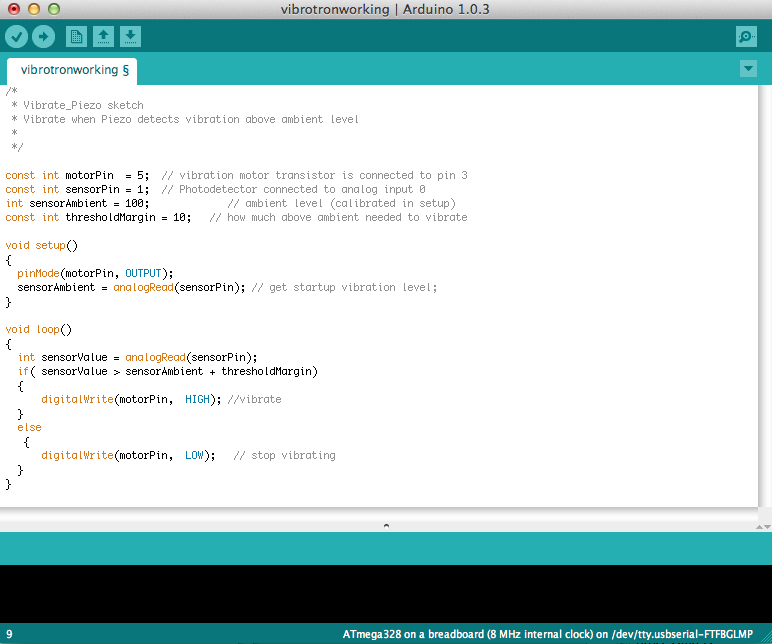
In initial programme testing I used a Arduino UNO as its based around the ATmega328 we had here in inventory
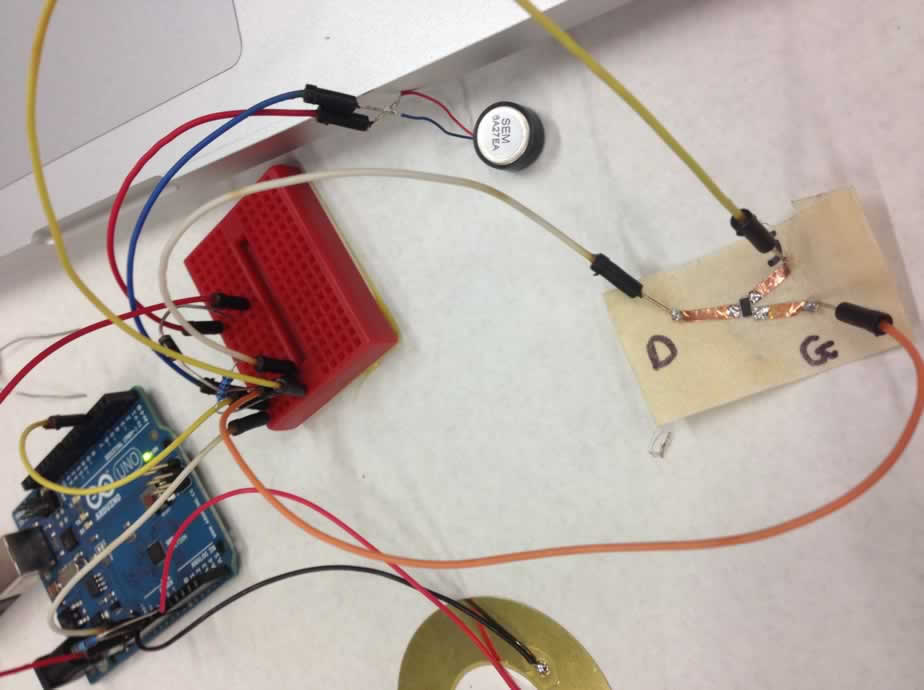
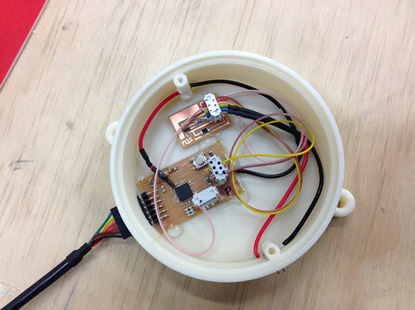
I ended up using Neils Fabduino design (http://academy.cba.mit.edu/classes/embedded_programming/index.html) with a ATmega 328 (running 8mhz internal clock), input from a piezo sensor with output to small vibration motor, programmed in Arduino IDE.
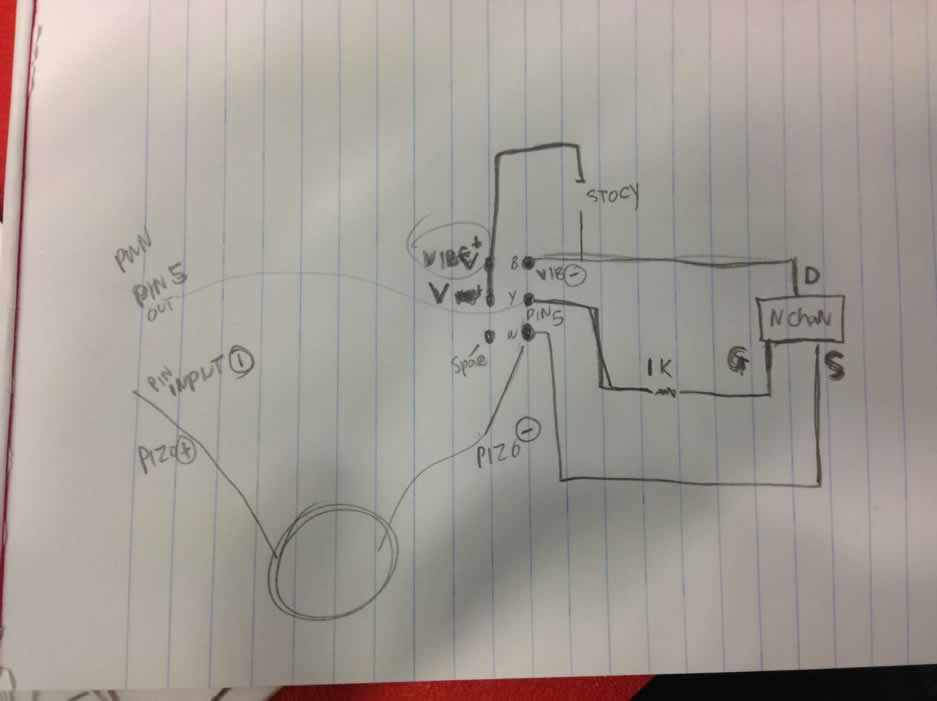
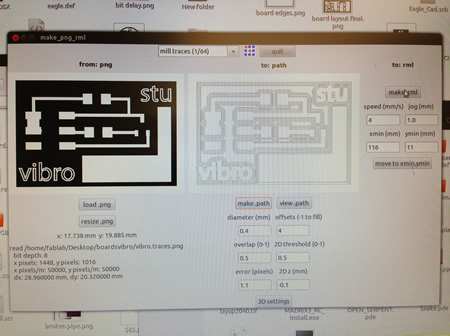
Once I had my circuit working I drew it up and milled and stuffed the board.
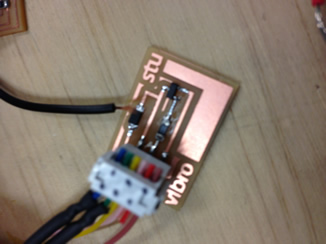
Circuit contains 1k resistor, Schottky 1a 100v diode and N Channel MOSFET, don’t make the same mistake as I did and accidently use a P channel MOSFET (they look identical).
Below is a snap of where the programming is at this stage, as you can see it is very basic, I want to develop this with some math to get some variation response on the vibration output. For the sake of testing at this stage the code works in principle offering cause and effect with some success. Any suggestions or tips here are most welcome.
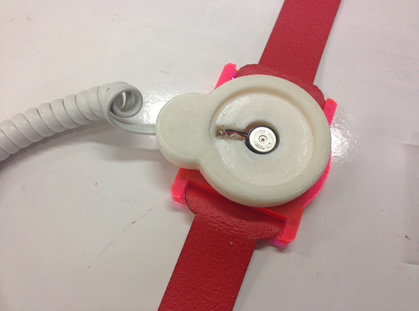
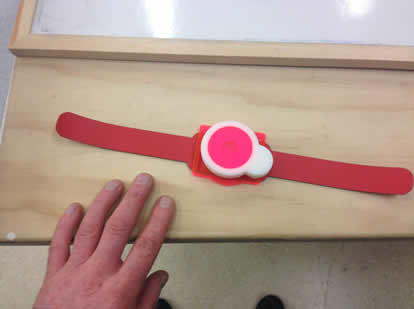
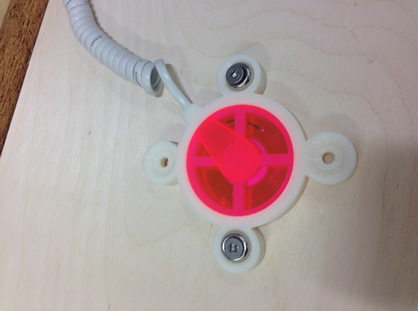
My next task was to design a wearable enclosure for the vibration motor; I made the decision for a watch like enclosure with and adjustable strap. This enables placement anywhere on the upper arm or lower wrist to keep hands free for other tasks. The upper arm seems to offer more sensitivity to feedback compared to the wrist in testing, perhaps because there is more muscle and flesh in that region of the body.
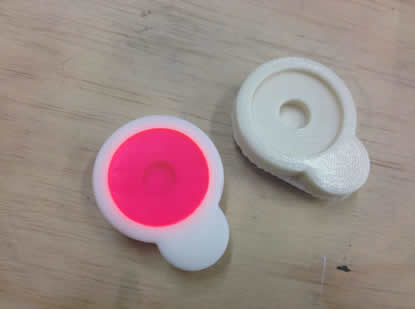
The enclosure was designed in 3D in cad the printed, the strap and acrylic pieces were laser cut.Note the head swivels to adjust its position in relation to the cord. A small clear led was later added to give some visual feedback.
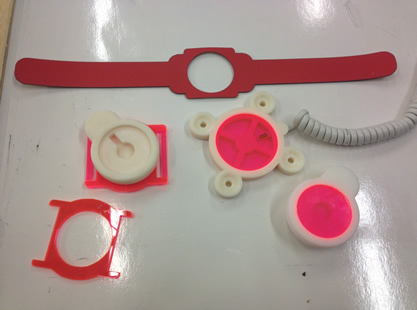
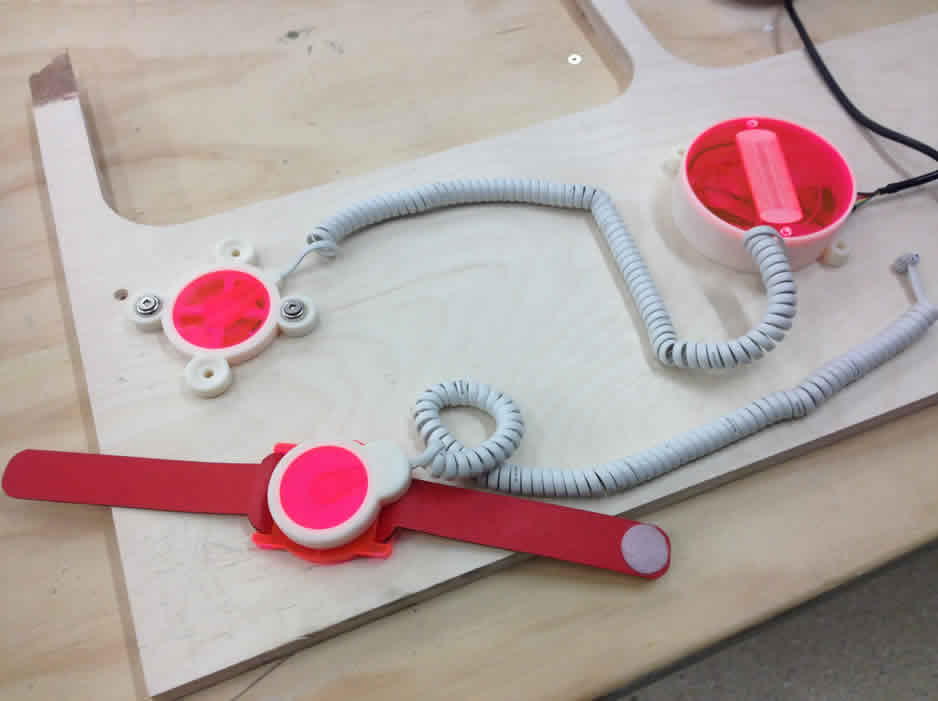
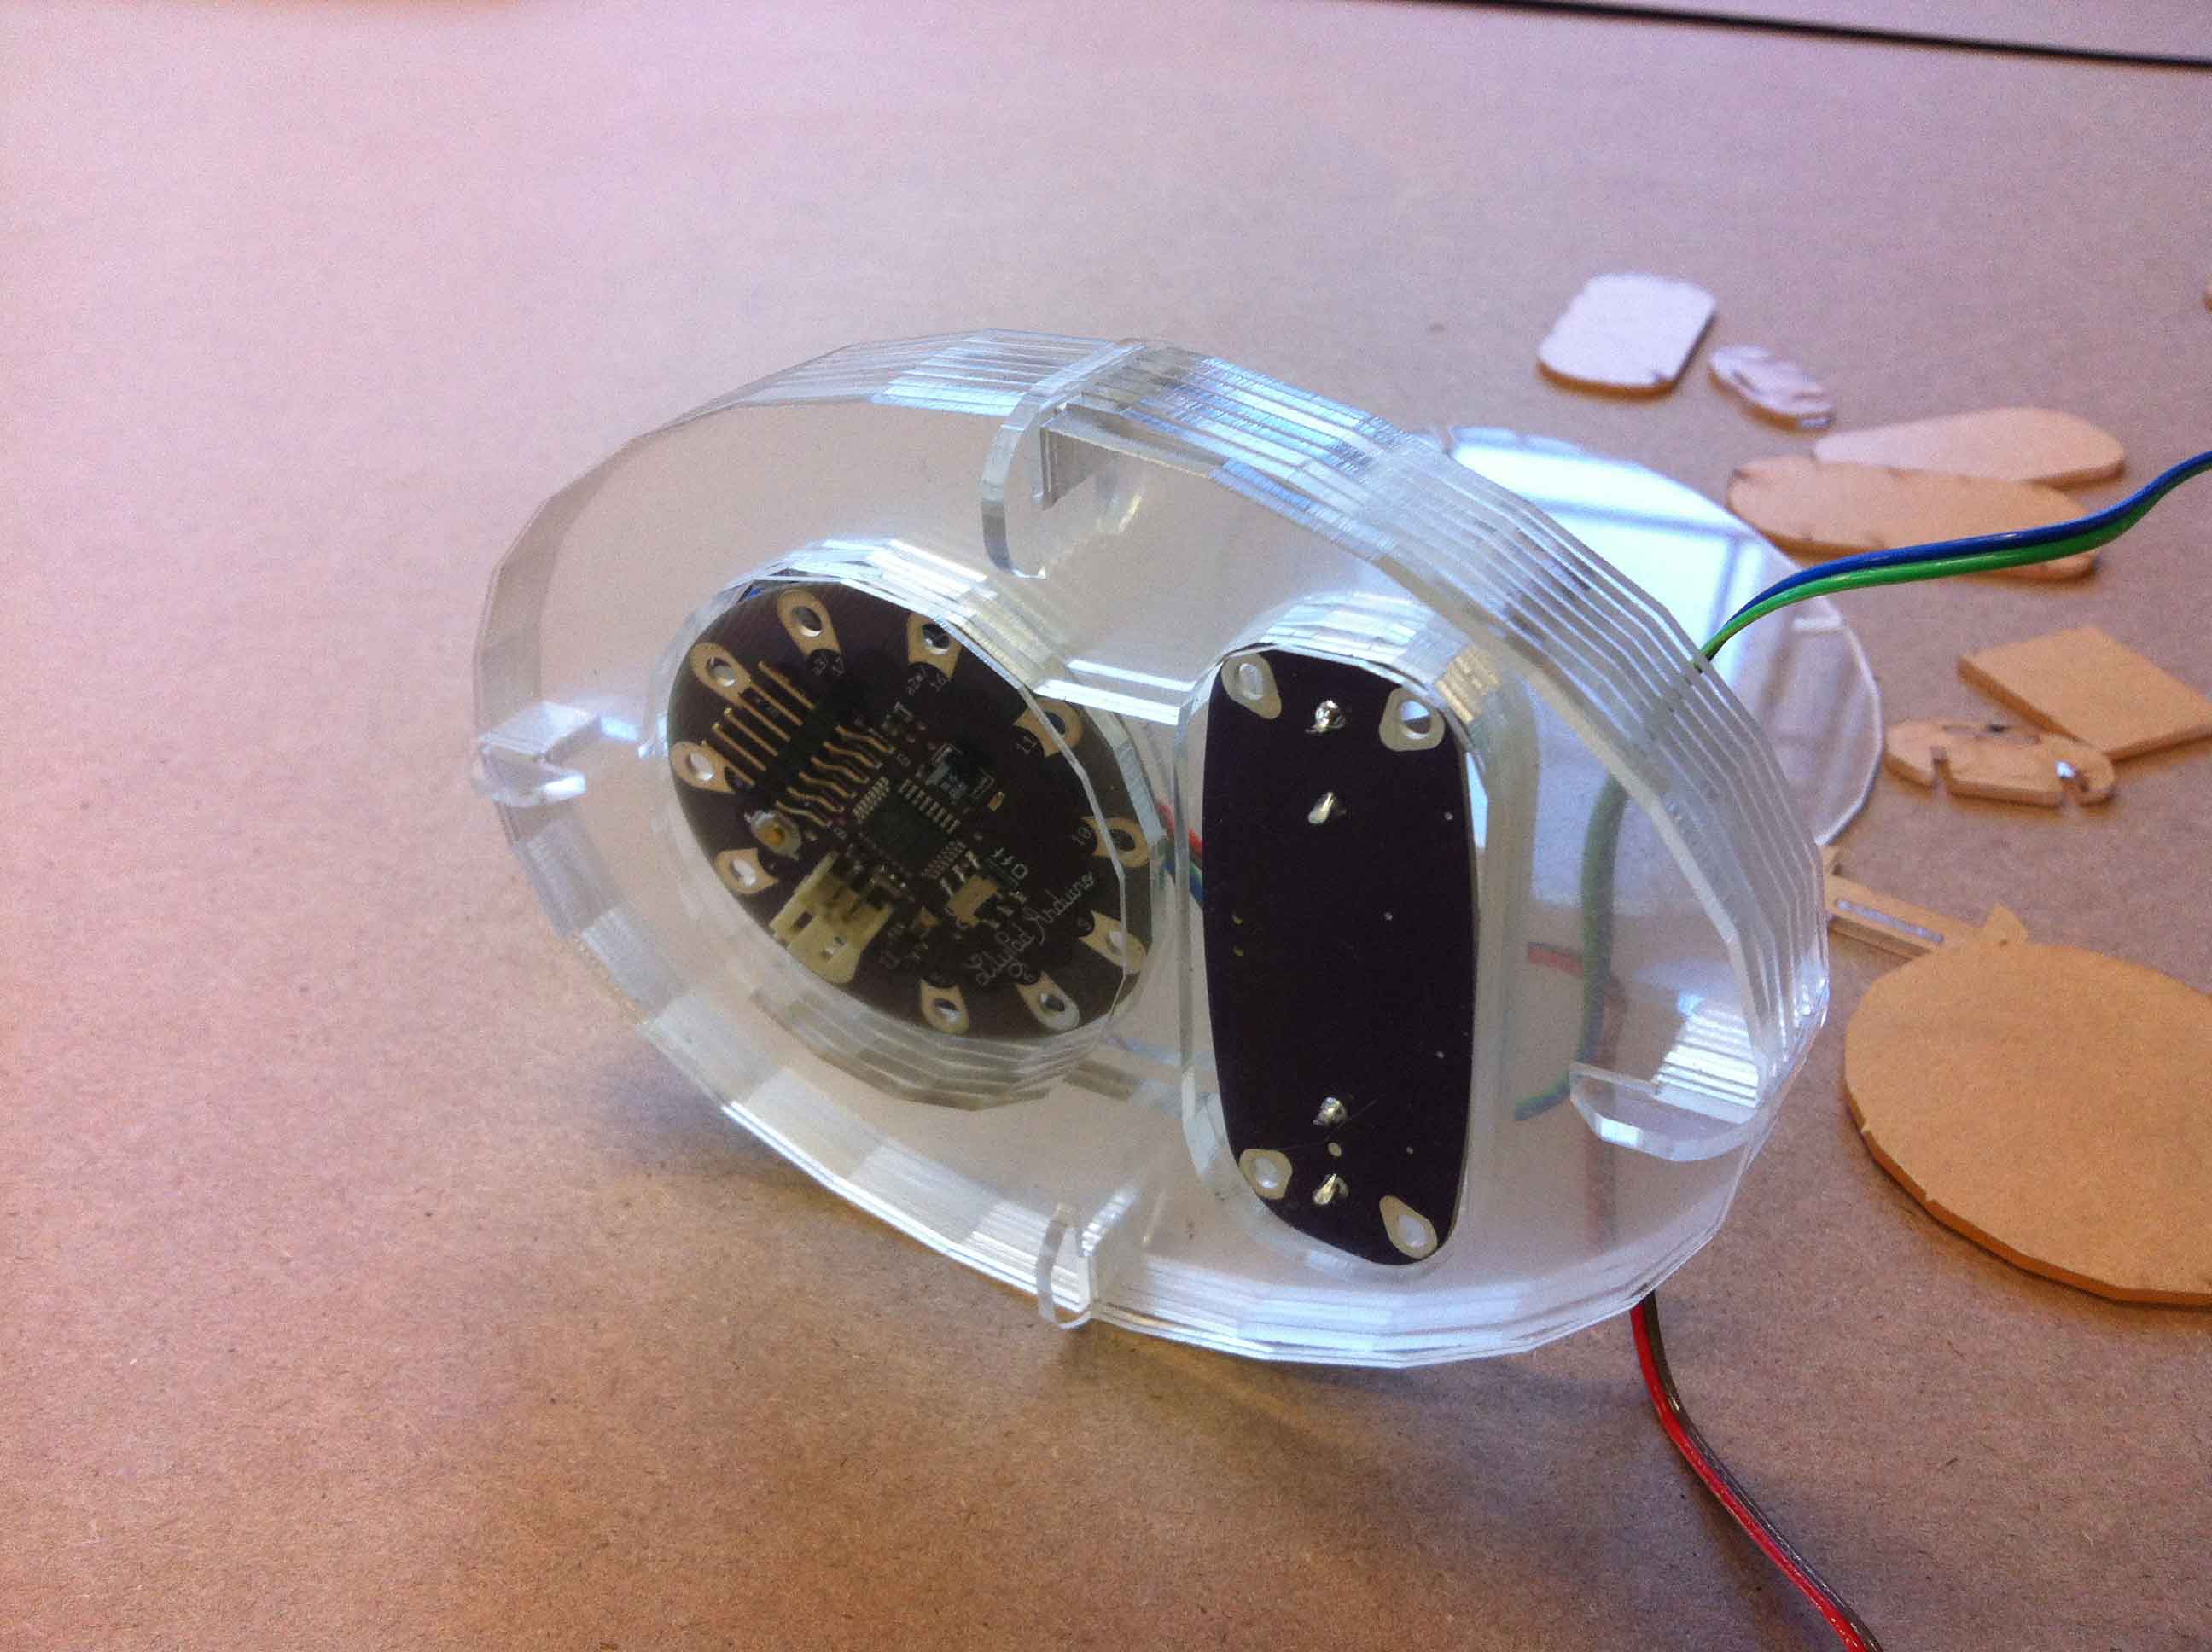
Following the same design aesthetic, I designed, printed and cut enclosures for the Piezo and the controllers.
Here they all are as a happy family.
Summary
Overall I’m happy at where the project got to in the time frame I had, it is a work in development and I will try to source some research funding to develop the project further.
Aspects to further develop and explore.
Sensors input. More sensitive Pezio and explore laser modulation to get really sensitive feedback at the cutter head. Multiple senor data could be really useful.
Programming. Refine the way the system processes data and have a feedback to the local computer that’s running the machine (perhaps data base of data ,conditions and material/user responses.).
OutPut. A more refined and perhaps more sophisticated feedback mechanism; this could be a better motors or use air or pressure onto the body.
A big thank you to Bas our mento,r for his technical support, words of wisdom and overall moral support and Wendy the manager of the Fablab Wellington, collaborator, colleague and class mate of Fab academy 2013. The International Fablab community, past and current students for great documentation tips and inspiration.
I might get to share a beer with some of you in Japan at Fab9!!
Stuart Foster