
DESIGN
-For my
final project i need a proximity
sensor which we don't have example
for. So i looked for some examples
online, most of
them were complicated i couldn't
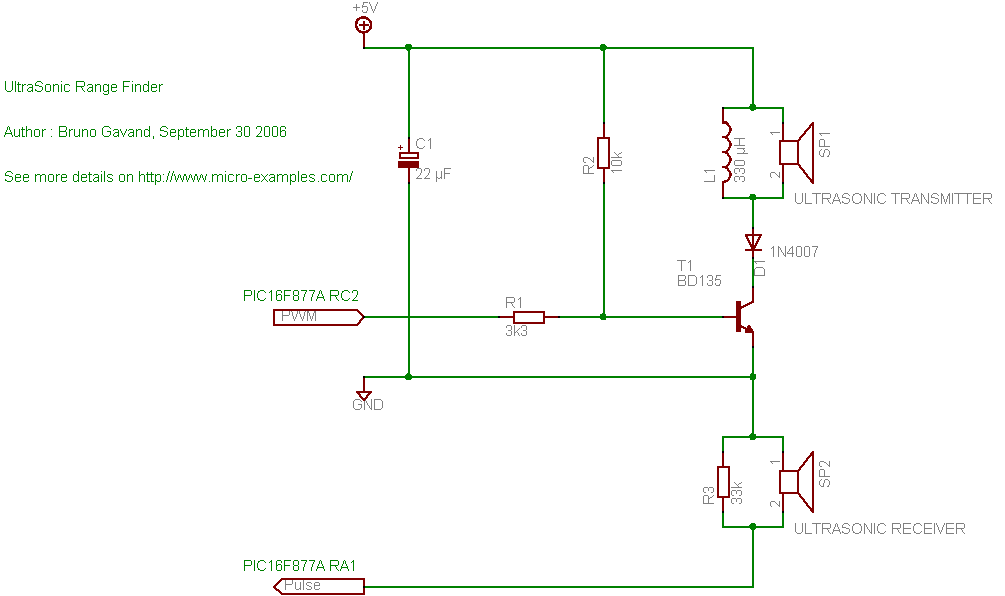
follow.On this link
i found the simplest one, basically it
works with ULTRASONIC waves. With both
the transmitter
and the receiver the sensor cant
detect the distance of the surrounding
bodies. But i couldn't find some of
it's components on our inventory
like the BD135 - BD136 Complementary
low voltage transistor and
the 300Microhenry Conductor.
-As for the conductor it can be easily
done with a certain formula find it on
that
link but as for
the transistor
it cant be
replaced
with any
of those we
have in the
lab.


-So i decided
to put that
aside and try
with a
different
sensor
for this week
but keep
researching
for my final
project. I
decided to add
a light
sensor to my
previously
designed board
on the eighth
week, i edited
the EAGLE
file basically
to remove both
the LED and
the switch
with their
resistors then
to
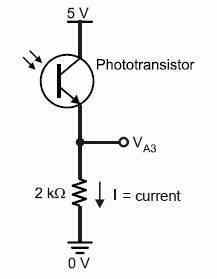
add a PHOTO-TRANSISTOR
NPN 1206
along with a
resistor to
control the
current.
A
photo-transistors
a component
with a
direction you
will
find the
direction in
the data sheet
of the
component.
Finished the
PNGs and
started
milling after
that came the
soldering
everything
went fine UNTIL
the
programing!

ERROR
-Each time i
run the
AT-tiny 44
program on the
arduino it
gives an
error.
i
checked the
process all
over starting
with the last
step to find
out where the
problem
was. i checked
the arduino
script then
the ISP
connections,
then the
board it
self. then
found out a
SHORT CIRCUIT
done while
milling!!
-To solve some
connections i
made a jumper
to jump
circuit above
the
ground
wire to the
VCC wire,
while milling
the machine
merged both
parts!!
-With a cutter
i carefully
separated the
connected
traces
and with a
Multimeter i
made sure
there's no
current is
flowing
through
- Then the
sensor worked
finally and i
used it again
in the Interface
and
Application
Programming
>Proposal
>Digital model
>Laser Cutting
>Electronic
production
>3D Scanning
& Printing
>Electronic Design
>Molding & Casting
>Embedded programing
>Computer-controlled
machining
>Input devices
>Composites