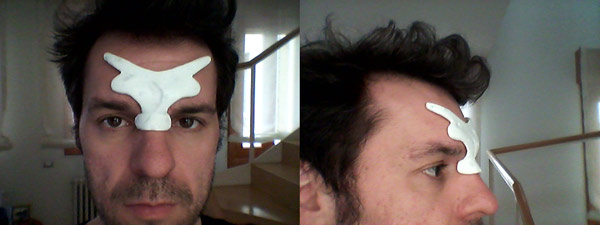
During this week I´ve been working in the main phisical piece of my project, the one placed in my forehead wich will hold the structure for sensors and wiring. At this point the project looks like this:
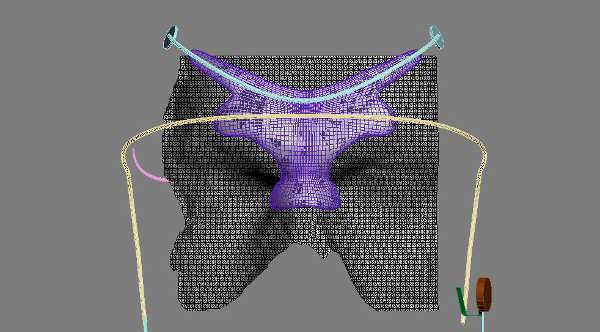
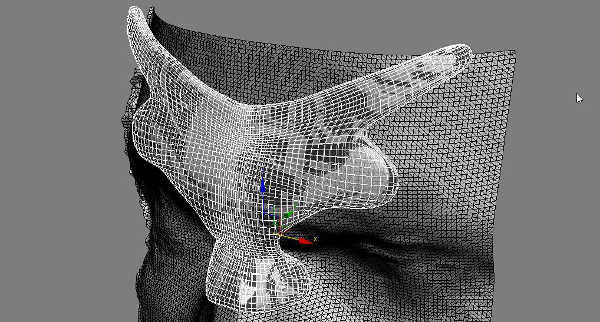
THe goal of this week has been to remodel the piece of the mask, mold it and cast it. The previous piece I had 3D printed was smaller and didn´t fit perfectly in my face, because I had followed the 3D modelled based in my pictures, wich is a nice way to do it but not as accurate as needed for this stage. This is the link to week 02 where I explain this process. To need a more accurate 3D model of my head in week 05 I scanned that area of my body, and placing the previous piece in that model:

You might see some overlaping areas and gaps between them. THis is so, the starting point of this week: Remodel the piece. In the next pictures I´m showing some screen-shots of the process; I used 3D studio Max for this porpuse. THe editable poly for the main frame, shell modifier to get the thicknes, 3mm in this case; then I made a symmetry since I only made the half of it. THe final step is to use the turboSmooth modifier to get the final smooth result. Some pics of the process, first editable poly steps:
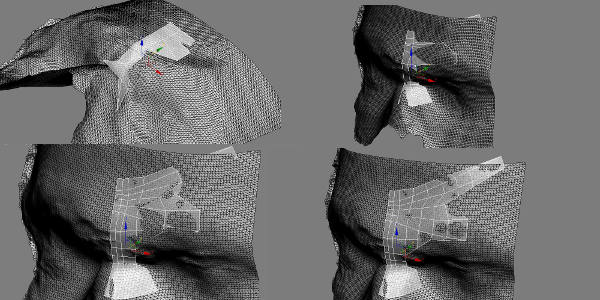
Second step the shell modifier:

Third step the symmetry modifier:
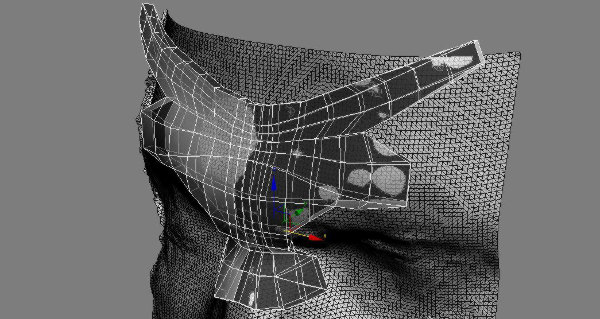
And the final step the TurboSmooth modifier:
After the piece is finally modelled is time to design the mold and cast parts. It is difficult to visualize this process at a glance, so I made this sketch to help me out:

The mold and cast seem to be easy to model since the mold is the negative of the piece, and the cast is the negative of the mold. But in my case, the first step, to get the negative of the piece and split it in two parts was a bit tricky. First I had to divide the piece in two surfaces and then to manually model the flat plane around the boundary edge.
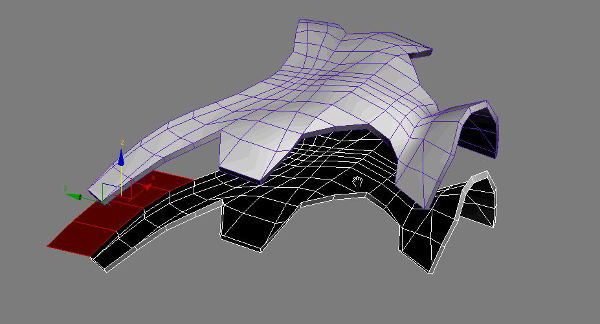
To 3D model this plane around the half piece, I used the edit poly tool in 3D MAX, and I turned off the turbo smooth modifier, so that I might work in a low poligon model. In the next picture I show the result of this part of the process:

You can see the surface created all around the piece wich is not flat, and divides the piece in two parts. This surface is neccesary to create a compression between the two parts of the mold, and not letting the final material to come out.
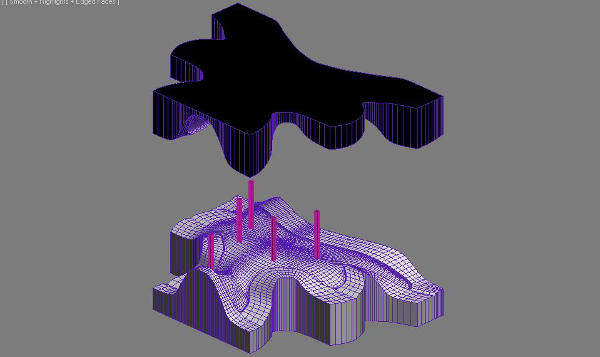
This process has to be done for each half piece. The cilinders that you see in the picture will be the holes, I will insert the final material through. THey are 3 mm wide, as the syringes that I found. I placed them in the highest parts of the piece to ensure the material gets all over the cavity.
Once the molds are done, it is time for the cast. To do this I just picked the size of the wax block that I was going to mill, and made the difference with each mold. This geometry is the one that we will use in the Roland Modela to mill the wax blocks
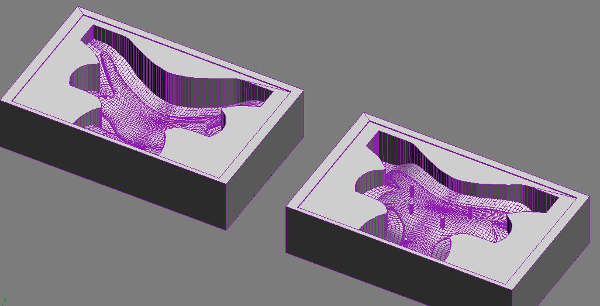
I exported each block in a different .stl file, and imported them in the Fab Modules, to mill the wax. You must mill the wax in two steps, the first one in the rough settings, and the other one in the finnish settings. This is the screenshot for the rough settings, in FabLabLeón we have a 3mm end mill, thats why that parameter is changed:
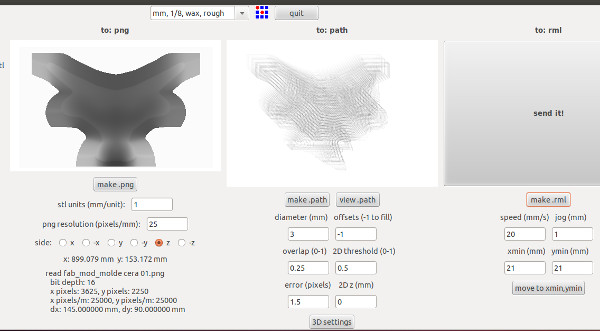
And this is how it looks like once the block is milled in the rough settings:

This is the screenshot for the finnish settings, again the end mill used is 3mm wide, and I used a 0,75 overlap to get a better result:
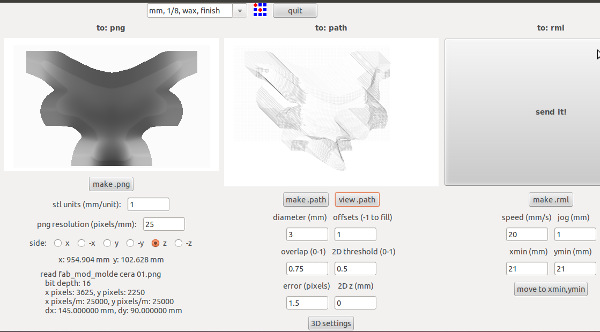
And this is how it looks like once the blocks are milled in the finish settings:

Once the wax casts are ready is time to make the silicon molds. For this I used DOMOO 25, and these were my calculations for the two components:
	DOMOO 25

	product A 100 gr 44%

	product B 130 gr 56%

	density d = 1,40 gr/cm3

	Piece 01 Volume = 112 cm3

	Piece 02 Volume = 77 cm3

	TOTAL = 189 cm3 * 1,40 gr/cm3 = 264,6 gr

	product A --  264,6 * 44% = 117 gr

	product B --  264,6 * 56% = 149 gr
After measuring the components is time to mix them and place the mixture over the casts:
In the DOMOO 25 specification sheet says the mixture is ready in 70 min, but after that time it was still very sticky so I decided to leave it 24 hours hardening.
After that time it was still sticky, but it was very easy to take out the mold from the cast, here is the result:
And the final and thrilling step, to make the final piece! I used a two components plastic wich hardens in 10 minutes, so I had to be pretty fast inserting the mixture in the cavity, since its liquid period expires very fast. To insert the mixture I used the syringe that you see on the next picture:
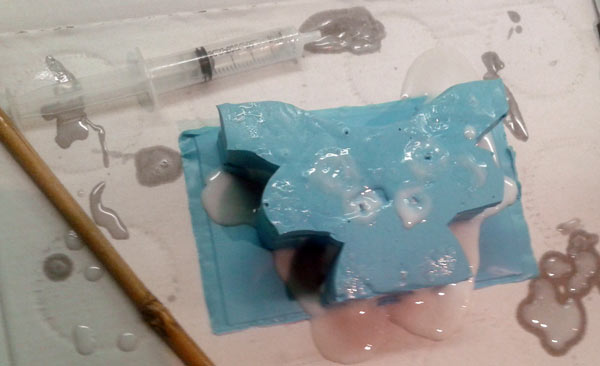
After half an hour this was the result:
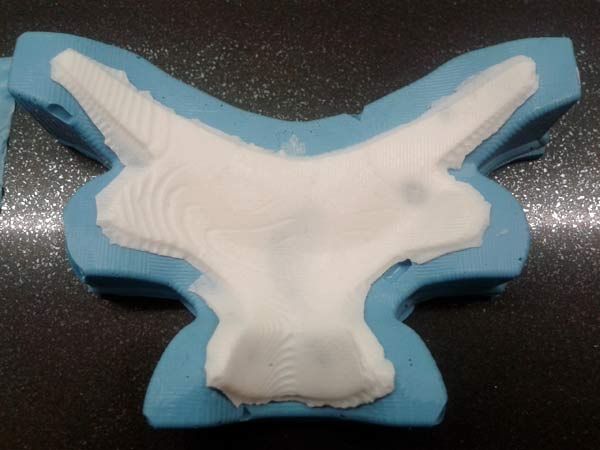
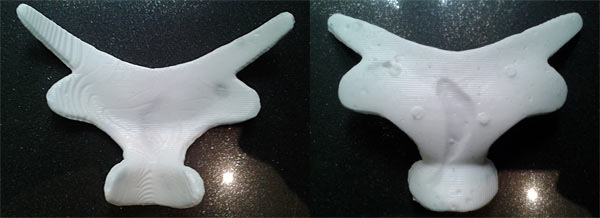
I cleaned up the borders with a cutter and as you can see the piece is done!!! In the middle there is a big bubble of air, you might see the diference of the color in the piece, but anyway it is a fantastic achievement.
And the piece in its place!!! As you might see in the picture is a totally customized product, since it fits perfectly to my head.
