WEEK 8
[EMBEDED PROGRAMMING]
The assignment for this week was to program my led+button from week 6.
I decided to use Arduino IDE
as my programming application, so the first step was to learn the language main functions:
void setup() - the setup function will only run once after each power up or reset button high and is used to initialize variables, pin modes, specific libraries, etc...
void loop()-
After creating a setup() function, the loop() function does precisely what its name suggests, and loops consecutively, allowing your program to change and respond.
These are the minimum requirements to work with Arduino.
If you download and run the software, you'll see the BareMinimum file under File>Examples>Basics and there we have the void setup and the void loop.
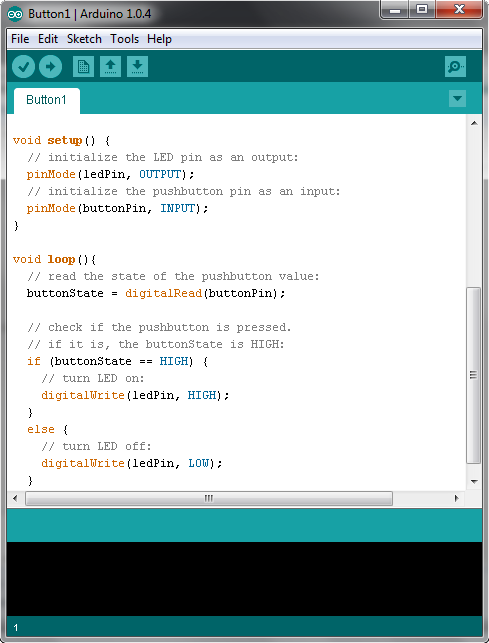
With this part understood, we can upload a different code and try to understand. Go to File>Examples... again and this time let's upload the specific code for controlling our board ...Digital>Button.

If you want to understand everything written on these lines, check this page. Later I will pass through the most important parts.
Now it's time to upgrade the Arduino IDE, because we are not trying to program Atmega processors, we are programming Attiny processors with external clocks. So if you go to High-Low tech page you can download their libraries and if needed you can follow their detailed tutorial on programming an Attiny with Arduino. Basically you just need to unzip the folder to [Arduino folder location]>hardware, restart Arduino IDE, go to Tools>Board, and select the correct processor. In this case, the Attiny44 (external 20 MHz clock).

After those steps, it's time to connect the FabISP and the led+button to the pc. You'll need two cables:
FTDI cable
- connect the led+button board to the computer. You'll also need a driver for the FTDI cable.
programmer cable - connect the ISP with the led+button board as you see in the image.
Then, you need to verify if the right Serial Port and Programmer are selected on your Arduino application.
Now look at the code again. There are two important lines to be changed before you upload anything valid to the board.
const int buttonPin = 2;     // the number of the pushbutton pin

      const int ledPin =  13;      // the number of the LED pin
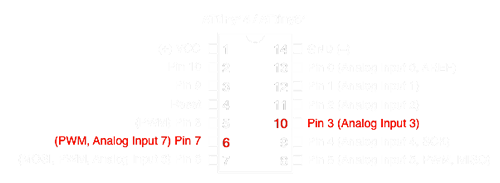
The constants at the end are used to set the processor pin numbers where the led and the button are. As we are not using Arduino, we need to change its values. If you check the conversion table, you'll understand the following change:
const int buttonPin = 3;     // the number of the pushbutton pin

const int ledPin =  7;      // the number of the LED pin

Now, you're ready to burn the bootloader Tools>Burn Bootloader and upload your code. Usually, with the Arduino you don't need to do this step, unless your board is not working properly and you want to debug it.
The Arduino app will take some seconds to upload the code and after that, you should have your board ready to turn the led on and off at your command.


