Week 15: Interface and Application Programming
Group Assignment
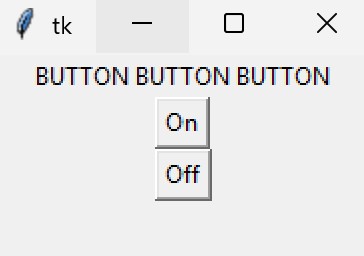
In our group session, we learned how to use the Tkinter library in Python. Before coding, I had to install the pyserial and tkinter libraries. To do this, I put in the commands “pip3 install pyserial” and “pip3 install tk” into the terminal. The goal was to turn the onboard Arduino Uno light on and off. There is an on and off button that sends 1 or 0 respectively to the Arduino. The Arduino is running code that will turn the LED on and off based on what it gets as input from the computer.
                           PYTHON CODE

import tkinter
import serial

#connect to microcontroller
port = serial.Serial('COM6', 9600,timeout=1 )

#turn on light
def handleOn():
    port.write(b'1')

#turn off light
def handleOff():
    port.write(b'0')


window = tkinter.Tk() #create window
txt = tkinter.Label(text='BUTTON BUTTON BUTTON') #add label in window
txt.pack()
onbutton = tkinter.Button(text='On', command=handleOn) #on button
onbutton.pack()
offbutton = tkinter.Button(text='Off', command=handleOff) #off button
offbutton.pack()
window.mainloop() #window can now be interacted with
                              ARDUINO CODE

void setup() {
  Serial.begin(9600); // Initialize serial communication at 9600 baud
  pinMode(LED_BUILTIN, OUTPUT); // Set the built-in LED pin as an output
}

void loop() {
  if (Serial.available() > 0) { // Check if any data is available in the serial buffer
    char receivedChar = Serial.read(); // Read the character from the serial buffer
    if (receivedChar == '1') { // Check if the received character is '1'
      digitalWrite(LED_BUILTIN, HIGH); // Turn on the built-in LED
    } else if (receivedChar == '0') { // Optional: Turn off LED if '0' is received
      digitalWrite(LED_BUILTIN, LOW); // Turn off the built-in LED
    }
  }
  delay(100); // Add a small delay to avoid overwhelming the serial monitor
}
Making a Piano Interface
The "Piano" In Action
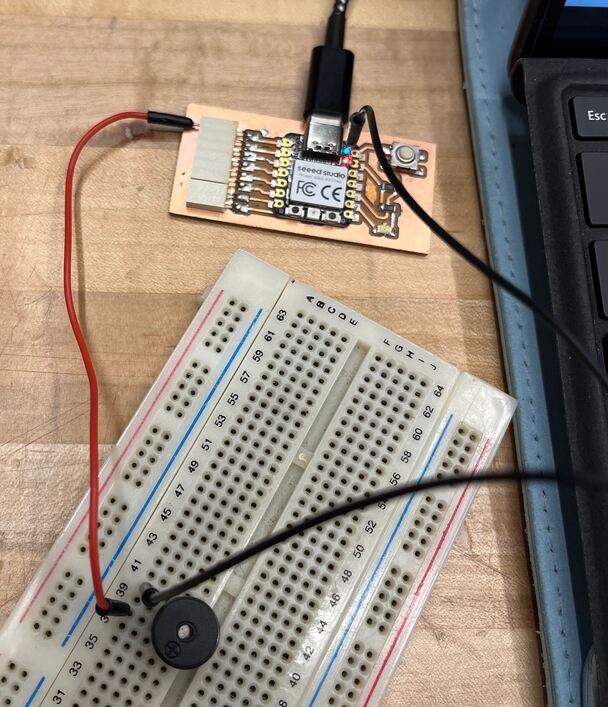
The Circuit
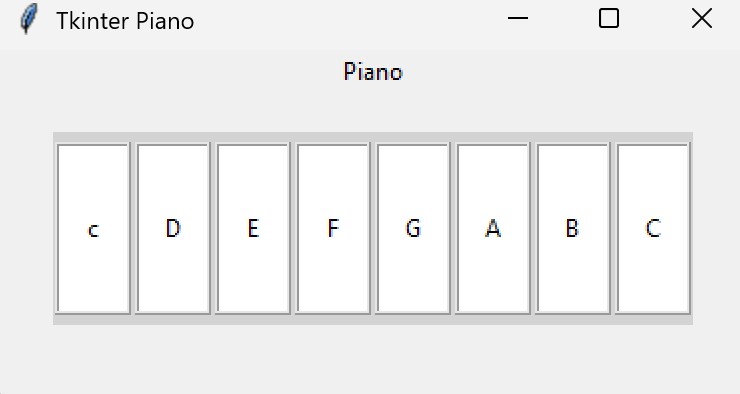
Piano Interface
I made an interface that connects with the passive buzzer I used in week 10. The application sends the note’s letter to the microcontroller. The circuit is the same as week 10, since it’s just a ground and an input wire from the passive buzzer to my circuit board.
The python code was done in VS code and is based on this code from Google’s AI Overview. The buttons are created in a for loop that uses a list of the characters to make each button a different note. I used this page as a reference for customizing buttons. The low C is lowercase because two uppercase Cs only made one button. The command for the buttons takes a character as input that will then be sent to the microcontroller. There is also a print statement for debugging purposes. The buttons themselves are in a rectangular frame and use a grid so that they are all nicely spaced in a row to look like piano keys. I referenced this page to understand how to position buttons, since I had originally tried to space the buttons with pack().
The microcontroller code uses a switch break statement to see which key has been pressed. It sends the appropriate signal to the passive buzzer to play the selected note. The duration of the note is set at 500 milliseconds, or half a second.
                  PYTHON CODE

import tkinter as tk
import serial

port = serial.Serial('COM6', 9600,timeout=1 )

#Playing each note
def play_note(note_name):
    #send note to microcontroller
    port.write(note_name.encode())
    #print in terminal for debugging
    print(f"Playing note: {note_name}")

# Create the window
root = tk.Tk()
root.title("Tkinter Piano")

#Title
txt = tk.Label(text='Piano')
txt.pack()

# Create the frame for the keyboard
keyboard_frame = tk.Frame(root, bg="lightgray")
keyboard_frame.pack(pady=20)

# Create piano keys
keys = ['c', 'D', 'E', 'F', 'G', 'A', 'B', 'C']
for key in keys:
    button = tk.Button(keyboard_frame,
                       text=key,
                        command=lambda k=key: play_note(k),
                        width=4,
                        height=5,
                        activebackground="black",
                        activeforeground="white",
                        bg="white",
                        fg="black",
                        relief="ridge")
    button.grid(row=0, column=keys.index(key), padx=1, pady=5)

root.mainloop()
                          MICROCONTROLLER CODE

#include "pitches.h"

const int outPin = D0; //output to buzzer
const int duration = 500; //how long noise is made

void setup() {
  pinMode(outPin, OUTPUT);
}

void loop() {
  if (Serial.available() > 0) { // Check if any data is available in the serial buffer
    char note = Serial.read(); // Read the character from the serial buffer

    //play note gotten from user
    switch(note){
      case 'c':
        tone(outPin, NOTE_C4, duration);
        break;

      case 'D':
        tone(outPin, NOTE_D4, duration);
        break;

      case 'E':
        tone(outPin, NOTE_E4, duration);
        break;

      case 'F':
        tone(outPin, NOTE_F4, duration);
        break;

      case 'G':
        tone(outPin, NOTE_G4, duration);
        break;

      case 'A':
        tone(outPin, NOTE_A4, duration);
        break;

      case 'B':
        tone(outPin, NOTE_B4, duration);
        break;

      case 'C':
        tone(outPin, NOTE_C5, duration);
        break;

      default:
        tone(outPin, NOTE_B0, duration);
        break;
    }
  }
  delay(100);
}